75th Anniversary of the Battle of Monte Cassino and Northern Italy (Gaming The Battles)
2nd Battle Monte Cassino
The US II Corps had taken heavy casualties during the first Battle of Monte Cassino and were withdrawn to allow for reinforcements to arrive and for the two Divisions, (34th and 36th) to take some much needed rest. II Corps was replaced by the New Zealand Corps, transferred from British 8th Army. The New Zealand Corps (NZ Corps) was commanded by Lieutenant-General Sir Bernard Freyburg and consisted of the 2nd New Zealand Division and the 4th British Indian Division. The NZ Corps was however formed in a somewhat ad hoc way and had no formal Corps HQ, with the 2nd NZ Division HQ performing both the Divisional and Corps HQ tasks.
Upon arrival, the NZ Corps were well aware of the difficulty of the task that they faced but were strongly pressed to launch a new offensive as quickly as possible to try to breakthrough to the now severely under pressure beach head at Anzio. This lack of planning was far from ideal however 2nd NZ Division, containing two Infantry and one armoured Brigade, was considered ideally suited for achieving a break through.
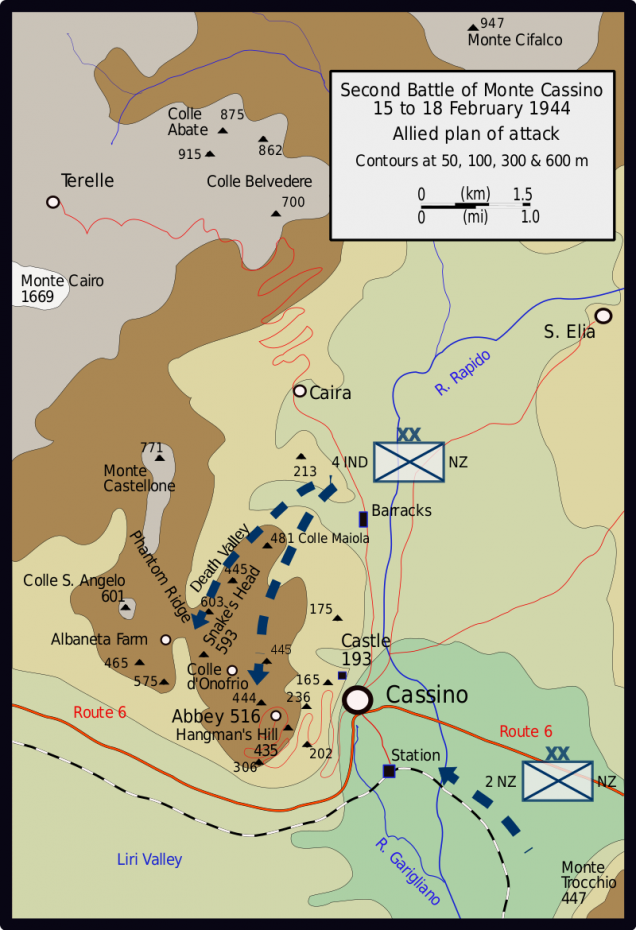
Freyburg had originally planned an attack to loop around Cassino from the East and encircle the defenders. The mountainous terrain and lack of easy access required the attackers to rely on mules to carry supplies and this was something not in ready supply. In the end, Freyburg settled for a plan similar to that enacted by the US II Corps just a few weeks earlier. The 4th British Indian Division would attack up the hill to the East of Cassino and then turn West to tackle the Monastery whereas 2nd NZ Division would attack across the plains of the Garigliano and Rapido and assault the town of Cassino directly.
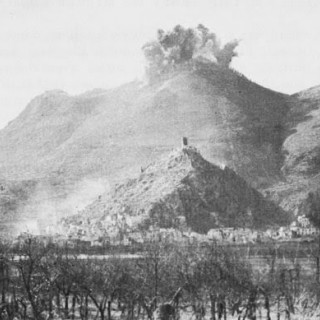
Bombing of the Abbey
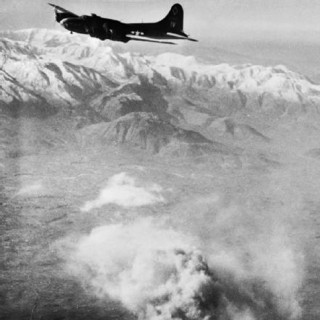
Brigadier Dimoline, acting commander of the 4th BI Division, was sceptical of the plan and insisted that the monastery be bombed before any assault could be undertaken, believing it impossible for a defending army to not be using it for protection. Unbeknown to the Allies, the Germans had agreed not to occupy the monastery and use it as a defensive position. It was General Alexander, the Army Group commander, who eventually agreed to the plan to bomb the monastery and so on the 15th February 1944, in one of the most controversial Allied actions of the Italian campaign, Allied bombers flew over the monastery.
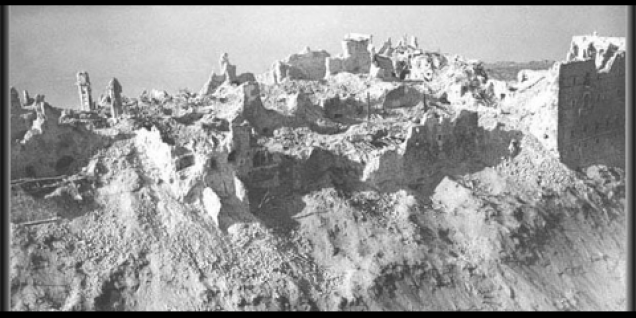
142 B17 Flying Fortresses, 47 B-25 Mitchells and 40 B-26 Marauders flew sorties over the monastery and dropped an estimated 1,150 tonnes of explosives. Between the bombing runs, Allied artillery pounded the hill top relentlessly. The following day, Allied artillery continued the pounding while fighter bombers flew repeated sorties to bomb the hill top. By the end of the second day, the monastery was a smoking ruin, a few shattered walls remained, poking up between the rubble.
Following the bombing, Pope Pius XII remained silent on the matter. However some Cardinals and other members of the Catholic church were less charitable and were scathing in their condemnation of the bombing.
Investigations following the bombing suggest that the only people killed at the monastery were over 200 civilians and monks taking refuge. No evidence has ever emerged that the Germans used the monastery for any military activities prior to the bombing and that all of their defensive positions were outside of the walls and lower down the slopes of Monte Cassino.
Those that survived the bombing fled the ruins and monks led a number of the wounded down the slopes to German first aid posts. From there, the German troops transported the wounded to field hospitals further behind the front line.
The entire bombing campaign had been planned by the Allied Air Staff and had been viewed as a separate, independent operation. As such, little coordination had taken place with the troops emplaced around Cassino. At the conclusion of the bombing, NZ Corps had only been in place for a few days and were not ready to launch an assault. This complete lack of coordination would prove to be costly for the Allied forces.
With the destruction of the Abbey, the German army no longer felt an obligation to keep their agreement to remain outside of the monastery. Troops from 1st Fallschirmjager quickly moved into the ruins and began turning them into a fortress and observation post. The Allied bombing campaign had only succeeded in handing the Germans a more defensible position and make the taking of Monte Cassino harder.
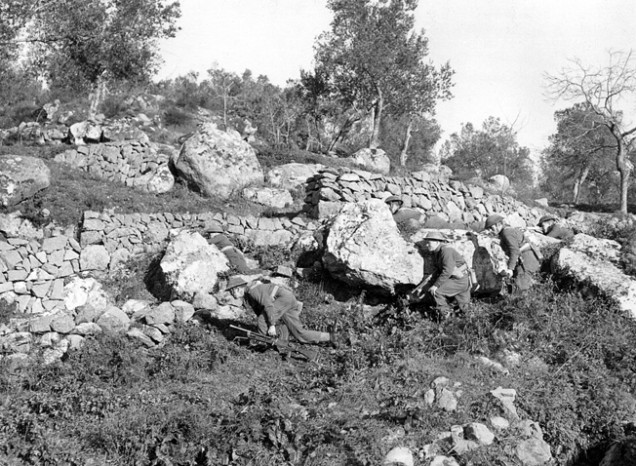
In the days prior to the bombing, the 4th British Indian Division had crossed the Rapido and had been slowly advancing up the slopes to the East of Cassino. They then turned Westward and fought their way along the hill tops toward Monte Cassino, taking almost the same route that the US 34th Division had taken.
By 16th February, the 4th BI had advanced to Snakeshead Ridge and were in sight of a key German defensive position, point 593. Just 70m separated the Allied troops from point 593. As night fell on the 16th, a company of 1st Battalion Royal Sussex Regiment were ordered to attack. Despite the ground being rocky, there was little cover and any sign of movement was fired upon by the defending Germans. Additional defensive points were also able to lend their support to point 593 and the assault ultimately failed, with over 50% casualties.
The Royal Sussex Regiment were ordered to attack again on the night of the 17th. The attack was proceeded by an artillery bombardment but, unfortunately for the 4th BI, to hit the monastery, Allied artillery shells had to fly very low over Snakeshead Ridge, with many shells landing among the British troops trying to advance. Despite this, the Royal Sussex Regiment attacked at midnight and managed to reach point 593. The fighting was brutal, bloody and often hand to hand however the defenders of the 1st Fallschirmjager just managed to cling to their defensive positions, beating back the Royal Sussex Regiment.
The following night, the main attack was launched along the width of the hill top. The Rajputana Rifles took up the assault against point 593 from the Royal Sussex Regiment, the remnants of which were held in reserve. The 9th Gurkha Rifles were ordered to take another main German defensive point while the 2nd Gurkha Rifles were to directly assault the monastery. The terrain was far from ideal for such an assault but it was hoped that the Gurkha’s mountain training would stand them in good stead. The hopes proved faint and despite valiant efforts across the entire front, the 4th British Indian failed to make further ground. The assault was eventually called off with casualty rates running at close to 50%.
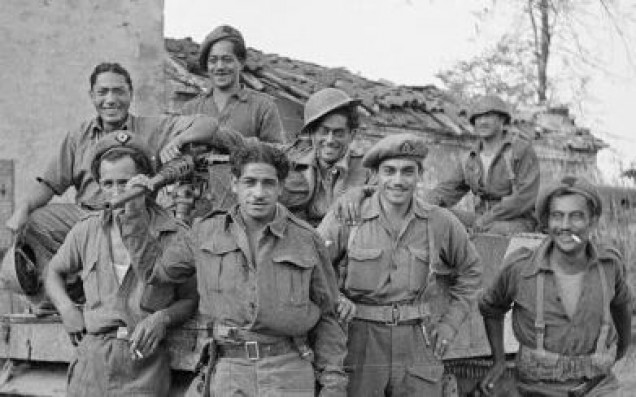
The second part of Freyburg’s plan was being enacted in the Rapido valley at the same time as the 4th British Indian were struggling in the hills above. 2nd NZ Division attacked across the plains toward the town of Cassino. On the night of the 17th February, two companies from the 28th NZ (Maori) Battalion advanced along the raised railway track into the town. The advance was hard going as German mortar teams had targeted in on the route while every bridge had been removed. Behind the Maori’s, NZ engineers worked relentlessly to rebuild the bridges to allow the armoured brigade to advance and support the infantry.
Despite the odds, the Maori’s fought their way through to the railway station in Cassino but by day break, they found themselves isolated. A near constant smoke and artillery barrage from the Allied artillery allowed the Maori’s to hold their position for much of the day despite constant German counter attacks. Toward the end of the 18th February, the Germans counter attacked with 2 panzers and, with no anti tank guns and with no further likelihood of advancing, the Maori’s were ordered to withdraw. The Maori’s suffered 60% casualties in the assault and had advanced far further than the defenders had imagined possible. Kesselring is recorded to have expressed surprise that their counter attack was able to succeed and the belief on the German side was that Cassino might have to be surrendered.
The second battle of Cassino had come at some cost to Freyburg’s NZ Corps. An estimated 800 casualties had been sustained during the assault. Unknown to the Allies, the German defenders had suffered far worse. By the time Freyburg had called off the assault, the defenders had lost an estimated 4500 men and were in no position to see off another assault. Had the Allies prepared and coordinated better at the outset of the assault, it’s feasible that they could have broken through. Unable to do so, both sides settled back to rebuild and reorganise. Heavy rains and flooding in the Rapido river valley also made further assaults highly problematic for a few weeks.


![TerrainFest 2024! Build Terrain With OnTableTop & Win A £300 Prize [Extended!]](https://images.beastsofwar.com/2024/10/TerrainFEST-2024-Social-Media-Post-Square-225-127.jpg)











I love it, @redvers – maps, tactics, and history … we need more projects like this in the community. 😀
Thanks @oriskany, glad you’re enjoying it.