
Hürtgen Forest - Game Video
Brucelea v. Oriskany - PanzerBlitz Ostfront 1943 (p1)
This weekend saw the kickoff of another web wargame, this time between myself and @brucelea (Andrew) in the UK. Moving out of the Tunisian desert, we squared off this time on the Eastern Front, in the blood-spattered, snowy steppes of the northeastern Ukraine for a game of Avalon Hill’s PanzerBlitz (updated).
Setting: February 1943. The final death throes of the Battle of Stalingrad have finally ended. The whole German 6th Army and half the 4th Panzer Army are gone, trapped by a massive Soviet encirclement and killed or captured practically to the last man. To effect this encirclement, two more Axis armies (Romanian 3rd and Italian 8th) have been effectively annihilated in place. A gash hundreds of miles across has been ripped in the southern German line, and fresh Soviet fronts (spearheaded by Katukov’s 1st Guards Army and Rybalko’s 3rd Tank Army) pour through the breach. German Army Group “A” must be pulled out of the Caucasus in record time before they too are lost, along with the remnants of German Army Group “Don.” As bad as Stalingrad has been for the Germans, another disaster is about to eclipse that defeat by a several grisly order of magnitude.
To win desperately-needed time and stabilize the southern German line, Field Marshal Erich von Manstein engages in a campaign of mobile defense, falling back, allowing the Soviets to rush forward, then hitting back only in carefully-chosen, perfectly-timed counterattacks. He uses Soviet momentum against them, baiting them forward in the empty vastness of the eastern Ukraine, striking when forward elements have separated themselves from support columns, when Soviet spearheads have spread too far across the steppe, when Soviet tank and mechanized corps start to feel the iron tug of logistics tighten around their necks.
Of course Manstein has to trade space for time, and this includes the Ukrainian city of Khar’kov. In a nightmarish breakout, encircled German troops of the Grossdeutschland Divisions and Hausser’s II SS Panzer Corps have cut their way free of the encircled city, disemboweling Soviet tank and motorized formations in the process. Still the Soviet advance continues, driving desperately south and west, hoping to reach the northern shores of the Black Sea, and thereby slice off the entire southern third of the German army in the East (perhaps a solid million men, three times what was taken at Stalingrad).
But in the wake of the Khar’kov bloodbath, Soviet armies may have finally pushed too bar, they’re too spread out, too exhausted, suffered too many casualties, and are too badly undersupplied. Conversely, the Germans have been falling back on their supply lines and rail heads, and Manstein feels his moment has finally come.
This will be what history calls “Manstein’s Backhand Blow,” the re-re-retaking of Khar’kov, the stunning battle of maneuver that will slam the runaway Soviet advance in its tracks, and stabilize the German Army in the wake of the Stalingrad disaster.
One of the many opening attacks Manstein will launch, primarily along the routes between Khar’kov and Peter the Great’s old battlefield at Poltava, will come here, with the Grossdeutschland division, spearheaded by a handful of the precious new “Tiger” heavy tanks, hitting the 12th Tank Corps of Rybalko’s 3rd Tank Army.
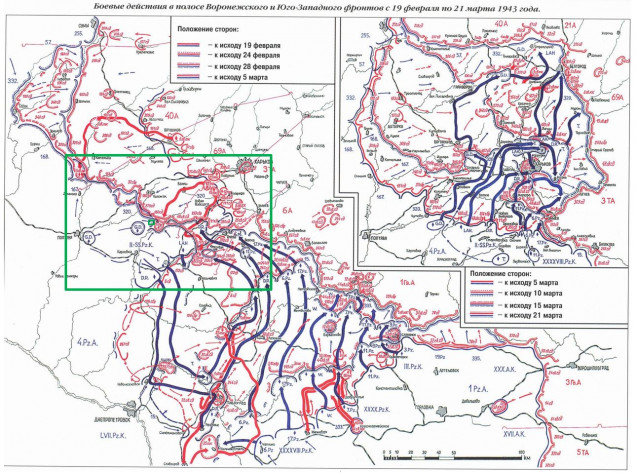 Some of the RKKA maps from this campaign, showing the final phases of the post-Stalingrad Soviet slashes down through Khar'kov, followed by the German counterattacks back up toward the Russo-Ukrainian border.
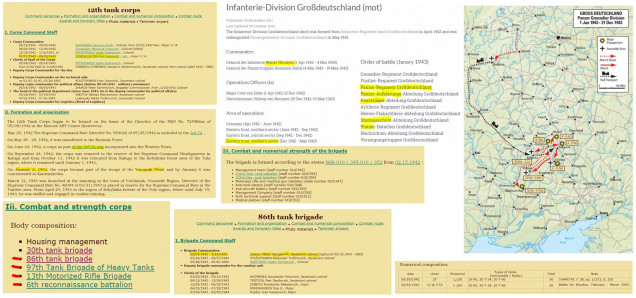 More historical research, allowing me to convert actual orders of battle for the identified units involved into PanzerBlitz army lists. You can get pretty detailed information, down to the staff officers, individual battalions, and actual tank types and unit counts for the brigades in question on the dates in question.
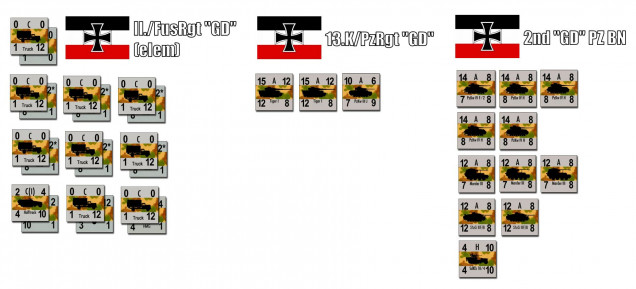 We're trying to keep this game a little faster, so we're leaving off a lot of off-board assets like air power and especially artillery. Here's the German force, including elements of II. Battalion, Fusilier Rgt Grossdeutschland, some of their panzers (with PzKpfw IV/F2s for HQ tanks, those SHOULD be PzKpfw IV Gs for the battalion tanks, but the game values are the same). PzKpfw VIE Tigers make up 13. Kompanie, PzRgt Grossdeutschland (along with a handful of late model PzKpfw IIIs). There are also two batteries of StuG-III, Marder PanzerJaegers, mortars, and engineers and FlaK SdKfz 10 halftracks. Call it 500 infantry and 70 armored vehicles.
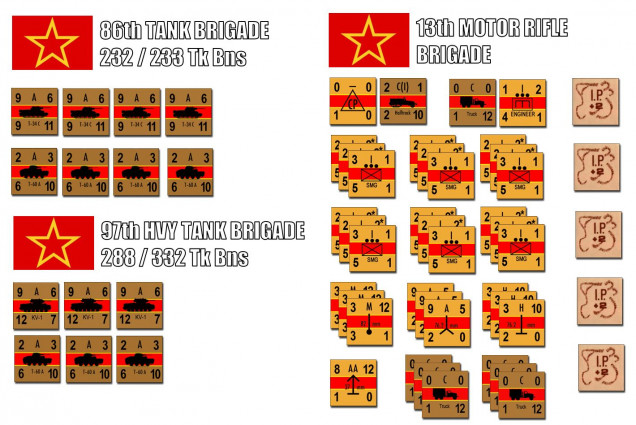 The Soviet force is at least 1300 strong, plus 70 tanks as well. But these tanks are nowhere near as powerful. Yes, those KV-1s of 97th Heavy Tank Brigade are great, and T-34/c medium tanks of the 86th Tank Brigade never go wrong. But about half the Soviet tank force are T-60A light tanks. Barely weighing 5.8 tons, they carry only a 20mm autocannon and armor sometimes as thin as 7mm. For all the press the T-34 gets, in early 1943 a huge portion of the Red Army's tank force was made up of hopelessly inadequate machines like this.
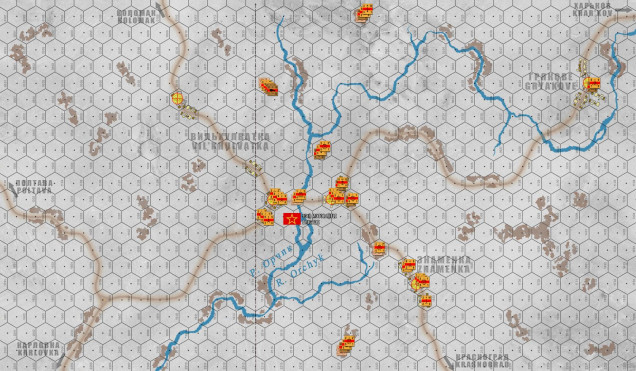 The Soviets get to set up the 13th Motorized Rifle Brigade (up to the line, 20 hexes / 5 km from the east end of the board). Scouts and partisans have alerted them to the approach of the Grossdeutschland kampfgruppe, and their two brigades of tanks get to arrive on the beginning of Turn 1 from the eastern end of the board. The Germans, of course, enter from the western end of the board. Note the small Soviet force in trucks in the norther-center part of the board, behind the village of Vil'khuvatka. These are perhaps intended to rush forward and seize that westernmost objective hex, at least slowing the German advance and forcing them to fight for this first objective. Please bear in mind that when I draw these maps and design these scenarios, I don't know which side I will wind up playing.
 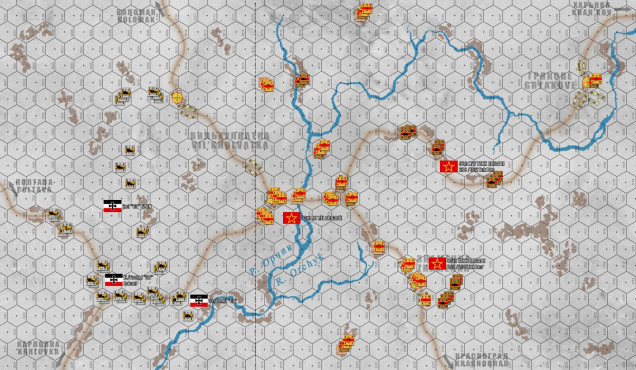 Game day! The web meeting begins and Andrew chooses to play the SOVIETS. So I thunder on the western side of the board with my Grossdeutschland kampfgruppe (far and away one of my favorite German divisions - all the elite troops and top-line equipment without most of the political "baggage" that comes with playing the Waffen SS). Note I have speedy halftracks (flak and pionier engineers) bolting for that northern objective hex. I can't quite make it in Turn 1, which means Andrew will get to force at least a brief fight there if he wants. Marder panzerjaegers and PzKpfw IVs move up in support. Meanwhile, I have a column of trucks carrying my fusiliers, led by my Tigers, approaching the main crossing village hexes of Vil'khuvatka, while more PzKpfw IVs, IIIs, and my StuGs cross the puny and frozen Orchyk River (more of a creek at this point) to threaten the southern objective hexes of Znamenka, or (alternatively) pivot north to assist a larger assault on Vil'khuvakta.
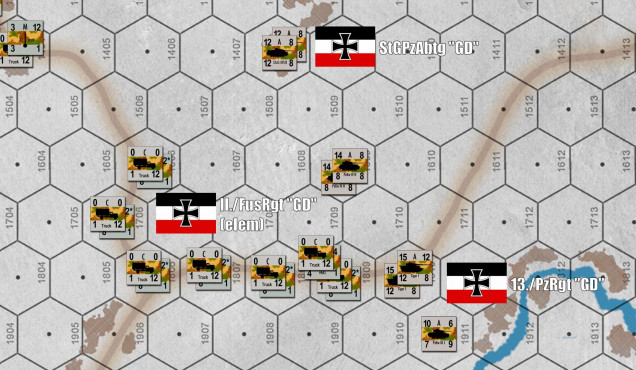 A close-up of my "schwerpunkt." Tigers, baby! Let me see if I can NOT waste them this time by being overaggressive like I was in the last game against the British in southern Tunisia.
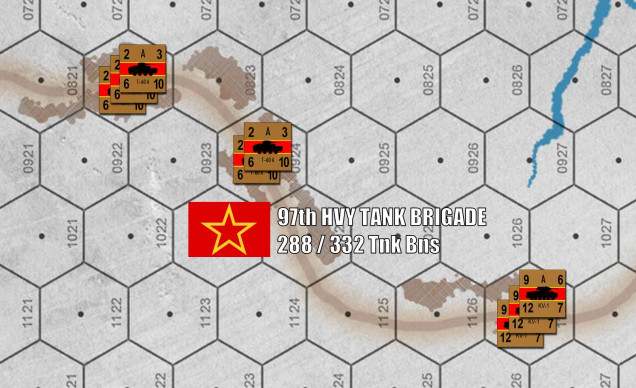 Of course, on his Turn 1, Andrew gets to bring on his tanks. In a tank fight, I'm winning this game hands down. But he's beating me in infantry and artillery, and of course he's also got time and distance on his side. This is a German assault, so it's up to me to take the objective he starts off holding with fortified troops. The burden of victory is on me.
 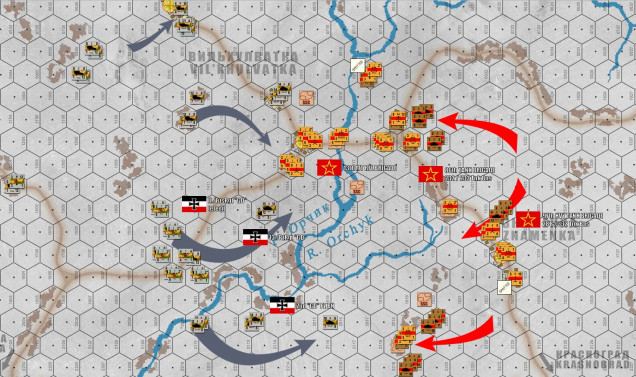 So far, so good. Andrew has opted against a showdown in those northern town hexes, so I take the first of five objective hexes (I have to take at least 3 of 5 to win). I am 1/3 of the way to victory without firing a shot. The second objective hex will not be so easy. There's no real way to take this except by frontal assault, but even a frontal assault can be carried off with speed, precision, and relatively few casualties if handled just right. PanzerBlitz is a game about DETAILS, careful balance and combination of arms, utilization of the turn sequence, large-scale planning and small-scale execution. It will take me a few turns to set up, but I believe I can kick down the front door in the middle and take that objective hex, probably destroying the bulk of Andrew's firepower in the process.
 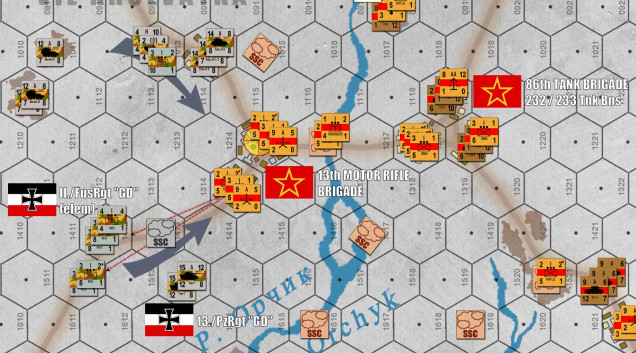 I continue to set up for my assault in the center. German smoke screens (dropped by my battalion 81mm mortar battery) screen the advance of my infantry. Tigers, PzKpfw IVs, and Marders will lead off, while Mgs from halftracks and 20mm flak will also pour in to soften enemy positions. I'll take some AT fire coming in from those two batteries of Soviet 76.2mm AT guns, but I'm trusting the Tigers to bear the brunt of that, while my more expendable Marder IIIs will take the "crossfire hex" in the center. Finally, the "pionier engineers" will spearhead the infantry assualt INTO the town hexes, supported by German HMG and 81mm mortar fire, as well as plenty of HE direct fire from the tanks (especially the Tigers). But you know what they say about battle plans, and how well they survive first contact with the enemy . . .








Leave a Reply