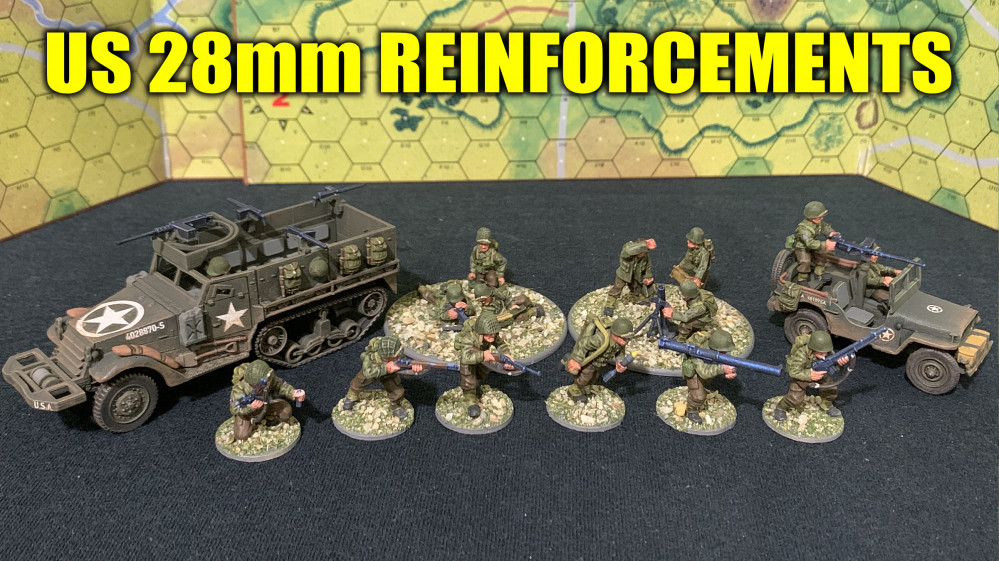
Oriskany's US 28mm Reinforcements
USMC vs. NVA, Hill Battles of Vietnam, 1967 (p3)
The battle of @rasmus ‘ NVA (320th PAVN Division) against my Marines of “Lima” Company, 3/4th Marines (Camp Carroll, 3rd MarDiv, I Corps) continues …
*System: Valor & Victory (home-written “Vietnam Edition”).
*Setting: December 1967, near the DMZ between North and South Vietnam, along tributary of the Quang Tri River, toward the Laotian border.
Already things are going pretty badly for my Marines, trying to approach and clear this NVA-held village. Their over-extended left wing has already been hit twice by devastating and bloody close assaults by die-hard NVA assault groups, their commanders all-too eager to exchange squad-for-squad with far more “expensive” USMC infantry. The right wing of my advance has been more or less halted by pinpoint MVA mortar and DShK heavy MG fire from the village, streaking out across those open rice paddies. My battalion 81mm mortars have more or less splashed all over the place and honestly didn’t kill anyone.
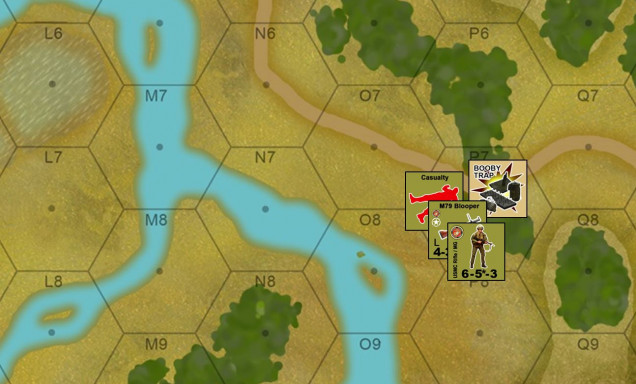
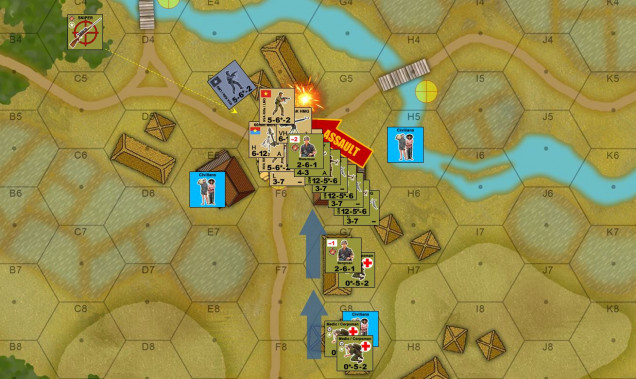
Now, to add insult to injury, as I try to pull my right-wing assault down to reinforce my left wing assault, as the last squads fall back to redeploy (screened from more of that DShK fire), they instead hit a booby trap, instantly knocking out a fireteam and causing another casualty counter that must be evacuated from the battlefield.
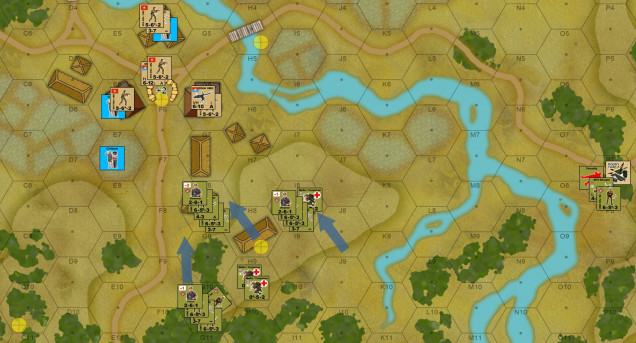
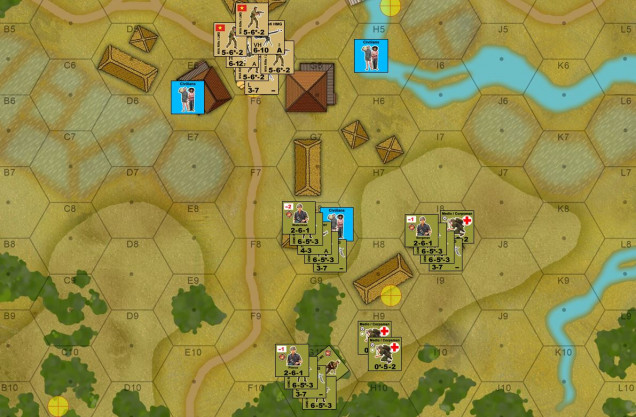
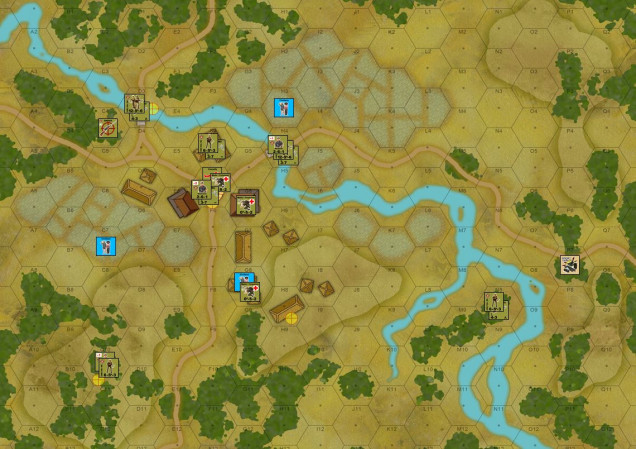
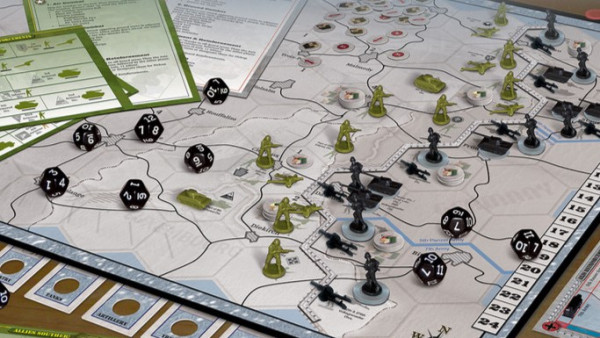
The big picture at the beginning of Turn 4, with Captain Waterman pulling in the platoons of 2ndLts Pierce and Bergman into a renewed push on the village from the southeast. If there’s any silver lining to the Marines’ clouds, it’s that these desperately bloody NVA charges have seriously depleted Communist manpower and killed off all their officers, leaving the remaining fireteams huddled in the center of the village (fortified mortar pit dug in with sandbags).
So Rasmus has two choices here. Pretty much the only way I can even come close to winning this game is if I take all the objective hexes, and perhaps some prisoners as well. He can either make a last stand, and hope to cut another bloody swath out of my Marines as we mount the game-ending assault. Or, he can accept the fact that I’ll take all the objective hexes, and instead use the time-honored Vietnamese tactic of melting back into the jungle and off the table, denying me the victory points of NVA casualties and POWs.
For better or worse, he chooses the former. The NVA will mount an uncharacteristic stand. Perhaps it’s the fact that there are no officers left, and their last orders were to fight the American imperialists.
In any event, Captain Waterman has pulled his company together for the final assault.
Captain Waterman personally leads the assault into the final NVA position on Turn 5. Now here, the Marines finally catch a real break.
Rasmus adds up everything in his hex into a final opportunity fire, hoping to gun down Marines as they rush his position. Here’s what happens, though. He rolls boxcars (all the firepower checks in this game are 2d6, low rolls better, so boxcars are the worst possible roll. Not only does all the NVA fire miss (perhaps panicked as they realize their end has indeed come), but per Valor & Victory rules, whenever you roll boxcars on a firepower check … an enemy sniper appears.
So a Marine sniper, with his M40 rifle emerges from the jungle behind the NVA and immediately makes a sniper attack on the stack that rolled the boxcars. I roll a d6, score a 4, subtract the +2 defense bonus afforded by those sandbags, and thus knock out an NVA fireteam (2 casualty points per half squad).
Alternatively, Rasmus could have chose to pin down two fireteams rather than killing one, but that would just lead to two fireteams immediately dying as soon as my assaulting Marines jumped into the sandbags and put a pistol, entrenching tool, or K-Bar into someone’s face.
The assault goes in and with a positively sick number of firepower points, wipes out the NVA position, “tabling” Rasmus’ force. But honestly, he’s the NVA, he’s supposed to be tabled or run away. It’s all about playing for time, and inflicting American casualties, of which there has already been far, far too many. And this assault has cost me still more, with three NVA fireteams and +2 sand bags = 5 required casualty points. I kill off half a squad for 3 casualty points and pin down two more fireteams, ending the battle.
On Turn 6, I have enough time to spread out and take all the objective hexes (bridge hexes H4 and D3, village hexes F6 and H8, and high ground hex C10). Last-minute casualties are successfully evacuated during the after-action phase of Turn 5, and no civilians were hit. Honestly, I would also have taken an NVA POW counter here (successful US assault on a Vietnamese position), but I would not have had time to get him evacuated, so wouldn’t get the victory points for this anyway.
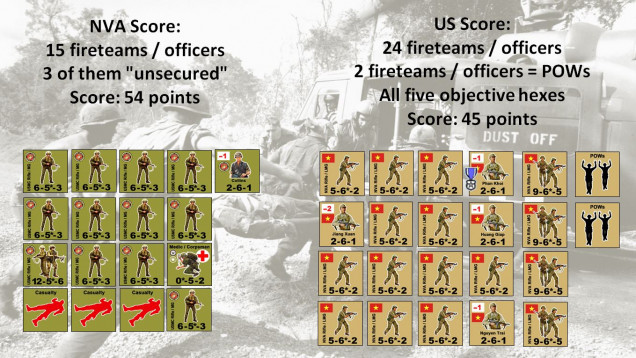
So here’s the score. As often happens in asymmetrical warfare, the “stronger” side wins the battle but loses the game. There’s just no way in virtually any realistic Vietnam War game that the NLF or PAVN will ever stand up and defeat American units in a face-to-face fight. They will never hold the field. They will either be wiped out or make a frustrating withdraw off the field, melting into the jungle in true guerilla war style. They’re real objective is either stalling for time or causing unacceptable Free World casualties.
In this, Rasmus has succeeded admirably, as shown in the scoreboard below.
Now, the only thing I would add to this is the one POW counter we forgot to add back on Turns 3 and 4 (Lt. Phan Khoi in hex G10). I would have had time to evacuate that POW to the rear, thus giving me 3 more victory points. But even so, the score would have been 48 to 54, still a clear NVA victory.
So while the operation was an American success (the village was taken completely), it’s more or less crippled Lima Company’s ability to conduct further sweeps through the Hill Country northwest of Camp Carroll through the rest of December, 1967. Accordingly, 3rd Bn / 4th Marines will have a tougher time countering further NVA infiltration across the DMZ and overall buildup or the 320th PAVN Division in preparation for the Tet Offensive at the end of January, 1968.
Congrats to Rasmus on the win!


![TerrainFest 2024 Begins! Build Terrain With OnTableTop & Win A £300 Prize! [Extended!]](https://images.beastsofwar.com/2024/10/TerrainFEST-2024-Social-Media-Post-Square-225-127.jpg)














Excellent stuff. Congratulations to you and Rasmus on a great game. Look forward to reading more.
Valor & Victory is a great system, @gremlin . Lots of mods put out by the community, of which my “Valor & Victory Vietnam” (V3 for short) is just one. As with most hex & counter command tactical games, though, there is no “points” system, so balance is tricky. Added to that, Vietnam is of course asymmetrical as hell, so balance is actually challenging. And of course, all the units are mine (i.e., not “official”). And they’re very powerful, so again, balance is tough. These scenarios are being written down, and I’m thinking about re-running this scenario again solo. The… Read more »
Thanks for the reply. Do you have solo rules for the game or do you just play both sides?
@gremlin – This game was played live online against @rasmus . If I were to replay it (time permitting), yeah, I would probably just play both sides. Vietnam (or really any asymmetrical engagement) is surprisingly accommodating for that, the “free world” side will ALWAYS win the “battle,” the challenge is in how quickly and bloodlessly you can do it.
Full rules (for “real” Valor & Victory, as opposed to Vietnam):
http://www.valor-and-victory.com/
Free to print & play, highly recommended.
Great read @oriskany even knowing the result – I should have just run away turn 5, but I got greedy and hoped the collection of heavy weapons would net me more expensive USMC counters. But then that double 6 looked back at me and made me pay for my greed.
I really enjoyed the game
Yeah, that last firefight on Turn 5 cost the NVA one fireteam to the sniper, and three fireteams for the assault, and I lost one fireteam in the assault. So NVA -4 points, USMC -3 points. I’m pretty sure either way the USMC is going to wind up with all the objective hexes.