Skip to toolbar
Soldado's Burrows and Badgers terrain - Part the second! The Mansion of Marneous Blackwick!

Soldado's Burrows and Badgers terrain - Part the second! The Mansion of Marneous Blackwick!

Supported by (Turn Off)

Forging on...

Tutoring 11
Skill 9
Idea 11
No Comments

And beating about the bush….

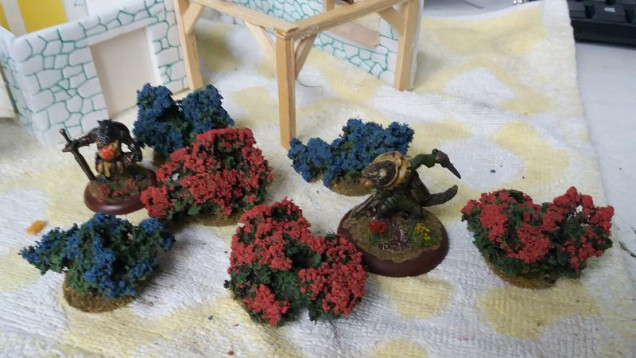
So while I prevaricate on how to do the terrain board itself heres some bushes


Heres what we end up withHeres what we end up with
Start by cutting a scouring pad into strips, Ive cut these to be about 10mm wideStart by cutting a scouring pad into strips, Ive cut these to be about 10mm wide
Then cut into not quite squares, the bigger the bushier but over 20mm and theyre awkawrd to keep upright while the glue driesThen cut into not quite squares, the bigger the bushier but over 20mm and theyre awkawrd to keep upright while the glue dries
Tease the squares apart, you'll need about 3 per bushTease the squares apart, you'll need about 3 per bush
Hot glue the 3 bits together and the to a base.Hot glue the 3 bits together and the to a base.
coat in pva and sponge bits, then hang them upside down so that the weight of the PVA doesnt leave them flat, I did this in a box so that anything that dropped off wouldnt make a mess on the floor.coat in pva and sponge bits, then hang them upside down so that the weight of the PVA doesnt leave them flat, I did this in a box so that anything that dropped off wouldnt make a mess on the floor.
Once dry, paint them in the same way we did the hedges and then add some coloured flock.Once dry, paint them in the same way we did the hedges and then add some coloured flock.
And Ive added some stone texture to the forge itself, milliput and a small stone and a carving tool were all that was needed.And Ive added some stone texture to the forge itself, milliput and a small stone and a carving tool were all that was needed.

Leave a Reply

Supported by (Turn Off)