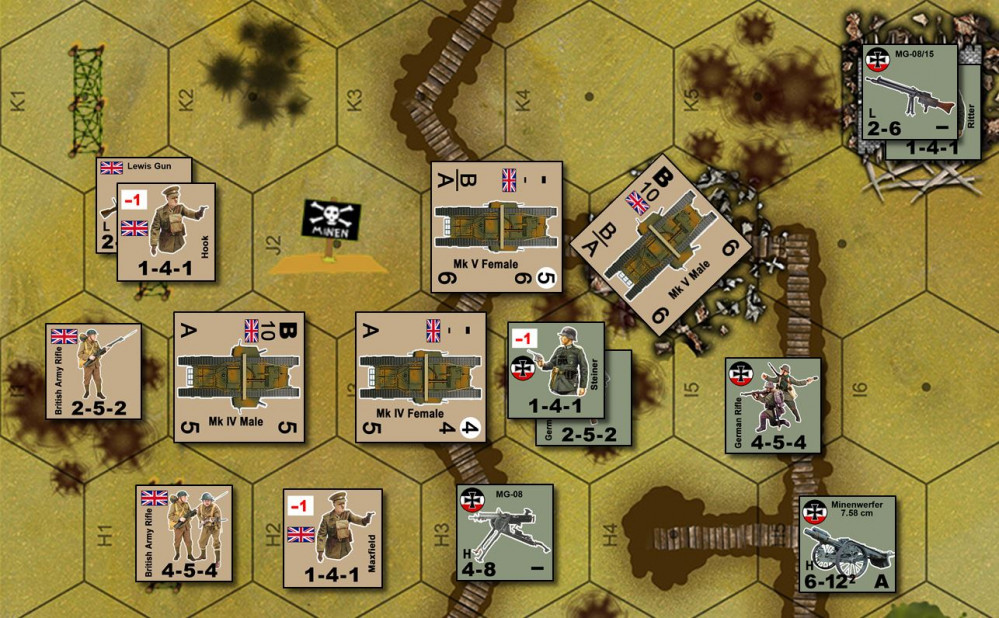
Oriskany's Final Days of the Great War - Australians + British tanks vs. Germans at Hamel
Australians vs. Germans at Hamel, 1918 (Part 06)
We come at last, folks to the end of this epic game of Valor & Victory – where we’ve tested not only our 1918 Australians, but also back-dating the V&V tank and AFV rules back into our 1918 edition, and trying out our new “Monash Doctrine” special rules specially for the Battle of Hamel and subsequent BEF offensives leading into the Hundred Days (August-November 1918).
So far we’ve seen Australian infantry advances through barbed wire and gaps in German minefields, hit-or-miss close artillery support from off-board batteries, hit-or-miss direct fire support from four Mark V “male” and four Mark V “female” tanks, and finally the first Australian assaults directly into the German primary trench. Some of those assaults were bloody failures, but others were successes, along with some tank overruns, finally cracking the German trench line. Not all the tanks made it through, some hit by German infantry counter-assaults, others hung up on the trench until they were abandoned by their crews under persistent German mortar fire.
But by the end of Turn 4, the primary trench line was secured, and by Turn 6 a wild run-and-gun fire fight through the German communication trenches eventually secured the second German trench line and even took the first objective building in the town outskirts beyond. But that left only two turns left for the Australians to take at least eight of the sixteen building hexes in the town behind the German trench system.
By now with only two operational tanks left, the British actually did some great damage in the south, eliminating several German fire teams and LMG (MG 08 15) teams, enabling swift Australian assault and occupation of key building hexes. Things in the north were a little more stalled . . .
But now we’re in the home stretch, with just one and a half turns to go, to see if the Australians can put one more big crack in the German positions in this town, and claw out a hard-won and bloody-knuckled victory here in our commemorative Battle of Hamel game.
Turn 7:
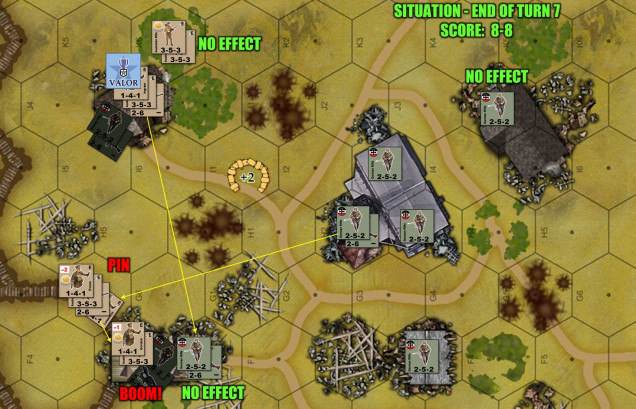
SO despite further successes for the British tanks and Australian infantry in the south, here in the center and north, things are still pretty stalled. The buildings are a little further away, leading to more dead ground for any Australian assaults to have to cover. Suppression fire is a problem since there are not British tanks up here with Hotchkiss MGs or 6-pounder guns. And of course the Germans are shooting back, their MG 08 15s pinning down Australians in certain spots.
On the Australian turn, however, they do have one success. Captain Evans, applying his -2 leadership bonus (lower left), is able to direct sufficient rifle and Lewis Gun fire into the last German “minenwerfer” mortar team to eliminate the unit and clear a hex for immediate occupation. After he picks his way carefully forward during the “Advance and Assault” phase, however, some of his men are actually hit by German LMG fire and half a squad is pinned down.
As the Australians occupy that building hex, though, they now own a total of eight such hexes.
The game is officially tied at 8-8!
Can the Australians take one more building hex in the last turn of the game? Can the Germans hold on just one more turn?
Turn 08 begins!
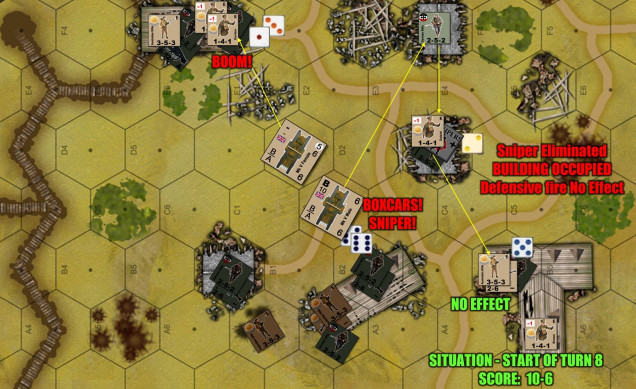
In the south, the two surviving British tanks try to again put down fire suppression on remaining German infantry units that could chop up Australian infantry making the final rushes. But at last their luck deserts them, and a boxcars roll (2d6 – the worst roll in the game) indicates that a German sniper has made his appearance!
The German sniper not only occupies a building hex the Australians though they’d cleared by fire on the previous turn and would now occupy for free, but also pops off rounds at the nearest Australian unit. Fortunately for the Australians, the German sniper roll is only a 2, and compared against the cover bonus of +2 (ruined buildings), no damage points are inflicted on the Australian squad. Counterfire is then able to eliminate the sniper.
The Australians dodged a bullet there, literally.
The Australians then occupy the building and the British Mark V “female” tank puts enough MG fire into another building to eliminate the small German fire team. Two more building hexes are thus occupied during the Australian movement phase, nudging the score up to 10-6. The Australians have, on the final round of the game, officially won.
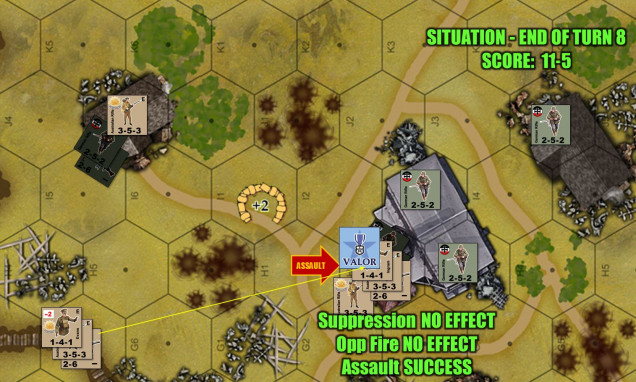
In the north, a last assault is mounted against the large German-held building in the northeast. First, Captain Evans, having detached some of his platoon to Lt. Ingram, keeps the rest of his men with him in the German communications trench, putting a “fire and maneuver” base of fire down on the German building,m trying to pin the Germans down for Ingram’s assault.
Evans doesn’t roll well enough, though, even with his -2 leadership bonus. Fortunately, the small four-man German LNG team doesn’t roll very well either, and Ingram has angled his dash in such a away that only one other German team ever gets a shot at him, which also doesn’t do enough damage (remember “valorous” units are allowed to flat-out ignore the first casualty point inflicted by any APFP check).
He and his men are just THAT hard-core, sprinting across the shell-shattered village square, kicking down the door, and bayoneting the first man in the German MG team and taking the rest of them prisoner.
With one German unit in the hex, and a +2 terrain bonus for ruined building, Ingram would normally be required to now pay three casualty points for the assault. But again, valorous units can ignore the first one. Rather than take casualties, Ingram opts to “pay” the two remaining required casualty points by pinning two of his half-squads. Being elite units, valorous, plus with a -1 officer in the next, they get to roll a rally on 9 or less on 2d6, pretty easy roll.
End result, they both rally, leaving Ingram with his full force successfully (and bloodlessly) assaulted into that German hex.
These casualty management and morale / rally dynamics are actually crucial. It was exactly this moment in the game that cost the Irish the game in our recent Assault on Courtrai game in mid-October. The last assault of our 36th Ulster Division force was technically successful, but took too many casualties and then failed to rally pinned units, allowing the Germans to counter-assault on the last turn and actually win the game.
Not here. With eight men in good order, four of them “valorous” with a Lewis Gun, plus a -1 officer, this hex is far too strong for the Germans to try a cagey last-minute counterassault to steal back a hex. They try some close direct fire just for sport, but don’t score enough successes.
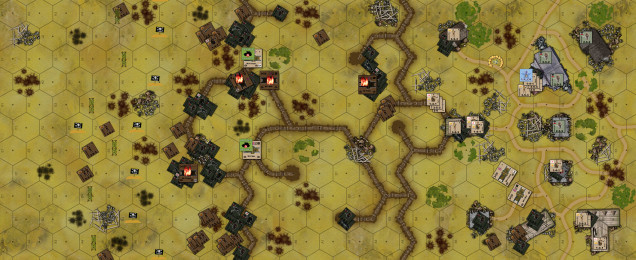
The game is finally over at the end of Turn 08, an Australian 11-5 victory.
The final battlefield. Units lost have not been removed, but left as darkened counters on the counters where they were lost.
German losses: 38 killed, 112 wounded and prisoners.
Australian losses: 30 killed, 60 wounded
British losses: four tanks, 5 crew killed, 11 wounded.
Allied total: 35 killed, 71 wounded, four tanks (+2 immobilized / crippled)
Out of 16 objective building hexes, 11 now held by Australians, 5 by Germans = an Australian win.
Thus ends our Battle of Hamel game. I hope you liked it. If you want to try Valor & Victory, the original WW2 game is completely free to download and play here:
http://www.valor-and-victory.com/
Thanks to everyone who supported or participated in the discussions of these Great War articles and associated content.


![TerrainFest 2024 Begins! Build Terrain With OnTableTop & Win A £300 Prize! [Extended!]](https://images.beastsofwar.com/2024/10/TerrainFEST-2024-Social-Media-Post-Square-225-127.jpg)










Apologies that I hadn’t got this yet but I’m slowly working my way through the parts now. You’ve done an excellent job with all this and it’s tempted me to have a look at both the physical version and the steam version
testing comment field?
Ok, I can post comments now.