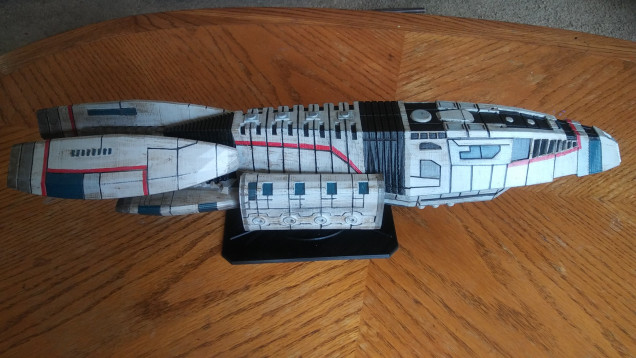
Battlestar Galactica The Thin Red Line
Adamant Painted
In a prior post I forgot to mention making the base for the Adamant.
Keeping with BSG tradition of not cutting corners in this production standards. I went in and cut the corners off the base. It may be hard to see from this picture, but the base has firing arcs laid out on it. The peg for the base is designed into the base it has a 5mm diameter and is roughly 4 inches high.
So to get this base to work as intended you have to find the center mass for balancing and take a 6mm drill bit and make a center line hole. Once that is done and the hole is cleaned up a bit. A 3D printed insert is glued in place which will allow the 5mm peg to slid up into it.
The 1st Base I printed worked great for the Colonial Mover. However for the Adamant I cracked the peg on its first use. The issue was with 3D printing you tell a Slicer program how solid you want the model. Most people hover around a 10%-20% infill for their prints. If you wanted a model completely solid this infill would be set at 100%. Now the problem is the greater the infill the more print time and materials that are being used. For those that haven’t had much time around 3D printing, this infill will be printed out in a honey comb like pattern narrower or wider depending on your infill settings. Most 3d printed objects are basically a 1-3mm thick shell of the object with this honey combed infill pattern inside it.
To counter the weight of the Adamant I bumped my infill setting to 50%. To give it more than enough structure to hold the weight of it. This also meant this base print would take 14hours to do. Needless to say it did the trick.
Painting the base was a very simple process. Automotive black primer , then sealed with a semi-gloss clear coat.


Leave a Reply