Infinity Terrain
Painting the Service Area
Been a bit of a week for me in non-hobby land. Still found time to hobby!
Midweek I loved the comments on the Hobby Hangout I got I did see someone advising of a spelling mistake. Please feel free to point this out with other comments. I do this Blog as fun and so that it’s useful (mostly to myself). Spelling and writing is very much not my strongpoint. Any comment to improve the project or the blog is very much appreciated.
Sadly the above made the project move to the top which was unintended and sorry if you clicked on and didn’t see an update. I also learned that titles and single image text do not spellcheck.
I started to get the Service Area painted. I knew I didn’t want to hand paint this it’s too big and I needed to add interest onto this. I decided to do some blends. I wanted to keep the service area itself the same colours roughly as the picture.
I started by painting the Service Area white then masking the model off.
Here are a few tips:
- You can bend masking tape around curves. The thinner the masking tape the easier this is. You can do this inlayers if you need it to be thicker.
- Save your good (expensive) tape for edges, use the cheap stuff to fill in or use paper and stick it down.
- Take some of the stickiness of cheap masking take off so it doesn’t pull the paint off.
- You can mask then cut round of you have an edge to place your blade against.
- After masking and cutting go round and ensure all edges are pushed down.
- If you leave masking tape on for some time use a hairdryer for a few seconds to loosen the adhesive before pulling the tape off.
- You can place a blade on the asking tape and lift up to cut the tape.
- if you have parts that fit together you may already have some waste material you can use for a mask.
- Just before painting check for spots you have not masked. This has saved me more than a few times and it’s difficult to see what you have not masked (including here).
- The more time you spend masking the better it will be. (the below was as fast as I could go)
I am not the best at masking, I never give it the time it deserves. I just want results, this is terrain and I treat it as such and any problems I can turn into features. If you want a close to perfect finish you can get it but take the time to do it.
I Sprayed white. then done a grey face over the front and the back. Then masked.
Sprayed white then masked the trim then went onto the final colour red I done a darker red at the bottom then went over everything in a light red then unmasked.
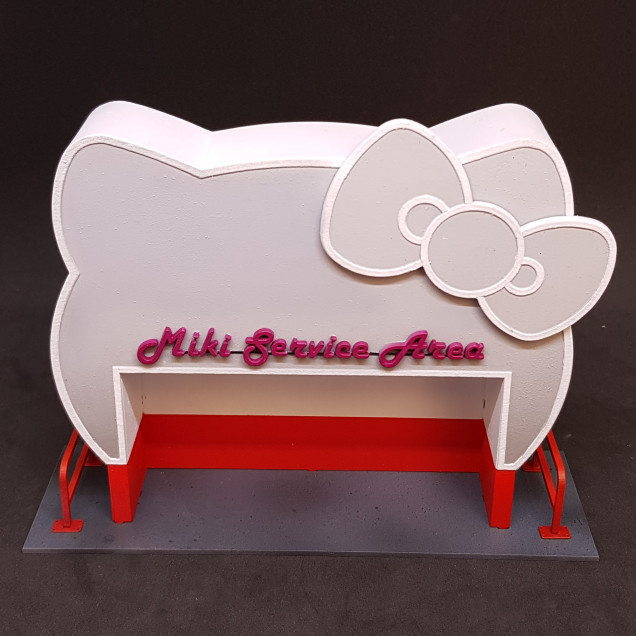 I sprayed the base grey and speckled (sprayed from afar) with two shades of blue and black to give some texture. I hand painted the sign in a pink, this will get a glow effect when done.
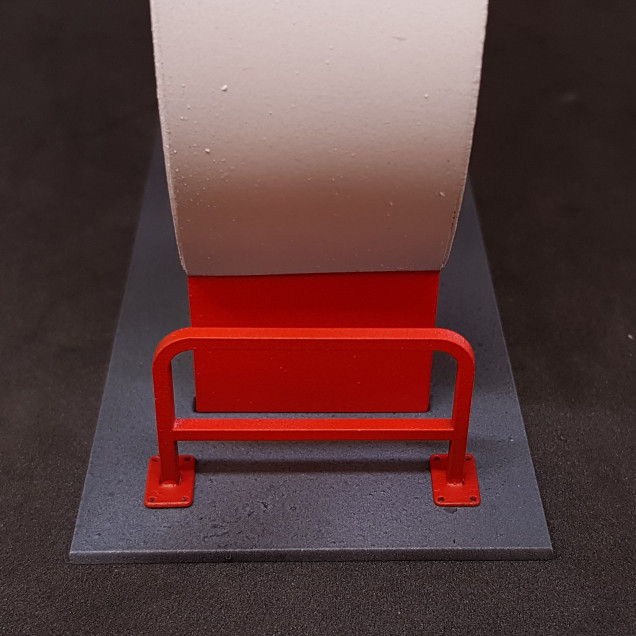 I felt that the railings didn’t look like they fitted in. I went back to the laser cutter and made some mounting points for the railing. This detail is in the original photo. Do not know why I didn’t spot this before. I painted this solid red as the side of it was almost the height of the railing.
 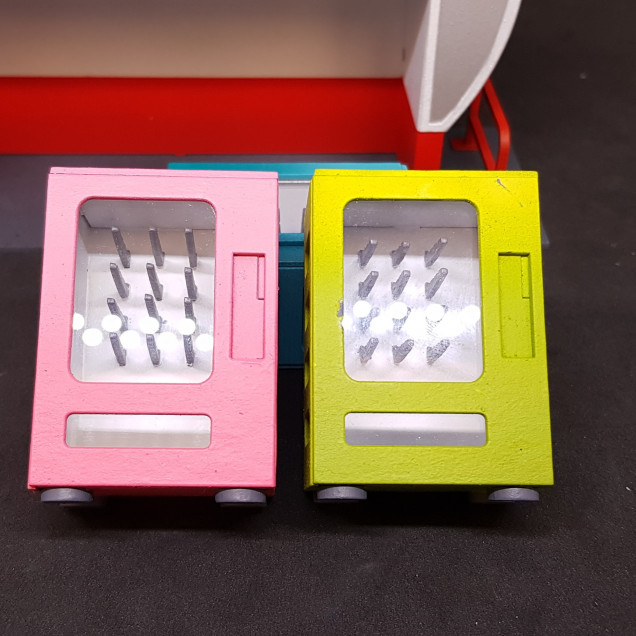 I painted the containers without taking pictures. This was simple, I painted the inside white so that you can see the contents (which I decided to leave out?). After this I used the cut-out pieces from the laser cutter as a mask. I push fit everything back together and sprayed white then went in with a two-colour fade from dark at the bottom to light. After this I took off the front and removed the MDF mask. Hand painted the product rails, put in the acrylic and used PVA to mount the glazing so this didn’t fog up. Pushed everything back together and it didn’t need glue so left this (if I wish to fill this later).
 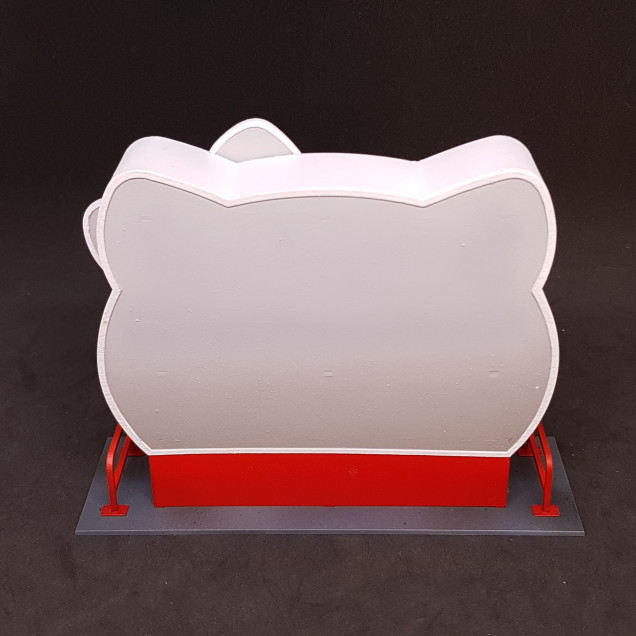 Had a hiccup. My wedding ring put a dark line on the front and back so had to mix up a colour to fix this. It worked but you can still see this under camera but not in real life. Here is the back.
 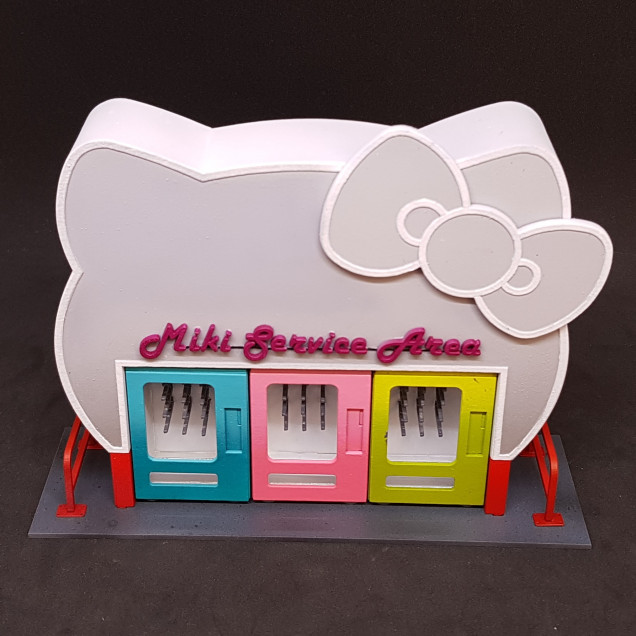 Everything together. I like the contrast of the fun building with a drab paintjob and the boring vending machines and exciting colourful paintjobs.
 So that’s me so far. I have a to do list today:
- highlight everything I may just do this with thin white to make it pop apart from the red on the building.
- Glue everything. Most is push fit assemblies at the moment.
- Weather this. This will be very difficult as a white roof you don’t normally see would not be white on any day apart from the day of construction.
- Do the sign, give it a glow with an airbrush of pink and then hand highlight it to pop.
- Make and fix on the control panels on the vending machines.
Almost done and then I need to get my thinking cap on for the Hobby Challenge. Can’t wait to see what everyone comes up with this time.


![TerrainFest 2024 Begins! Build Terrain With OnTableTop & Win A £300 Prize! [Extended!]](https://images.beastsofwar.com/2024/10/TerrainFEST-2024-Social-Media-Post-Square-225-127.jpg)




Looking fantastic as ever, I love the American 50’s vibe to the vending machines colour scheme. Nice catching on the railing mounts. I do look forward to seeing the neon glow effect in it’s final finished glory!
Just finished, need to write it up. it looks a lot different finished in my eyes. Just seen this again and lol’d. I hope not to disappoint.