Home › Forums › 3D Printing for Tabletop Gaming › Loving the AnyCubic Photon resin printer!
Tagged: 3D-printing, Anycubic, boba fett, jabba the hutt, Photon, Star Wars, Star Wars Legion
- This topic has 15 replies, 6 voices, and was last updated 5 years, 11 months ago by
shingen.
-
AuthorPosts
-
January 11, 2020 at 9:26 pm #1470028
I’ve only had it a few days but have been printing like a mad thing!
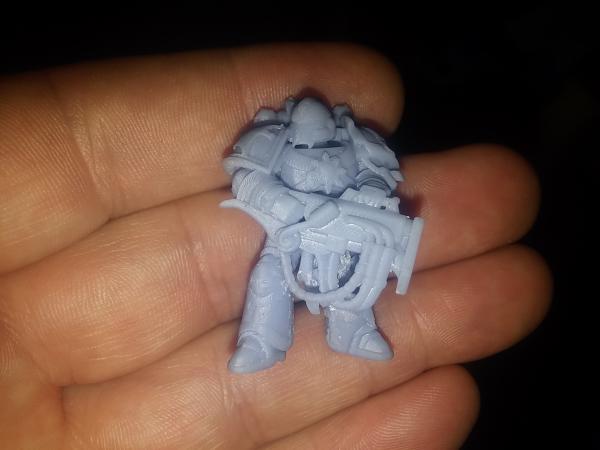
First print was awesome. Then I started loading up the print plate. It takes a bit longer getting all the supports right for five or six minis at a time, but then after one five hour print job, you’ve got five or six minis, not just one!
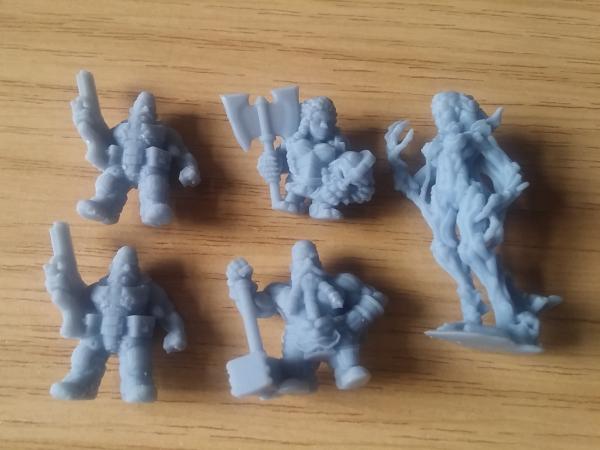
Yes, I printed a Boba Fett.
Yes, I got the scale all wrong.
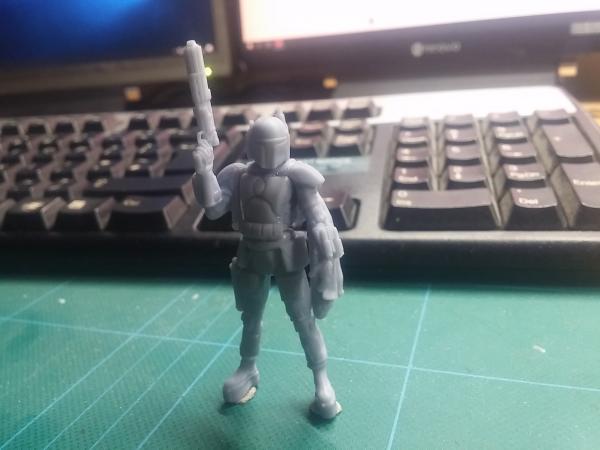
No, I don’t know why he’s wearing Beatlecrushers either.
January 12, 2020 at 12:02 am #1470059Yay! I had my first failed print!
Well, I’m not sure if “failed” is right: I aborted it. Because I ran out of resin mid-print. I was about two-thirds of the way into the second episode of Mandalorian (is it me, or is it just every Clint Eastwood movie ever made just rolled into two episodes with a tin hat instead of a leather fedora?) when I thought…. “I don’t remember hollowing out that Jabba the Hutt miniature – he’s going to take *loads* of resin to print….”
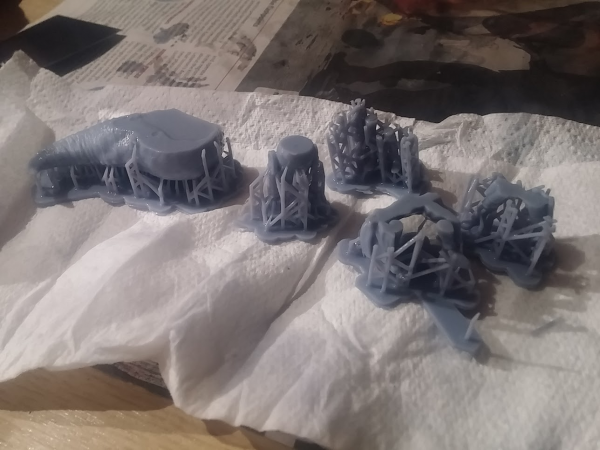
Needless to say, I got there just a few layers too late (as you can see on the Jabba model, I’d only just started running out of resin). Ah well – just spent an hour or so hollowing out and re-prepping my multi-model file for printing. I’ll leave it running overnight and see how it looks in the morning…
January 12, 2020 at 6:36 am #1470088These look great. 3d printing is looking more and more a possibility for those of use that just want to improve our hobby and not start a new one.
January 12, 2020 at 9:00 am #1470093I’m not going to lie, taking an stl model from a store, angling it, adding supports, finding and fixing islands…. it probably takes about an hour (once you know what you’re doing) on a build plate of five models.
If model creators could do the extra step and do all this validation – or partner with someone or give them re-seller rights after they’ve done the work – then it would be almost print-and-paint. I’m pretty computer literate (having programmed the software for stuff like this and made CNC machines for years – about five years ago we made our own SLA printer by inverting the lens in an LCD projector) and I still find it a lot of computer work.
I’ve now got .photon files so I could re-print my minis exactly as I did the first time, knowing there’d be no failures (providing there’s enough resin!) – the thing is, how many Jabba The Hutts does one person need on the tabletop?
January 12, 2020 at 9:03 am #1470094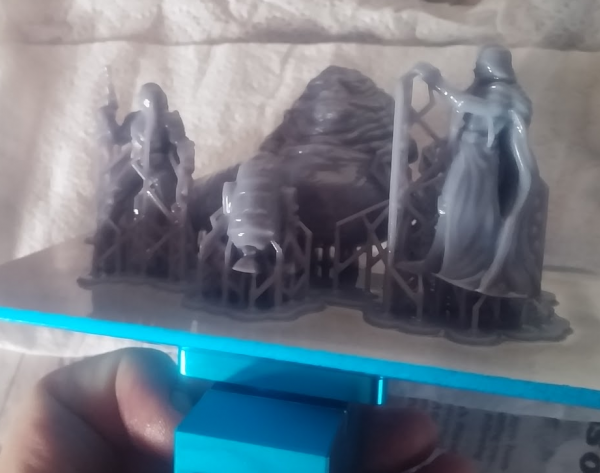
Looking good, straight off the build plate….
(you can’t see him, but C3PO is behind Darth Vader too)
January 12, 2020 at 9:26 am #1470095January 12, 2020 at 10:34 am #1470111The Kacophani Marines do look great! It took me a while to work out how to repair the multi part mesh to get it to print as a single part. Though because it’s multimesh, I might take the heads off them all and print them separately, so they can be swapped about in an army.
January 12, 2020 at 5:15 pm #1470138Does the jabba + vader print look ‘wet’ because it is fresh of the printer ?
Or is it tricky to capture the detail of a model that isn’t primed ?
And yes … ready-to-print files for these printers would definitely be the one thing that could catapult this from a mere niche to something even non-techy people could do.
I can definitely see myself buying one of these 3D printers in the near future.
January 12, 2020 at 7:09 pm #1470147@limburger – they are fresh off the printer (although it was an overnight print so they were left hanging for about three hours) and if you look closely you can see they’re still attached to the print bed.
Here are the same miniatures after a 1-min soak in isopropyl alcohol and 10 minutes under the “sunbed” (nail varnish lamp)
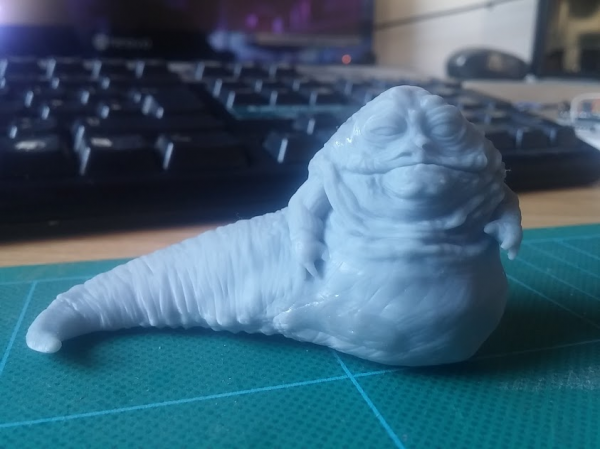
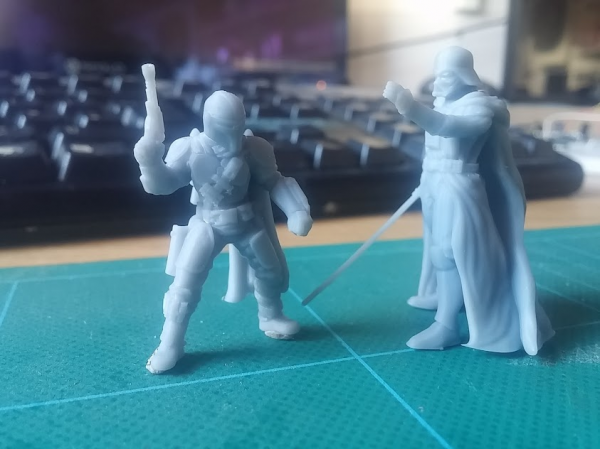
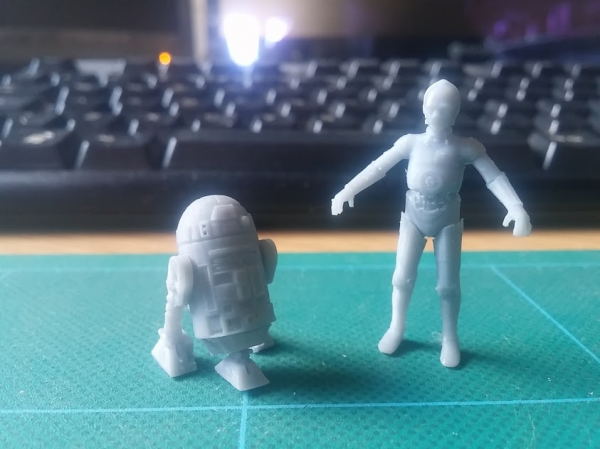
The detail on these miniatures is insane! I love the Jabba The Hutt model.
Darth Vader I’m less keen on – it’s like the modeller did a good job, but hasn’t *quite* captured *something* about him – I’m not sure what, and I’m not sure why, maybe it just needs a coat of paint? I think it’s the helmet: I much prefer the helmet shape from Episode IV than the elongated one in Empire Strikes Back/Jedi. Maybe that’s it?
Anyway, the Boba Fett character was a modification (yep, he’s not just some random Mandalorian, the creator did put a backpack on and the half-length half-cape thing) but I prefer this pose to the rather more static pose of the oversized one I printed earlier.
All my spare time is currently spent fixing 3d models and cleaning up prints as they come off the bed; I’m going to have to put some time into painting these up, to show them off at their best – at the minute, they’re just adding to Grey Mountain.
January 13, 2020 at 4:33 pm #1470329I just got an anycubic too.
im finding farting about with the files in the provided slicer to be really hard work, and I’d say I’m reasonably well experienced at it, my FDM printer has done a solid 6km of filament (about 20 spools)
what slicer are you using and where are you finding your models?
January 13, 2020 at 4:55 pm #1470331My workflow sounds quite convoluted, but it creates print-ready models relatively quickly (at least far quicker than struggling with the AnyCubic branded software!).
I get my .stl files from a variety of places – yeggi and thingiverse and stlfinder have loads of free models, some of which are very good. I’ve been a patron on Patreon for a few years of various artists and did some shuffling around and have a few favourites for .stl models (ThatEvilOne and Francesco Pizzo make amazing models) and lots of creators have a back catalogue on MyMiniFactory.
I start by loading the .stl file into Prusa slicer. Tilt upwards by 10-15 degrees (look at any sticky-out bits to guage which is best). Add auto-supports. Add any supports you think might help (on the edges of shoulder pads, weapons etc) if they haven’t already been placed. Prusa slicer is currently the best for adding auto supports – it puts them in sensible places and they’re really easy to clean up after printing (they’re in between the light and medium sized supports that Chitubox creates). Editing supports manually in Prusa is pretty intuitive too – just grab and drag them around and you can see the “angle of approach” before you hit “apply”. Export the plate *and supports* as an stl file.
Load this stl file into Chitubox and slice it. If you scroll down through the layers, you might catch if there are any stray islands (it’s quicker to find them at this point, manually add a support in Prusa and re-export the .stl). Save the sliced model as a .photon file. (if you want to add supports in Chitu at this point, set the z-height in the supports settings to zero otherwise it’ll mess things up! Personally, I go back to Prusa, add the supports there and re-export).
Load the sliced .photon file into the Photon File Validator. Hit Fix. Auto-fix the one and two pixel islands. Scroll through the layers to fix any others (either find them and add extra supports – sometimes I just add a few pixels across a couple of layers to make any remaining islands part of an existing shape).
Fixing in the file validator is a last-resort; adding the supports in Prusa means that once you’ve got your model slicing with no islands, you export the whole thing as an .stl file and drag it onto your build plate in Chitubox whenever you need to fill up a few gaps on a print job (I have space marine heads as separate, supported heads that I use to fill in any gaps on a multi-mini build plate – just to get the most out of each print run!)
I’ve got the process down to about an hour for a full build plate of five or six minis.
It seems like a faff but I’ve not yet had a failed print (because of bad slicing/layout/design).
I sometimes also edit the .stl files in Blender before starting the whole process, and fix them using netfabb, but that’s a whole other story! For prepping and printing files, add supports in Prusa, slice in Chitubox, validate with the file validator. Then bang! Print away…..
January 13, 2020 at 5:21 pm #1470332@blinky465 I did see the support plate. It’s definitely the post processing that makes those minis look more detailed than they would appear to be fresh of the printer.
Although that’s probably not quite as different in real life, or is it ?Your workflow is definitely complicated, but it makes sense to use the best program available to do the job.
If only the default software was better at placing those supports …If this tech and the associated software keep improving then it really will disrupt the hobby, provided the industry doesn’t go ful l retard once the inevitable copyright issues gain critical mass.
I think Disney’s stance on these not-quite-legal Starwars models may very well be the proving grounds for this tech.
January 13, 2020 at 5:41 pm #1470335Well I’m glad im not the only one that thought it sucked balls.
thanks for sharing your workflow
January 13, 2020 at 6:36 pm #1470354Yeah, I hunted down some Star Wars models to show off what the printer can do to my wife (an easy win with characters she knows and recognises). I doubt I’ll ever game with them. I did think about copyright issues and whether or not there would be much life to this whole 3d printing lark once the “big boys” started getting sites shut down (or models removed at the very least).
But sites like Patreon and MyMiniFactory and CGTrader show that there are plenty of creators out there, many of whom have sub contracted for the likes of GW and ForgeWorld, simply selling directly to the public.
For players like @warzan who are maybe finding existing IP a bit stale, or looking to “game in the gaps” there’s a treasure trove of goodies. Brand recognition is the only thing really stopping it taking off more quickly, I reckon.
January 13, 2020 at 6:42 pm #1470355Sure, my work flow *seems* complex when written out, but it’s not that arduous. What’s more complex is hitting auto support and hoping for the best, waiting four hours, getting a failed print, cleaning the bed, emptying the tank, filtering and replenishing the resin, relevelling, then repeating it all again with no understanding of why the print keeps failing!
Yes, using a 3d printer requires a bit of work. But to print a really nice picture on an inkjet you still prep the image in Photoshop, use the right paper, set the best quality paint settings etc…. It all takes time and a bit of effort up front!
-
AuthorPosts
You must be logged in to reply to this topic.


