3D Printing For Wargaming Part Four: Smart Design…
April 13, 2015 by crew
My previous article showed that printing anything is actually pretty easy. It’s printing something pretty and/or useful that takes some effort. Here’s where I would love to give you some advice...
Think Modularly
One of the key considerations in making 3D models is how to save yourself time. Yes, you can make a whole table of unique objects, each of which you printed in one go, but consider this: each of those models will require design time, modelling time, troubleshooting, and revisions. The payoff is not that good.
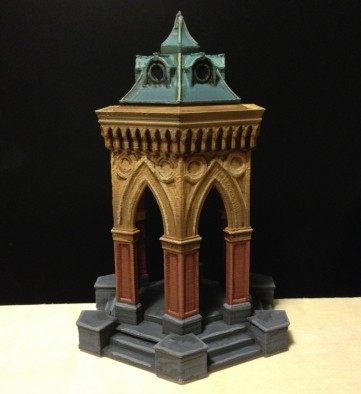
So, for example, you may decide to create a model of a medieval well. And it would look nice and you can have it be something that your armies could fight around. But you really only need one on your table. In this case I would choose to make it “The Colossal Well of Angelic Tears” and craft it to be so impressive that it would be used as a centrepiece. Even then you have to consider how much time you’d put into it and how much you’d use it.
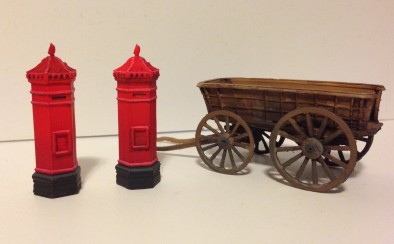
It is much better, in my opinion, to find a design that you can replicate multiple times on one tabletop without it seeming odd. If that model is large enough, you could even have that model be made up of components that you can switch out to make each object feel unique. If you make any mistakes along the way, you only have to replace the single part that was the problem.
Some examples of better choices with repeating shapes...
- Barrels and crates
- Stables
- Fences and Walls
- Row Houses
- Telegraph poles & traffic lights
- Wood piles
Even if you decide you want to make lovely unique objects, consider how you might be able to make the object out of pieces. In the case of “The Colossal Well of Angelic Tears” perhaps there are pillar details on each of four corners that are exactly the same. You make one model and print it out four times; a four-to-one payoff is still good in anybody’s books.
Working With Strengths & Avoiding Weaknesses
In a previous article, I outlined some of the problems you might encounter on a 3D print. Here are the ways that I avoided some of those issues by designing my models cleverly...
Warping is something that I still regularly have problems with and I often consider sending away for the heated bed option on my printer. If I keep my prints with a smaller footprint (around 8cm in either direction) then the warping is small enough that the prints are still usable.
Finding a balance between having a stable footprint (with enough contact to keep adhesion) while minimizing the amount of plastic that touches the cold build plate is hard but worthwhile.
Vertical detail is a tough issue to deal with. My solutions are to...
1) Print architecture more often than not; it means more rectilinear shapes.
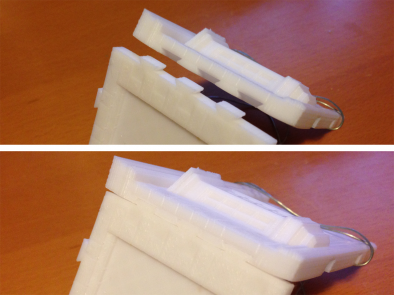
2) Contrary to the wall I made in my last article, I find it better to print walls and detail in the x and y directions (flat to the print bed) rather than vertically. This means you have to be clever about being able to attach prints together. It is for this reason that I used the dovetail system on my Victorian Row Houses...
3) If not straight and crisp, consider objects that are naturally messy or old looking. Ruined or weathered objects account for the fact that you will not always get sharp, accurate detail.
Overhangs can be dealt with a number of ways...
- Let the slicer build support structure for you.
- Build your own support structure into the model that you create.
- Change the orientation of the model to one that suits the print better, usually requiring you to...
- Separate your model into multiple pieces that you can assemble back again once they have been printed.
- Add slopes where there are otherwise right angles.
Finish, and the lines left behind from the printing process is a big topic that people deal with in many ways. It’s one of the first things people comment on when they see a print. Here are some solutions...
1) An acetone vapour bath. I do not advise this solution nor have I tried it, but if you expose the print to acetone then it “melts” the plastic enough to blend the surface detail together. You can check YouTube for how others have done it. I think this is only a good solution if you have printed something large enough that losing detail won’t affect your piece.
2) A product is available that uses a resin to fill the spaces between print lines. The one I have found is called by XTC-3D Coating by Smooth-On Inc., but there may be others.
3) Using enough primer to cover over the unwanted detail.
My solution to the issue of finish, however, is to design prints where the amount of exposed vertical detail is limited (the biggest detractor) and to allow the paint job to distract you from any problems. Beyond that, I just prefer to accept the striations as part of the medium of 3D printing.
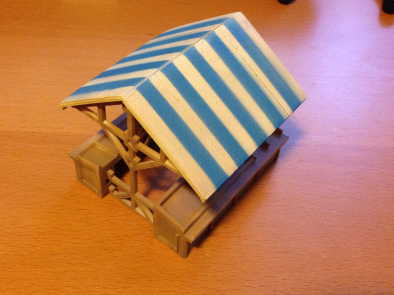
In some cases I’ve even had people comment about how the print lines suit the model, and that it makes the model look better (as in the case of this market stall awning, and how it looks like stitching on cloth). In any case, people comment on the lines initially, but soon accept it.
Reference Makes it Better
It sounds like an obvious piece of advice, but take a look at architecture before you start designing. Think about the time period you’re trying to replicate. Look for artwork that you would like to bring to life. Use it for inspiration. You don’t have to copy it entirely, in fact I would suggest not doing that, but find elements that you like.
I bring this up because I know I am the kind of person who just stubbornly thinks I know how things look. However it’s just so simple to open Google Images and take a look around.
Consider how the structure was actually made. A door frame, for example, will have a lintel that supports all the weight above it, i.e. it’s a beam that goes across the gap and extends over the walls to support the weight from above. If the building is made of stone then that lintel has to be thicker. This helps the believability of your creation.
Think Iteratively
Don’t try to solve all your issues in one go. You will not be able to do that. Print things. Try a small scale print to see how things will turn out before committing to the full size. Experiment with connections like dovetails and peg-in-hole tolerances on a test piece before putting it on your main print. Again, you are trying to save time, so why print a huge piece only to find out something is wrong?
If things do go wrong, you’re still in a great position. The plastic is cheap and fixes are easy.
Conclusion
As previously stated, this is a hobby in-and-of-itself that beautifully complements what we all love. It will take some time to get used to and it will require you to think differently about what is a good and bad print. You may want to tackle your own designs or you may want to just print what you find available. You’ll print a lot of errors, but you’ll be able to print as much of the good objects as you would like.
It’s definitely a hands-on tool; not as simple nor as plug-and-play as a paper printer. The results are not as elegant as something you could buy from a store either. The results however are fruitful; of respectable quality and rewarding. The fact that 3D printing has a future in wargaming is undeniable.
Are you game?
3D Printing For Wargaming Series
Part One: Where To Begin?
Part Two: Pitfalls of 3D Printing
Part Three: Making & Printing Step By Step
If you would like to write articles for Beasts of War then please contact us at [email protected] for more information!
"It is much better, in my opinion, to find a design that you can replicate multiple times on one tabletop..."
Supported by (Turn Off)
Supported by (Turn Off)
"Don’t try to solve all your issues in one go. You will not be able to do that..."
Supported by (Turn Off)




![TerrainFest 2024! Build Terrain With OnTableTop & Win A £300 Prize [Extended!]](https://images.beastsofwar.com/2024/10/TerrainFEST-2024-Social-Media-Post-Square-225-127.jpg)




Superb series, 3D printing is something I’ll look into in the future. It really does open up a world of possibilities for both us users and wargames companies.
Thanks very much!
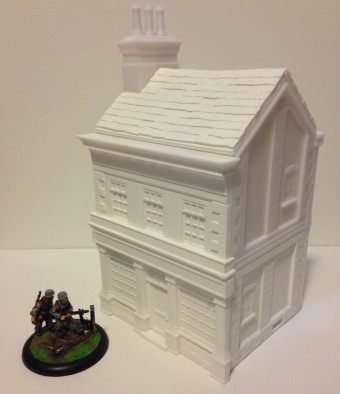
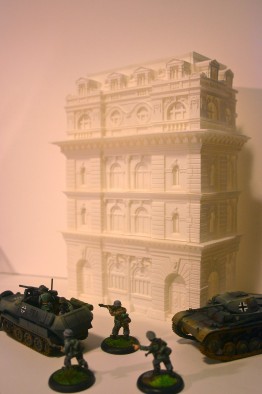
As a supplemental: that large, ornate, Victorian building is my latest print. I’m pretty happy with it! Here are some more images:
http://i.imgur.com/yxLK62i.png
http://i.imgur.com/FaR7NK1.jpg
I’ve got to go print the other half now. For a week.
Are the files for that one up on your thingverse account yet?
Not yet. I’ll post them soon. I only finished the modeling last night! I also want to make sure I have a nice image for it, as there’s more chance of me hitting the front page of Thingiverse.
Looks worth the wait, that is stunning.
Very well done series. I was going to ask about the building in the final photo, but you’ve already answered my question. I hope you’ll continue with additional articles as you continue refining your processes.
Great series. Well done and thanks.
Well done pal. I’m also 3d printing with great sucess! Its a hobby all of its own!
you should do article about your experience @tonka73 !
marvel article! thank you again for sharing your experience, it’s great read and great informations! dont stop!
the Victorian building looks great, one other good thing about making things in sections is that you can change one part to make a new structure and any damaged/malformed parts can be used to make destroyed buildings so less wastage of plastic.
Good point, yes. In fact, this new building is split up in floors that just sit on top of each other with alignment pegs so that you can actually re-arrange them if you want. Or add more levels. I’ll take a pic of the construction of it when I get home tonight.
sound good more pic’s please when you get the chance @herrigold
Here you are @zorg :
http://i.imgur.com/qgiwTyE.jpg
http://i.imgur.com/ERZswI7.jpg
Sorry for the poor quality. I may have a new printer but I have a 13 year old camera.
WOW very crisp detailing I see you mastered the printer very nice building parts. @herrigold
i like this article series 8P. i look to be the next logical step for some gamers in term of terrain
thanks tobyn
Great series, i am really tempted to give it a try
The bed is well worth it but it is something you really need to account for on it’s own and design around because of the slight melty contact point.
I have been following your series, and think your comments and experiences match mine I have two comments 1 using a bit of abs sludge (juice- abs melted inactions speaks ghin on the print bed) if using abs to hold the print while printing works well. (I admit I also use a heated print bed in addition) But the area of your arrival I think you are missing is the use of other materials to reduce time and plastic, if printing walls of a house print only the details and glue to cardboard, use a tin can and print a… Read more »
That’s true, you can definitely merge your 3D prints into traditional scenery creation. In fact, it’s a great plan. I think I was enamoured by creating something that I can produce uniformly and in great numbers, like a company would. That becomes slightly more difficult when you have to do hand edits after the printing is done.
A fascinating series showing a lot of skill and dedication. Thank you for sharing.
I’ve been creating lots of little bit for making scenery. The printer I have access to isn’t very detailed so some of this loses it detail, but the scale is so small anyway it isn’t super obvious.
Works out quite well.
http://i1317.photobucket.com/albums/t629/Failtruck/FlatsPlate_zpsfmlhkdsl.jpg
http://i1317.photobucket.com/albums/t629/Failtruck/Spartan%20Plate_zpsw78ikx6j.jpg
http://i1317.photobucket.com/albums/t629/Failtruck/scifiplate1_zpskodqwwug.jpg
http://i1317.photobucket.com/albums/t629/Failtruck/scifiplate1b_zpsau3txttt.jpg
well that didn’t quite work. :/
Looks great! How are you finding working with SketchUp?
It’s pretty quick to make basic models. I’ve tried max, rhino and solidworks and I just can’t get the speed up, and I just love push/pull modelling. Most of those pieces I did over a lunch break. I have a sizeable, detailed had block on the go, and even given that’s detail have managed to do most of it in a few days lunch breaks. Just wish I actually got to take more lunch breaks to do the modelling!
What do you work in?
3DSMax. I’ve been using it since… well since it was 3D Studio Ver2, actually. That was 1995.
Games industry? I’m a producer (well I was), no 3D at my new place.
Yup! http://www.mobygames.com/developer/sheet/view/developerId,27741/
I’ve got nothing so impressive on my CV. A bunch of Facebook games and a studio that gt torpedoed by the mouse. :D.
Really enjoying your series on 3d printing by the way!
Some pieces done with algotythm
[image]http://www.okb-14.com/files/gimgs/14_OKB-14_D800_141019-1479.jpg[/image]
Each of them can be specific and printing piece by piece also let the oportunity to do so.
Look lovely! I’m sure they look very alien without the painting; the colours really set them off.
Wait a minute, how did you print those? They don’t look like FDM prints, especially with the overhangs. And what’s algotythm?
Is there a part 5 in the works?
Great articles and really thinking out my printer purchase. thanks for all the info and insight