Anatomy Of An Air Compressor Part One – Introduction
February 10, 2016 by crew
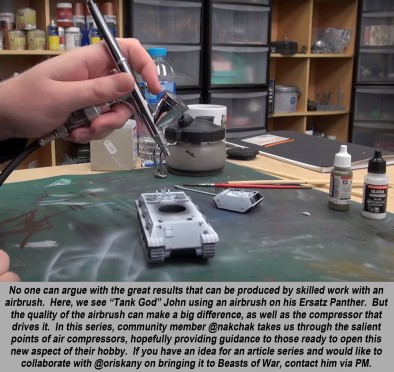
Greetings, fellow Beast of War subscribers. Thinking of making that big jump into air brushing?
I am BoW community member @nakchak, and in this article series I hope to shed some light on the anatomy of a compressor, what each part does, and hopefully help you be better informed when you come to buy one.
Explanation Of Terms
The following terms will be used throughout this series...
- Receiver - also known as an air tank, stores compressed air and smooths the pulsations from compression from the output pressure.
- Static Pressure - this is the output pressure when your airbrushes valve is closed.
- Working Pressure - also known as operating pressure this is the pressure available when your airbrush valve is open.
- Duty Cycle - the amount of time your compressor can run for without having to be left to cool. This essentially dictates how long you can be airbrushing before you have to let your compressor cool down. If your compressor has a 30-minute duty cycle then it means for every thirty minutes the motor runs for, you need to give it thirty minutes to cool down. In effect you get half an hour of painting time.
- PSI - Pounds per Square Inch a measure of pressure, other scales are sometimes used such as bar, but most tutorials refer to psi so shall I.
Types Of Compressor
In the hobby market there are effectively three sources of compressed air for hobbyists to use...
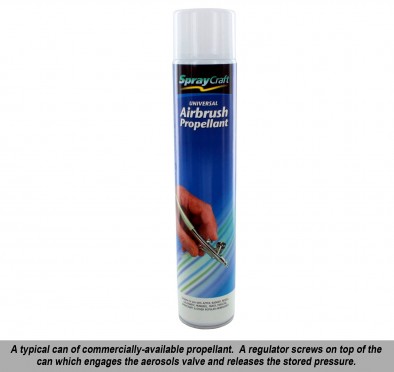
The first method is to use cans of propellant (Tinned Wind), These are cheap cans of aerosol propellant and come with most starter sets without a compressor. These are a sure fire path to frustration, whilst they can certainly power your airbrush, they suffer from two major problems, firstly the pressure is hard to regulate and hitting and exact PSI is nigh on impossible.
Secondly and more fundamental is the cooling caused by using the propellant (think ice on a propane tank in the middle of summer), as the can cools, the pressure inside drops off. This means you crank open the valve some more to maintain pressure and thus it cools some more. Eventually you have the valve fully open and still your airbrush is spattering. All you can then do is swap cans or wait for the cold one to warm up.
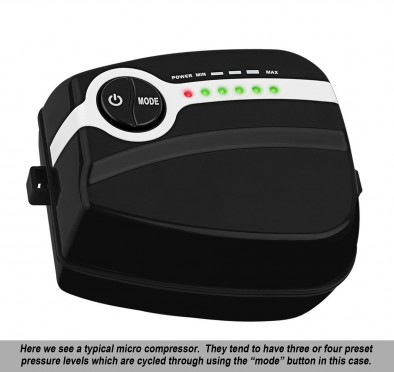
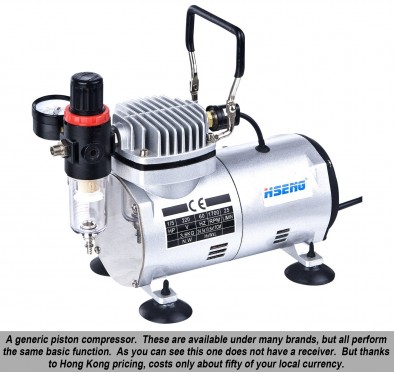
The second common option is to use a micro compressor; these are generally cheap (£45 - 60) direct from Hong Kong eBay bargains. Micro compressors generally use a bellows-type compressor, which works in a very similar manner to aquarium air pumps. Often sold for nail art, they are small palm-sized units and are quite good if you are travelling a lot, but suffer from some fairly hefty drawbacks as well.
They tend to have a low working pressure (< 30psi) due to the compression mechanism used and the lack of a receiver means they suffer from pulsation of the output pressure. They also tend to run continuously, so are prone to wearing out and getting warm with use.
They are however quite quiet in operation and take up very little space in storage, so can be easily chucked in a rucksack if you paint on the go, and can be quite useful as a backup air source in case your main compressor fails.
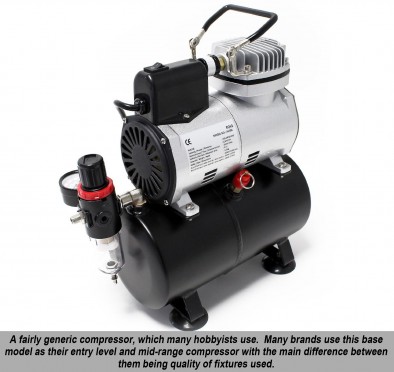
The third and perhaps most common are piston based compressors these are the sort you most often see in starter sets and on sale in hobby shops. They are miniature versions of workshop compressors (these can also be used without issue, just the noise means you would be unlikely to not be banished to the shed) with a small footprint, which vary in price from £45 to...well, the sky is the limit based on quality.
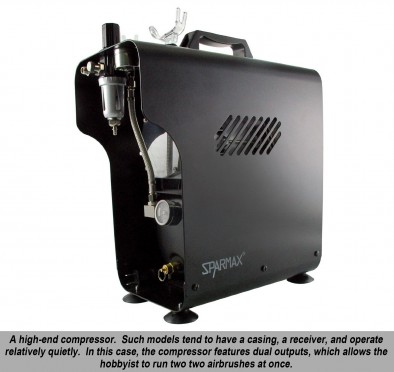
The cheapest models tend to not have a receiver but mid and top range models do. The main difference between bottom and top range is the quality of ancillary the components (regulators, water traps and pressure switch) used, the engineering and the materials used, as a result of this the duty cycle varies greatly between budget and premium models.
Cheap compressors often have a thirty-minute duty cycle (i.e. thirty minutes of the motor running) which must be observed otherwise the piston can warp in the bore and write off the compressor as well as burn out the motor, if either happen you will need a new compressor. More expensive models tend to have a higher duty cycle with top of the range being rated for continuous use.
The main drawbacks with piston based compressors are the noise they produce in operation, especially if you don’t have a receiver, as the compressor runs as you use your airbrush, and the heat generated by compressing the air and the friction of a piston running in a bore, which is why most piston based compressors have cooling fins on the piston housing, and require a cool down period.
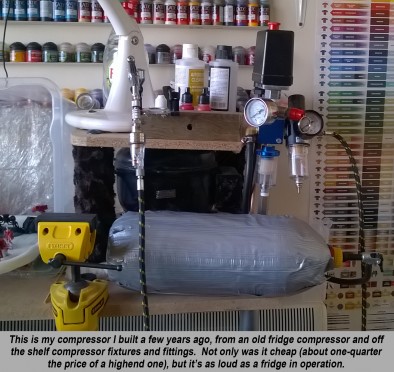
There is a fourth method air generation; the DIY approach, which allows you to make a virtually silent compressor for under £100 but is beyond the scope of this article.
Operation
All air compressors share the same basic function, to take in atmosphere (aka air), compress its volume and release it to a device to do some work. Work being powering a tool, or transferring air into a container like a tyre.
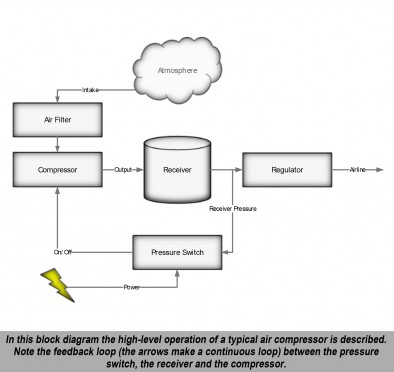
The following assumes a piston based compressor with a receiver; When the compressor is turned on and the receiver is empty/at one atmosphere pressure inside, the motor will run driving the piston until a cut off pressure is reached which disengages the pressure switch and cuts the motor. At this point the pressure inside the receiver is at the threshold pressure (usually about 60 – 80psi on airbrush compressors).
As air is let out of the receiver by opening the air valve on your airbrush, via the pressure regulator, the pressure inside the receiver drops, until it reaches a point where the cut in pressure (40-50psi) is reached, which re-engages the pressure switch and restarts the compressors motor, which runs again until the cut out pressure is reached.
When air exits the receiver its generally at too high a pressure to be useable for painting, so has its flow restricted by an adjustable regulator that allows the user to set the pressure from 0psi to the cut out pressure of the pressure switch (you cannot exceed the cut out pressure, as that’s the limit of compression set by the manufacturer).
Some compressors come with an output direct from the receiver, which is used as a high pressure line, and is often used to aid cleaning and paint changes.
The operation of a receiver-less compressor is virtually the same other than it’s the pressure in the piston bore which cuts in and out the motor, and as it’s such a small volume opening and closing the airbrushes air valve is all that’s needed to start and stop the motor.
A micro compressor tends to use the speed of the bellows operation to dictate the pressure generated, some run continuously like an aquarium air pump, others have a pressure switch. They all tend to offer pressure regulation by adjusting the speed of the motor and so offer very little in the way fine of pressure adjustment.
More To Come...
This concludes the first part of this series. In the next instalment we shall look at why a receiver is highly recommended on an air compressor and why pressure stabilisation and regulation should be considered before buying a compressor.
If you would like to write an article for Beasts of War then please contact us on [email protected] for more information!
"In the hobby market there are effectively three sources of compressed air for hobbyists to use..."
Supported by (Turn Off)
Supported by (Turn Off)
"There is a fourth method air generation; the DIY approach, which allows you to make a virtually silent compressor for under £100 but is beyond the scope of this article..."
Supported by (Turn Off)




Massive thanks to @oriskany for helping get this article off the ground along with his photo captioning wizardry 🙂
Looking forward to more from you chap. I had little to no clue about this stuff so it’s very helpful!
Glad its helpful, if anything will save me rattling out the same replies on the forum 😉
…@oriskany is pretty good isn’t he?
Amazing article. I have airbrushing stuff, but I have never really learned about it. After this i will be an expert. Well done. (100pts)
Great intro into the world of airbrushing. Noise is often an issue. One compressor with air reservoir worth mentioning is the Bambi Silent range. Not cheap but almost silent so you can have it running to refill the reservoir at 2am next to the bedrooms with the wife and kids asleep in. Bliss 😉
My diy compressor is virtually the same as a bambi or silair as they both use fridge/air conditioning compressors in their guts, only difference between theirs and mine, is that mine is made from a repurposed cat toy and salvaged bits rather than a welded frame and a new compressor, oh and the price, the diy approach cost me < £100 😉
But being able to airbrush with a new born in the room next to my mancave was great 😀
I have seen similar things to your diy compressor, it was in an IED factory! I love it.
If noise is an issue try hi-density foam mats to stop vibration noise.
http://www.amazon.co.uk/Foam-Sheet-9-X12-6mm-Black/dp/B001946SH0/ref=sr_1_28?ie=UTF8&qid=1455138611&sr=8-28&keywords=foam+padding
@zorg great tip, you can also use sheets of pc silencing foam you buy from Maplin’s. Its the stuff you can buy to absorb vibrations from fans and disks.
yup probably cheaper as well.@nakchak
I actually learned a lot front this. As fate would have it, I just got an airbrush from my better half @gladesrunner for Christmas and now I have to get a compressor for it. Perfect timing! 😀
Awesome article!
Thanks @oriskany look forward to seeing your hyper productiveness being air powered!
I’ve got a Sparmax one similar to the one in the photo. It makes a bit of noise when it fills back up but nothing so loud that you can hear it in another room. Was definitely worth splashing out for it as opposed to getting a cheap one.
Much like monitors its always wise to view a compressor as a part which will outlive a few upgrades. If given a choice of cheap compressor expensive air brush, or expensive compressor cheap airbrush id go with the latter, and get a more expensive brush later on.
Special thanks to @brennon and of course @lancorz for the layout, publication, and the kick ass banner along the top of the backstage “upgrade” layout.
And yes, nakchak, I have seriously told my Dad he may “have” to build me a new shelving unit for all the new tanks / aircraft I may be airbrush painting in the near future. 😀
I’ve been thinking about getting an Airbrush for a while so will be following this with great interest. Great article thanks to all involved.
Its been a lot of fun learning a new technique deff recommend giving it a go.
Great job @oriskany and @nakchak ! I’m in the market for a compressor, so this was quite timely. As some of you know, I’ve been busy destroying models with spray bombs lately. Very informative!
@cpauls1 hopefully the series will help you feel informed when you come to get one. There are quite a few things to balance against budget.
Well I have learned an absolute ton n fact I would say I know about 90% more than I did about compressors. Cheers Tim mate, only thing now is I know what I want now and it aint the price I was looking at as a result of this. Victoria has added your name to her book of grudges, LOL, actually we both have read through this and both enjoyed it, (God I am so lucky my woman who is and can be a girly girl when she wants is so into the tools section at the local B&Q store… Read more »
…me too!
Glad you enjoyed it @chrisg & @unclejimmy more to come 🙂
I would like to suggest that those who have airbrush setups give us some snapshot reviews of their compressors and what they like/dislike about them. I have a workhorse 10+ year old compressor from Harbor Freight that is good enough to drive my brushes for standard work but is not good enough for me to do detailed things. No regulator, no moisture trap, no air tank, no on off switch (yes, plug in, unplug!) but steady performance. I am interested in upgrading after using the thing on my Team Yankee vehicles.
http://www.beastsofwar.com/groups/painting/forum/topic/what-are-you-painting-now-1/?topic_page=97#post-149031
Well, it’s definitely better than the way I was doing my Team Yankee T-72s . . . with a “painting tent” and rattle cans. 🙁 Not the worst of results, but definitely labor-intensive.
http://www.beastsofwar.com/groups/painting/forum/topic/normal-service-has-been-resumed/?topic_page=6#post-140999
http://www.beastsofwar.com/groups/painting/forum/topic/we-didnt-lie-to-you-folks/?topic_page=12#post-141835
love the tanks a nice effect with the paint template @oriskany
@mwcannon that sounds like a good forum topic to start!
If you look at the link @tomatovich posted a few posts below you could just build your self a plug on regulator setup and be good to go. As you already have a shop compressor im guessing you have other bigger air tools as well, if thats the case you need to decide if you want a dedicated airbrush compressor or if you want a new shop compressor, which you could use for airbrushing…
I was lucky enough to have a small shop compressor (2-gallon) before I stepped into the realm of airbrushing recently (GREX XGi, 0.3mm). While it is very loud (lives in garage), it does not run as often as the small reservoir systems. While the compressor has it’s own regulator, I cobbled a separate system with a moisture trap and regulator to allow me better control. I’m pretty new to this and there is a lot of experimenting with paints, preshading, etc. Honestly, it’s nice to prime a mini now and not have it looked like I dropped it in the… Read more »
https://lh3.googleusercontent.com/FheDLuTi8GhPvGAnzKvT0GPGhaGJWXg7fnAbR7_UXp9f2TNGDa5GRuFEJ2E0etx7VSzCNWn0kgxHDLcPoUXtogQ35IWiJ3LymvkU-25Ocx-d0cMXOMc5VbF9eqH-z8YSUkejgKwmjIcP2eJNXWH-R1OS0nM4oAZ0W_SqmCbf-xXM0tndPm4CnU13kNZ8gMS0xxog4lK0hM_fysD5xTYCxWdI07LEHRekpIDVUyt_y_WMyfIlsGa_FUtLSWhccAShMsq4utlK64UwvPOONlVOJI5BN58p77a4-24GfqPbJdrXQRajyc2wPsXn5DPL5X5-GDM8hlQFQC4GQIjThXtmZHH6EfmswCtdjdCT94S9OL3TLu2uDBWKNI4zLnW3KWjVf_RHLuk8bM0WuJ-p6ki5Da3-LSPvv_OZwN37AlRP3Q0JxroBEsM2AbtSvWpspm_THW_QmLtXg4030tY5sWc35LodQRLlJlD1Yt8S-067Z9yNRbW8b1OSbdz5i-mRm1i93ONBqDlL7wrhQFMYr5N_vp7zYWEr8D-s06bP_O3IvlyGwn2zlWGHcGvseam4dG09=w1698-h955-no
Nice!!
Just add a receiver, fridge compressor and pressure switch and you have a 2nd compressor, a shop with that many clamps and grips needs more air 😉 if nothing else airbrush’s are great for dusting
YOU CAN NEVER HAVE ENOUGH CLAMPS!!!
Man, that link is pants. Google used to be simple, but they really mucked up the interface. If anyone has any suggestions for using Google Photos, that’d be appreciated.
I’ve read reviews about the compressors and how the air-flow can be inconsistent without a reservoir (or one that is too small). Do you have an opinion/experience with this?
@tomatovich id suggest you check out part 2 when its published 😉
In short id say only buy a compressor without a receiver if you really absolutely cannot at all afford the extra change to get one with one, it acts as a water trap, stabilizes output and increases the duty cycle
A great start @nakchak the only thing you may have added was the water trap which most compressors have. But you will most likely cover this in the setting up of the compressor for painting.
oops my bad you did.
@zorg I think you will be sick of them by the end lol
Awesome article @nakchak, I literally started my first foray into airbrushing this week and I’m still fairly unsure (re: terrified) of the gear involved. Will definitely be looking out for more articles in this series.
@irredeemable cheers dude, get stuck in and just practice drawing dots and lines of differing size and thickness to practice brush control with food colouring onto paper that way you get used to and get a feel for your new kit.
Good job on the anaal nathrakh avatar btw!
great article sir, nothing to add.
Thanks 🙂
Great article. I have been giving airbrushing a lot of thought. I would love someone to may be give me a link to a good kit for under £100 that I could think about starting with?
Cant really offer you a link as i cant personally vouch for the quality of the item, but i would advise you to spend more of your budget on the compressor and as little as you can on the airbrush to begin with, as you will keep the compressor longer than your first airbrush, and you can invest in a high quality airbrish once you are confident with your first one, where as if you get a nice brush but a crap compressor no amount of money spent on the airbrush will make up for a poor air supply…
Thank you. Really appreciate the article.
Glad you enjoyed it 🙂
Well written, to the point.
I’ll look forward to seeing one on the DIY as well
@rasmus thanks, will see if there is demand for a diy compressor series although im unsure if it would be suitable as bow content as there is an unavoidable electrical wiring part. Which although trivial as its just wiring a switch also could be lethal because electricity… Maybe @warzan could clarify bow’s level of comfort on publishing something like that…
Adult supervision required . . . which leaves me out. 😀
Got into airbrushing within the last month primarily to get a nice clean finish on the umpteen Imperial Fist tanks I have to paint.
Set up:
Iwata Smart Jet Plus Compressor
Iwata Eclipse CS airbrush
I would thoroughly recommend giving it a go if you are able – absolutely no need to be scared of this.
@aidenb5 nice setup 🙂
Basecoating no longer becomes a chore with an airbrush, and the effects you get just by preshading are amazing, there are some great imperial fist tutorials out there, sure you will have seen them but:
http://rustandthecity.blogspot.co.uk/2012/11/tutorial-airbrushing-imperial-fist.html
http://www.corehammer.com/how-to-paint-imperial-fists/
If you dont have it already get yourself some model air burnt umbra its ace for shading red and yellow
Great Article guys!!!!! I’m sooo glad I waited to buy the other half of Oriskany’s christmas present until after this article series came out.
@gladesrunner thanks, hopefully it will help you navigate the purchase minefield…
I’ve got a bad feeling that at the end of this series I’m going to be dropping serious money of an full airbrush set-up..
Really great article series.
@jonnyt It can get expensive quick, but so can most things in our hobby 😉 There are some pretty competent starter bundles for about £120 or so, which are more than adequate to get started and find out if its worth investing in better/quieter kit once you have a feel for the basics
Great info and really helpfull maybe something to add is the difference between membrane compressors and oil compressors?
@ancientsound good point, i decided to focus on the sorts most commonly encountered, as the principles apply to all, i.e.its very much dependent on the quality of the membrane mechanism as to the pressure achieved, and the majority of what was said about micro compressors holds true compared to a piston based compressor throughout the airbrush industry. As for oil in compressors all you can do is keep an eye on it and top up if needed, just part of regular maintenance really, and if you are getting a lot of oil in your water trap then something is probably… Read more »
@nakchak keep up the good work on this as I am interested how these work as I have an airbrush and compressor but don’t know where to start 🙁
@naff101 i assume you have set it up, if so practice trigger control by drawing lines of increasing thickness and dots of different diameters, then draw a grid of dots and then connect the dots with lines trying o keep the thickness consistent and the line straight. Rather than using decent paint for practicing i use food colouring and water. Once you have a feel for how your airbrush responds get some paint, vallejo primer is a great place to start (once you find the shade that works for you will probably never buy a rattle can again), as is… Read more »