
I don’t know yet
Ratlines and Deadeyes
Rigging.
Rigging is a bit like marmite or vegemite, you either love or hate it. I like the look of having it on ships as I feel that it finishes them off, however, I also understand that full rigging would be an absolute nightmare to game around. With that in mind I have gone with a rather streamlined way of doing things, adding just enough to give the feel of it without becoming a massive undertaking. One of the first things I see when looking at rigging is the ratlines and dead eyes. The ratlines are what we often see seamen scurrying up in pirate movies and form a kind of ladder between the shrouds of a sailing ship. Deadeyes are small round wooden discs with holes in them. The deadeyes are used as a ‘block and tackle’ and could create greater tension in the shrouds.
I wanted to use both on my ships because the ratlines just look good, and the deadeyes add an extra point of interest to the bottom of them and help create the illusion of rigging.
The obvious choice for the ratlines was a black elastic string. It could be stretched to give it a nice taught look. The downside is that over time it will start to lose its elasticity and start to sag.
I opted for metal ratlines in the end for a couple of reasons.
- I can magnetise prone-looking models to make them look like they are climbing the rigging.
- It’s rigid and won’t sag over time.
- Being stiff it adds a considerable amount of support to the masts.
Old Glory sell a nice collection of metal deadeyes that will also be used in vast quantities.
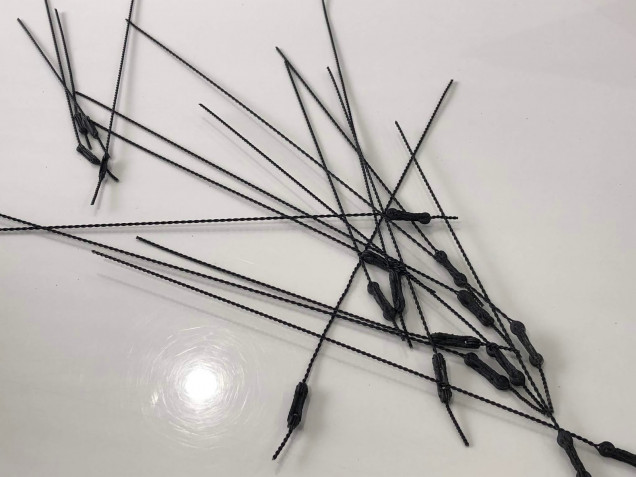 Metal wire was twisted using a small cordless drill. I threaded one of the Old Glory deadeyes onto the wire before putting the ends of the wire into my drill. Carefully I held the deadeye in one hand and the drill in the other. The turning action of the drill causes the wire to twist around itself forming a rope like pattern.
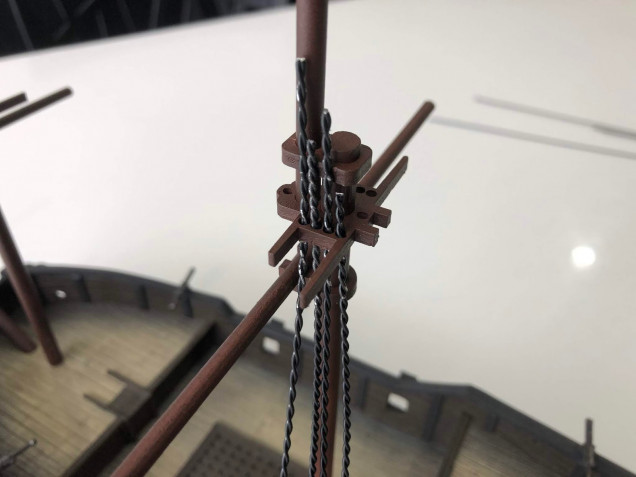 The end of the wire without the deadeyes was put through the holes on the masts and cut to the correct length. As they are metal and quite robust, they did not require gluing.
 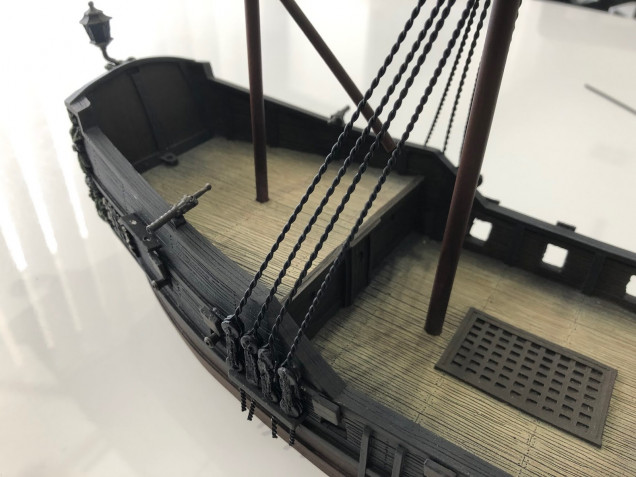 The other end of the wire gets inserted to the holes on the channel on the side of the hull. It takes a bit of fiddling to do and some care as the metal wire can easily scratch the paintwork of the hull.
 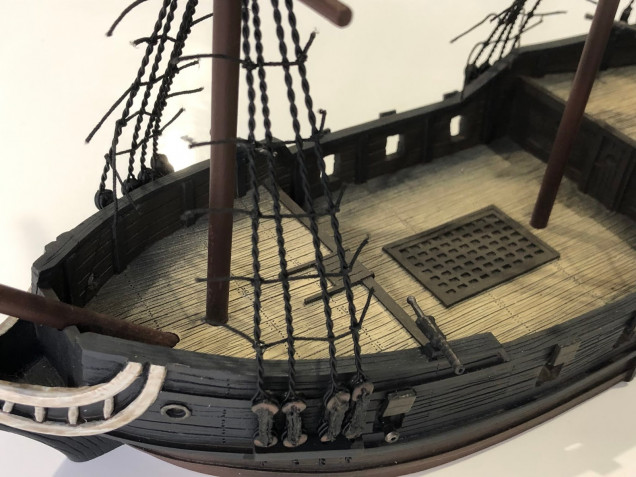 I used thin elastic to finish off the ratlines. I used a template to space out each 'rung of the ladder' 1.5cm to form rectangles that look good enough to give an impression of what they would look like. Once each line was done I tied it off and added a small dot of superglue to hold it in place. I small touch of matt varnish took away the sine of the glue.
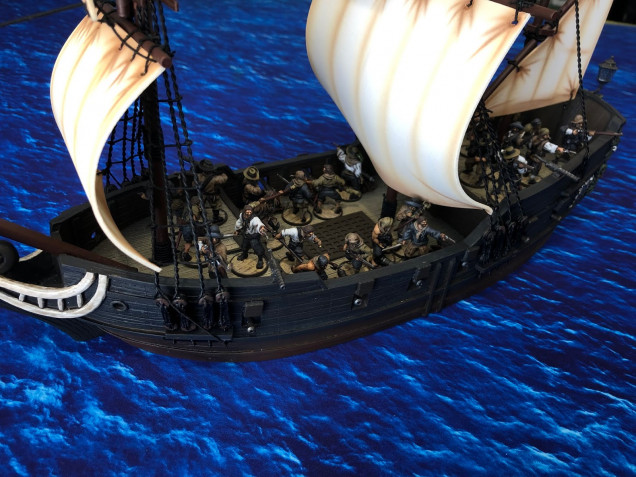
 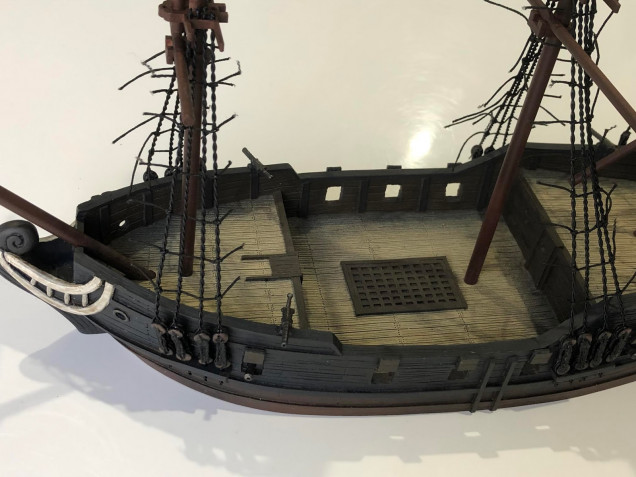 Once they were all done and the glue had dried, I just went around and trimmed up all the loose ends. After that I just added sails and a few other lengths of elastic string to create an illusion of running and standing rigging. I didn't go overboard with the rest of the rigging because I still wanted to be able to get access to the decks for figure placement.
For how to do sails, Gerry has kindly done a couple of excellent video tutorials that can be found here for EVA style sails
and here for canvas style sails.






Leave a Reply