
Kira's Club Terrain - A Spring Clean Challenge
Week 1 - Results
Time to look back and see how this week went.
In short, this was a bit of a mixed bag but having more stuff done than at the beginning of the week was always the point. I’m not of a mind to consider any progress a failure but rather to use these reflections to consider the measure of success.
Let us start with the Rohirrim Battleforce and what I have come to call the “What… what?” moment.
Rohirrim Results or "How Did This Get Past Quality Control?"
I’ll not dwell on this one too much as it was something of a sideshow to the theme of the project but I did run into one complication I haven’t been able to solve just yet worth noting: holes.
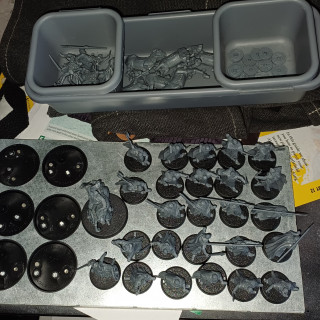
Below on the left is a snapshot of the set as it is now. I magnetised all of the bases without much fuss and got them in place for their respective models to be mounted. Down the right of the plate are the Warriors loosely grouped by weapons and next to these is Éomer (on foot in front and mounted behind). Nothing much exciting here unless you want to see these models in detail but that’s another project.
But to the left we find six magnetised bases without models and pots of horses and riders above it all.
So what went wrong?
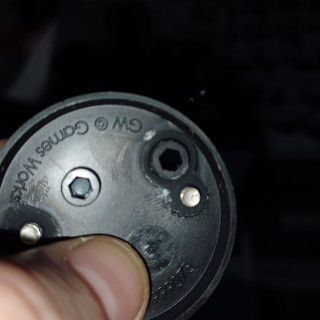
So, if you turn your attention to the second image below, you will see a photo of the peg on the horse’s hooves to be inserted into the holes on these bases as seen through said hole. Spend a moment more looking and you may see the gap surrounding said peg even though it is inserted into said hole…
Yep, the pegs are significantly smaller than the hole intended for them to insert… This was the “Wait… what?” moment.
I have no idea why as these “cavalry” bases are the same as the one supplied for the mounted Éomer and his model fits in perfectly (in fact, the one if the image isn’t even glued in, I left it loose to pop out again and make painting it easier) but for some reason the Riders just don’t fit their supplied bases.
Sadly, I have been away much of this past week and though I packed up my old kit bag and took my hobby around with me: I did not foresee needing to fill any gaping gaps and had none of the usual go to fillers for this.
All this needs is something like some green stuff or some Milliput to get them all set in there but alas, it’ll be next week before I am back in my hobby space with access to these so finishing this job off is going to have to wait till then.
Breaking ground on the 4Ground kits
I made some decent headway on these having dedicated most of my hobby time to these over the Rohirrim above.
Though there were some ups and downs to these as I got into the zone on how best to work with these models and the 4Ground style of kits by the time I was worked through a few of them.
Things started out simply enough as I began with kit 101, a relatively simple Apartment block . I followed the instructions verbatim on this one and, though it took a fair while, it came together without much fuss.
Then I moved on to its Damaged version and the problems began to emerge.
Firstly, one of the challenges of the Damaged buildings proved to the fact that almost none of the floors of the building are a complete four side rectangle due to all the gaps where the damage occurs. This made it very difficult to put even sided pressure on the pieces as they set to keep everything together as the glue dried enough to keep everything where it needed to be.
This led to all sorts of problems with pieces popping loose when only half dried and things not quite setting in the right place or connecting surfaces tearing.
And all of this coming apart and trying to get things put back together caused all sort of damage to the facing pieces (most of these kits come down to a simple inner layer that gives the structure and an outer layer that has the coloured and textured presentation layer but the outer most of these are a thin layer on top of the mdf making it prone to pieces breaking loose and peeling away if too much pressure is applied).
All in all… this Damaged building is a bit of a mess if I look closely at it (good job its meant to be damaged already I guess) and is likely going to be at the back of any setup its used for in the future but if nothing else it taught me some important lessons.
Namely
- Sometimes, ignore the instructions: build the inner first and let it dry fully. Then the decorative outer can be applied on top of this solid base. Any additional details can wait till this is dry as well so things don’t shift when they are partially dry.
- Break sequence and work on all floors of the building in parallel, when one step of a floor is drying work on the same step of the next floor. That way, when that step for the last floor is done, the first floor is dry and ready for the next step.
- Place the “sprues” flat on a cutting mat and cut out the pieces from the back. This sandwiches any decorative layers against the matt and massively reduces bits chipping off those thin outermost layers.
- Reinforce the arches of the roof with a piece of wood. These are very thin and potentially under a lot of pressure so I used the sticks included on a lot of the “sprues” (ostensibly to help poke the other pieces out but I found using the blunt edges of my other tools equally effective so I repurposed them here).
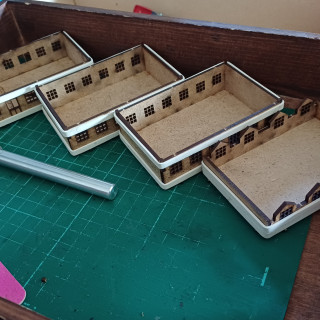
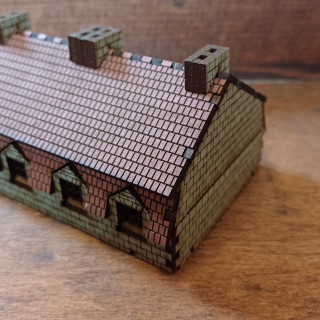
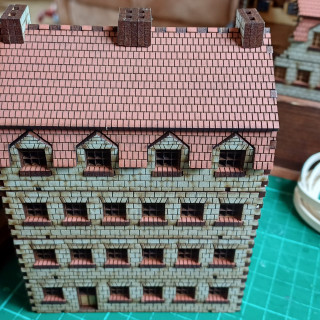
These steps were refined over the course of my third build and by the fourth, I had them down to a science. This has both made the builds themselves somewhat faster but also resulted in cleaner and better looking results. See the gallery below for a set of snapshots of working through these steps as I built the 102 North Western European Ashlar Bank/Apartments in the following steps.
- Built all the inner walls of every floor (even when the instructions began to the outer walls).
- Attach the outer walls to add the outer colour/texture
- Build the roof and reinforce it.
- Add all of the window sills/windows as the kit requires.
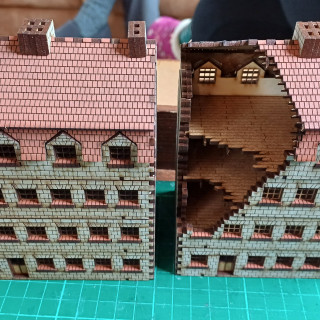
- A comparison of 102 and 102D which I managed to build both of in about the time took me to build 101D having got this process down,
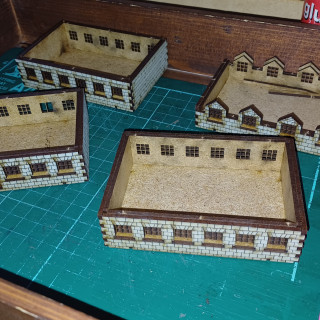
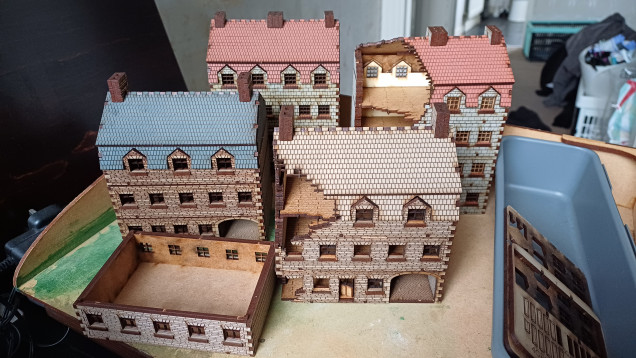
So, four whole buildings and two add ons (one at the front and one currently in the tall red roofed building at the back).
I did make a start on the fifth building, the North Western European Terrace Houses (Type 1) but this only got as far as the inner walls of the bottom floor so I didn’t include it in the beauty shot.
Not bad for a week’s work I feel and checks of six baggies of laser cut mdf from my To Do pile and puts them into Done. A good start if I do say so and I do as it’s my project blog, along with some lessons learned to hopefully get some more done over the next coming week.
But what will I pledge for Week 2? Well…
Next Post
Next will be my pledge for Week 2. But it’s about half past eleven at night as I write this so I think I’ll have to come back tomorrow and write that one (also, I need to snap another photo or two of bits I intend to work on).
As with the Week 1 stuff, I have already decided what I will be working on and have made a start even though I hadn’t been able to find the time to blog it before now but hopefully I’ll be back tomorrow (on my lunch break if nothing exciting happens at work) to document this second pledge and show what I am working on next.




Leave a Reply