Building Foam Dungeon Tiles (EVA & Upholstery Foam)
Making A Cavern Corridor for Dungeon Delving Part 2
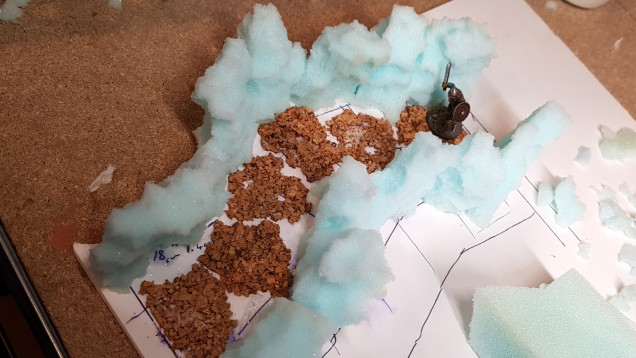
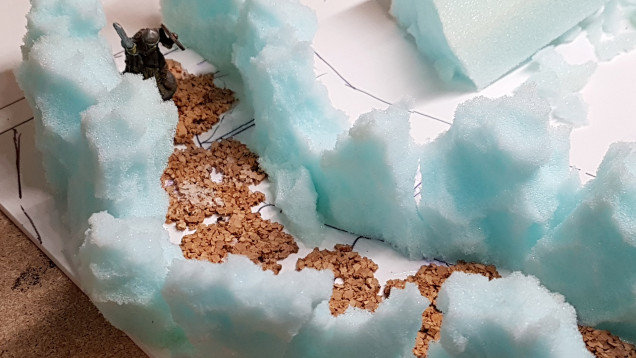
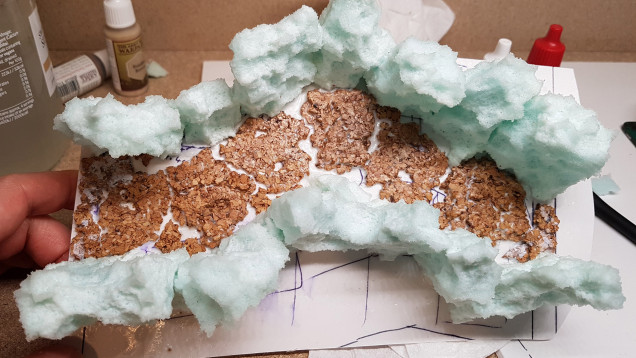
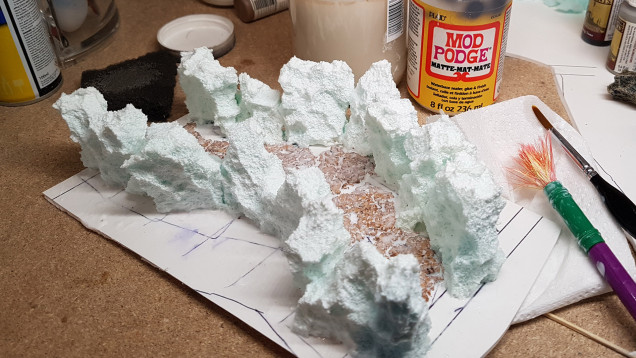
Continuing on with the Cavern Corridor I stuck down all the rocks to a Foam PVC sheet base using contact adhesive which is important as you can not use super glue as it will eat the foam.
Note, I planned out the tile by drawing a rough outline on the Foam PVC sheet and measuring the size it would be, had I constructed it in the style of previous builds.
I didn’t dwell too much on the size as I was eager to progress with the build. I’ll revisit the considerations of tile sizes in relation to each other for creating a modular dungeon later, should I decide to expand the project further.
Using Cork Sheet for Movement Tiles
For the cavern floor, I aimed for a natural, uneven appearance, distinct from cut stone. Thus, I chose to use cork sheets, available in rolls. You simply tear a piece from the roll, then continue to rip smaller pieces off until you achieve a piece roughly the size of a 3 cm square, but with an interesting, natural shape.
To further enhance the floor’s irregularity, you can create holes in the cork or layer pieces on top of one another. This technique allows for the creation of varying elevation points across the floor, while still ensuring there are still flat areas suitable for placing miniatures.
To distinguish between movement tiles, I raised every other tile by double-layering the cork, effectively differentiating each tile’s position.
Unlike foam, you can adhere cork with super glue and even use an activator to expedite the drying process.
Mod Podge is a Magical Liquid for Hobby Projects
Once the build was complete, I coated the entire cavern corridor with Mod Podge, a magical adhesive and sealant combo known for its awesome flexibility, allowing it to bend without cracking. This flexibility is crucial, as one of the main advantages of using upholstery foam for rocks is their ability to be bent, squashed, and dropped without sustaining damage. Therefore, if you’re going to cover them with glue, it needs to be just as flexible to prevent cracking.
Now over the years, I’ve used this method to create numerous rock formations. Until now, simply painting the foam surface, as the paint adhered well, even when the foam was compressed. However, foam rocks reveal a porous surface characterized by many small holes. This structure is what allows the rock to deform under pressure.
For quicker projects, leaving the rocks with their porous surface is perfectly fine; they still look impressive from a normal viewing distance. But for a more believable rock texture that withstands close examination, adding additional layers of Mod Podge is the key!







Leave a Reply