


Building Foam Dungeon Tiles (EVA & Upholstery Foam)


Making A Cavern Corridor for Dungeon Delving Part 1
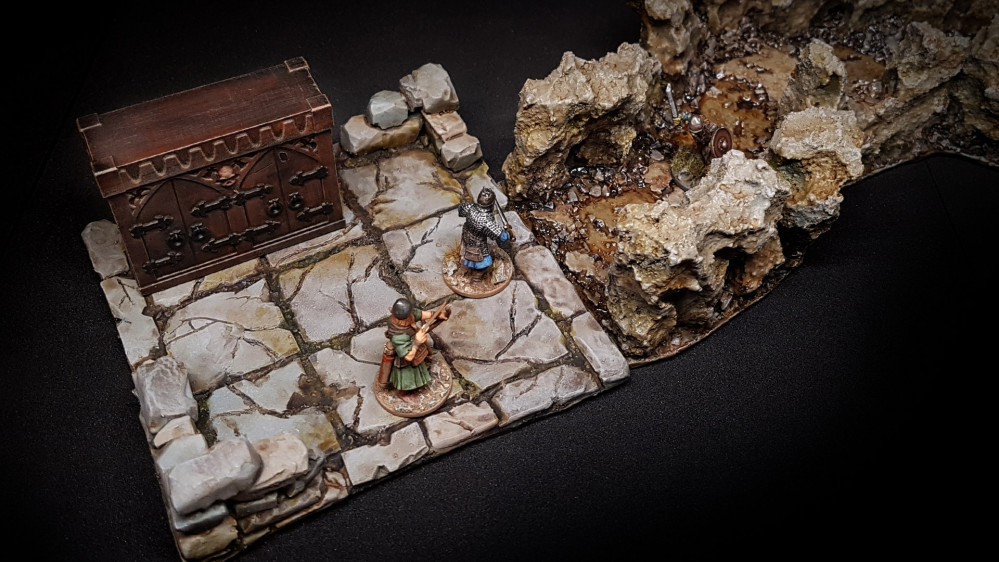
Having covered the fundamentals of crafting stone block rooms, I turned my attention to creating a dungeon tile in a cavern style. This design aims to mimic the appearance of a space chiseled and carved directly from solid rock, serving as a secret passageway between rooms or an unfinished corridor awaiting completion.
Lloyd's FoamStone: Where Innovation Meets Tabletop Terrain!
Similar to the previous room style, my goal is to create a cavern that’s not only lightweight but also outperforms resin or plastic in terms of durability. Enter the Lloyd classic FoamStone (patent pending, possibly, or maybe not—who can really say?), also known in the craft circles as upholstery foam. Which is the very best there is when you absolutely, positively need to cover every inch of a room with rock, accept no substitutes!
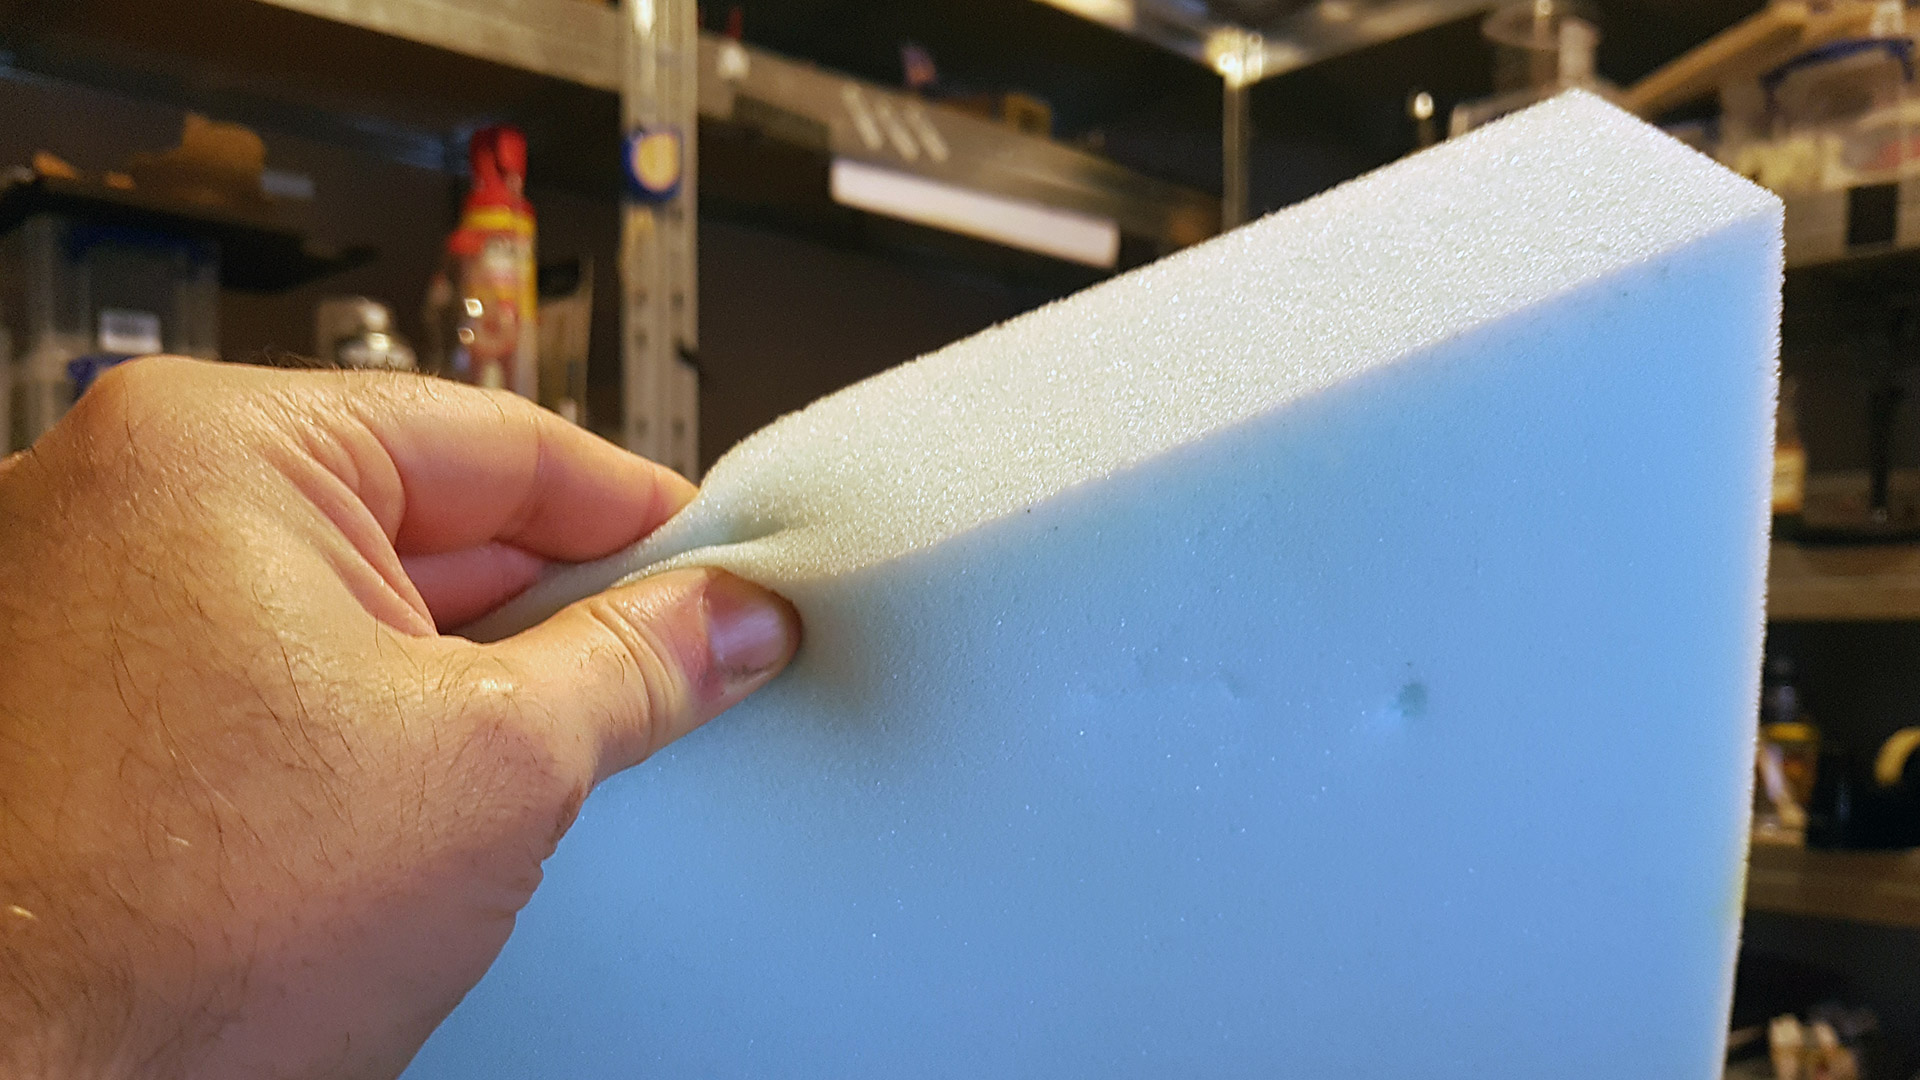
Upholstery foam is available in large sheets and comes in a variety of thicknesses. The type I’m using is 2 inches thick (approximately 5.08 cm). It’s very squishy and tears apart easily, qualities that constitute its secret sauce.
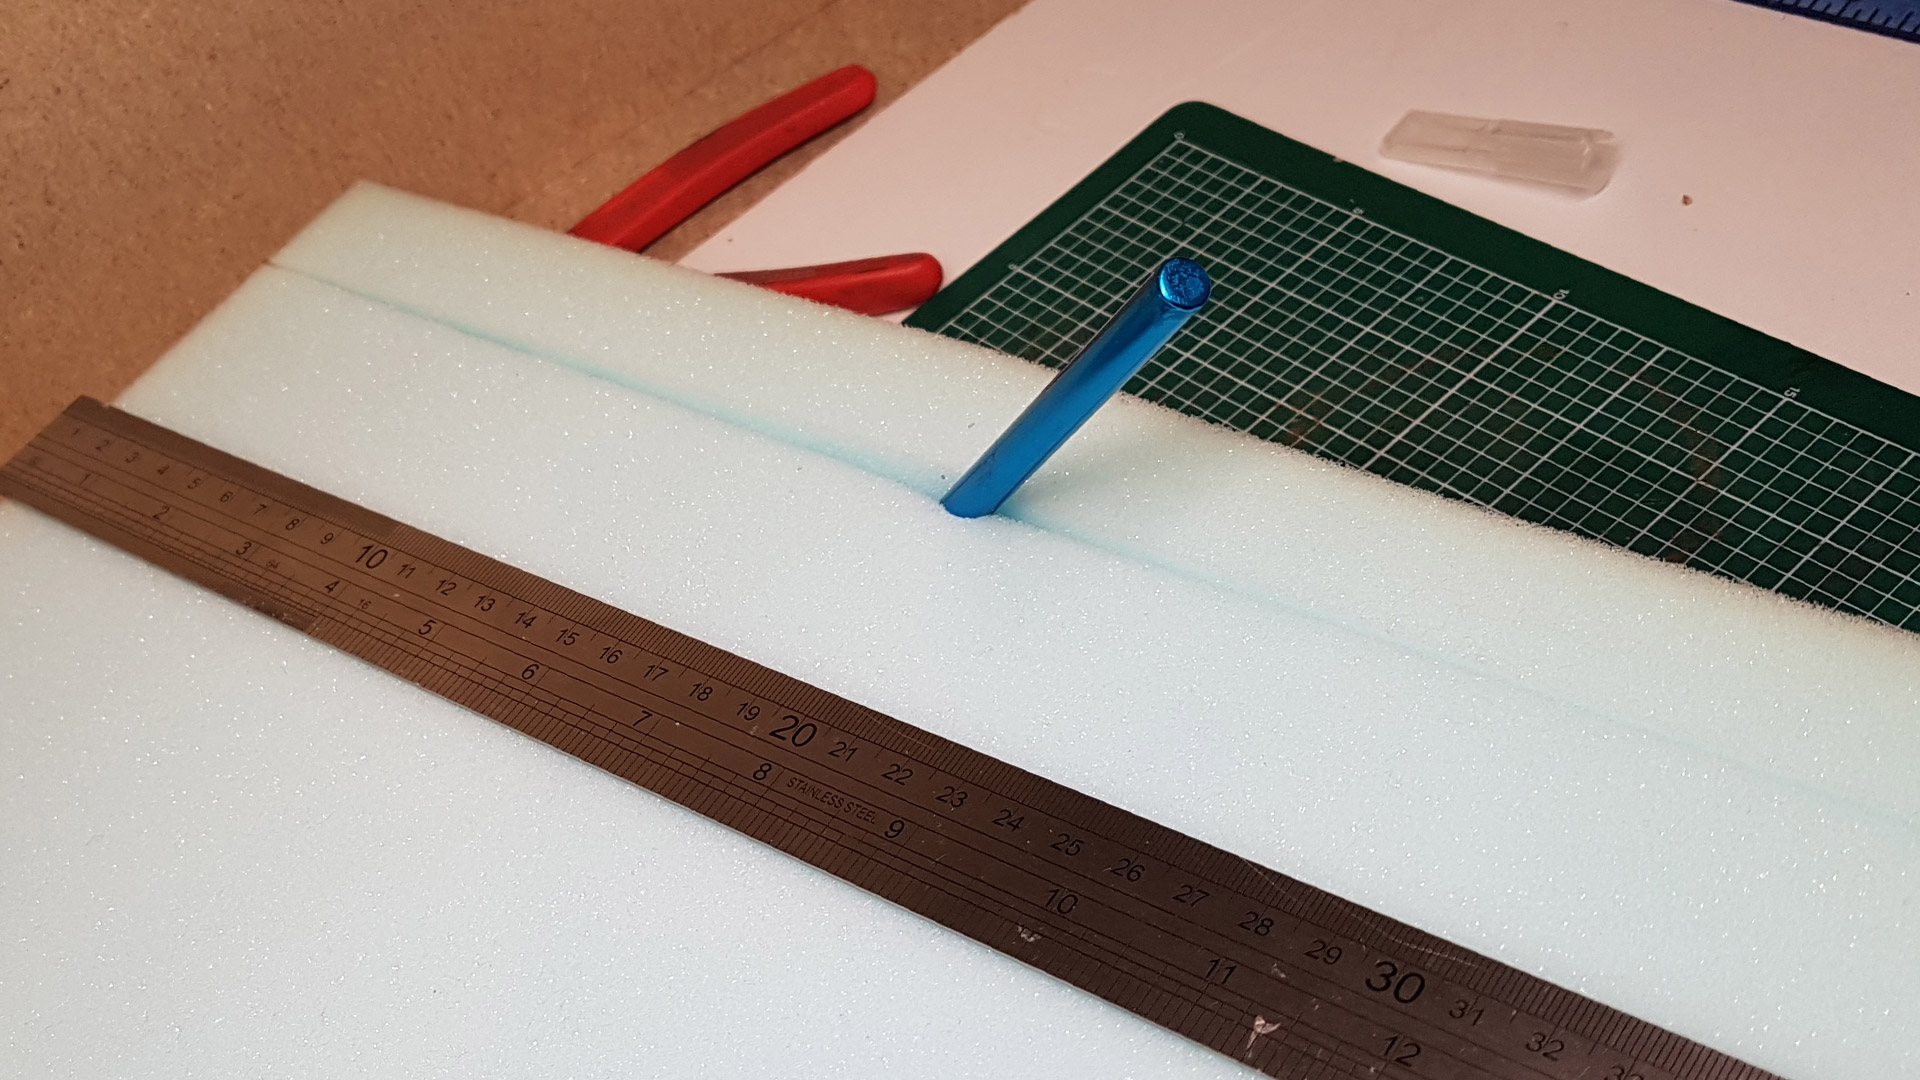
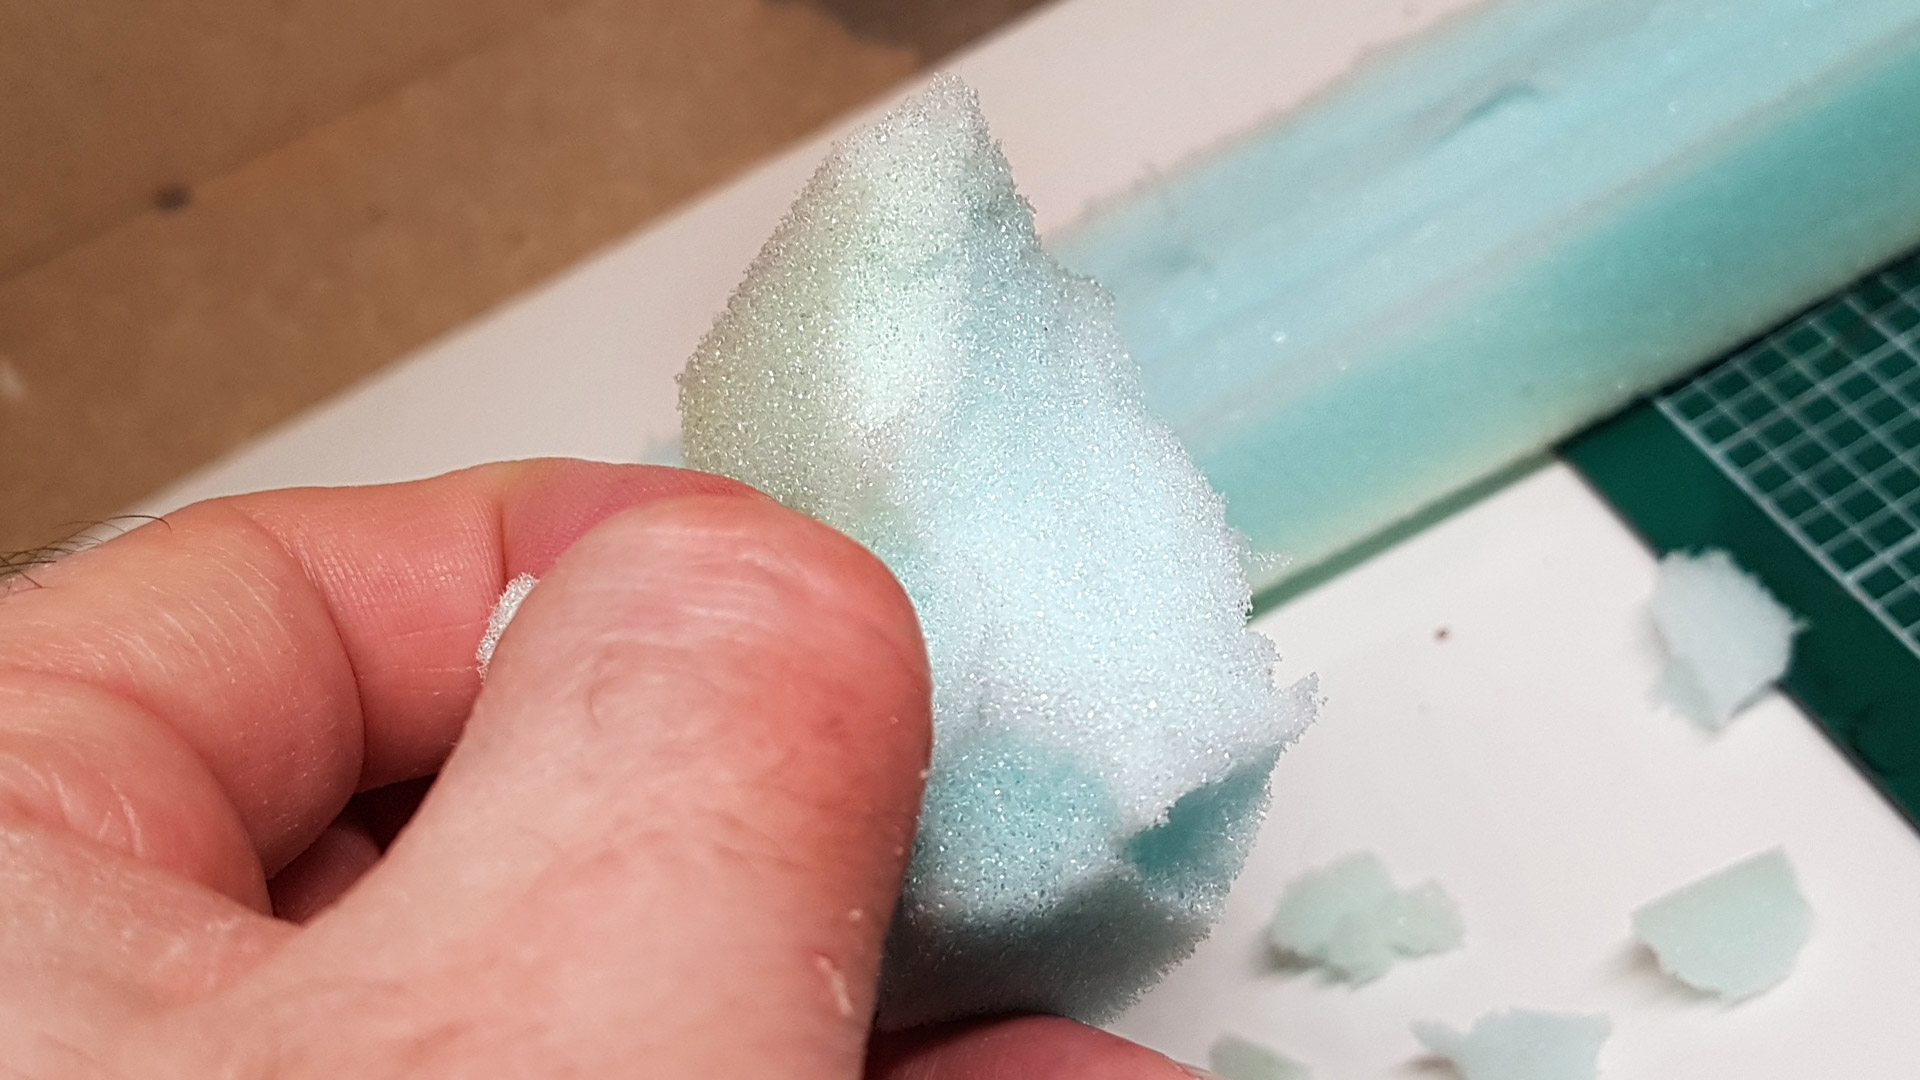
To begin, I sliced off a strip of foam the width of my steel ruler, which measures 2.8 cm wide. However, precision in width isn’t critical since the foam will be pulled apart to shape it. The key is to ensure the strip is wide enough to handle comfortably and provides ample material to create interesting shapes.
To cut the foam, simply score it with a craft knife along the ruler’s edge, gradually deepening the cut with each pass through the foam. As illustrated in the photo above, my knife is deeply embedded in it, demonstrating the technique.
Forming the Rocks or In This Case, Foaming the Rocks
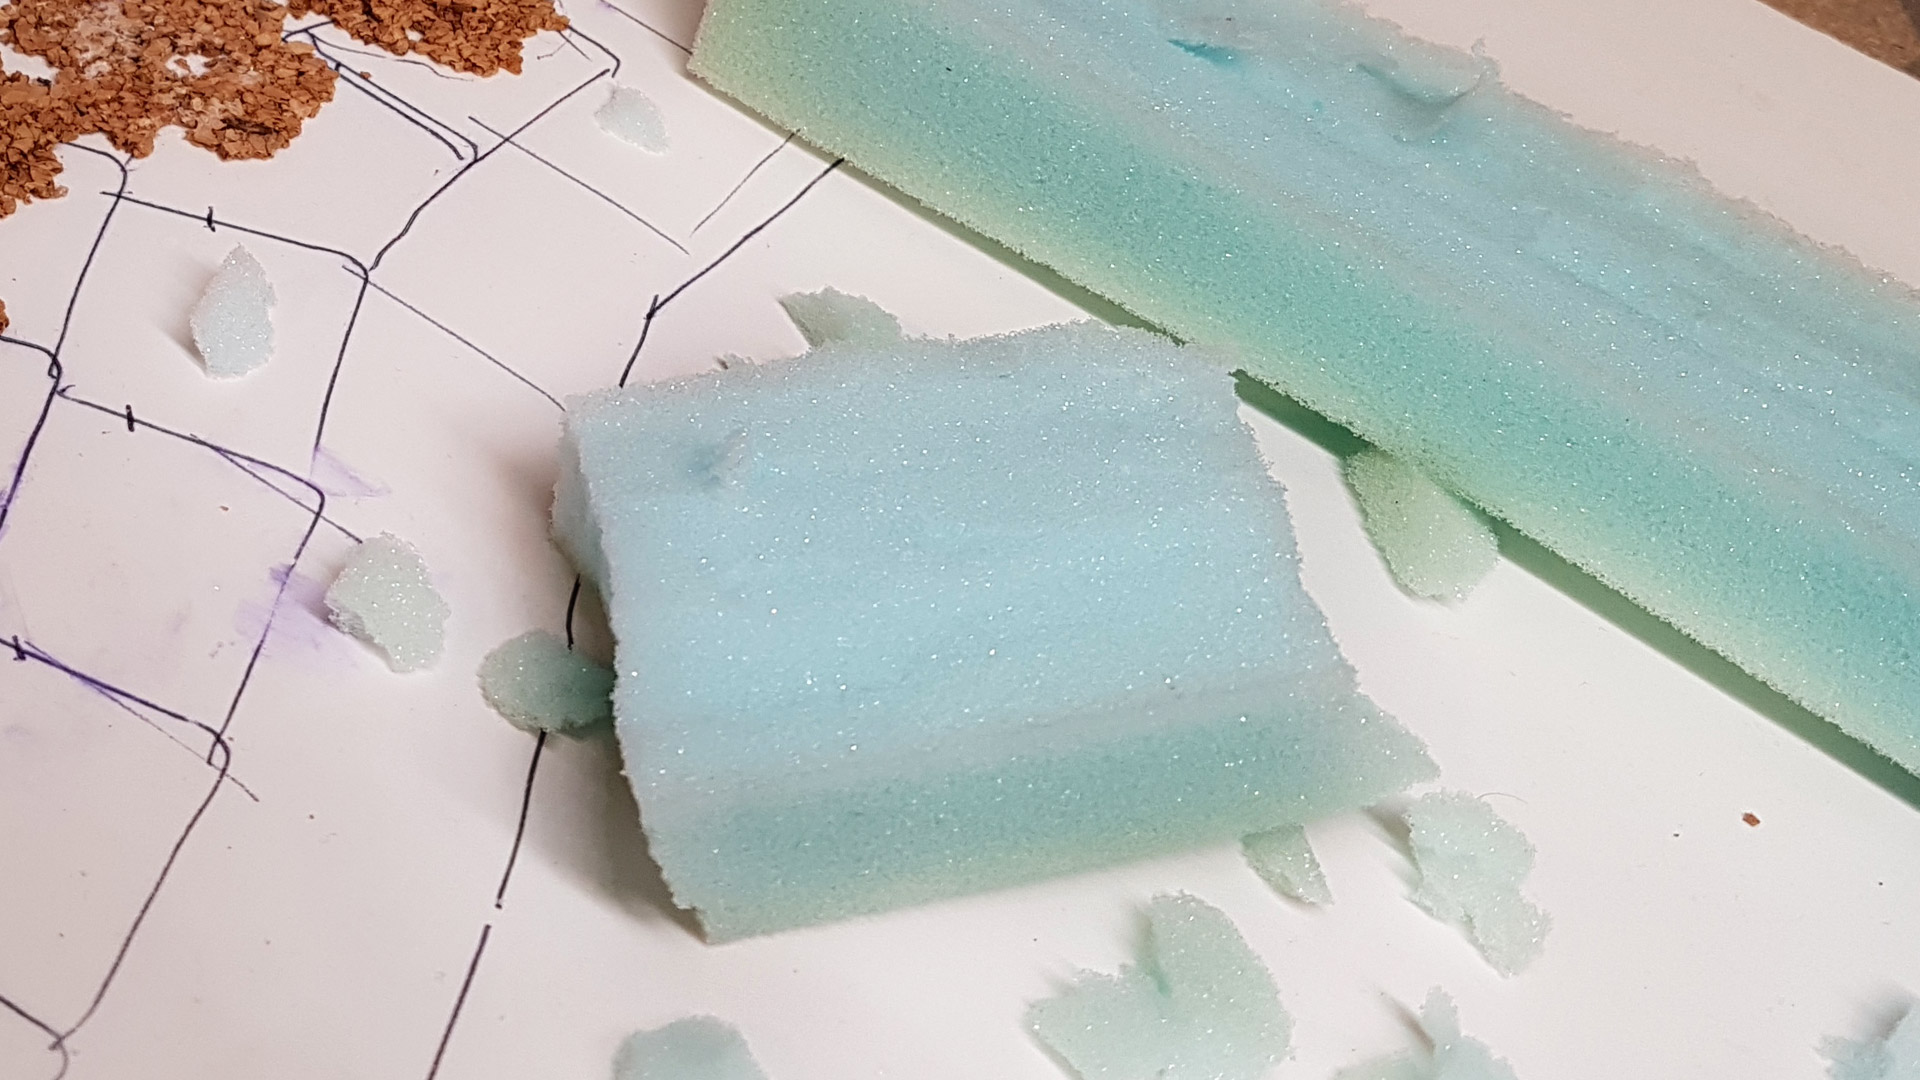
To craft each rock that constitutes the cavern walls, simply tear off a block from the foam strip. Then, selectively rip pieces away to eliminate any square edges, except for the bottom, which should remain flat for easy attachment to the base.
This method is surprisingly straightforward, with the rocks naturally taking shape as you remove pieces. Aim for variety in the contours—create indentations, protruding parts and overhangs for a more compelling rock formation. Avoid ripping off pieces in a uniform manner, as this could result in a blocky, unnatural appearance.
As you sculpt each rock, ensure variation in size and height to enhance realism. When positioned closely together, these rocks will form natural-looking crevices, mimicking cracks found in real rock formations. However, be mindful to avoid overly large gaps, which could make the rocks appear more like separate columns than a cohesive wall.
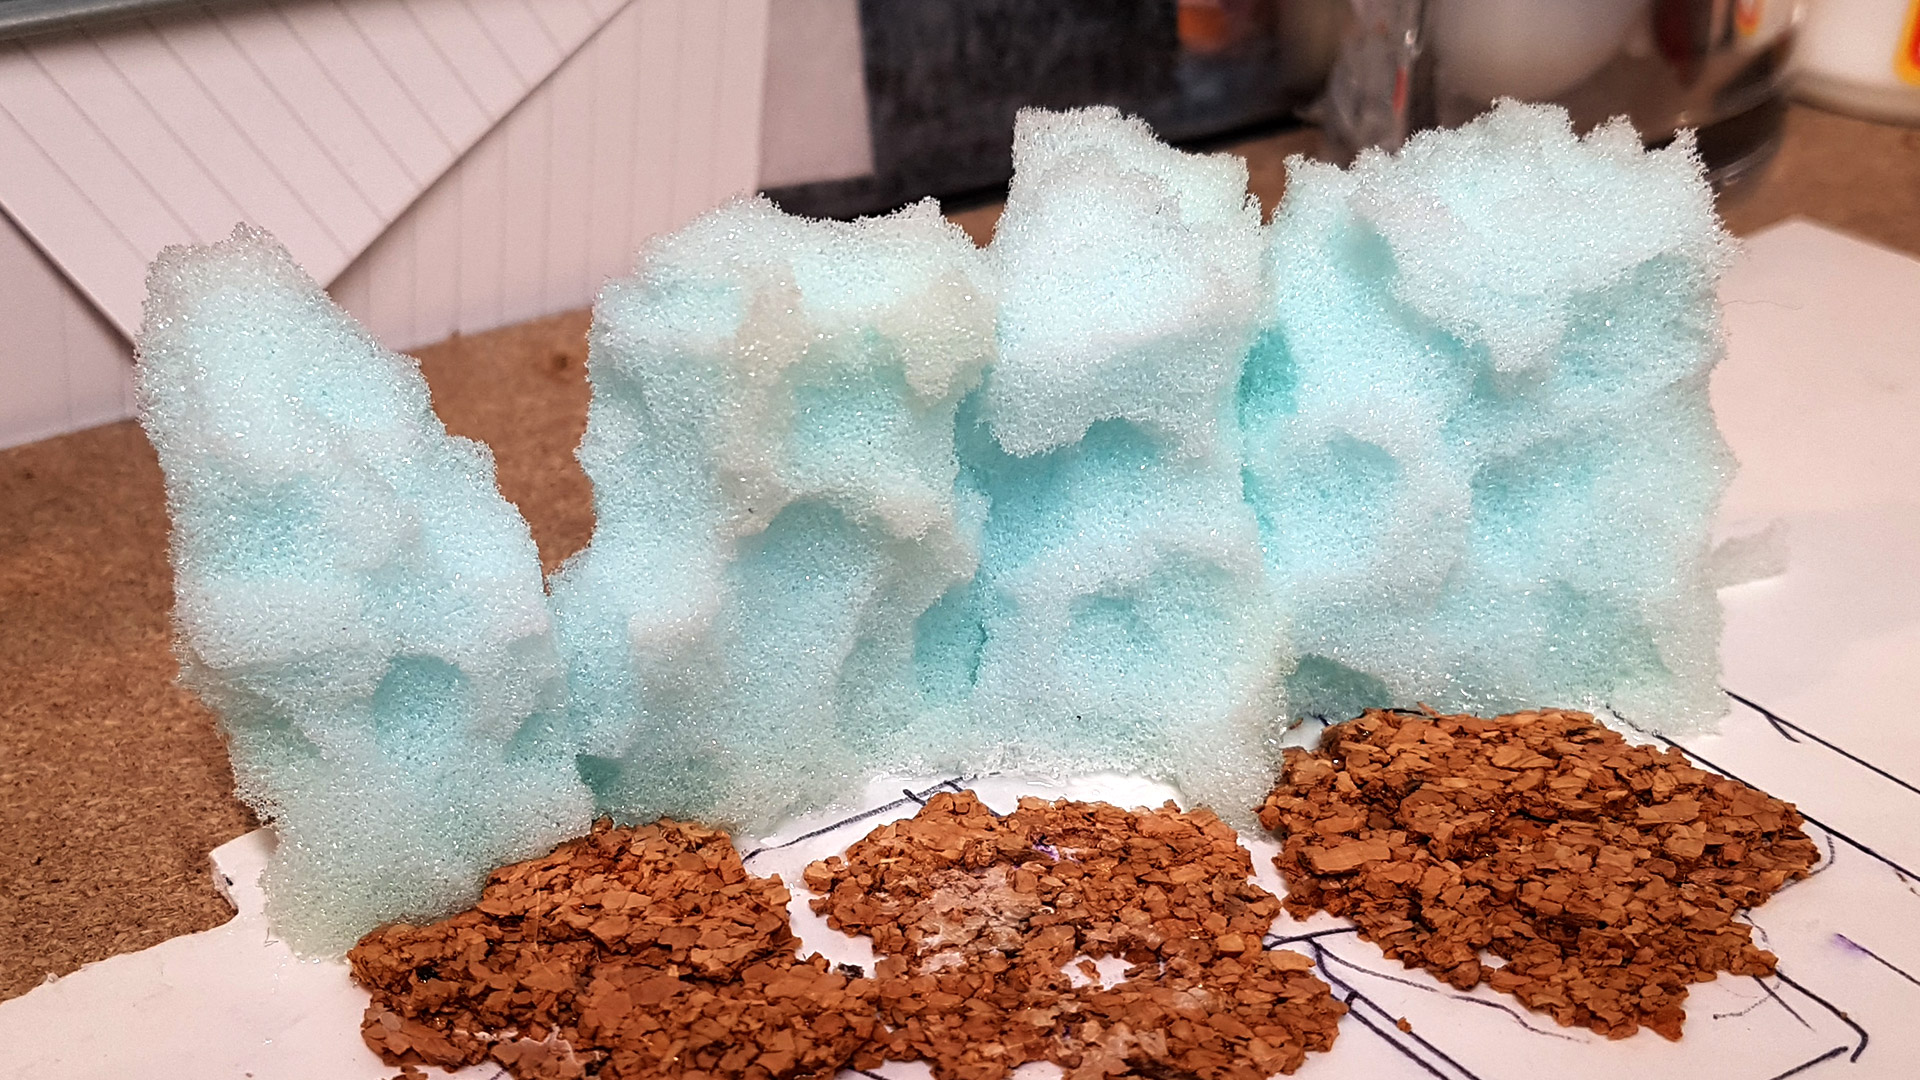 Make Sure to Remove Any Flat Surfaces Left Over From the Shape of the Foam Sheet


Leave a Reply