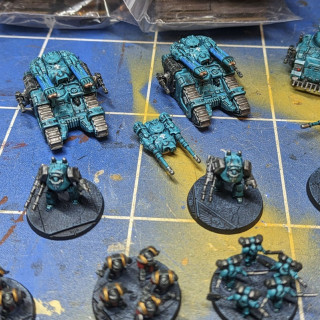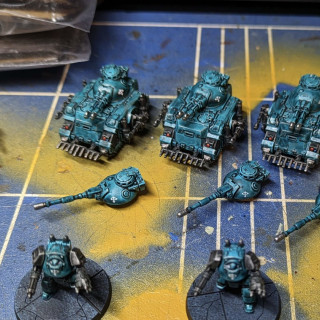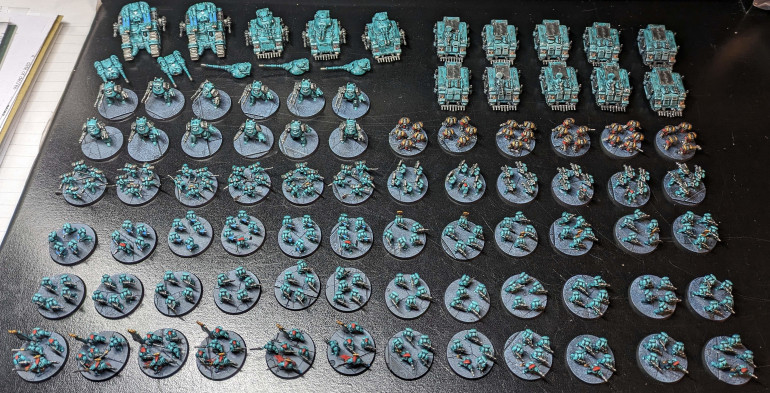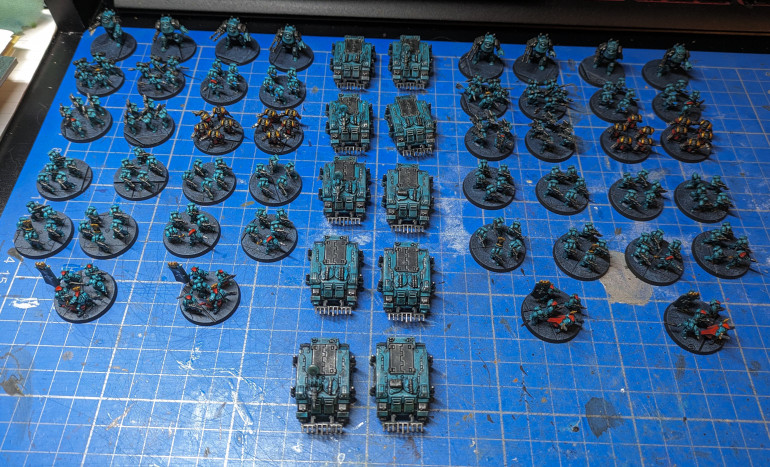
Gorram’s Grand Army Project
Recommendations: 501
About the Project
One dog's quest to have more painted armies than unpainted
Related Genre: General
This Project is Active
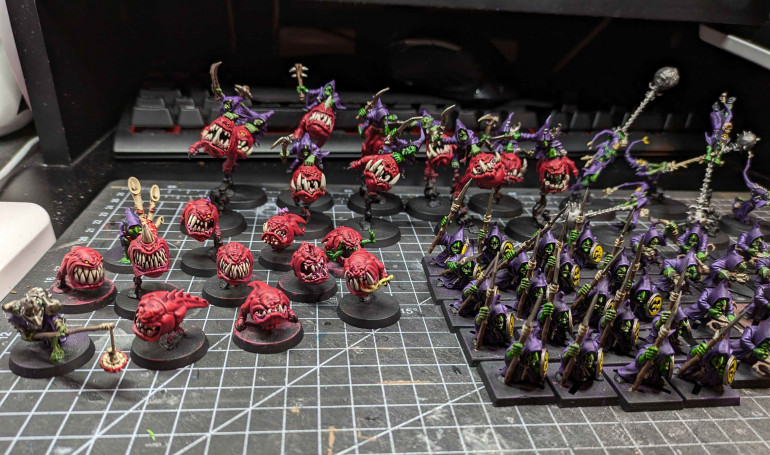
November Project: Night Goblins Finished
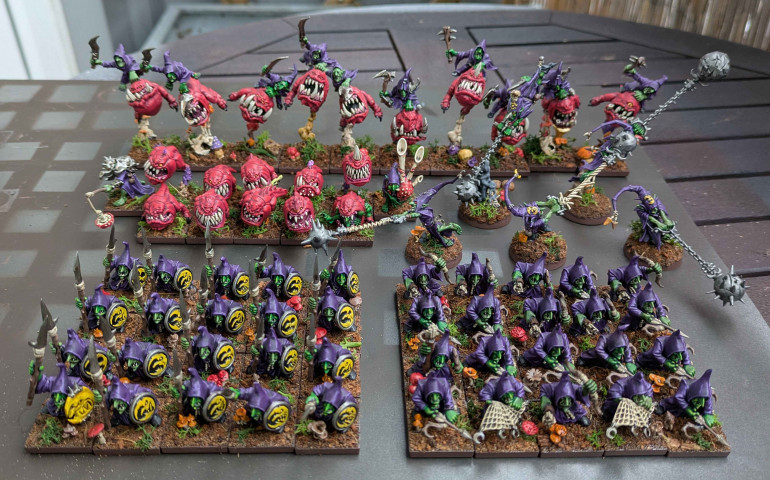
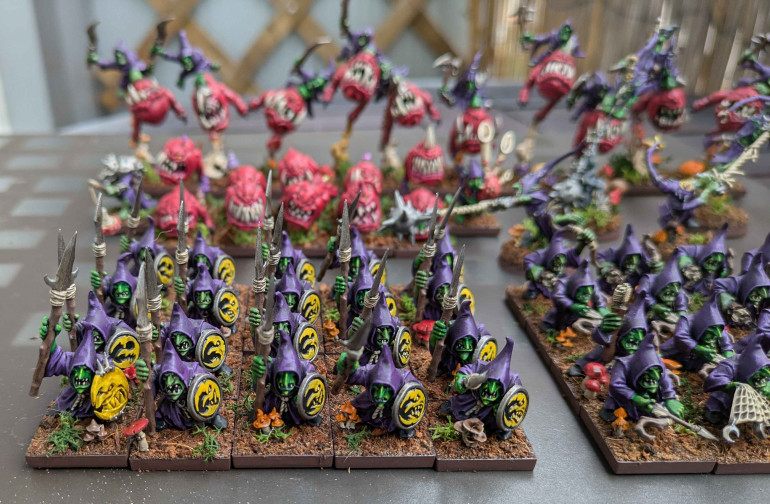
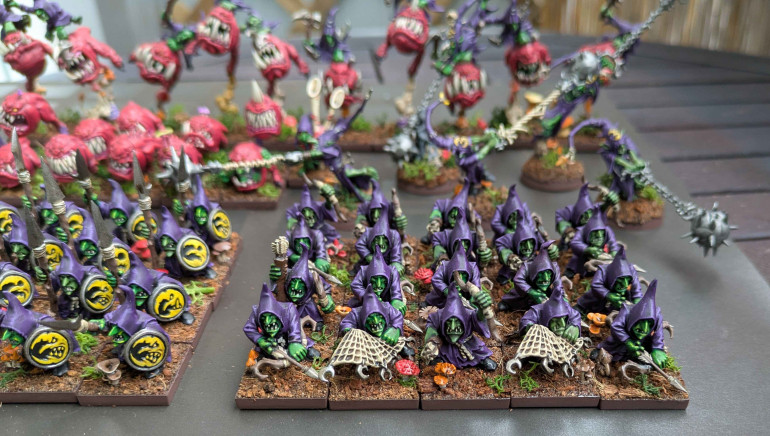
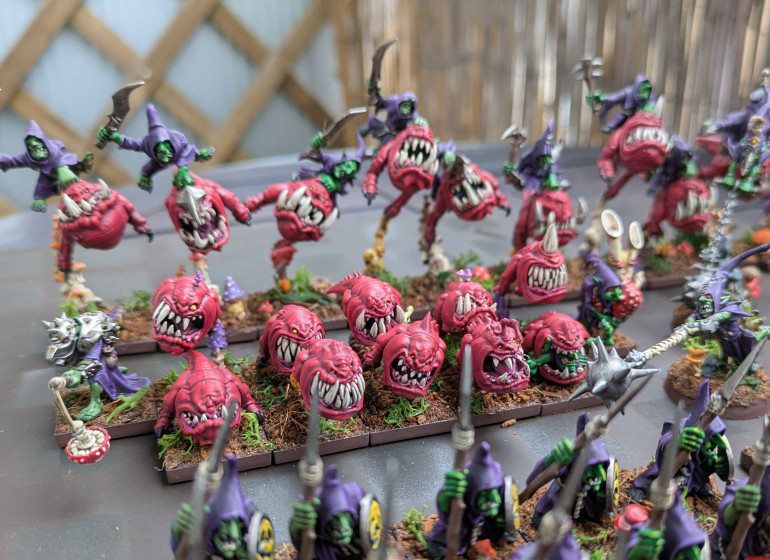
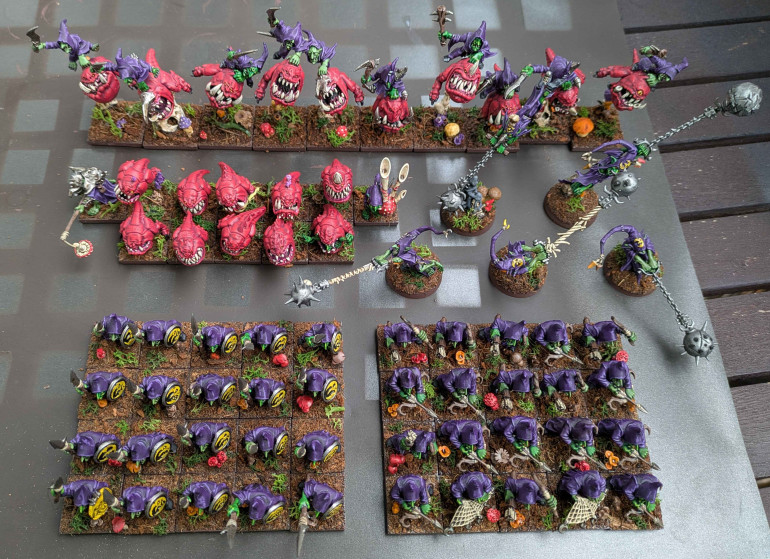
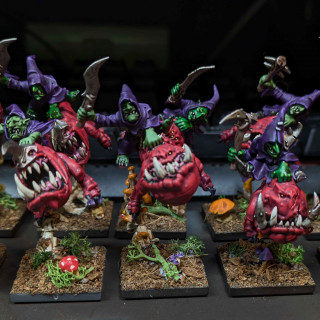
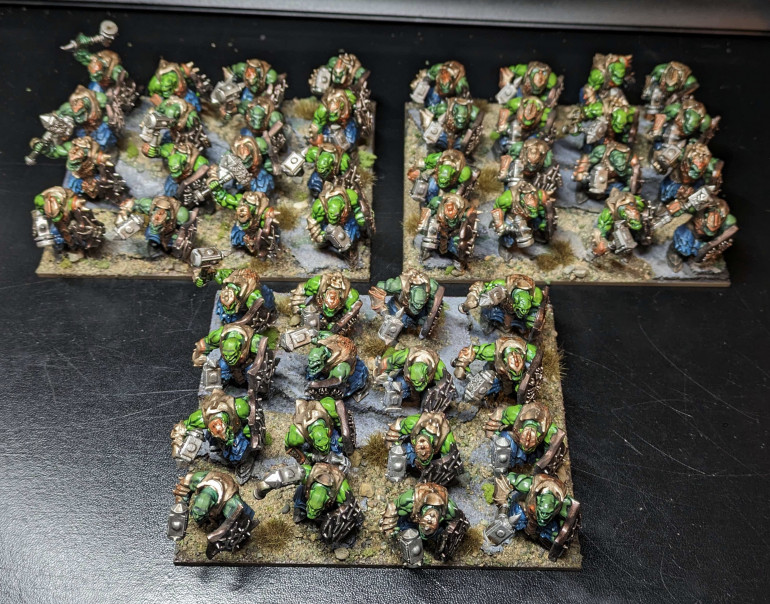
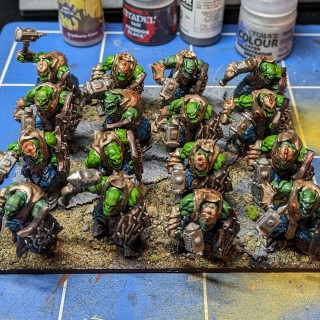
Army finished… for now at least! I’ll definitely be adding to this one when pennies allow.
November Project: Night Goblins Part 5
Technically this is a spillover into December now but thanks to a bad bout of illness it was pushed back. I’m determined to finish it before the year is out though so let’s get into basing.
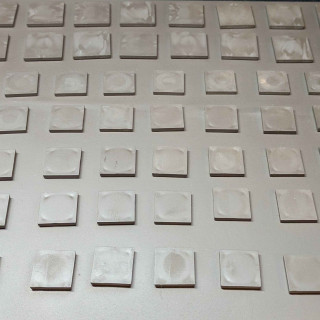
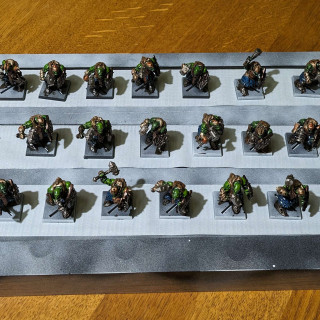
I don’t really have plans to play with this army but if it does ever get to the table, I want it to be flexible about game system. I love the multibasing aspect of Kings of War but these guys are going to be individually based. By putting the infantry on 20mm squares they can work easily for KoW or Old World with some spacer trays. The squig hoppers count as cav but in OW that means 25mm squares (light cav) or in KoW 25x50mms. The models aren’t really big enough to justify the 50mm depth so I’ll work on some filler bases to help them out.
Basing steps:
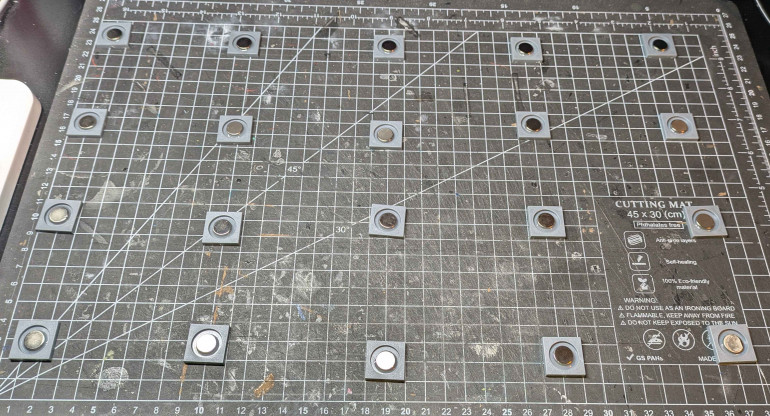
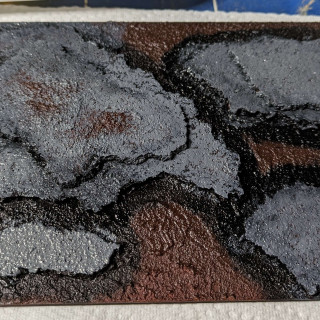
- After getting all my bases magnetised, I gave them all a spray prime in brown. This is mainly so no grey shows through the final look. Black would also work.
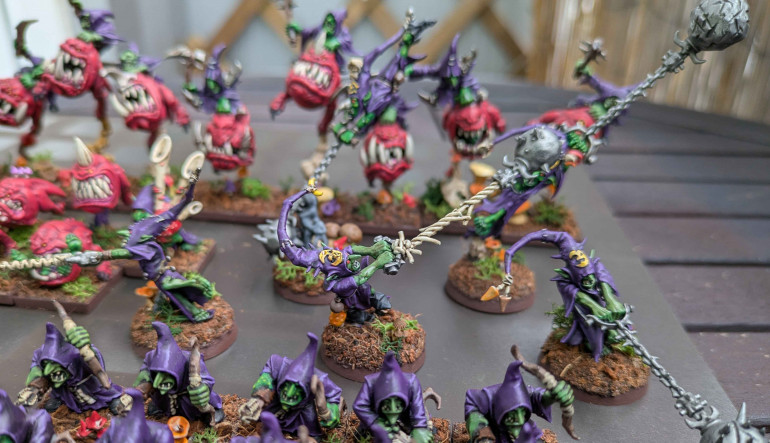
- The exception to this was the fanatics. The models are so top heavy that I needed to add extra weight to the base in the form of a penny. Once this was glued on, I used some brown texture paint to hide it before continuing to…
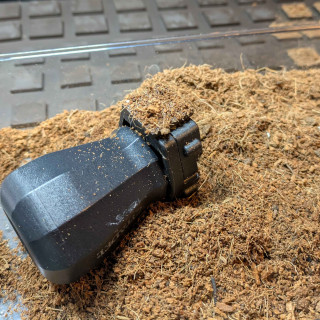
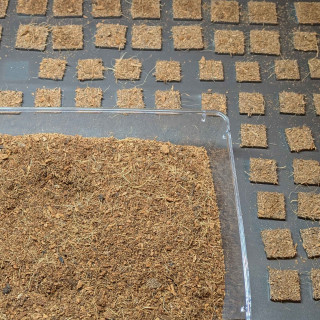
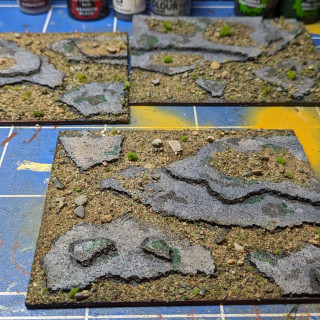
- The main part of the basing is going to be forest floor made out of coco fibre, the kind sold as a soil rather than as a hanging basket liner. It comes compressed in bricks and after some effort with a saw, I got a small chunk broken off and into some water to rehydrate it. Then I dried it out again. Yes, this was a necessary waste of a few days 😆
- I used superglue to get a good layer onto the bases. This is a messy step. Or it was until I realised I could mount the base on the magnet at the side of an old GW painting handle… fingers spared!
- Time to mount goblins, more super glue but less mess. Some of the models needed an extra application of the coco fibre at this point to blend their mounting points in better.
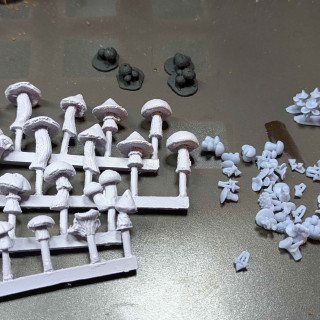
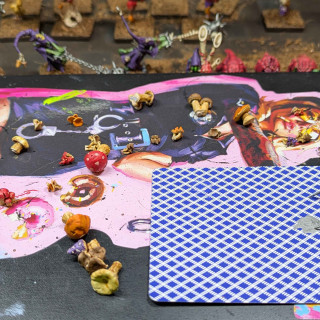
- Over the months, I’ve collected mushrooms for basing. There’s some great ones from Bad Squiddo, some less great ones from a 3D printer on eBay, some from various GW goblin and troll kits in the bits box, and then there some I printed myself.
- I looked at a lot of online images of mushrooms to get some colours. I was going to do lots of different ones but in the end I thought maybe sticking to a few across the army would look a little more cohesive.
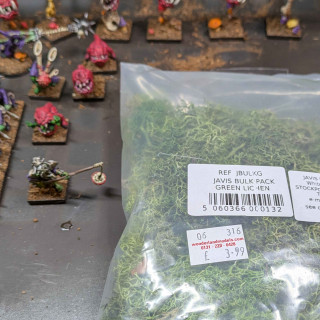
- At this point I was going to use a bunch of autumnal leaf litter to finish the bases off but, after seeing them all at this stage, I decided a little green was needed instead. Looking through the flock box, I found some reindeer moss. Little scissors and little tweezers deployed and I think it’s a much better look.
- Can’t paint an army and not rim the bases so I spent a tedious 90 minutes or so going round each base with a couple of layers of dark brown because it looked better with the basing scheme.
- Lastly everything got a soak of isopropyl alcohol and then watered down pva to stop the coco fibre from shedding. In the future the whole army will need to be hit with a matte varnish but the weather here isn’t likely to be conducive to that between now and late spring!
November Project: Night Goblins Part 4
As expected the rally was far too exciting to focus on painting however I managed to finish these guys off over Sunday and Monday evening. That means everything I currently own for my Nigh Goblins. I’ll definitely be adding to this when pennies allow.
I’ve started on the basing but that’ll take a bit of time as I’m going to fit it in between parts of my new Terrainfest project. Right now I’m gluing magnets on the bases before I start (for once!) but this has to be done in batches of 20 or so thanks to space and the curiosity of cats.
November Project: Night Goblins Part 3
The time difference for the rally this weekend means that stages aren’t starting until 10.30pm and then run until 7am. I’ve not watched all the way through Thursday or Friday but I have stayed up until after 2am (which is late for me.. I’m one of those sad early to bed weirdos). There’s something really nice about very late night painting sessions, a level of guilt-free enjoyment. You can’t do anything else without disturbing other people so just sit for hours and enjoy yourself.
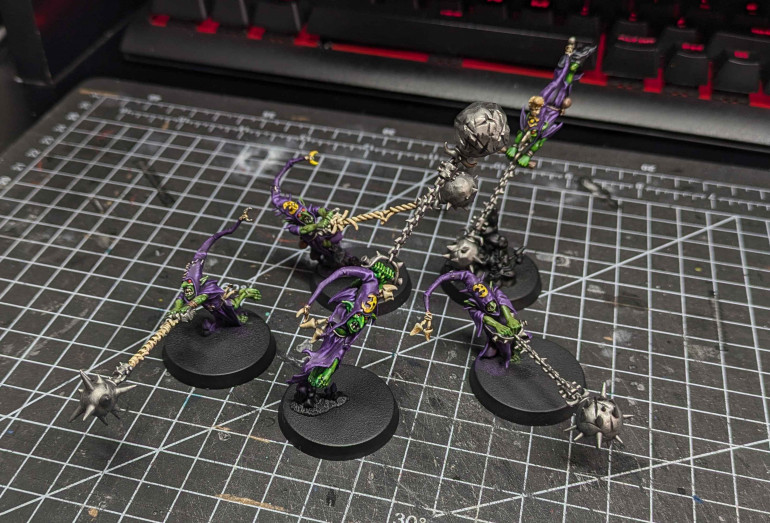
Friday night got the five fanatics painted (I still haven’t found the sixth one). These are very delicate miniatures. I managed to break one within the first five minutes. I really would rather have the old metal fanatics but they’ve been ridiculously priced every time I’ve looked on eBay so these are what I have.
These are going to be a bugger to base – even being plastic models, they are going to need heavy weighting on their final bases.
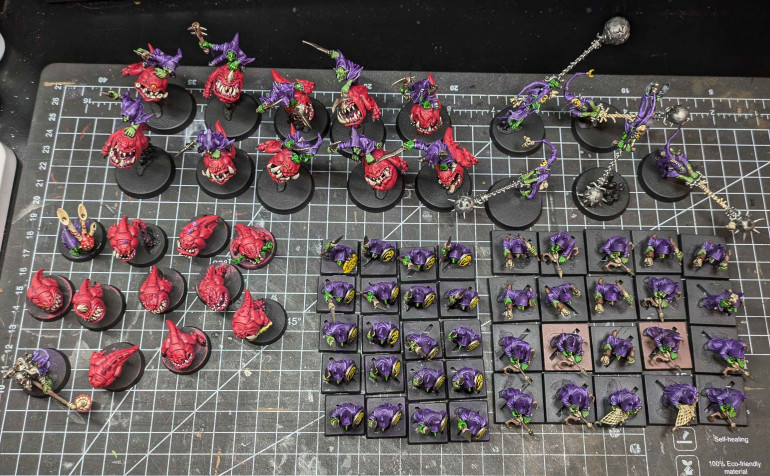
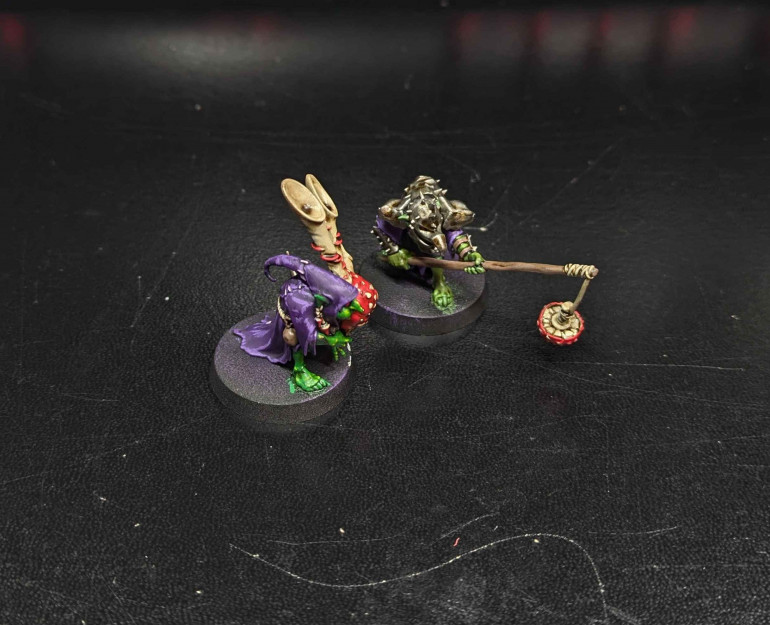
I also got through the two squig herders done. This leaves me just ten squig hoppers left to paint on the final night of the rally. I’m writing this during the first stage and there’s already been a big drama moment so who knows how much sleep/painting I’ll get done!!
November Project: Night Goblins Part 2
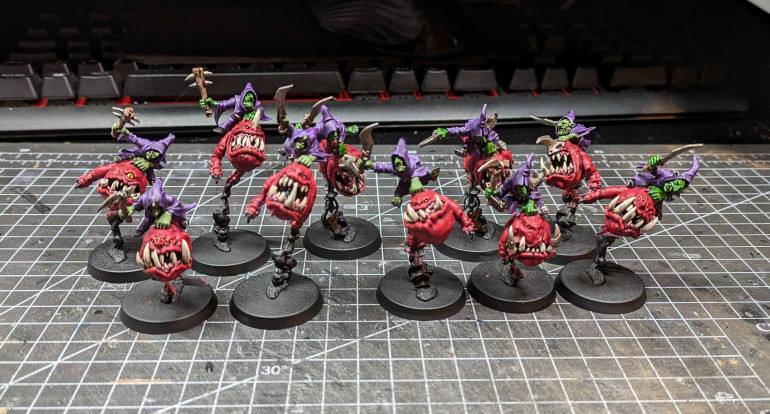
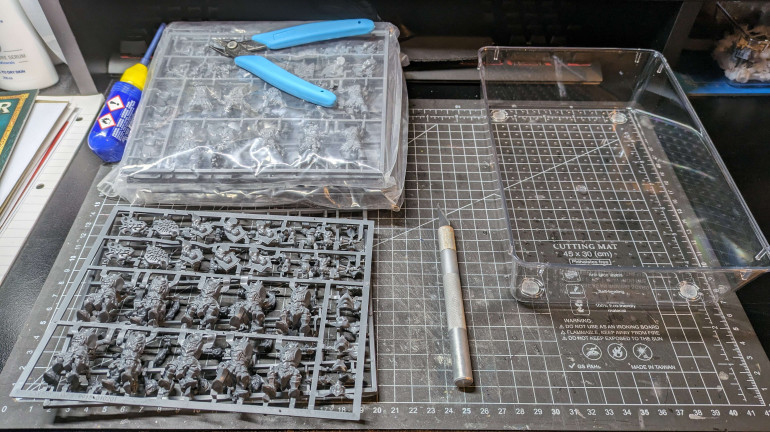
Feeling like I’m on a bit of a roll, I decided to stick with my gobbos and build everything I have in the stash before the weather makes priming impossible the rest of the week. Over a few evenings I got glued together 10 squigs, 2 herders, 10 squig hoppers and six fanatics. When I went to prime everything I realised I’ve lost a fanatic somehow, damn impetuous movement!
The final rally of the WRC season was this weekend in Japan. That means late nights at the painting desk; plenty of painting and poor photography.
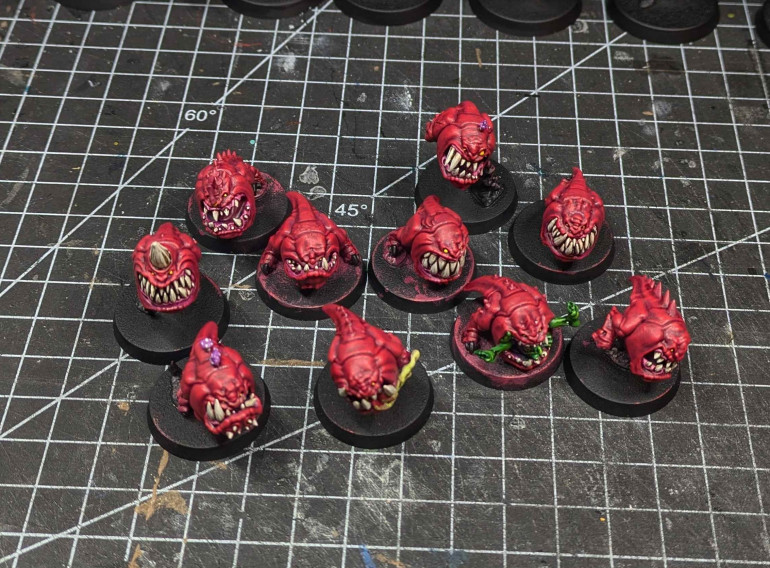
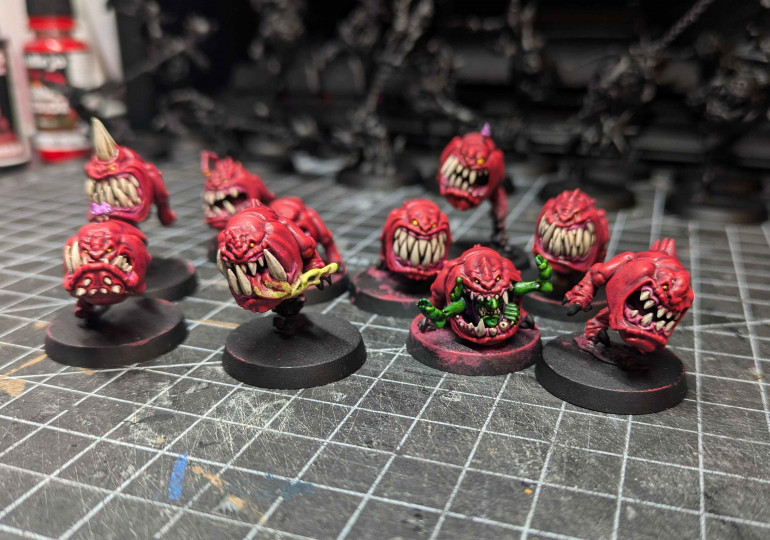
First up, squigs. I don’t think the exact paints really matter here, I went with three red tones with a mixture of dry brush and more detailed highlighting. Details are pretty minimal and I just went with basic paint jobs across the board.
These were delightful to paint up but I didn’t do the elements that will tie into the basing; I want to wait until I’m doing the final basing across everything before deciding on the colours for the various fungi all over the place.
November Project: Night Goblins Part 1
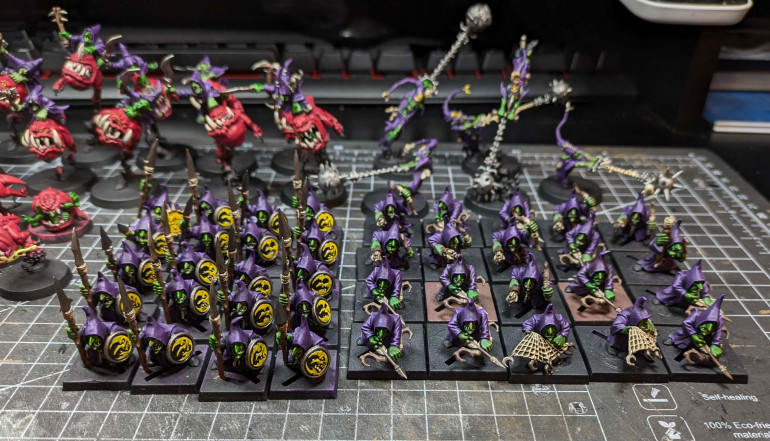
I’ve been playing a lot of World of Warcraft since the new expac came out and it’s put me in the mood for some silly fantasy. Looking at what I had in the stash that would scratch the itch I found a load of Night Goblins.
Being slightly older GW sculpts, the models are a delight to put together and pretty fun to paint.
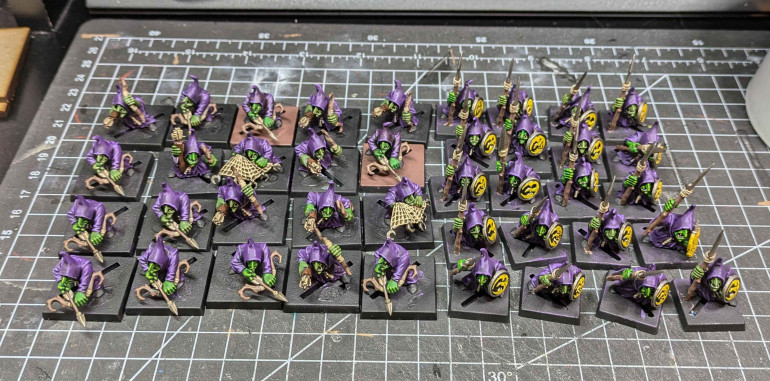
- Black prime so that a quick paint job that misses any bits won’t be as noticeable
- Heavy dry brush, almost an over brush Vallejo Royal Purple
- At this point I tried a couple of different highlight colours but went with Alien Purple from the Army Painter Fanatics range in the end. The basing for these is going to be very warm tonally so keeping the models a little cooler should hopefully meant they don’t get lost amongst the basing material.
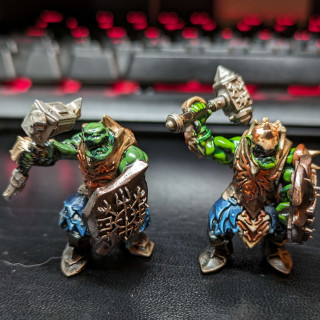
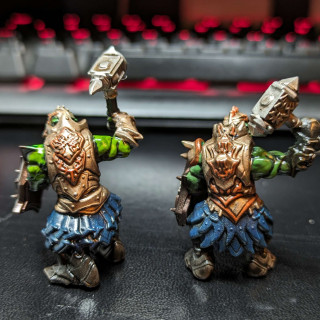
- Time for skin tones. Like with my Mantic orcs, I wanted two different ones, split roughly 50/50
- Base colour AP Fanatics Greenskin, first highlight Greenskin and Fanatic Rainforest mixed in a 1/1 ratio, final highlight pure Rainforest. Wash with Agrax Earthshade
- Base colour Citadel Warboss Green and highlighted with Skarsnik Green. Wash with Agrax Earthshade
- Metal details are just Citadel Leadbelcher base coat, wash with Agrax Earthshade
- Wood details are Fanatic Onyx Skin base coat, wash with Agrax Earthshade
- Ropes are Fanatic Ancient Stone base coat, wash with Agrax Earthshade
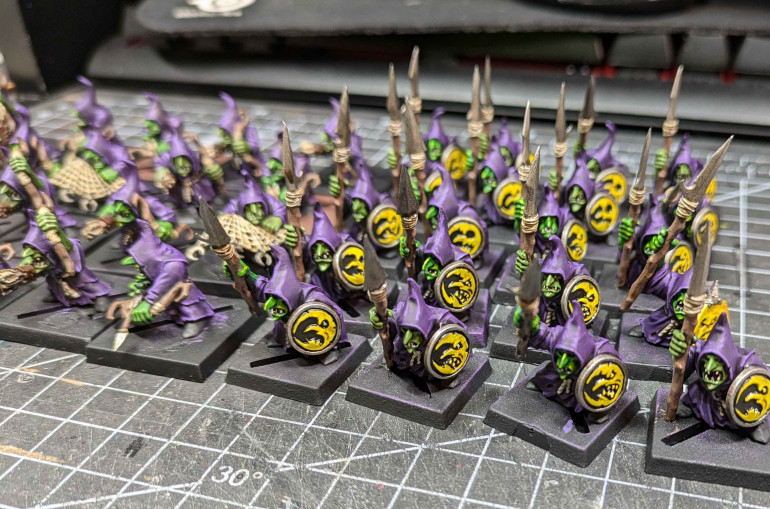
- Shields have their shield detail in Fanatic Demonic Yellow, the base was left the black from the prime. Wash with Agrax Earthshade.
Everyone is on temporary bases for painting right now but over the course of ten days or so, forty were done. I’ll base them all at the same time.
Dark Elves (Warmaster) - Part 1
One of our local gaming groups is a splinter from an RPG group that runs indie games. The idea was, initially at least, that the Wargames would be the same. However most of the chat revolves around playing “dead” GW games as several of them get that misty eyed nostalgia when words like Battlefleet Gothic and Necromunda are mentioned. I’m known to like painting small minis which is why I got added to a group chat for a slow grow Warmaster project (do not call it a league!!!) that will start mid to late summer and run for a few months.
What army?
I have easily 2000 points of metal dwarves painted. For some reason, lost to the depths of time (or the first lockdown as it is recorded in the history books), I re-based them all onto 40x40s, complete with Milliput to level them all out. Safe to say I’m not going to tear all that to pieces.
In the darkest corner of The Stash, I have some 10/12mm ratmen too but not enough for a full army and there’s certain units not represented that would be essentials. While hunting for options online, I can’t across a fairly local business that does 3d printing for you.
They had a 2k dark elves army for £75. All thoughts of ratmen vanished.
But wait a minute Gorram, I hear you type. Don’t you have a 3d printer already? Yes, yes I do. Having experimented with different scales though, it isn’t high res enough for 10mm in a way I’m happy with. I also looked into the cost of the stls and honestly, it was going to cost me more than the £75 to get them all, let alone buy resin, run the electricity etc
Eight days later, an army arrived in the post.
Quick and Easy Paint Scheme
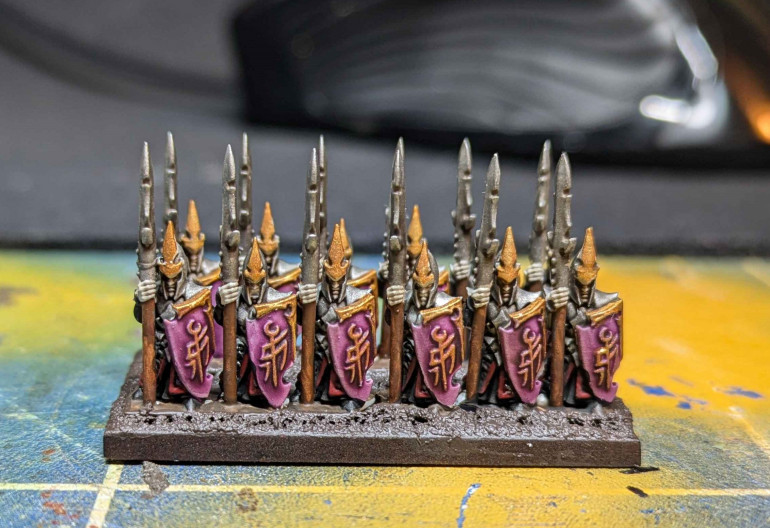
We’re aiming for our first games at the end of July so this will be another “get it done quickly” army. It seems to be turning into a bit of a theme for me this year. This is the first test base and I’m happy with the levels of contrast at 3ft.
- Prime Wraithbone
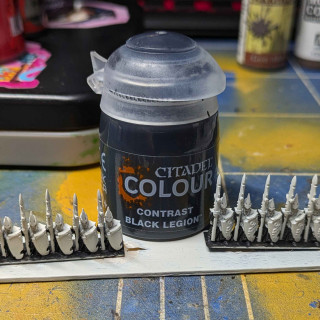
- Black Legion over the chainmail and boots
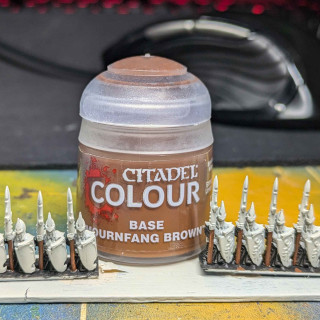
- Mournfang Brown on the spear hafts
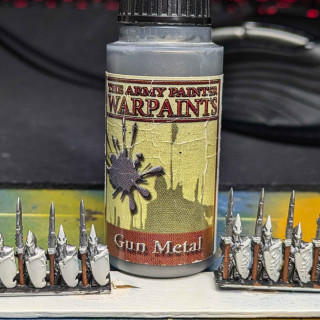
- Gunmetal over all the remaining armour, the spear tip and a slight drybrush on the chainmail
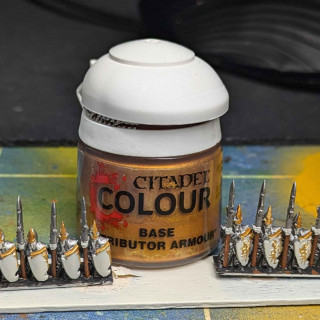
- Retributor Gold on the front helmet detail and shield details
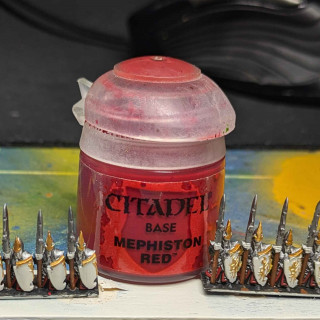
- Mephiston Red on the armour trim
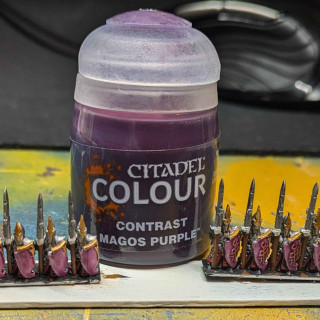
- Two coats of Magos Purple on the shields and the cloth
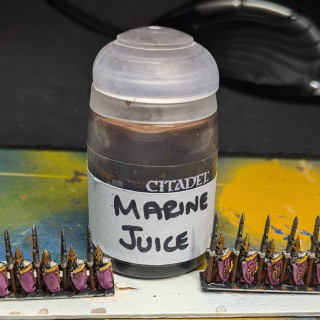
- Coat of Marine Juice (Sledgehammer Studio’s recipe) over everything except the Magos Purple
- Based with some texture paint; flock choice still to be made
Sons of Horus (Epic) Part 4
The last few weeks have been a little more scattershot in terms of what I’ve been working on. I have a secret project that’s taking most of my hobby time but it is feeling a bit sluggish at the moment. With a four day weekend, I finally managed to get my first game of Epic booked in so to shake things up a bit, I thought I’d try and get through the rest of my army.
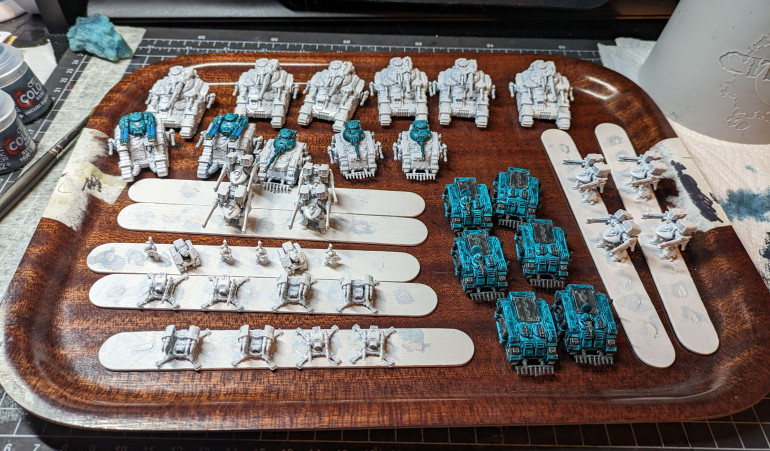
The small second wave of models and the first book expansion were released in February so managed to get two boxes of space marine support units to add in. I also still had a whole bunch of vehicles to paint up so I spent Friday getting everything primed and ready to go.
One of the few benefits to crippling social anxiety that I have been developing for the last few years is that the night before I know I’m going into a scary social situation, I don’t sleep. Sunday for example I was going into a new space, to meet new people, play a new opponent and a new game. Saturday night I got two hours of sleep. I did manage to paint the remaining 11 vehicles, 8 Tarantulas, 8 dreadnoughts, two Rapiers and finish six more Rhinos I needed to field a fully painted army though. Well except the decals… they didn’t seem like a great idea while sleep deprived!
Game Day
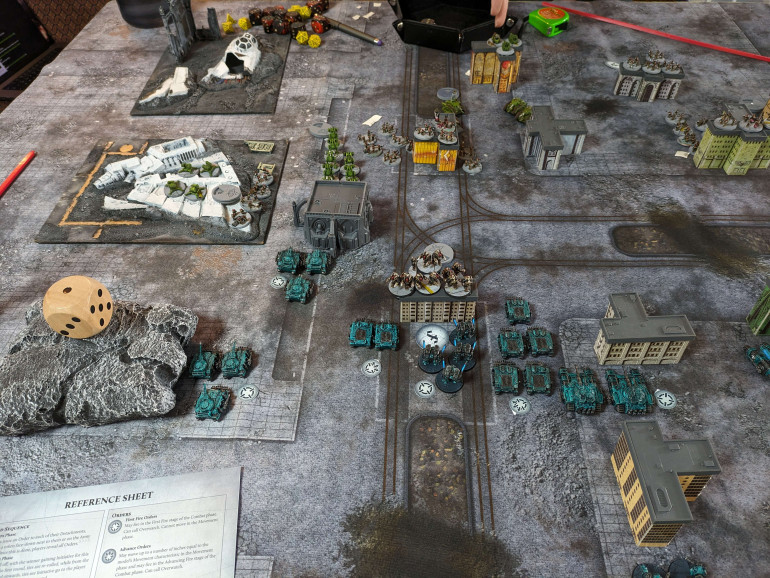
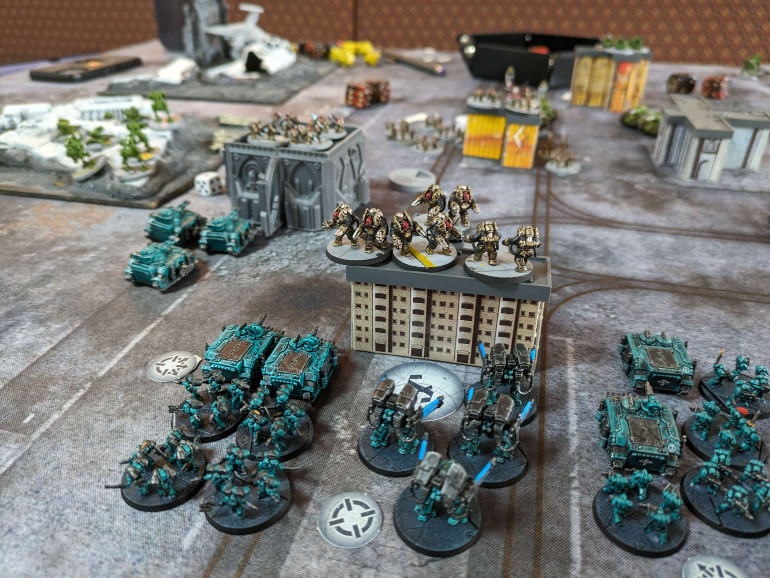
My first game (and my opponent’s third) took place at one of the local club’s Sunday afternoon sessions. I haven’t been to the club since pre-Covid but given how close it is to home, I really should make more of an effort. It was a lot friendlier than I remembered from 2018/19 and there were four women in the room which I think might be the first time I’ve not been alone on that front. That might not seem like much to most people here but it genuinely made a difference to me. We also managed to find an original Titanicus box in the terrain pile with cardboard and the polystyrene buildings in it.
As to the game – it was a mess. Weirdly for a GW game, not really because of the rules, I just couldn’t keep any of it in my head and the page flipping was constant and exhausting. 24 hours later, the rulebook is still an awful mess – I don’t understand how in this day and age companies still suck at putting sections of rulebooks in a sensible order – but the game itself doesn’t feel bad. With some work on my part to remember basic traits (or create a decent cheat sheet for myself), I think it could be a lot of fun. The combat is fast and models die quickly so it feels like a heavy attrition battle. I’ll give myself a couple of weeks to read the rules and then I’ll try to get another game in. I don’t think I scared my opponent off with my incompetence…
The main other takeaway for me is that I want to get working on terrain for this scale. The club is mostly historical so there wasn’t a great selection for our purposes. I’d also like to get a table together for my own flat. I have a box of the Warcradle plastic stuff they just released but after looking at it in depth, it will actually be more expensive to fill a table with than the GW stuff. I have some resin stuff in a box somewhere that will do the job for the flat but I don’t fancy carting all of that along the road to the club (I don’t drive so my back is pretty much my only mode of transport for it). Time to go throw some more money at the Goblin of Gaming.
Gnight Gnomes Part 2
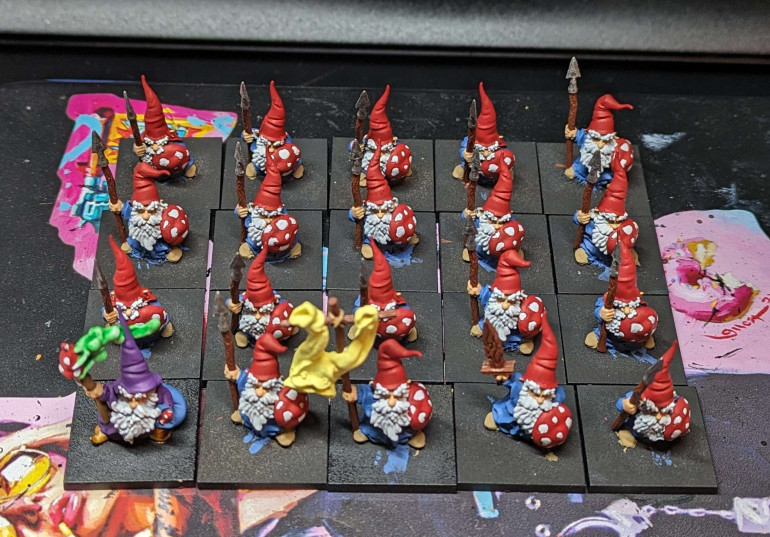
Quick update. Not had much painting time but that’s another batch finished up. I’m not super happy with the original basing I did so I’ve stopped at the texture paint stage and I’ll come back once I’ve had time to think/experiment with other flocks.
Gnight Gnomes Part 1
I need a bit of a break from painting Orcs and Epic so I’m going back to something I started a few months ago. Back in Gnomevember 2023, I printed out a bunch of the fantastic gnomes from Warp Miniatures. Over three months, Alex sculpted a whole army as goblin proxies. Like everything he sculpts, they are so full of character but importantly for me, they are also easy and fun to paint.
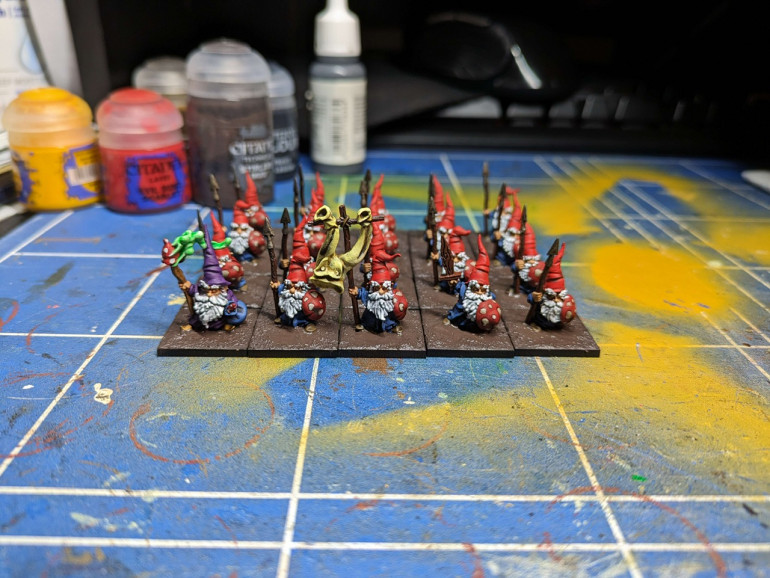
Sunday was my only day off this week so I only managed to get the base coats down. The batch was 19 spearmen plus a wizard which might have been a bit much (though I might also just have been tired and grumpy… emotions are weird).
Base coats:
- Robes – Vallejo Prussian blue
- Hat & mushroom shields – Citadel Mephiston Red
- Skin – Citadel Kislev flesh
- Beards – Citadel White Scar (also used for mushroom spots)
- Weapons – Citadel Doombull Brown and Army Painter Gunmetal
- Shoes – Vallejo US Field Drab
- Wizard robes and hat – Vallejo Royal Purple
- Wizard shoes – Citadel Retributor Armour
- Wizard staff – Citadel XV-88
- Wizard’s bag – Vallejo Prussian Blue
- Magic mushroom – Citadel Mephiston Red, White Scar for the cap and Contrast Hexwraith Flame for the smoke
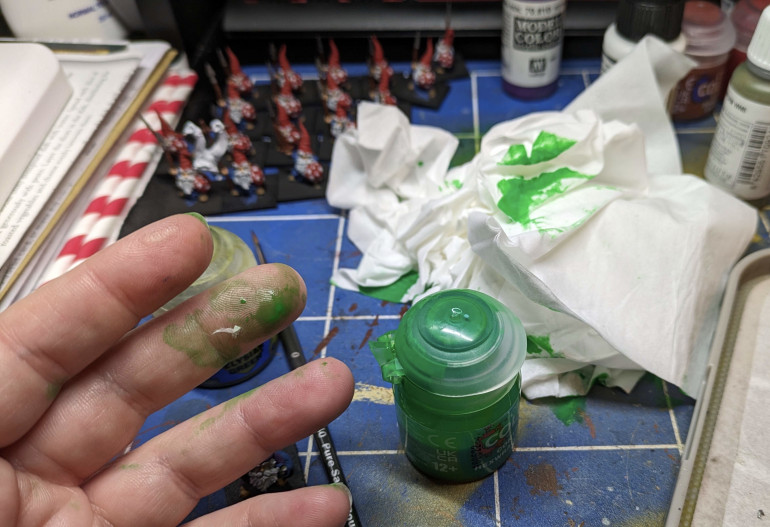
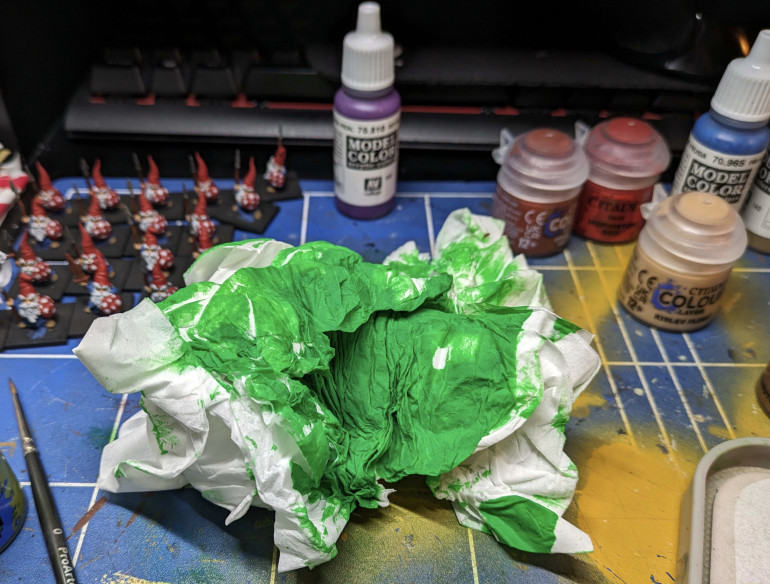
At this point I spilt half the pot of Hexwraith Flame when my hand forgot what holding onto a thing was. Why do you never drop the thick paints that wouldn’t go everywhere?
Riftforged Orcs (KoW) Part 3
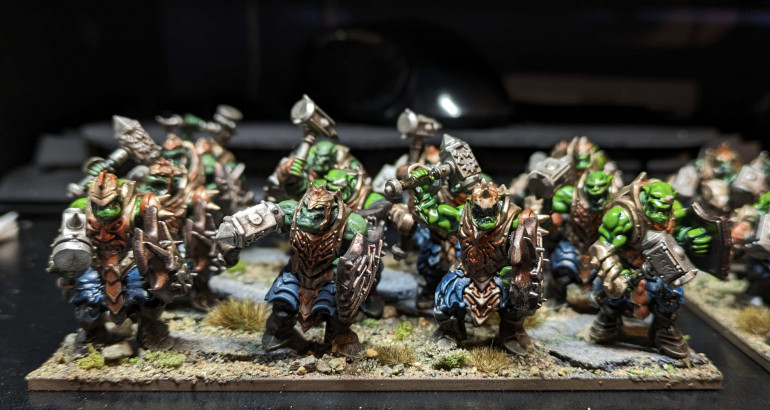
The final part of my basing came in today, a whole load of tufts from Tajima 1 Miniatures. For this scheme, I used a mixture of sizes of brown grass tufts and it just finishes these bases wonderfully.
The base rims were finished with Vallejo Chocolate Brown and, other than a varnish once the weather clears up a bit, I’m very content to say they are done.
Sons of Horus (Epic) Butt-butt-ding
This was a nice wee surprise on Sunday. Thanks Ben (and Gerry)!
Riftforged Orcs (KoW) Part 2
I got through another twenty Riftforged Legionaries this week so I should now have enough for my three starting regiments. This post is about how I have based them but mistakes were made so this is a cautionary tale; don’t be like me.
As usual, I started with an MDF base from Warbases. The orcs are heavy infantry so based on 25mm so the regiment is 125mmx100mm. I forgot to drill bases and putting magnets in them so we were already teetering on making life harder than necessary.
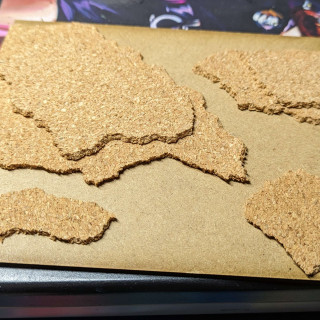
- Some torn up 2mm cork sheeting to give a bit of height.
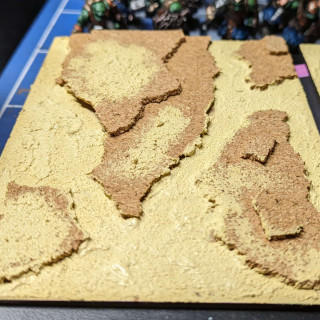
- Then a layer of AK Terrain Desert Sand
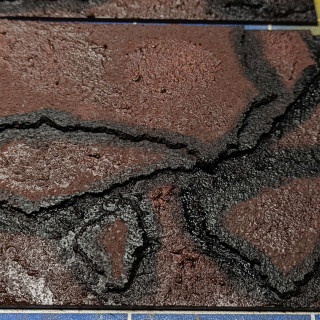
- Primed with dark brown
- Black used to edge the rock layers to give an extra level of depth
- Stippled Vallejo London Grey and then GW Administratum Grey
- This is when I should have glued down the models… I was too busy “doing” to be “thinking” and instead put down a layer of Geek Gaming Scrublands Base Ready mix
- Some random wee patches of washes to add more interest to the rocks
- Glued down the models, or tried to at least ? Some of them are definitely going to come off on their first trip to the table. The mix of particulates is too big to get a good foothold once the glue is dry.
These three bases will be the main part of my first 750 points which are meant to be playable for February. I need to paint up two other solo minis and then hopefully they can get to the table.
Sons of Horus (Epic) Part 3
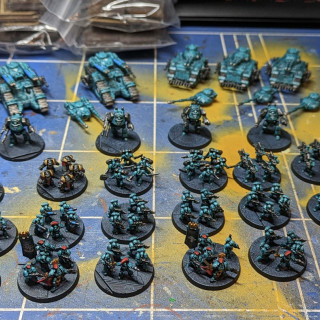
Another week down and this time I was focusing on getting the marine half of the starter box painted. Getting everything to a tabletop standard isn’t hard at this scale but I have every intention of coming back in the future and weathering the vehicles. Right now they have just rolled off the production line so that I can try and get a game in over the next few weeks.
I am mindful of burning out if I keep painting the same thing but this week isn’t going to have much hobby time anyway so it’ll mostly just be a building week. More epic? Yeah, but also more KoW Orcs.
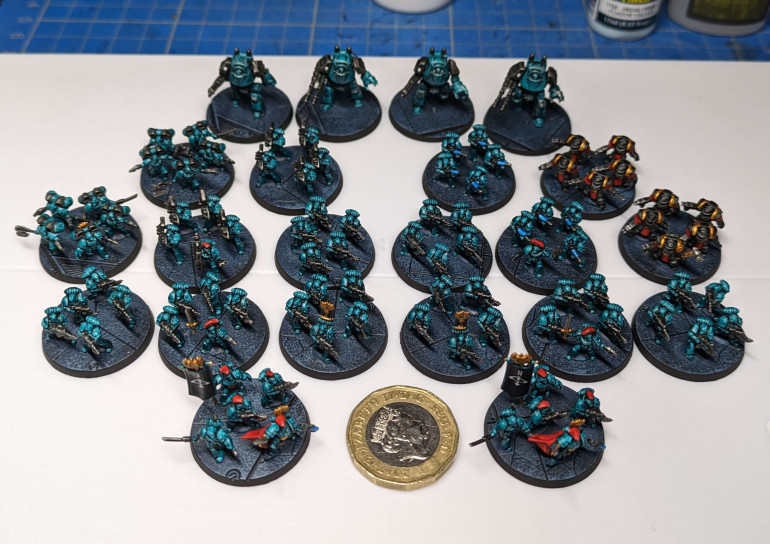
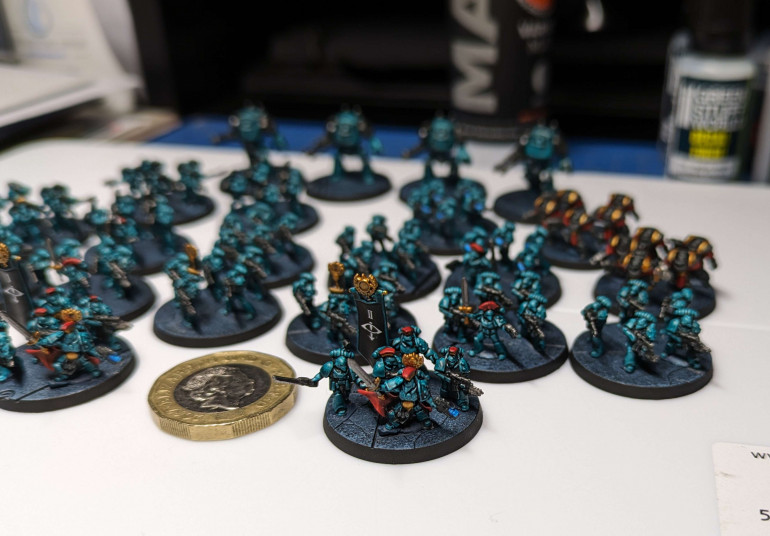
Here’s everything that I’ve painted so far. I have no idea what this is in points (probably not very much though) but looking at it all gathered together, it is starting to feel like Epic should.
Sons of Horus (Epic) Part 2
Delivery/Deliverance
I’ve known since GW announced Epic’s return that I was going to go hard into it. I love the idea of really big battles of tiny models in a sci fi universe that I really enjoy reading about. I said in my first post about this army that I had managed to scrape two infantry boxes and one box of rhinos while the rest of my pre-order was held up. I painted up half of the infantry and built the rhinos. Then I moved on to some of the many, many other projects I have with only a little envy for the other people in my local gaming community who had got some games in.
Last Sunday, I finally got a dispatch email for my Epic pre-order from Business Daddy. On Tuesday I came home from work to some expensive boxes of wee tiny mens. Knowing I wouldn’t have time to crack into them until the weekend but being a child who gets easily excited, I grabbed the other bits I had primed and worked on them during the week.
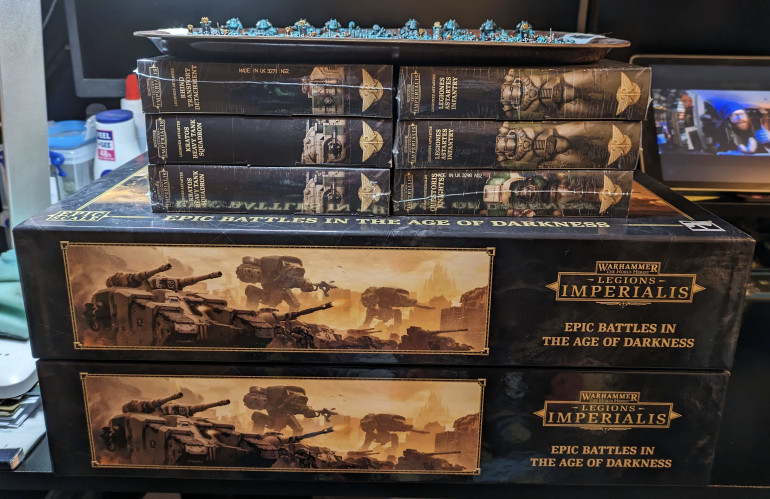 Step two: place painted things on a tray on top of the pile of plastic that arrived this week to prove you are in fact a moron. Sense of hubris threatening to overwhelm.
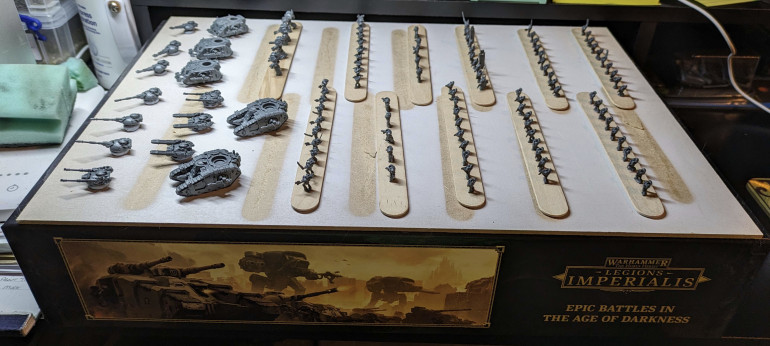 Step three: take out all the models you are going to sell and then merge everything else so it fits in one reasonable size box. Sense of hubris back within tolerable levels
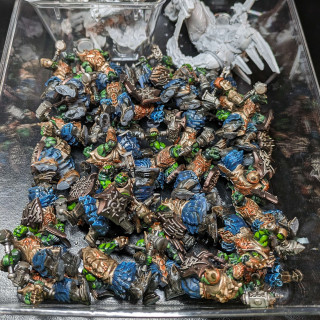
All those sprues in one large box feels more manageable. I know it is the same amount but my brain is suitably tricked… for now at least. I grabbed one of the starter boxes worth of models and got them ready for priming in the morning so that this week’s painting is good to go
Riftforged Orcs (KoW) Part 1
Basic Infantry
We’ve managed to arrange some people for a Kings of War slow grow to start out the new year. Some people will be expanding existing Ambush armies but not being one to make things easy for myself, I decided to start fresh with one of the several armies I have models for already. Looking for something that is a little more of a beatstick, I’ve decided to go for Riftforged Orcs.
I currently have the small army box and the models from the two player starter set Storm in the Shire. This gives me plenty of the basic troops to get started with.
The kit is one of the dual ones that Mantic has started using for core units. They can be built with shield and hand weapon (Riftforged Legionaries) or two handed weapons (Reborn Legionaries). The Reborn have a better stats like but they aren’t unlocking for the purposes of army building.
As this month is about building the core 800 points, I figured now was a good time to break the back of the infantry so let’s get to building models.
The models are that strange Mantic style – some really nice detail and some stretching that you saw on plastic kits 20 years ago. It’s clearly a compromise to show them to have bodies as one piece so all you have to do is pick a head and your arms. Very few mould lines so clipping and prepping was quick. Being a newer kit, they can be glued with plastic cement. Over all, a few hours of casual work, watching a movie, and the first 40 are built.
When I rummaged around for some painting bases to get them primed, I could only find 36 of the ones I wanted. I’m not painting in odd numbers like that so 30 got glued onto bases. A black and white zenithal prime for everyone to start with and then:
- I didn’t want all the skin to be the same so I used two different pairs of paints. Base was a Contrast paint (Dark Angels Green of Ork Flesh) and then one pass of highlights (Warboss Flesh and Moot Green respectively).
- Lore says that they have very nice gear, these are a cut above your scummy normal orcs. I find the studio paint job on these models a little off – all the armour and shields are the same colours and it just turns them into an indistinguishable mass with my eyesight so instead I broke them down into different sections
- Boots are no longer metal, they are heavy leather… or just a single coat of Wyldwood Contrast
- Kilts are also no longer metal, they are a single coat of Stormfiend Contrast
- The metal armour is Runelord Brass base with Screaming Bell to pick out some of the detailing
- Shields were Warplock Bronze with details picked out by an over brush of Canoptek Alloy
- Hand weapons are just Gunmetal for the heads and Wyldwood for the hafts
- The entire model got a coat of Marine Juice – equal parts Nuln Oil, Reikland Fleshshade and Lamian Medium – to knock back the colours and tie everything together.
- Being that these are basic infantry in a large army, that’s as far as I’m willing to go on them for now. I need them to go into a box until I base them later in the month so I gave them a coat of Matt varnish. I debated using a satin varnish given that there is still a lot of metal and it feels weird to Matt that down but then I realised I’ve run out and the decision was taken out of my hands. Then I used it and remembered that this matt spray is actually kind of shiny… some days you just can’t win.
As a batch, it was a lot but because it was mostly mindless base coating, it was relatively painless. Is 30 in a week realistic? No, I was on a short week at work so managed a couple of longer hobby sessions. Still, rather than dive straight into the next batch, I’m giving myself something else to paint for a few days. I also realised after I took the photos that I want to go back and do the mouths. I just forgot about them.
On multibases they will look good – I might go in and do a little more work on the front rows but that’s a future me decision to take.
And that’s the first 30 done. Good start but there’s a long way to go.
Sons of Horus (Epic) Part 1
Given how much I like painting small minis and enjoy the novels from the Warhammer sci fi wing, it shouldn’t be a surprise that Legions Imperialis turned my head. The fact that there are 12-15 other people at the club also picking it up made it an easy purchase.
As for the legion, no hesitation, it is Sons of Horus. I love the colours and I like the novels around them. I had to do some wiki-crawling to decide on a Knight House for future expansion. So I know this is SoH as they were on the novel Vengeful Spirit. That’s as far as I’m going at this point in terms of tying into the lore. My research phase caps out at “yeah I’ve read that book, I like those colours, they’d be fun to paint”.
Made the mistake of going with Business Daddy for my pre-order who didn’t get their full allocation and then failed to bother saying anything for six days. I’m not mad, just disappointed. There’s no point in cancelling because no one has the full order in stock so I’d be waiting regardless. I went over to another online shop and picked up a box of infantry and rhinos (safe to say there will never be too many of those in my army) because it has been a very bad week and I make poor financial decisions when emotionally ruined.
I’m not going to write screeds about the models. Let’s be honest, other people’s opinions are boring. You’ll know what you think, nothing I say is going to influence that at this point.
I did what I would usually do working at this scale and mounted them all on tongue depressors and primed them black. I like working from black because it cheats the recesses. I did a couple of test models and found that the colour of paint I had to hand for Sons of Horus wasn’t going to cover in one coat. This army is potentially going to run to thousands of models – I’m not doing two coats.
A quick trawl on YouTube, a re-prime and a trip to GW for one Contrast paint and this is what I’ve got:
- Prime white/wraithbone
- Terradon Turquoise contrast for the armour
- Black Templar for the weapons and to break up the armour on the larger models. The Terminators are also all Black Templar to be Abbadon’s Justicarum.
- Blood Angels red contrast for plumes, etc
- Retributor Gold for sword hilts, termie shoulder trim and some banner pole details
- Gentle dry brush of Leadbelcher over weapons and Contemptors for weathering
- Nuln Oil 50/50 with water as an all over wash to just tone down a tiny bit
- Bases are sponged with three paints (Incubi Darkness, Stegadon Scale Green and Thunderhawk Blue) to add texture without actually adding to the thin bases. Rim with Black.
- Transfers
That’s it.
All told, the whole box took around 3 hours to paint to this stage but another two hours to do the transfers, bases and gluing it all together. The scheme comes with only one minor change from this *video here*
I’m really happy with the armour colour, it’s going to look great across a whole army. It was also just delightful getting back to smaller scale minis after a few months of painting 28mm.
Prep Work – Part 1
Failure to prepare is to prepare to fail as they are fond of saying. Knowing that batch painting is going to become a bigger part of my hobby, I need to make a couple of adjustments to give myself fewer hurdles. It might seem silly but one of the first ones I need to fix is my painting handle situations.
Working on my depression-friendly project Children of the Hydra’s Teeth, I bumped up against an old, very minor issue. For working on 28mm miniatures,I have a Redgrass Games painting handle and have bought extra tops for it. They are very expensive for what they are so I only have five. When I batch paint I tend to work in 10s so it bugs me every time that I don’t own enough. The skeletons I’m painted in batches of six because that is what comes on a sprue and that’s even more annoying because it is just one that was left out.
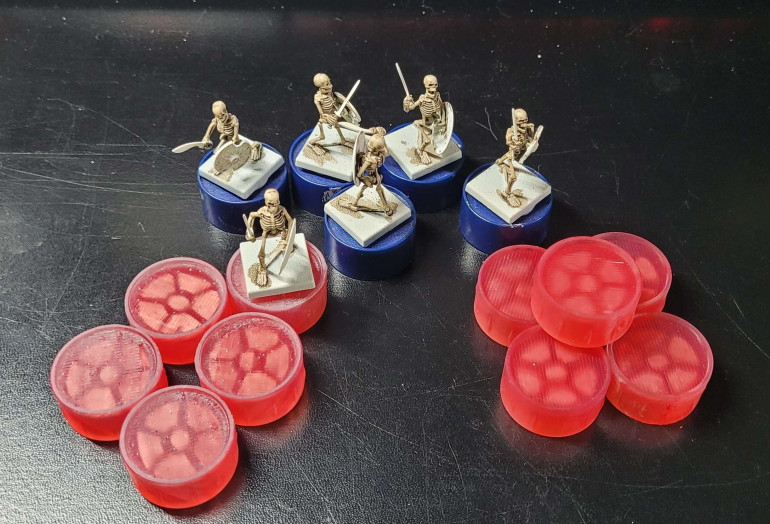
I’m still early on in my 3d printing journey but I’ve started to develop the “oh I wonder if I could 3d print one” mentality. Not yet at the “I wonder if I could 3d model that” stage. Thankfully nerds are nerds the world over and someone has already done the hard work for me.
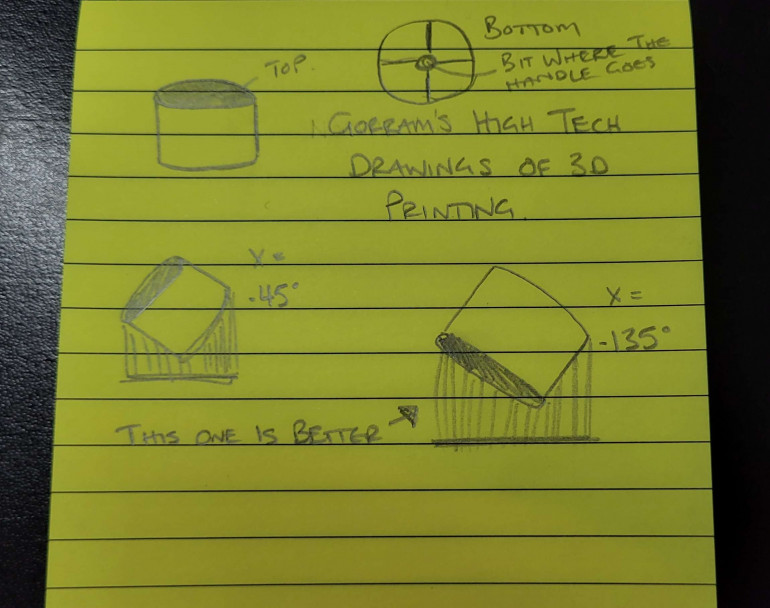
I’m still working on the best way to set things up for supports (which I also just use the automatically generated ones) so I prepared two options. I tried to put words in here explaining it but my brain can’t so here is a highly technical drawing instead.
As my brain is a broken piece of poop at the moment, instead of printing one of each as a test model, I did a bed of each. Sigh. Don’t be like me, engage brain better.
The first bed was fine. The caps needed a little sanding on the bottom edge but they looked good. The only issue was that the supports to make the underside included one in the hole that the handle goes into. It was a pest to try and get the support out. The caps fit but they are ever so slightly squint. Not in a way that will affect usage but I’m a particular type of fusspot and this is enough to annoy me.
So the second batch got printed and was better. There was virtually no clean up, no supports in awkward places, though the cap was a little tight but I’m sure that will wear with usage. So I know have 20(plus five spares that are slightly wobbly).
I paint my smaller scale models while they are glued to tongue depressors and I just grabbed another 60 of those. I guess that removes one major of the barriers to batch painting.
October 2023
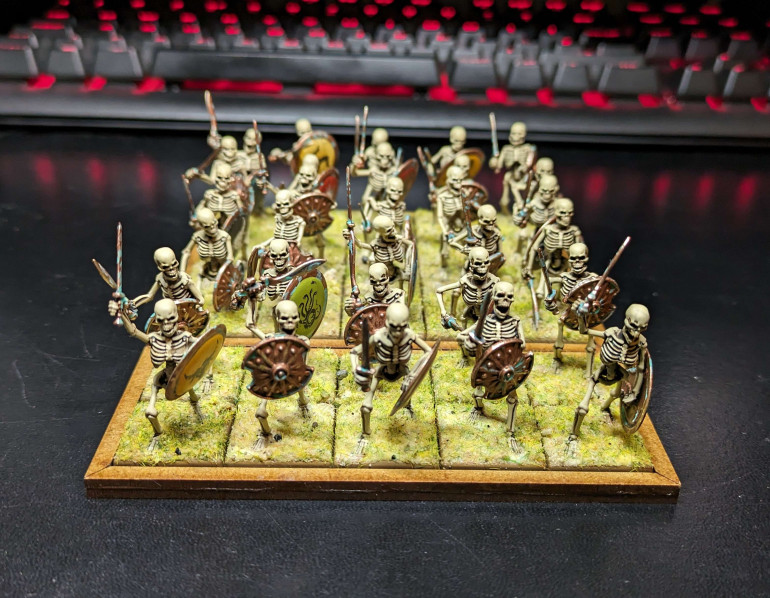
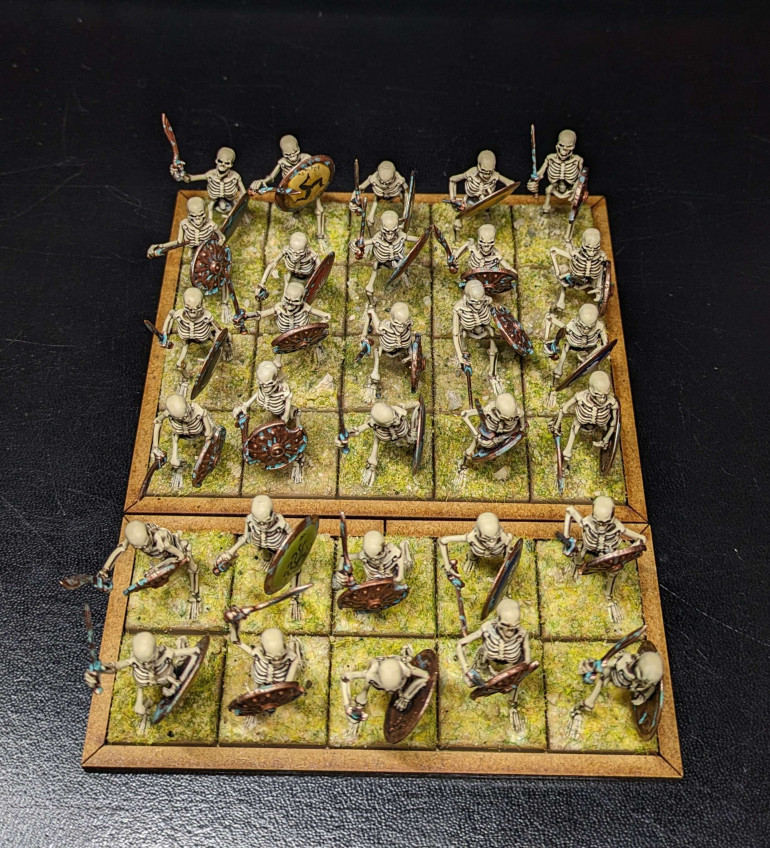
The first month of this grand project closes out with some progress. The Children of the Hydra’s Teeth are one third completed. All armed as sword and shield, the only thing I didn’t do to them was a final varnish coat because the weather has been awful. As they aren’t meant to hit the table any time soon though, this isn’t really a problem.
I would keep working on them but this morning I managed to get a ticket to Clash of Kings 2024. I guess I better start on a new army for that then…
The Set Up
I’ve always had a grand vision for big painted armies in my collection. Boxes of neatly painted, fully based little soldiers ready to go for anything. The reality is that I have armies, they just aren’t painted. Recently re-reading my copy of Armies & Legions & Hordes has inspired me to get my thumb out my arse and starting putting in more effort. Having painted up my some of my Children of the Hydra’s Teeth, I know I can do batch painting, I just need to actually do it instead of thinking about it. For this project an “army” is more than 50 miniatures.
The armies I know that I have in the stash, a mixture of part-painted and completely untouched, in no particular order is as follows:
- Early-Mid Imperial Romans
- Children of the Hydra’s Teeth
- Nac Mac Feegle army for Kings of War
- Vikings
- Turnip 28
- WW2 28mm British
- WW2 15mm Flames of War Americans and Germans
- ACW 6mm Confederates
- 40k/sci-fi Orks
- 40k/sci-fi Nids old plastics
- 40k/sci-fi Nids new plastics
- 10mm Ratmen
- 6mm Star Wars
- 10mm dwarves (3d printed)
- two other Kings of War armies
There may be other in there but these are the ones I remember for right now. Obviously that’s a lot of work, it represents over 2000 minis of various scales. This isn’t my only project either, there will be other things I want to work on and I’ll need stuff that takes me away from the monotony of batch painting. There will be other 3d printed projects. Plus a secret one I’m working on for next summer. I’m not putting a rough timeline on the project then but I want it to be something I am actively tackling.
As for how I’m prioritising them, one army has a chance of getting played with “soon” as there are some other people in my local area who are working on armies themselves and so first up will be The Tattie Bogles, my Turnip28 army. Unless I get a ticket for a tournament next year in which case I’ll need to get cracking on an army for that instead.
Is this the start of my transformation into a painting machine? Doubtful but hopefully it is the start of turning my collection into something closer to my dream and less a nightmarish hoard or grey and silver.


![How To Paint Moonstone’s Nanny | Goblin King Games [7 Days Early Access]](https://images.beastsofwar.com/2024/12/3CU-Gobin-King-Games-Moonstone-Shades-Nanny-coverimage-225-127.jpg)


