Aeon Trespass: Odyssey (ATO) by Lawnor
Cycle 2: Chimera Metastasios
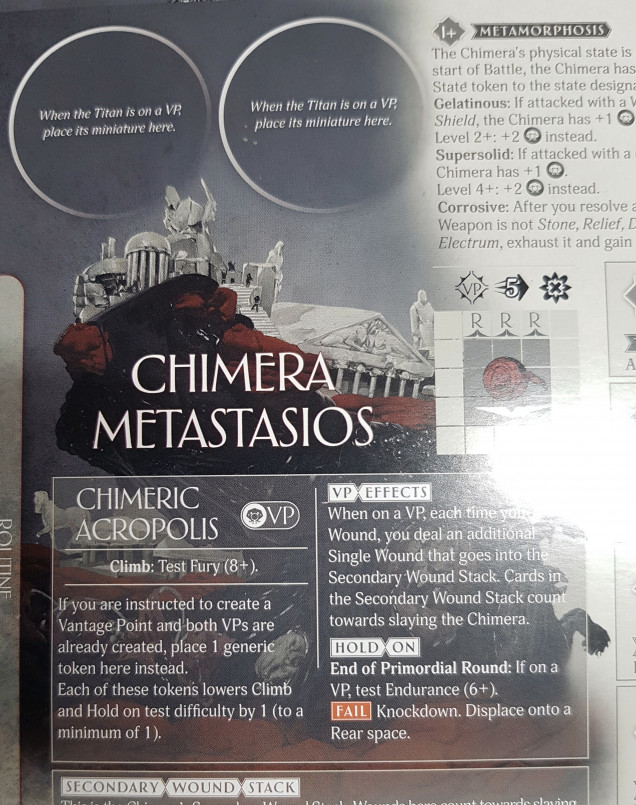
I hate this piece. It’s a mess. It’s hard to look and and hard to understand what’s going on. Plus, this is the only piece of art I can find for it. How helpful is this? They’ve hidden everything useful under all that text. It may as well not have a picture.
So let’s turn to the fluff to try and understand what on earth is going on here:
“Chimera Metastasios is what happens when you store too much volatile black ambrosia and monster parts in one place. The Chimera is a gelatinous slime that consumes all biological matter it comes in contact with. Hunger is all it knows, so it’s drawn to cities, cemeteries and battlefields.
For such an enormous creature, the Chimera is great at hiding: it uses ruins as a shell and camouflage and moves under the cover of night. A creeping city that can crush you in your sleep, what a tarrying though.
The Chimera has a variety of caustic attacks, some melee, some ranged, it can also use the abilities of the half-digested mythological creatures still trying to break free from the slime. The Chimera’s body dissolves metals as easily as flesh, rendering most weapons one use only and can harden to become solid matter.”
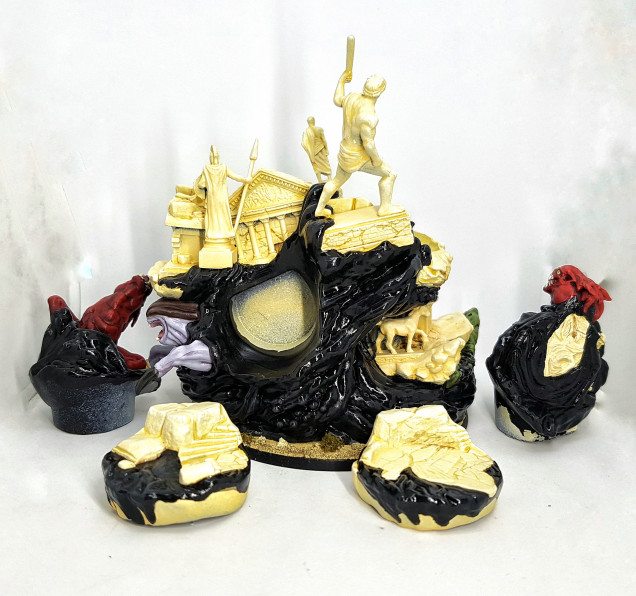
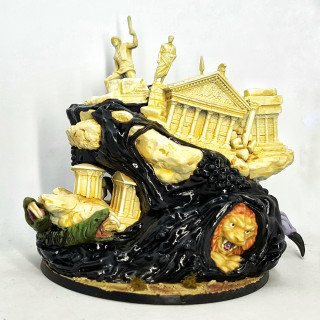
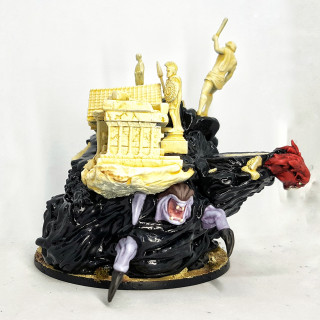
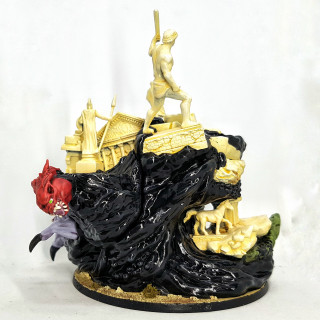
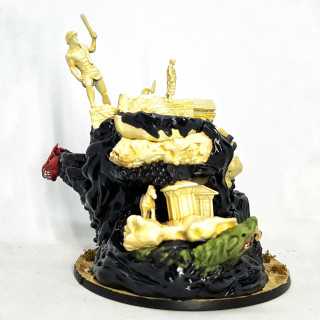
So basically it’s a huge gelatinous cube? I can work with that. It’s still overly busy. I really don’t like all those statues in different scales so close together. Even if the buildings have been dragged closer to each other it doesn’t work for me. Why is the lion the size of a building? Are there lions that big? Same for the snakes. What are the other two creatures? I’ve seen nothing to explain what they are or how they should look. They didn’t even bother to texture the base. It’s got smooth flat areas around it I had to texture myself. Not an issue, but they didn’t do this for other models.
I hate this piece. It has no focus and is just a mass of busyness and distractions.
Anyway, on with the paint scheme.
The stone was painted first using my standard basing method described earlier in this thread. I left the black ooze until last as it would have great coverage and also be harder to paint over. This lets me be a little messy with the other paint jobs. It also means that any black I paint will be on top of everything else, which reinforces the idea that the ooze is swallowing it.
Snakes
Base: 2 parts P3 Cryx Bane Base, 2 parts P3 Wurm Green, 1 part P3 Cryx Bane Highlight
Wash: P3 Ordic Olive mixed with P3 Armour Wash
Drybrush: Wurm Green
Drybrush: Wurn Green mixed with P3 Thrall Flesh
Lion
Base: 2 parts P3 Mouldy Ochre to 1 part P3 Thrall Flesh
Wash: P3 Rucksack Tan
Reclaim with base
Highlight: Base mixed with P3 Menoth White Highlight
Highlight 2: Add more Menoth White Highlight
Wash/glaze hair: P3 Skorne Red mixed with P3 Bloodstone. Do 2-3 coats as needed. Re-highlight and apply wash again. Maybe repeat until happy.
Bug Legged Thing Flesh???
Base: P3 Frostbite with just a dot of P3 Exile Blue and P3 Skorne Red. Just enough to tint the final colour so it’s still light blue but you can “feel” both the red and dark blue at the same time.
Wash: base with a little more Exile Blue and Skorne Red
Recess only Wash: Skorne Red mixed with Exile Blue
Highlight: reclaim with base
Highlight: Base with P3 Morrow White
Highlight: Push up to pure Morrow White on the sharpest edges only
Bug Legged Thing Carapace???
Base: P3 Battlefield Brown, P3 Umbral Umber and P3 Gun Corps Brown
Wash: P3 Thamar Black, P3 Brown Ink and p3 Red Ink
Highlight: Reclaim base
Highlight: Battlefield Brown and Hammerfall Khaki
Highlight: above with more Hammerfall Khaki
The other Monster Thing I Painted Red
Base: VGC 72.012 Scarlett Red
Wash: GW Carroburg Crimson
Drybrush: GW Evil Sunz Scarlet
Drybrush: GW Wild Rider Red
(I just wanted this done at this point. I should have been layering and gotten brighter tones)
Basecoat Eyes: P3 Menoth White Highlight
Pupil: P3 Necrotite Green
Mouths
Wash insides GW Carrouburg Crimson
Base Teeth: P3 Menoth White Base
The snakes had a thin line of GW Seraphim Sepia painted between their two fangs to separate them
Highlight: P3 Menoth White Highlight
Give the insides a coat of gloss varnish once all other varnishing is finished.
Black Ooze
Base: Revell Aqua Colour 36106 Tar Black
Drybrush: Tar Black with a little Revell Aqua Colour 36174 Gunship Grey
Drybrush: Above mix with a little Revell Aqua Colour 36176 Light Grey
Drybrush: above with more Light Grey
Glaze with GW Nuln Oil to smooth the transition out and add depth
Give it a coat of gloss varnish once all other varnishing is finished.
I should have pushed the highlights further with a drybrush of pure white. Most of the highlights got lost in the wash, leaving the gloss varnish to do all the heavy lifting. Had I cared for this model and wanted to sink the time in I could have tried for layering the highlights.
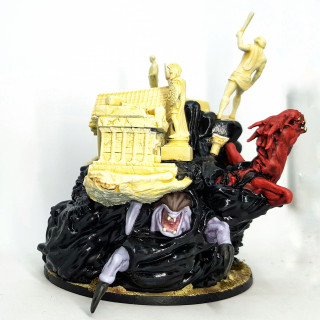
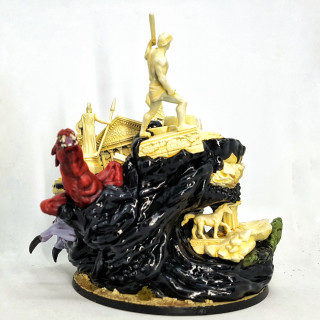
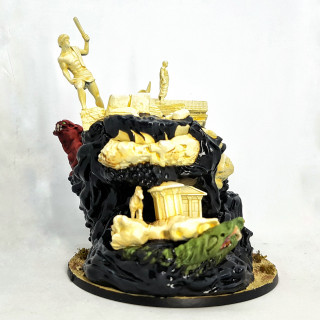
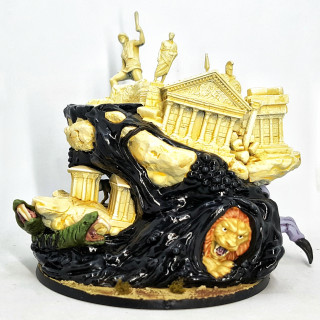
Here it is, with all the pure monster non-platform modules attached
Here he is with all the platform modules attached
That’s the last of Cycle 2 done. There are 7 models in wave 3, and an 8th model in the box, purely for painting. The end is in sight. I haven’t made a decision on how to paint the feathers on the Cycle 3 minis yet. perhaps I need to google for “Cthulu feather wings” and see what comes up?


![How To Paint Moonstone’s Nanny | Goblin King Games [7 Days Early Access]](https://images.beastsofwar.com/2024/12/3CU-Gobin-King-Games-Moonstone-Shades-Nanny-coverimage-225-127.jpg)




Leave a Reply