Kingdom Death:Monster - What have I gotten myself into??!!!
The Black Knight Pt 1
“They say if you take a lantern that never lit down the trail of corpses and past the whispering stars you will find an ancient figure atop a crest of determined faces. Treasured by a hidden cult of loyal squires, the figure will awaken for only the most honourable of challengers.”
The Black Knight has long been one of my absolute favourites of all the KDM sculpts/characters. He is rare~ish and when one does pop up for sale, he is usually priced horrendously………. Such is joy n pain of collecting KDM!! The Black Knight has become something of a white (or is that black) whale for me.
Anyways, recently a good friend became a client when he asked me to take on a commission to paint a Black Knight for him.
After some discussion and sharing of ideas, I was ready to go and had a few images in my head of how the finished piece would be. There will be a vignette scene built atop a blackened irish oak plinth but more of that later…………
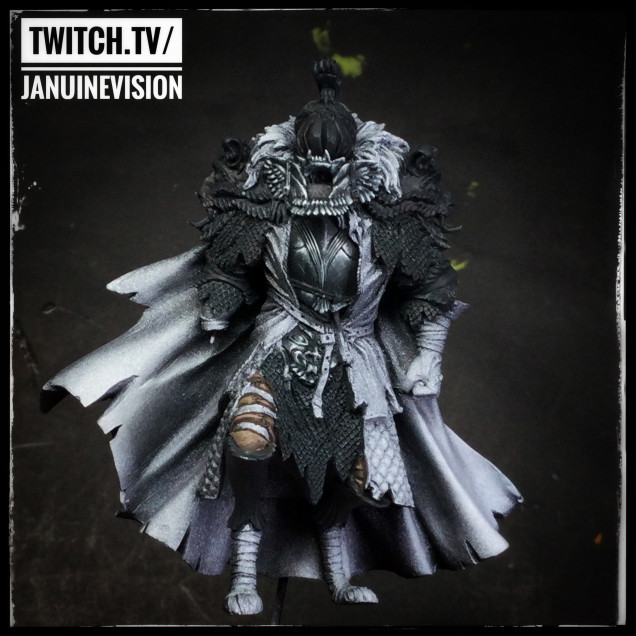
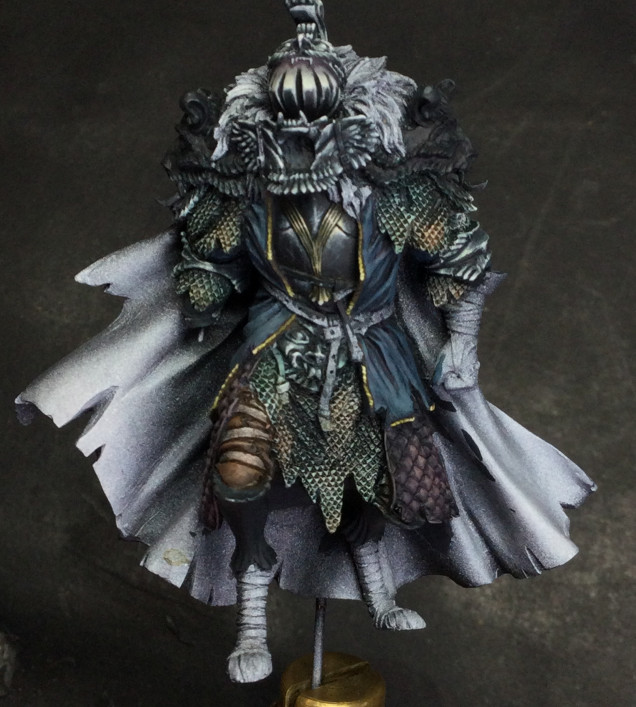
As usual with KDM, I was going the nmm route. NMM just suits the whole KDM aesthetic way more than TMM. I wanted to make his armour have a black feel to it, some age and wearing but still have some colour to it so it wouldnt get lost amongst the other details. I chose a slight blue tone to the workup by including some anthracite grey from AK Interactive 3rd gen paints in the mix.
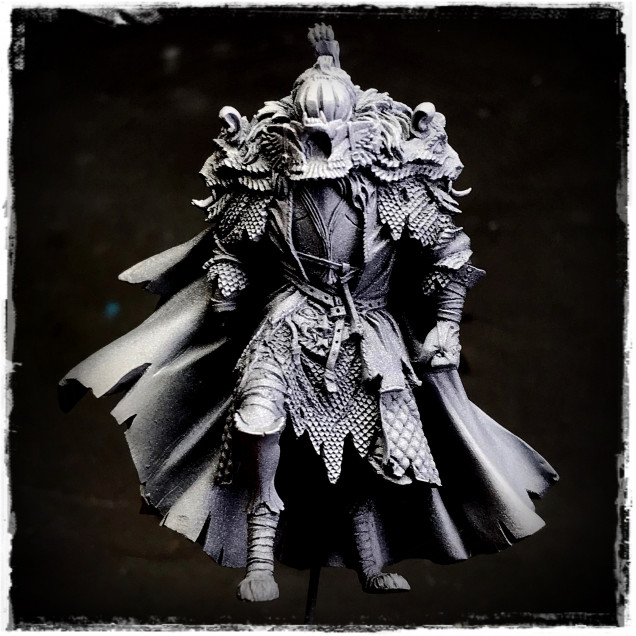
Starting form the centre, as i usually work from inside to out, I began with the plastron as the test panel for the non-met workup i wanted to go with. From there to the gorget and his…… groin face plate thingy
After a bit more of the armour plates, I decided to move to his scale mail. This was gonna be tricky………..
This Knight’s overall look is going to be quite dark as it is: armour, cloaks adn so on. And that is fine. However without the inclusion of some colour and some variety in the worksups for the differnt types of armour, the detail and character of the model will become so dark and without any clear definition.
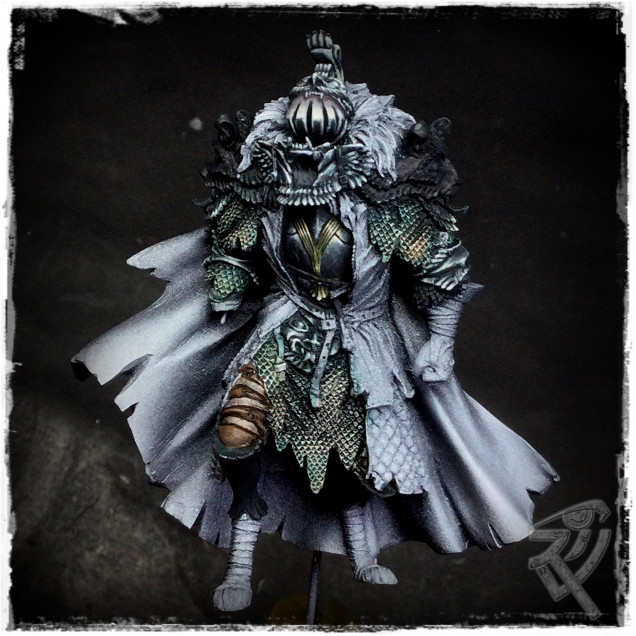
So I chose the scale mail to combat this. Scale mail is made up of looooooooooooooads wee individual small armour scales which are then fastened overlapping each other on a backing of cloth or leather. Soooooo they move about a lot and can reflect light in many different directions and with light….. comes colour!!
So firstly I painted the scale mail for value; lights and shadows and then in contrast to the more monochromatic plate armour, I added in some splashes of colour to seperate and define the scale mail vs the plate armour.
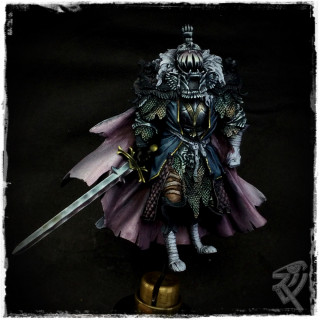
With the armour well under way, (I also worked the helmet with a high value reflective top to the visor) it was time to tackle some of the softer elements of his attire – the cloth. Under his volumenous great cloak, our knight is sporting a rather dandy quilted surcoat over the armour and what looks like a loose raggedy gambeson unusually worn over the surcoat.
I chose a cool blue for a the gambeson, to echo the blues in the armour and a deep purple for the surcoat which would tie in nicely with the future lining of the cloak and the core colours used in the fur.
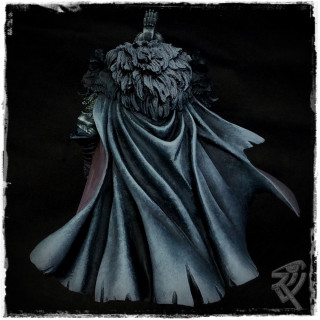
From here it was time to bring some work to the great cloak.
I decided I wanted a rough hefty texture to the other cloak and a smoother texture to the lining. Something some companies (cough cough GW) always seem to forget is that cloth, no matter what its manufacture or textile, has texture. heavy outer cloaks were usually made from heavy, weather beating materials such as wool.
So for the outer side of the cloak I wanted to bring in a rougher more dogged texture. This was done with a very simple stipple and smudge technique and again using cool blue greys for the colour.
The inner, or at least how much of it is done so far, was keep smoother by working the values up using a wet-in-wet technique.
Still a lot of do, not least building his base, buuuuuut we’re getting there and most importantly, I really really having fun with this one!!!!


![How To Paint Moonstone’s Nanny | Goblin King Games [7 Days Early Access]](https://images.beastsofwar.com/2024/12/3CU-Gobin-King-Games-Moonstone-Shades-Nanny-coverimage-225-127.jpg)




Leave a Reply