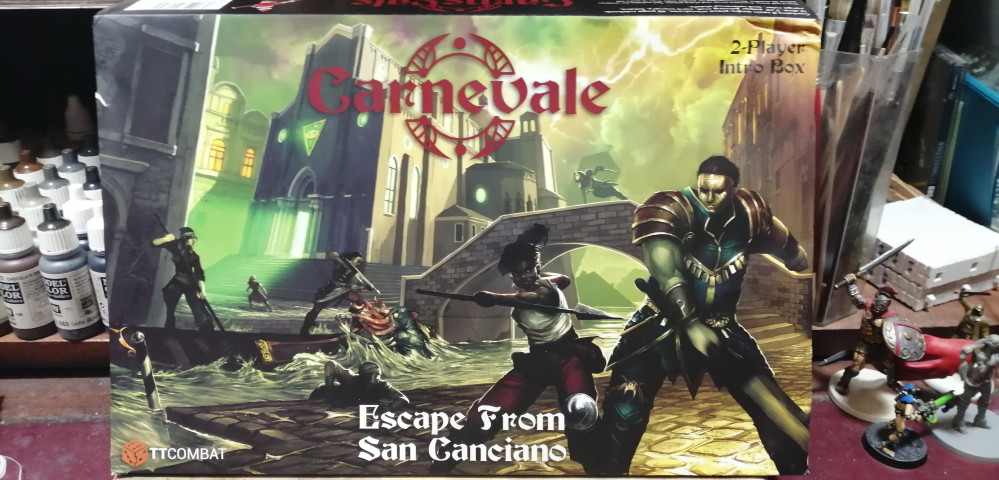
Carnevale – Escape from San Canciano
Recommendations: 180
About the Project
I decided I don't play enough games so splashed out on the Escape from San Canciano starter set for TTCombat's Carnevale game.
Related Game: Carnevale
Related Company: TTCombat
Related Genre: Fantasy
This Project is Completed
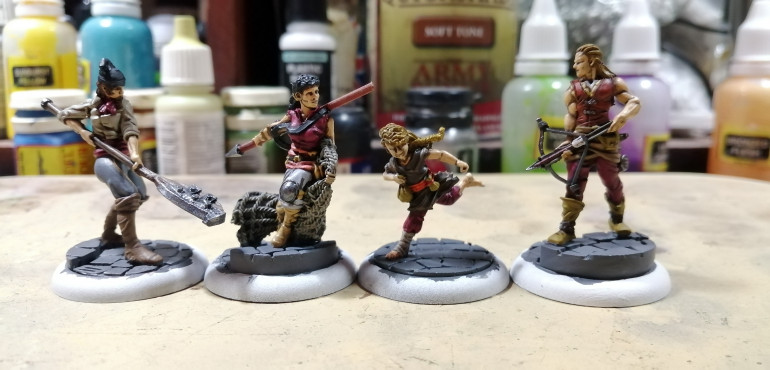
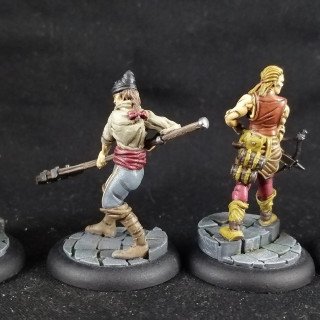
Painting the Guild - Pilferer
The lipped TTCombat bases provided are perfect for using base toppers. I contacted a friend with a 3D printer (https://www.beastsofwar.com/members/cookiesk8r/) who helpfully produced some amazing resin toppers for me to use on this project.
All paints are from the Vallejo Model Color range unless specified.
First steps are base coating all items and then adding a generous coat of Agrax Earthshade wash by Games Workshop to everything.
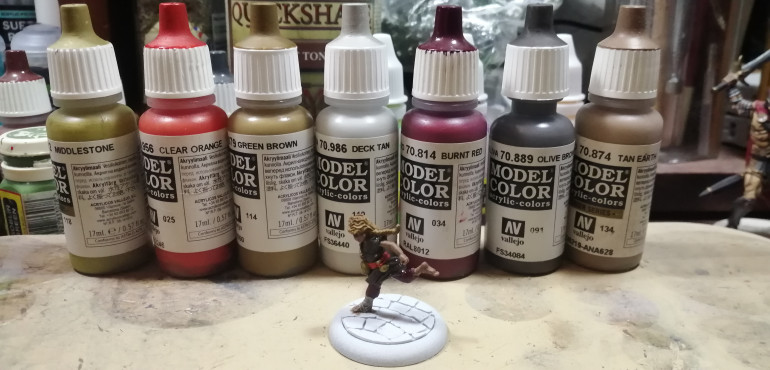
Hair – Green Brown
Tunic – Olive Brown
Trousers – Burnt Red
Belt – Clear Orange
Skin – Tan Earth
Pouches – Middlestone
Bandage (on foot) – Deck Tan
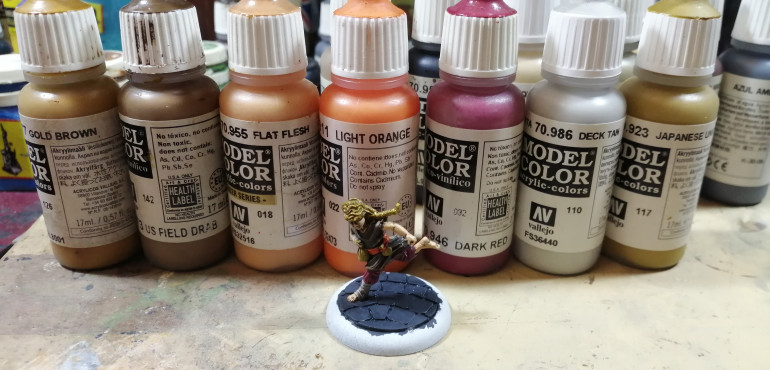
Hair – Gold Brown
Tunic – US Field Drab
Trousers – Dark Red
Belt – Light Orange
Skin – Flat Flesh
Pouches – Japanese Uniform
Bandage (on foot) – Deck Tan
A quick coat of Basalt Grey on the base and we will come back for finishing touches later.
Painting the Guild - Gondolier
The lipped TTCombat bases provided are perfect for using base toppers. I contacted a friend with a 3D printer (https://www.beastsofwar.com/members/cookiesk8r/) who helpfully produced some amazing resin toppers for me to use on this project.
All paints are from the Vallejo Model Color range unless specified.
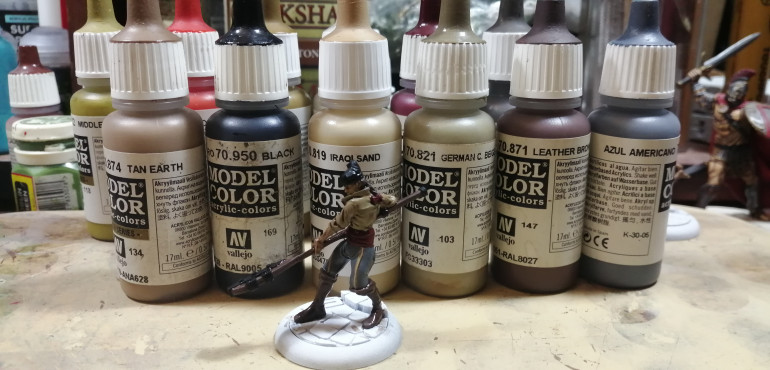
Cumberband, cravat, bow (in hair) – Burnt Red
Shirt – Garman Cam Beige
Hair, Boots, Paddle shaft – Leather Brown
Trousers – Intermediate Blue
Stripes on trousers – Iraqi Sand
Bandana, metal on paddle – Black
Skin – Tan Earth
After base coats were dry a generous coat of Agrax Earthshade was applied to everything.
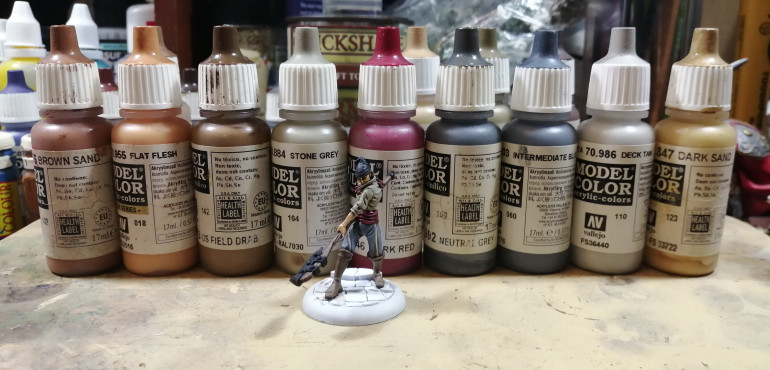
Shirt – Stone Grey
Hair – Brown Sand
Boots – US Field Drab
Trousers – Intermediate Blue
Bandana – Neutral Grey
Cumberband, cravat, bow – Dark Red
Paddle shaft – Deck Tan
Stripes on trousers – Dark Sand
Skin – Flat flesh
Painting the Guild - Arbalest
The lipped TTCombat bases provided are perfect for using base toppers. I contacted a friend with a 3D printer (https://www.beastsofwar.com/members/cookiesk8r/) who helpfully produced some amazing resin toppers for me to use on this project.
All paints are from the Vallejo Model Color range unless specified.
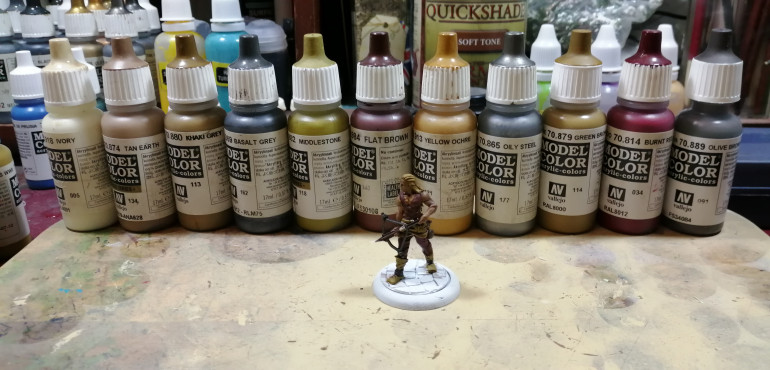
Hair – Green Brown
Waistcoat, Quarrel Shaft – Flat Brown
Undershirt – Yellow Ochre
Pouches, Belt straps, Boots – Middlestone
Barrels, Crossbow stock, Straps on ankles, Knife handle – Olive Brown
Waist wrap – Khaki Grey
Trousers – Burnt Red
Crossbow wire – Basalt Grey
Crossbow arms, Barrel rings, Clips on waistcoat – Oily Steel
Quarrel fletching – Ivory
Skin – Tan Earth
After base coats were dry a generous coat of Agrax Earthshade was applied to everything.
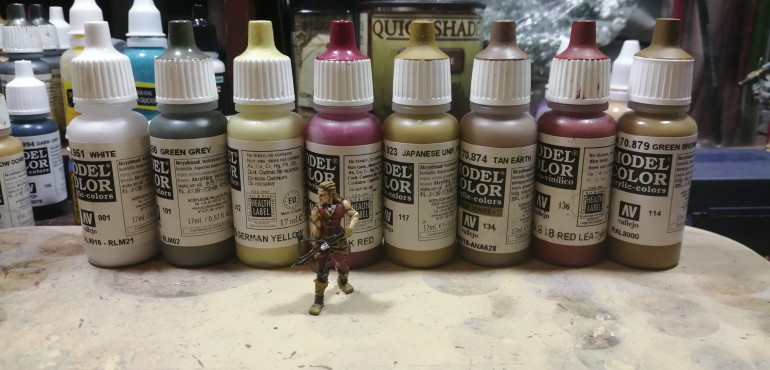
Hair – Golden Brown
Waistcoat – Red Leather
Undershirt – German Yellow
Pouches, Belt straps, Boots – Japanese Uniform
Barrels, Crossbow stock, Straps on ankles, Knife handle – Green Grey
Waist wrap – Tan Earth
Trousers – Dark Red
Quarrel fletching, Vest (at neckline) – White
Skin – Flat Flesh
Painting the Guild - Fisherman
The lipped TTCombat bases provided are perfect for using base toppers. I contacted a friend with a 3D printer (https://www.beastsofwar.com/members/cookiesk8r/) who helpfully produced some amazing resin toppers for me to use on this project.
All paints are from the Vallejo Model Color range unless specified.
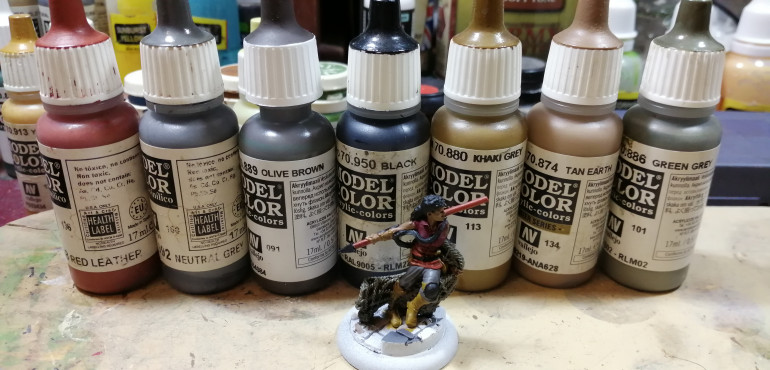
Hair, Strap over shoulder, Belt, Spear point, Bracer, Knee armour – Black
Shirt – Burnt Red
Cumberband, Spear handle – Red Leather
Net – Olive Brown base colour then overpaint the ropes only with Green Grey
Trousers – Neutral Grey
Boots, Satchel, Bracer straps – Khaki Grey
Skin – Tan Earth
After base coats were dry a generous coat of Agrax Earthshade was applied to everything.
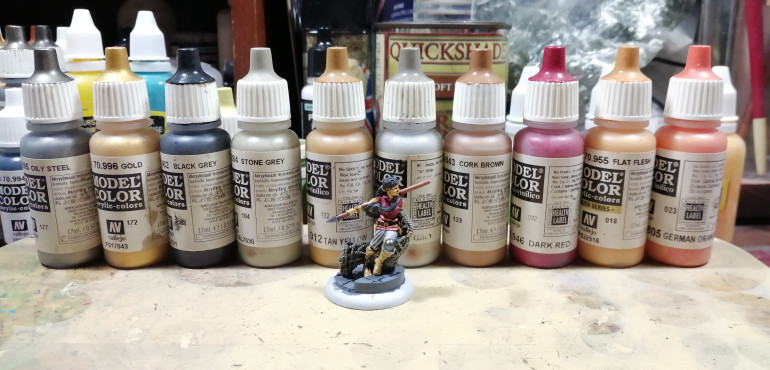
Spearhead, Knee armour, Bracer, Satchel rings – Oily Steel
Hair band – Gold
Hair, Shoulder strap, Belt – Black Grey
Net – Stone Grey
Trousers – Sky Grey
Boots, Satchel – Tan Yellow
Spear shaft – Cork Brown
Shirt – Dark Red
Skin – Flat flesh
Cumberband – German Orange
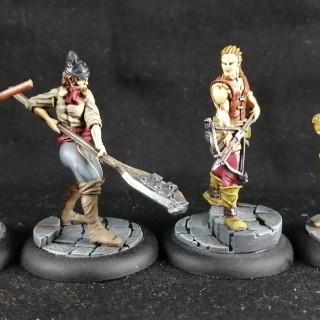
This final model completes the Guild models in the San Canciano set, apart from basing that is.
As a final touch I went back in and added some Light Flesh to the flesh tones on the faces and arms.
All of the resin base toppers were given a coat of Basalt Grey. When I have finished the Rashaar models I will put the finishing touches to the bases together for efficiency.
Painting the Rashaar - Officiant of Dagon and Cult Enforcer
With the Guild models finished we move on to the four Rashaar models in the Escaper from San Canciano set. The Cult Enforcer and Officiant of Dagon models are wearing very similar types of armour and so the painting processes for both these models will be very similar.
The Hydrid should be straightforward although it’s skin will need a different treatment due to it’s part human-part fish monster nature.
The Lesser Rhyll will need a completely different approach but we’ll get to that later.
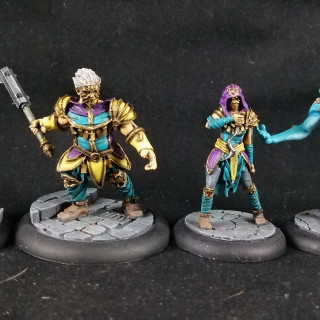
Officiant of Dagon
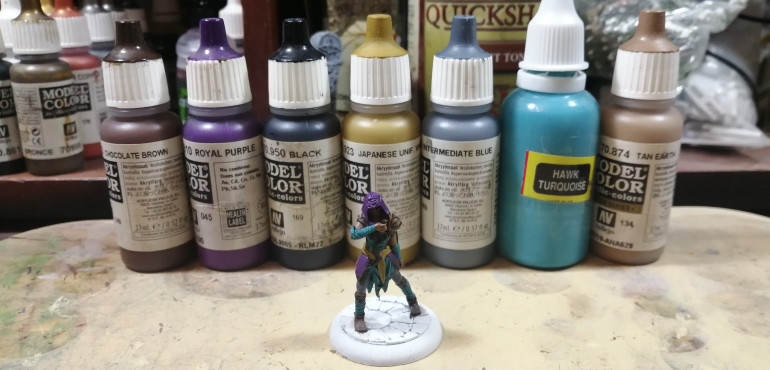
Initial base coats were applied to all the following areas using the specified Vallejo Model Color (or in one case Games Workshop) paint.
Robe – Hawk Turquoise (Old GW paint)
Trousers – Intermediate Blue
Hood – Royal Purple
Belt, Shoulder wrap – Japanese Uniform
Knife blades, metal decoration on front and back waist straps – Black
Boots, Kneepads, Mask, Epaulette ridges, Knife handles, Raised ridges on robes, Pouch on waist – Chocolate Brown
Skin – Tan Earth
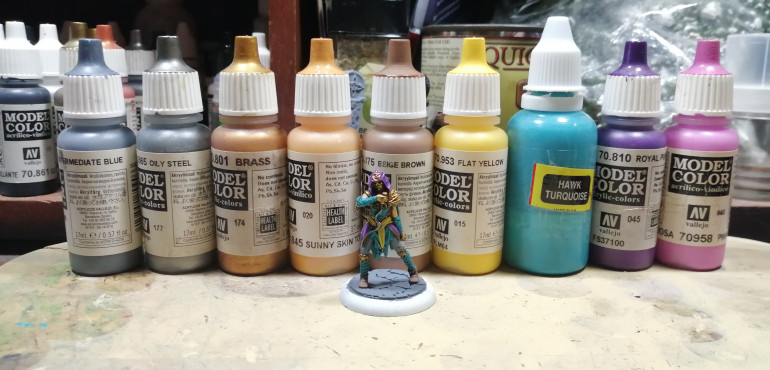
As with the guild models a liberal coat of Agrax Earthshade was applied to everything prior to the highlighting step.
The following colours were reapplied over our washed model covering about 70-80% of the original area leaving shadows in recesses and at the edge of areas.
Robe – Hawk Turquoise (Old GW paint)
Trousers – Intermediate Blue
Hood – Royal Purple 50%/Pink 50% (I don’t often mix colours but my lack of purple and violet tones in my paint collection necessitated it here.)
Belt, Shoulder wrap – Flat Yellow
Knife blades, metal decoration on front and back waist straps – Oily Steel
Boots, Pouch on Waist – Beige Brown
Kneepads, Mask, Epaulette ridges, Knife handles, Raised ridges on robes – Brass
Skin – Sunny Skin Tone
As with the guild bases had a generous coat of Basalt Grey and it’s done,
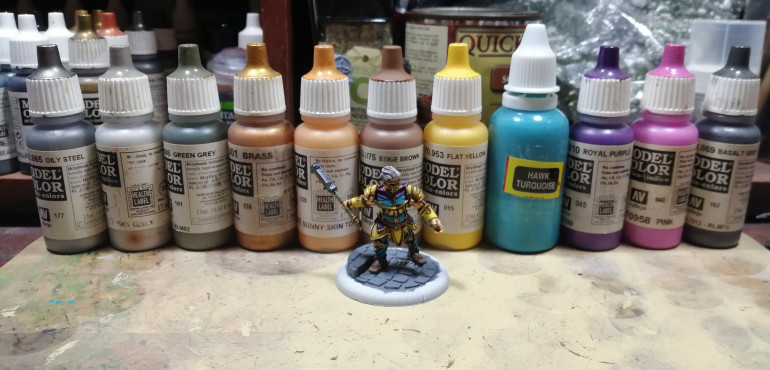
Cult Enforcer
As I said above this model has many similar to the officiant above, almost a uniform if you like, so I’ll simply summarize the differences here.
Mace handle – Base: Green Grey – Highlight post shading: Green Grey again
Hair – Base: Neutral Grey – Highlight: Sky Grey
Painting the Rashaar - Hybrid
Initial base coats were applied to all the following areas using the specified Vallejo Model Color (or in one case Games Workshop) paint.
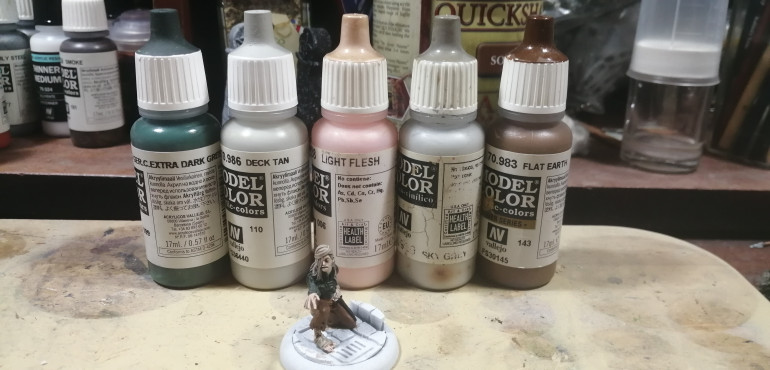
Shirt – German Camo Extra Dark Green
Trousers, Lacing tie on shirt neck – Flat Earth
Bandages – Deck Tan
Hair – Sky Grey
Tentacles (on head) – Hawk Turqoise (old GW paint)
Knife – Black
Skin – Light Flesh
Eye – Pink
As with the guild models a liberal coat of Agrax Earthshade was applied to everything prior to the highlighting step.
After the Agrax dried we went back over the original colors highlighting raised areas and edges as described below.
Shirt – German Uniform
Trousers – English Uniform
Lacing on shirt neck – Green Brown
Bandages – Deck Tan
Hair – Sky Grey
Knife blade – Oily Steel
Knife Handle – Bronze
Eye – Flat Yellow
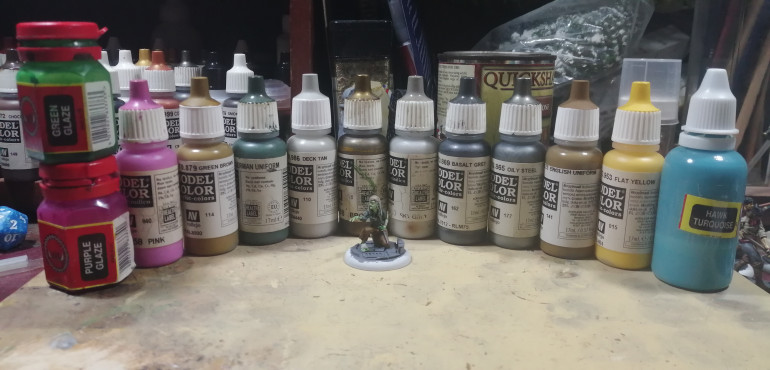
For the skin and tentacles I did not use a highlight step as such but instead tried some of my old GW glazes to tint the base colours.
Skin – Games Workshop Green Glaze
Tentacles on head – Games Workshop Purple Glaze
The green glaze worked really well but the purple didn’t really have the impact I’d have hoped for but as I move onto the last model I can refine the technique.
A coat of Basalt Grey again readied the base for the next step.
Painting the Rashaar - Lesser Rhyll
For this model I wanted to copy many aspects of the paint scheme on the TTCombat webstore.
My hobby buddy, David, suggested I take a very different approach to painting the model as my usual ‘base coat and wash to buggery’ method was likely to mute the colours irretrievably.
With this in mind, and with the experience learned from painting the Hybrid, I decided to Paint my target mid tones down initially then use pin-washing and glazing to add precise shadows and define areas of the mini.
The body and limbs
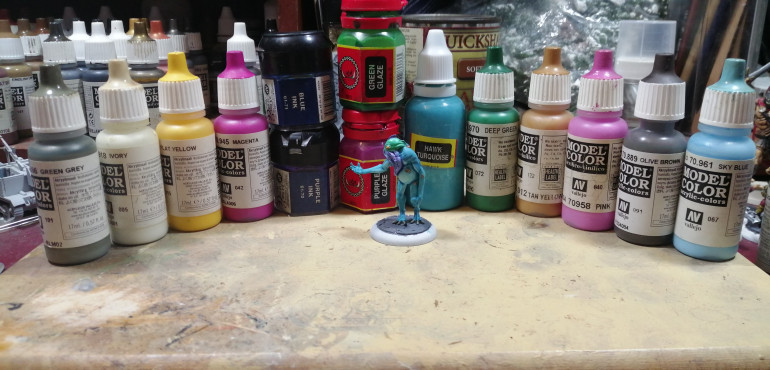
The first step was to paint the entire model except for the head and tentacles around the mouth in Games Workshop(GW) Hawk Turquoise.
I then wanted to create paler patches of skin around the belly, inside the arms and inner thighs to simulate a reptilian look. To this end I slowly added Vallejo Model Color(VMC) Ivory to my original GW Hawk Turquoise and then painted these areas in two or three steps using very thin paint to get a blended effect without going full wet blend madness on it.
To create highlights on the darker areas of skin in the original turquoise color that would look different to the ‘paler’ skin, I mixed the GW Hawk Turquoise with VMC Sky Blue and applied this to the upper areas of the model such as shoulders, tops of the forearms etc, in a standard highlighting pattern.
I then used a thinned GW Blue Ink to paint defined shadow lines into muscle creases and between arms and body etc in a pin-washing effect.
The head
The head was painted using inks and glazes directly over a white undercoat.
The head was painted with two generous coats of GW Green Glaze.
Shading was added to the ridging on the head with a very thin mix of VMC Deep Green and Vallejo Thinner Medium.
After this dried I felt the head still looked a little ‘flat’ so I painted a spot highlight right on the top of the scalp alongside the purple crest using VMC Ivory with just a touch of VMC Deep Green in it.
The tentacles around the mouth, crest atop the head and ridges down the models back were washed 2-3 times with GW Purple Glaze.
To deepen the shadows and define the purple/blue transitions on the model I used GW Purple Ink thinned with water and painted into recesses using, again, a pin-washing technique.
Final details
The barnacles crusting the creature were painted VMC Olive brown and then the very tops were touched with a highlight of VMC Tan Yellow.
The claws on the feet were painted VMC Olive Brown and highlighted with VMC Green Grey.
The eyes were painted VMC Magenta then VMC Flat Yellow over this.
The suckers on the tentacles were dotted with a VMC Pink highlight.
The base received the prerequisite coat of VMC Basalt Grey and we are finished.
The next step was just to finish the resin cobblestone base toppers for all 8 miniatures.
Basing and final pictures
The final basing steps for these miniatures was extremely simple.
The cobblestone had already been painted evenly with Vallejo Model Color (VMC) Basalt Grey so any drains and gratings were given an even covering of VMC Oily Steel,
Games Workshop (GW) Nuln Oil wash was applied liberally to the the whole base topper.
When this dried I applied small spots of transparent colour to create areas of colour variation representing moss and dirt on the cobbles. I thinned GW Green Glaze and Brown Ink with water for this purpose.
When these were dry I applied a drybrush of VMC London Grey to the cobblestones to bring out the stone texture and cobble edges.
Finally a nice even coat of VMC Black around the base rims and the models are painted.
A couple of light coats of GW Munitorum Varnish and they are ready for play.
In my next entry I’ll cover preparing the cardboard buildings included in the Escape from San Canciano starter set to get them ready for play.
The buildings
We are on the home stretch now and almost ready to get the game to the table.
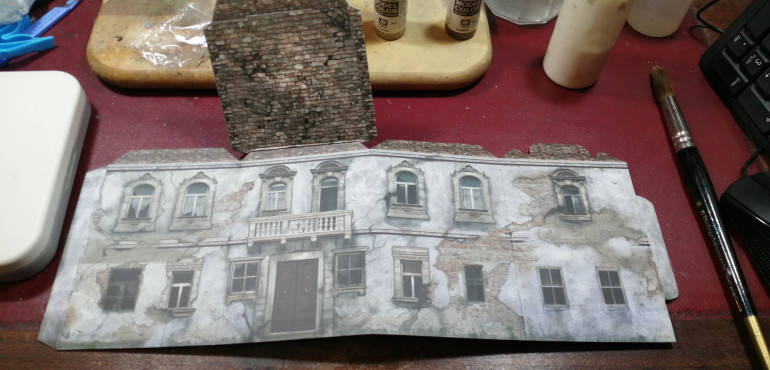
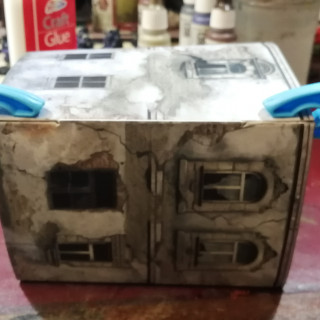
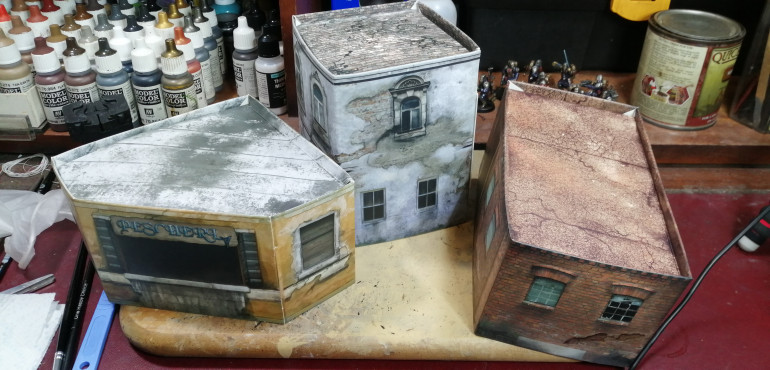
The last job is to assemble the 3 cardboard buildings that come in the starter set.
There aren’t any instructions in the box so I’m going to give a brief step by step here as by the third building I realised that things could go a lot more smoothly if things were done in a particular way.
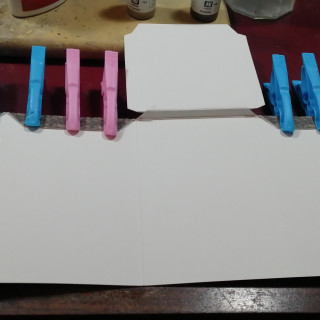
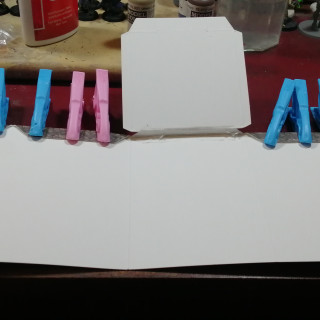
If like me you are using a PVA glue with a prolonged drying time clothes pegs will come in very handy.
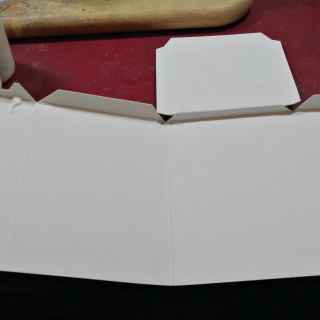
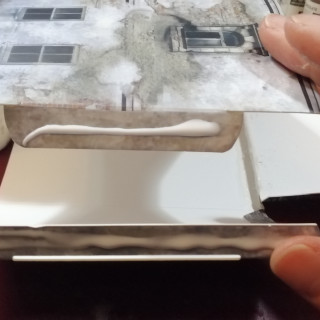
Start by creasing all of the fold lines in the flattened building. Fold all of the flaps down and pressing them against a desk or table run the back of a finger nail or something similarly smooth but hard along the crease to make the card stay folded when you release it.
Repeat this with all of the corners between the walls and the fold between the roof and its attached wall.
If you don’t do this the card can crease along lines you don’t want later as start folding the building up.
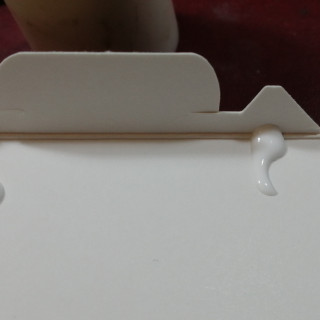
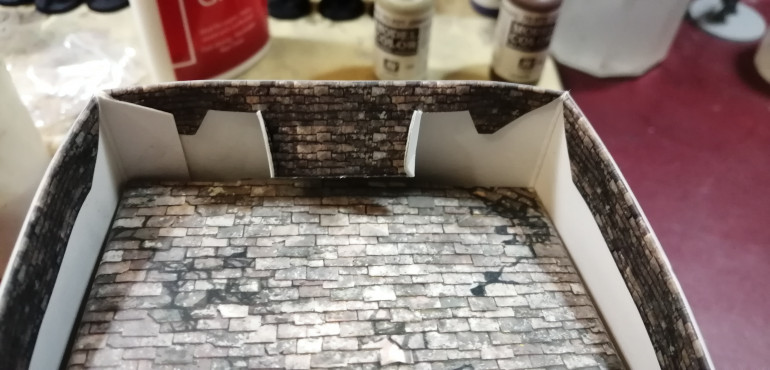
Each building has one or more of these special tabs that have notches in them. We need to glue then of the tab down to the wall it is attached to but leave the middle section without glue.
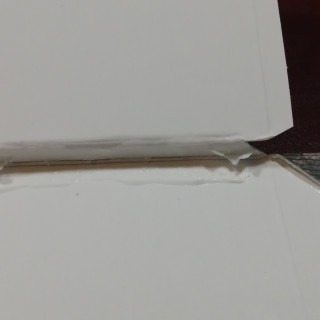
The remaining small flaps should be glued down along their whole length and stuck down to their attached wall.
The roof section has a small ‘bridging’ piece that connects it to the walls of the building, this makes the roof drop down slightly inside the walls giving a low parapet around the roof edge.
This small section needs gluing down to the wall but make sure the roof section is NOT glued down and is free to move.
This bit is very fiddly to peg easily so super glue or some other rapid drying adhesive may work better for this piece.
We are now ready to fold the building walls together and make the main shape of the building.
You will a short tab and a long tab with a slot cut between it and its attached wall.
Apply glue to both tabs and push the short tab into the slot next to the long tab.
When done correctly both tabs will be inside the building.
Wipe away any surplus PVA on trhe outside corner of the building with a fingertip.
This last step is the most fiddly of the process and involves securing the roof in place.
Remember that weird notched flap at the beginning, well that is what will secure the roof.
When you fold the roof into position at the top of the building there should be a slot in the edge of the roof next to this notched flap.
The slot is narrower than the flap’s middle section but you should see it flap is precut at the ends so it can be folded inwards by about 10mm at each end.
After folding these ends in it should fit neatly into the slot at the edge of the roof.
After pushing it through simply fold the edges back and the flap will not pull back trough the slot. If you like you can now add a bit of glue to the flap to make sure it is secure and stop it from pulling back through.
With that we are done and are ready to play.


![How To Paint Moonstone’s Nanny | Goblin King Games [7 Days Early Access]](https://images.beastsofwar.com/2024/12/3CU-Gobin-King-Games-Moonstone-Shades-Nanny-coverimage-225-127.jpg)


