
Minions of the Von Carsteins.
The skeletal Horde
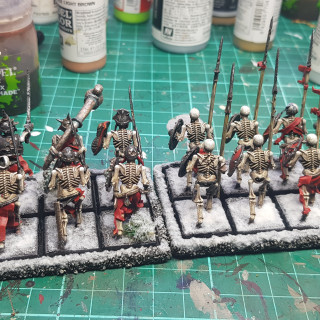
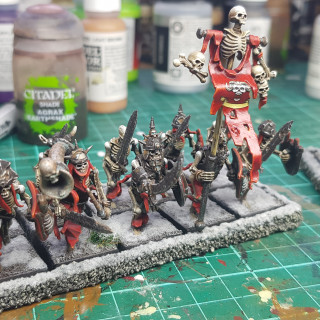
I thought i’d start with a core unit. I had two boxes of skelebobs. One from the Skeleton Horde ‘start collecting’ box and an additional ‘death rattle’ box.
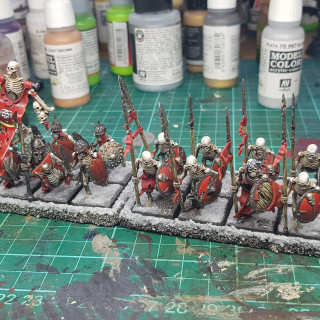
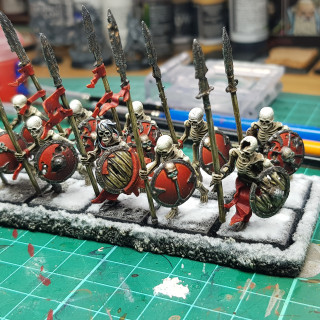
I couldn’t decide if I wanted them to be a unit of spears or swordsmen, so I decided to do 10 of both.
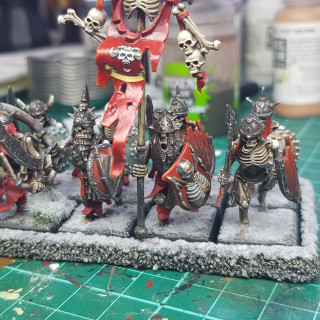
This meant that I could align my aesthetic preferences by taking all the none-armored components to make the spearmen and the armored components to make the swords men.
These skeletons were then superseded by the new skeletons around the time I was painting them, so I ebay’d a couple of extra boxes to later fill the units out.
They are based up with some Greenstuff world square bases as they should be.
The emblem on the swordsmen banner is also a GSW addition.
It’s quite noticeable in these photos that I didn’t dust the static snow/grass ‘ off enough.
The banner is also annoyingly shiny/satin-finished because I painted the matt varnish on with an old brush. This should be fixable by spraying the matt varnish through an airbrush later on.
I also need to add a word to the banner to finish the emblem.
I’ll probably attend to this when I finish the regiments.
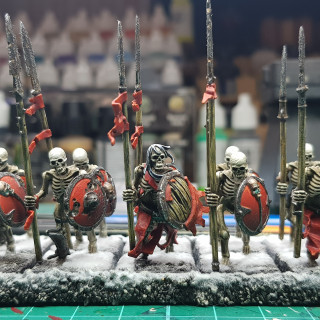
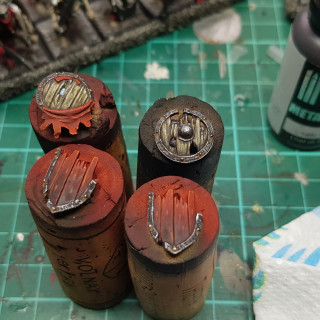
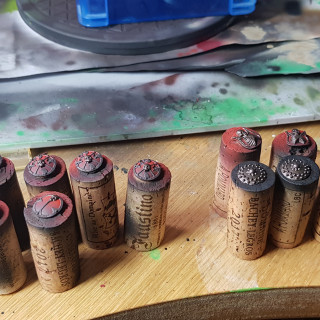
I was particularly happy with the shields so here are a few up-close snaps whilst they were still on their paint handles. They are also quite useful in showing the paint scheme with the exception of the bone and brass.
The paint scheme is as follows:
Bone:
Base coat: Vallejo German C. Black Brown
Highlight: P3 Beast hide – 45-degree angle from above with an airbrush.
Highlight: P3 Jack Bone -from directly above with an airbrush.
Wash: GW Agrax earth shade
Dry brush: P3 Jack Bone – all over
Dry brush: P3 Menoth White Highlight – Biased to the upper surfaces
Dry brush: Vallejo white – top of the skull and the shoulders.
Cloth and shields:
Base Coat: Vallejo Black and GW Khorne Red -Airbrush for smoothness.
First highlight/layer: GW Khorne Red- Airbrush from above and/or build upon the raised areas.
Highlight: GW Mephiston Red- highlight/ develop on the previous step.
Edge Highlight : GW EvilSunz scarlet
Edge Highlight: Trollslayer orange. Picking out Points etc.
Exposed Timber:
Base coat: Vallejo German C. Black Brown
Layer: Vallejo -Green Brown
Layer: Vallejo- Green Ochre
Highlight: Vallejo – Silver Grey
Final Touch: GW Agrax Earthshade – Dab this in-between individual slats of the shields.
The shields were easy because the grain was modeled, but the spears were a little more challenging.
I started with dabbing a few knots along each spear and then built the grain and highlights waving around them.
Rusted/dirty metal:
Base Coat: Vallejo Metal Colour- Gun Metal Grey
Dirty/Rusty effect: GW Technical Paint- Typhus Corrosion
Re-establish the metal: Vallejo Metal Colour- Gun Metal Grey- Make scratchy brush strokes across the main bodies/ central areas of larger armour panels. I scratched inwards from the outer rim/edges of the shields and blades. leave as much of the dirty layer as looks right and leave the grittiest deposits un-touched.
Edge Highlight: Vallejo Metal Colour- Aluminium. This is done lightly allowing for a bit of a ‘dry brush effect’ where it runs over the gritty texture. pick out all the bolts/rivets/ spikes etc.
Extra rust: Vallejo Orange Brown- water this down and dab it under the bolts where it looks like rusty water as spread the corrosion. Also, dab this in any corroded holes. ( Note. It might be worth scratching a few edge highlights back on from the last step….or even do this before the edge highlighting) .
Bronze/ brass:
Base Coat: Green Stuff World -Dark Bronze
Layer: Green Stuff World -Gladius Bronze – Stipple this on, but cover most of the base coat.
Warning: I find these paints quite thick and quick drying. They are perfect for this stippling action, but the drying time is something to be aware of as it becomes a race against ‘clagging’. Add a bit of water for good flow if applying normal brush strokes, the pigment content is pretty good so it shouldn’t thin out too much.
Edge Highlight: Green Stuff World – Tin Metal Grey
Patina: GW Technical Nihilakh oxide- Be frugal! I often find this too intense,











Leave a Reply