


![How To Paint Moonstone’s Nanny | Goblin King Games [7 Days Early Access]](https://images.beastsofwar.com/2024/12/3CU-Gobin-King-Games-Moonstone-Shades-Nanny-coverimage-225-127.jpg)


Spring Cleaning Military Orders


Joan of Ark 2.0 - Part Two.
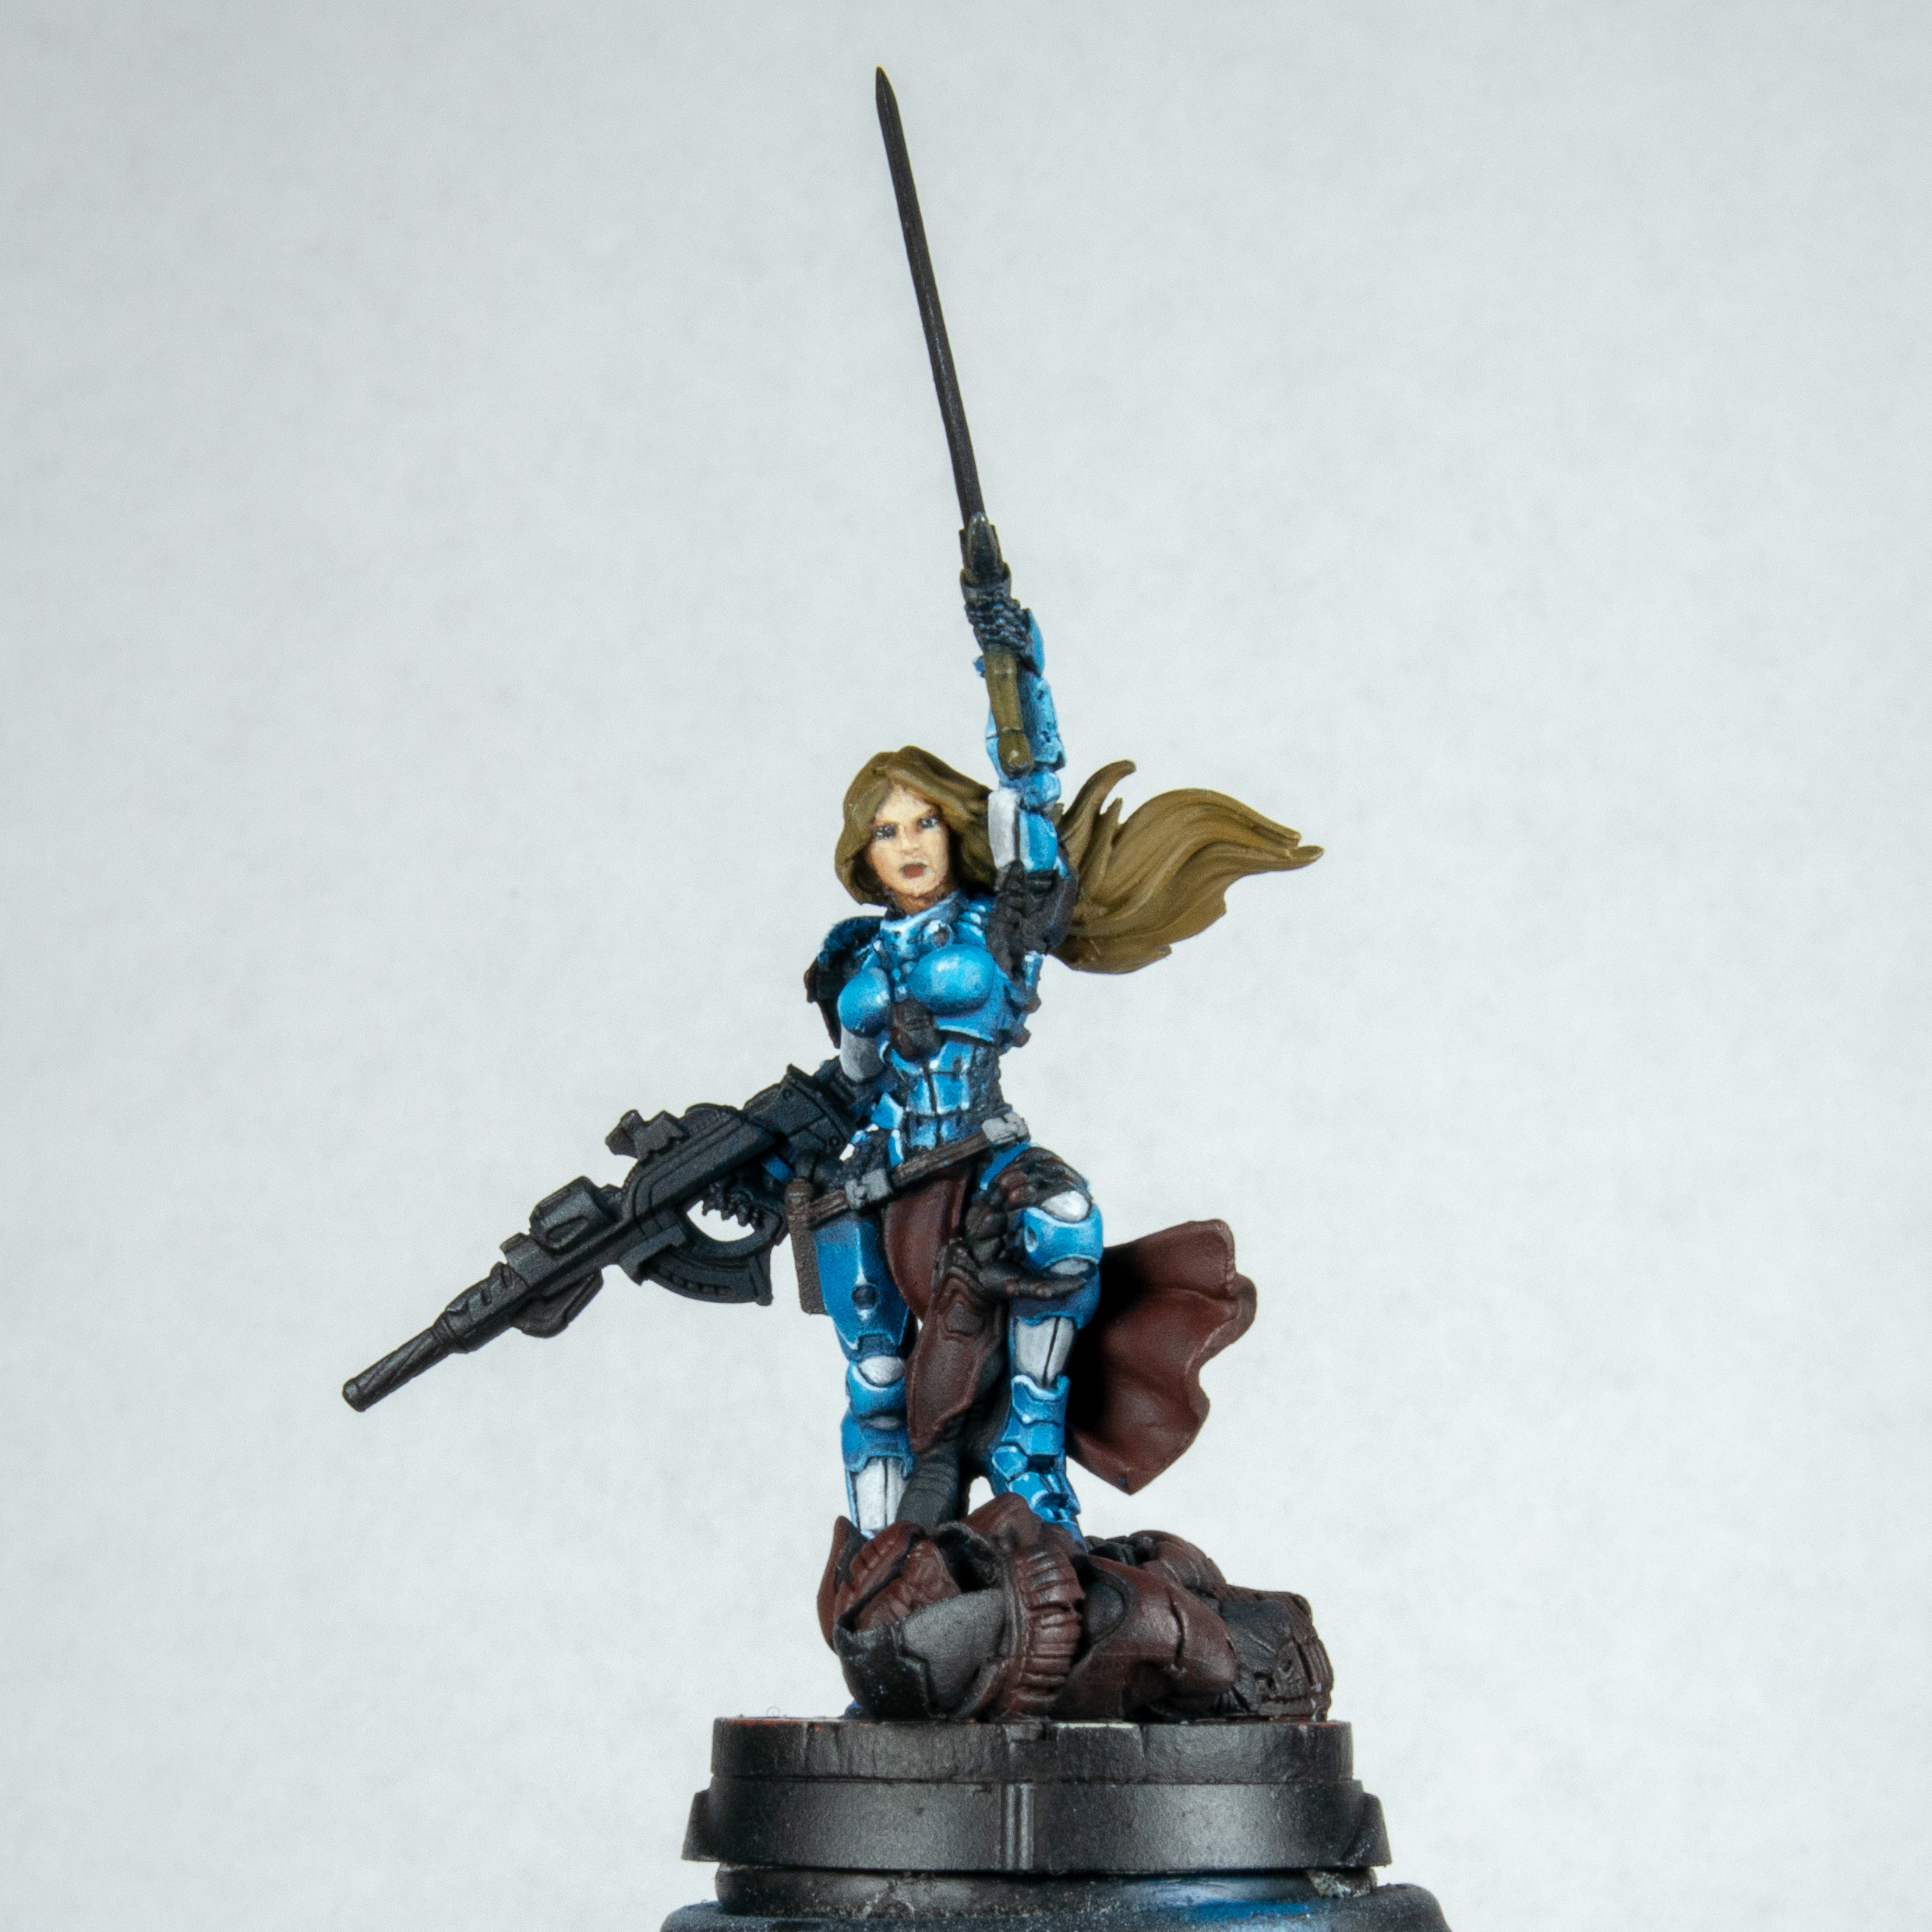 Next up is the face. I always want to do it at this stage, sometimes I leave it right to the end. But I decided to face my fear, pun intended. I will be here forever if I do a step by step on this. I took sunny skin tone as my base and slowly worked in glazes, lots of glazes of warm brown and dull red. I tried not to be hard with it like in most of my faces they always end up looking like men. This looks quite flat from this angle but you have to remember if you have two lights pointing at either side of your face there is not much shadows that are cast. From any other angle you can see more of the work. Sadly due to this point of view you will need to wait to the end. Faces in general are still very much a work in progress for me but I seem to have improved over the years. This is something that I may need to do some focused practice on. Clearly just watching Youtube has not worked need to do about 40 heads in a row. I also think there is one mould line on the model. That happens to be running to the right on the nose I cant be certain, that or I just painted by first broken nose.
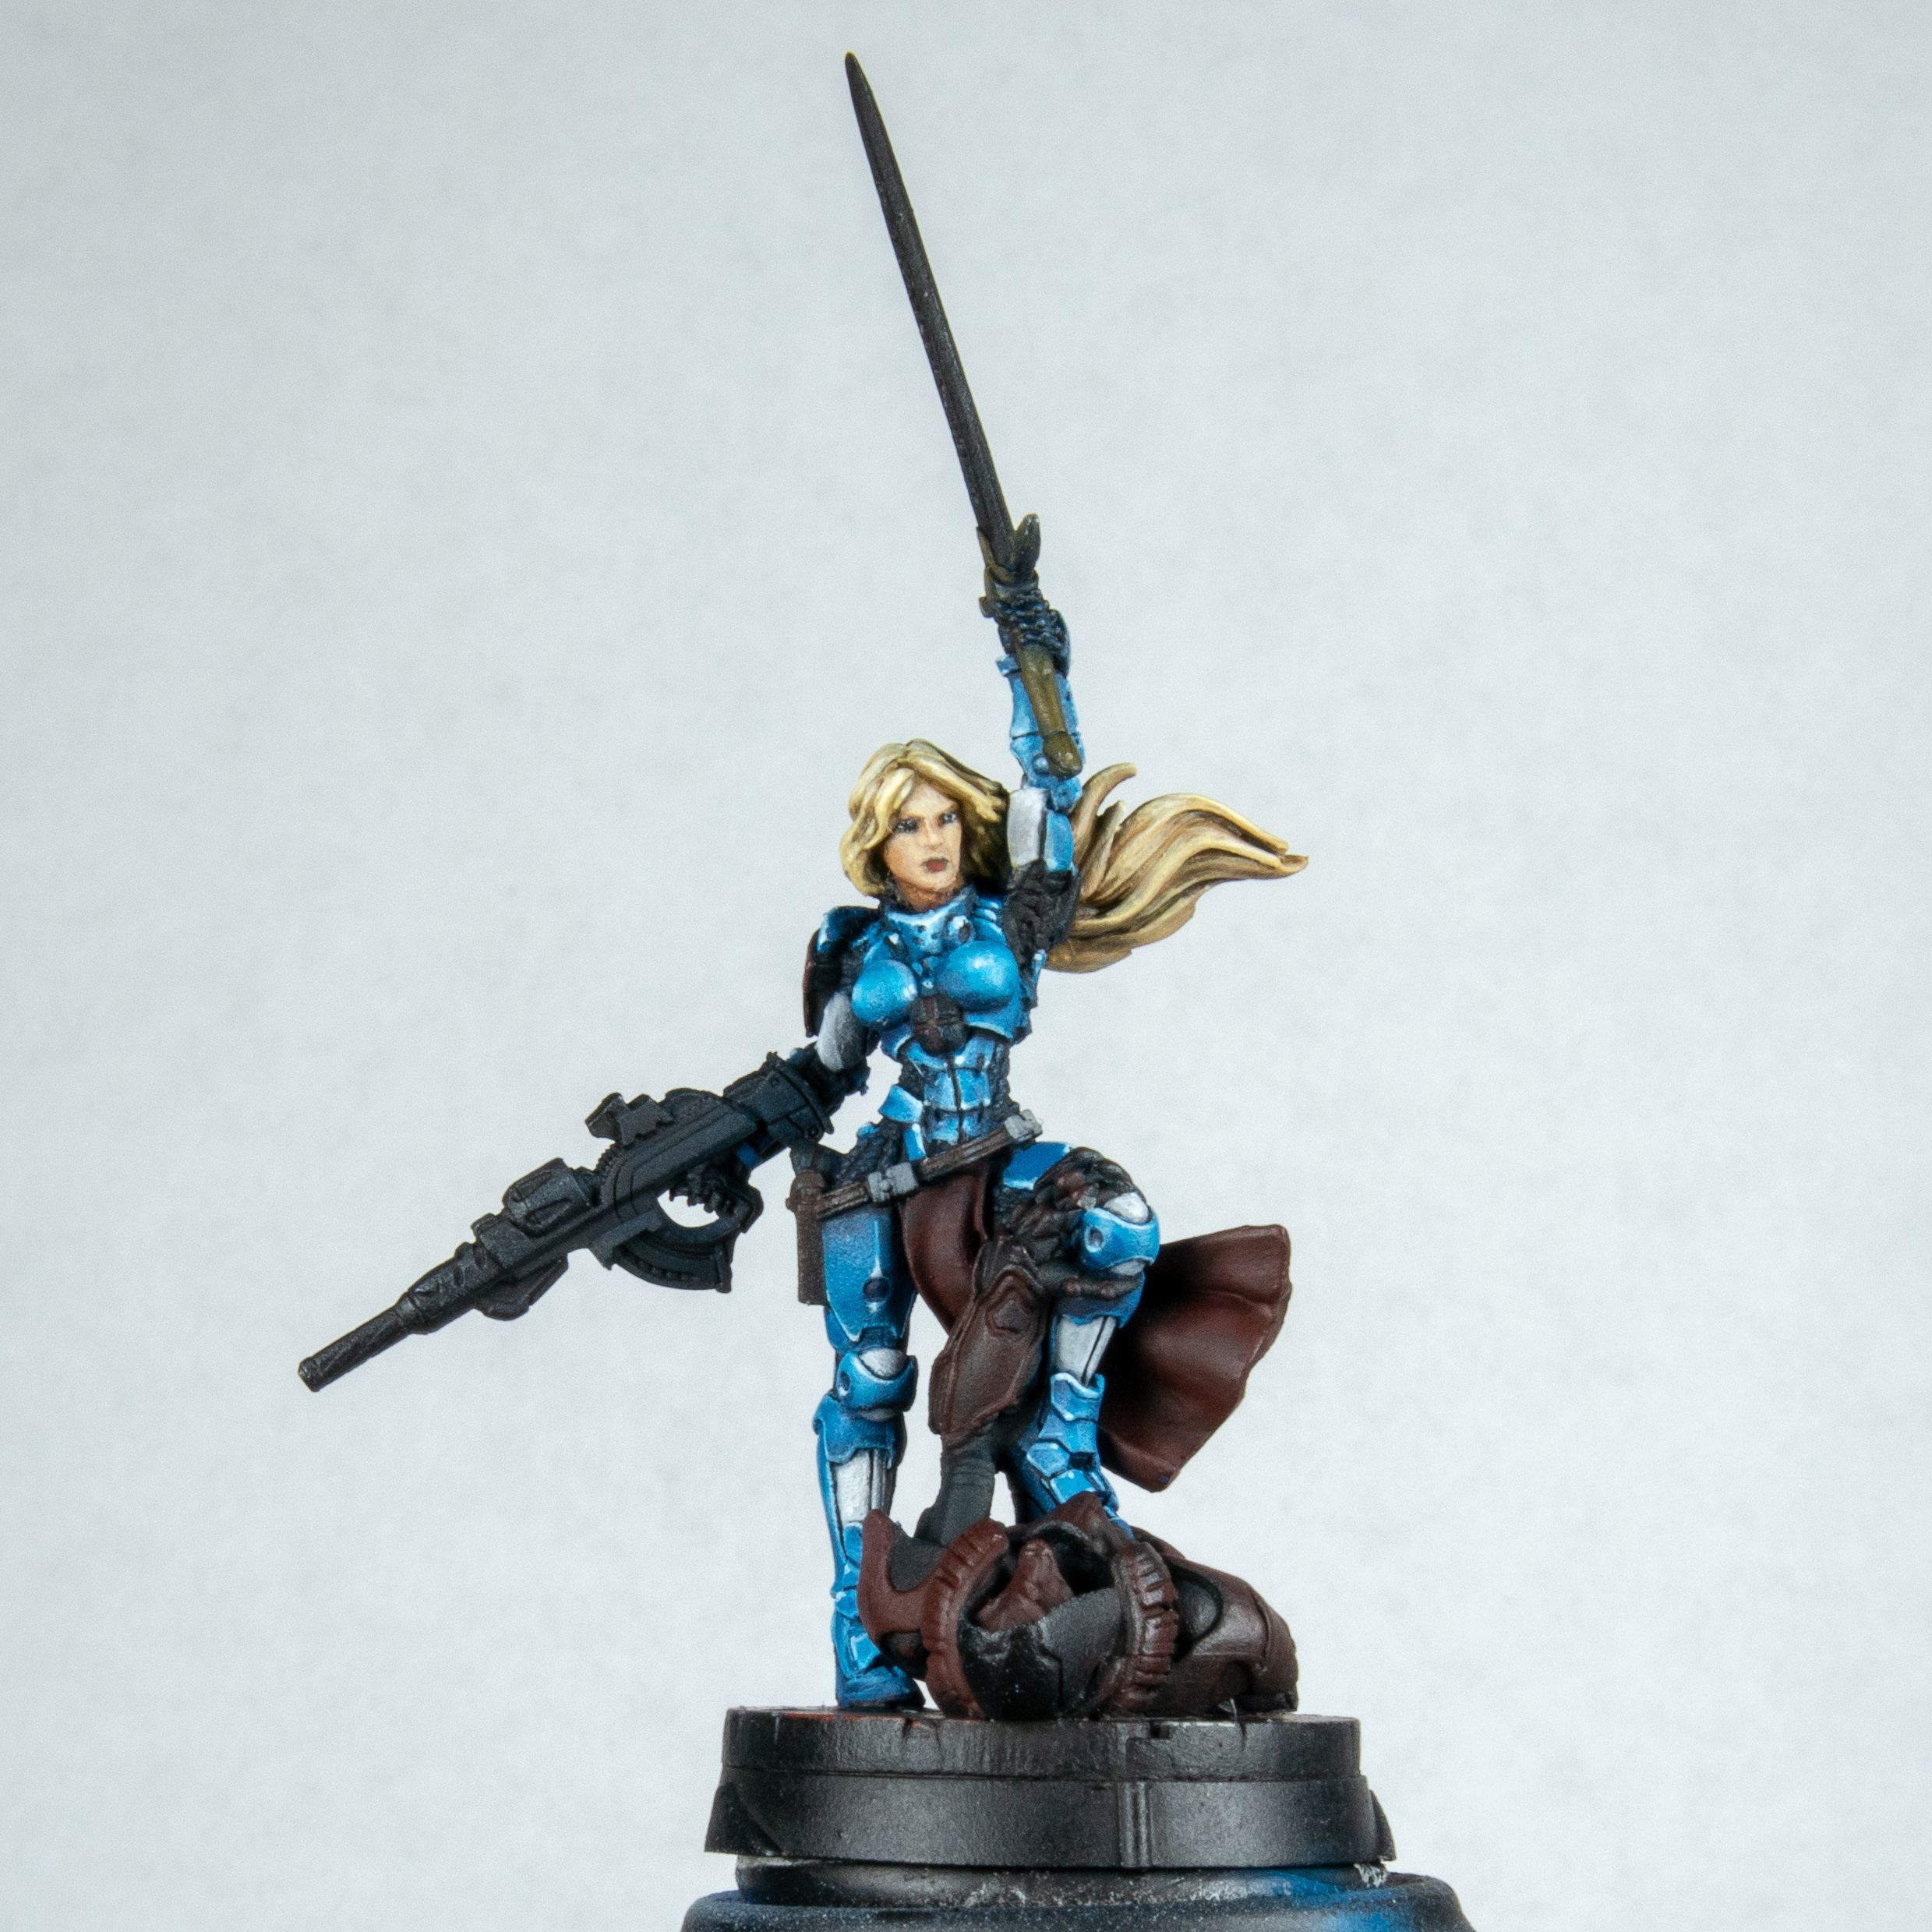 I love the hair on this model I had to paint it. Normally I would have left the gun hair and sword until the end. The main reason for this is that I have a tenancy to rest my hand on the model and can rub paint off or add hand oils. However her hair seems to be about 1/3 of the model and I wanted this very blond.. I started with English uniform flat colour. I then added some gold brown. When applying this I do small strokes almost little lines in the direction of the flow of hair to build up the texture. As I took this so light most of it was lost but it pleasures me to know it's under other small lines. At the stage of the gold brown I then washed with sepia ink in places and adding a little black in as well. I then re applied the gold brown and then added ice yellow to consecutive layers ending with ice yellow and white for the last very top highlights
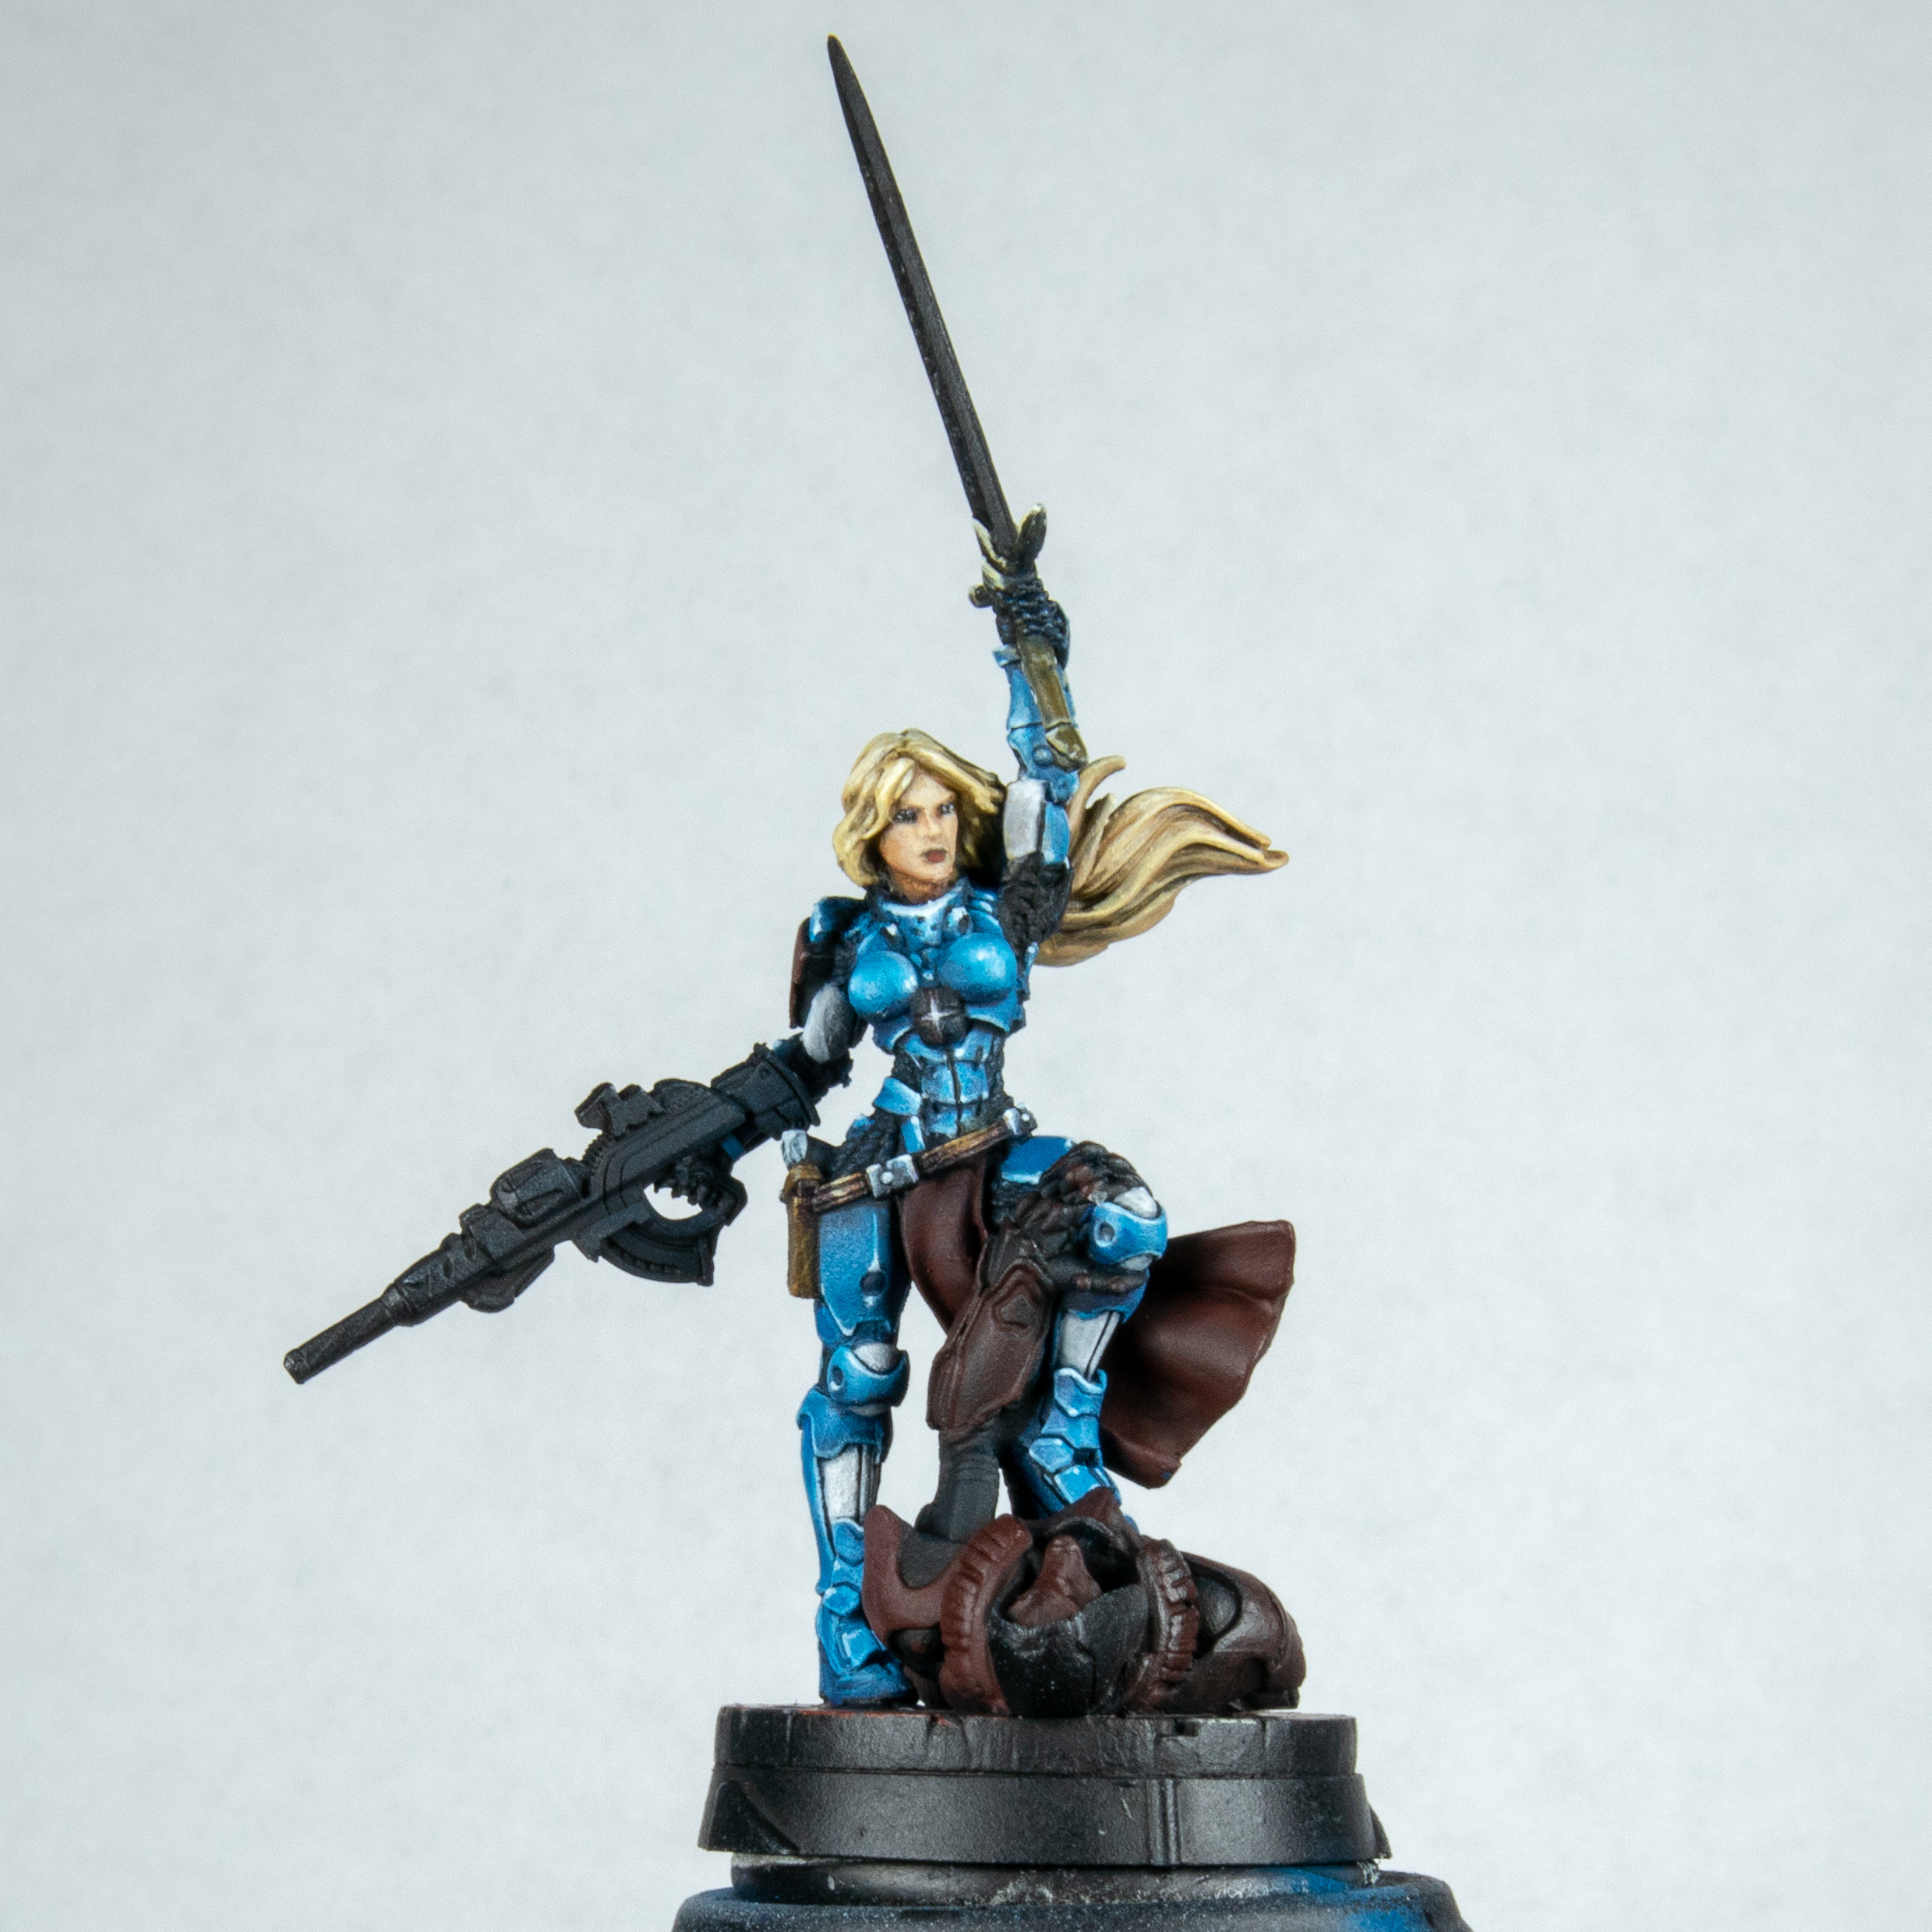 As I had the colours out I done the hilt of the sword to do a very dull gold. This is mostly black with English uniform a little gold brown ending in ice yellow. This was all done rule of cool. I didn't even think of my lights though this is not far off now that I look at it. I also done the holster and buckles. This was done with a stipple of dark brown, earth brown and sand colour then washed with sepia ink and then done it all over again. When done I used violet ink for the creases. I also picked out the buckles to do a silver metal look. Mixing dark Prussian blue and white I thought this looked a little dull.
 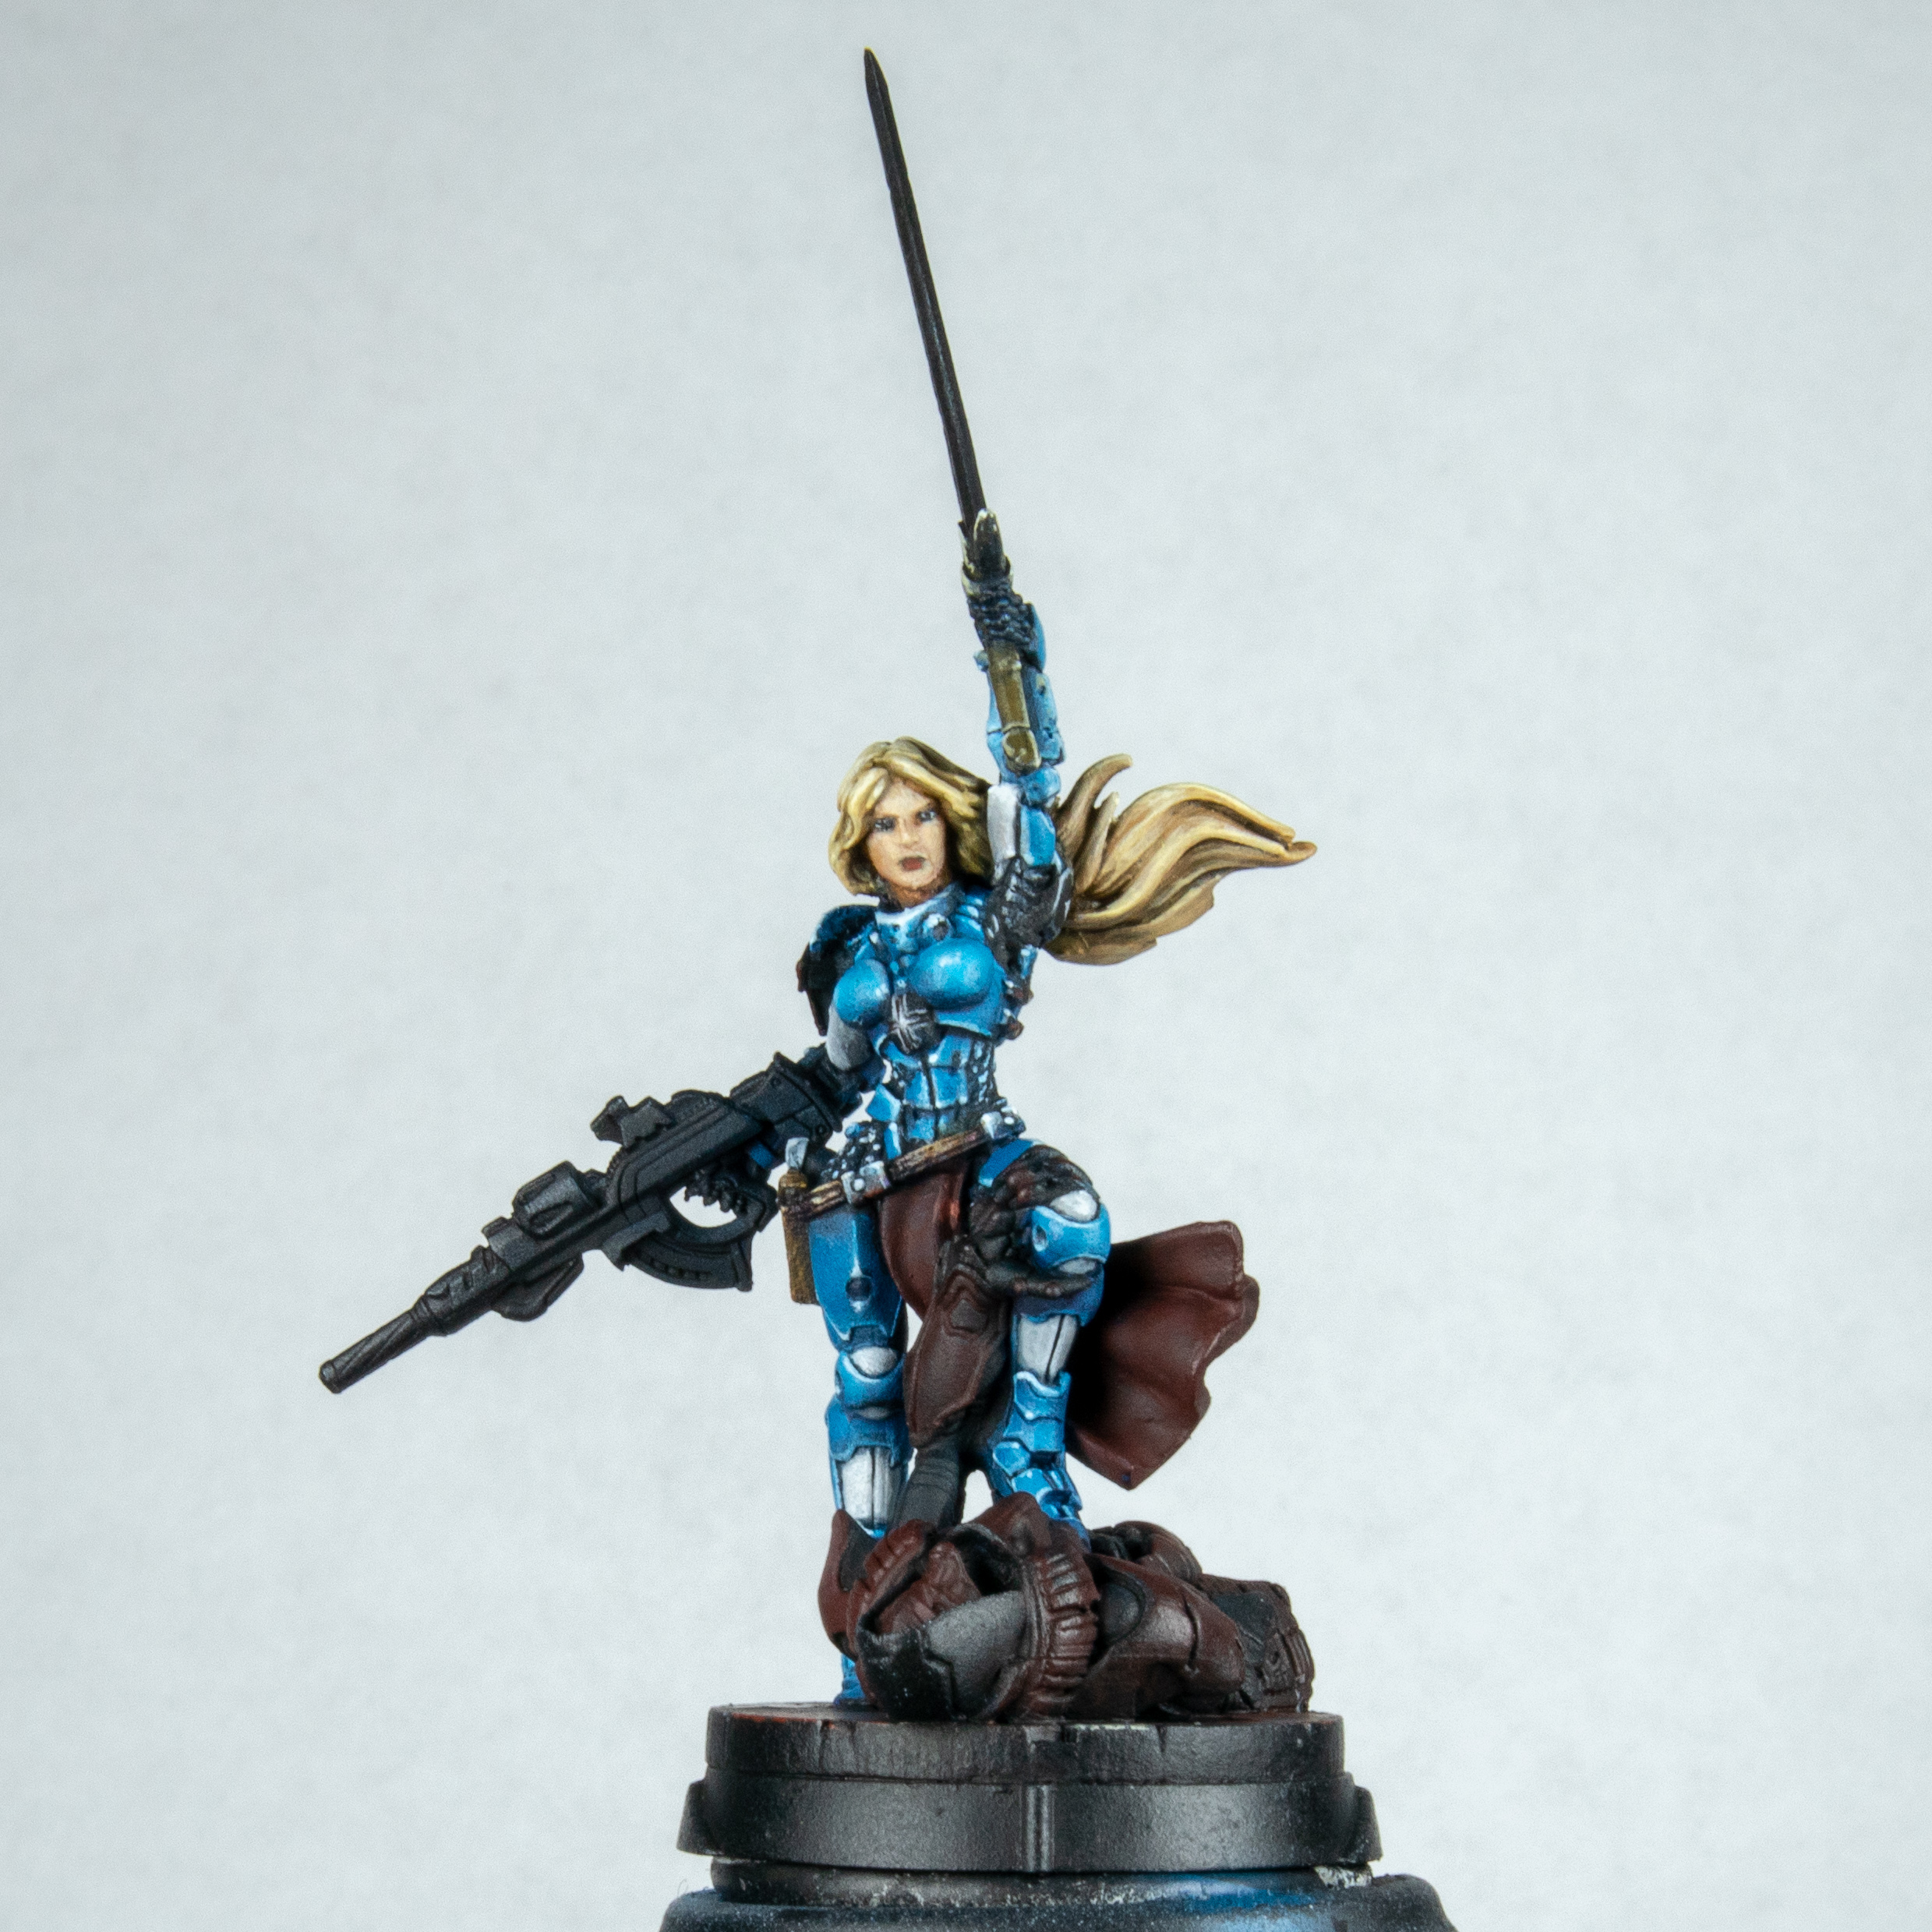 I then went ahead and fixed the belt. It was supposed to be silver but it was black at the bottom. I used red or blue for the reflections from the bottom depending on what was under each one. I also went ahead and added points of light on each of the mail sections done this in a pastel blue then picked out highlights by adding white to the mix. I did have issued under her armpit. This looked very strange done in this fashion. I couldn't shake this so I painted it over in back and tried to fade in a blue. This was rule of cool. I didn't want the viewers attention to be on her armpit. So it's not correct but to me it is right. I also highlighted the black on the cross section of the armour. I wanted to get an idea for my reflections on the belt buckles. Lol you have got no idea how pleased someone can be over buckles. Best part of the model even after I finished it.
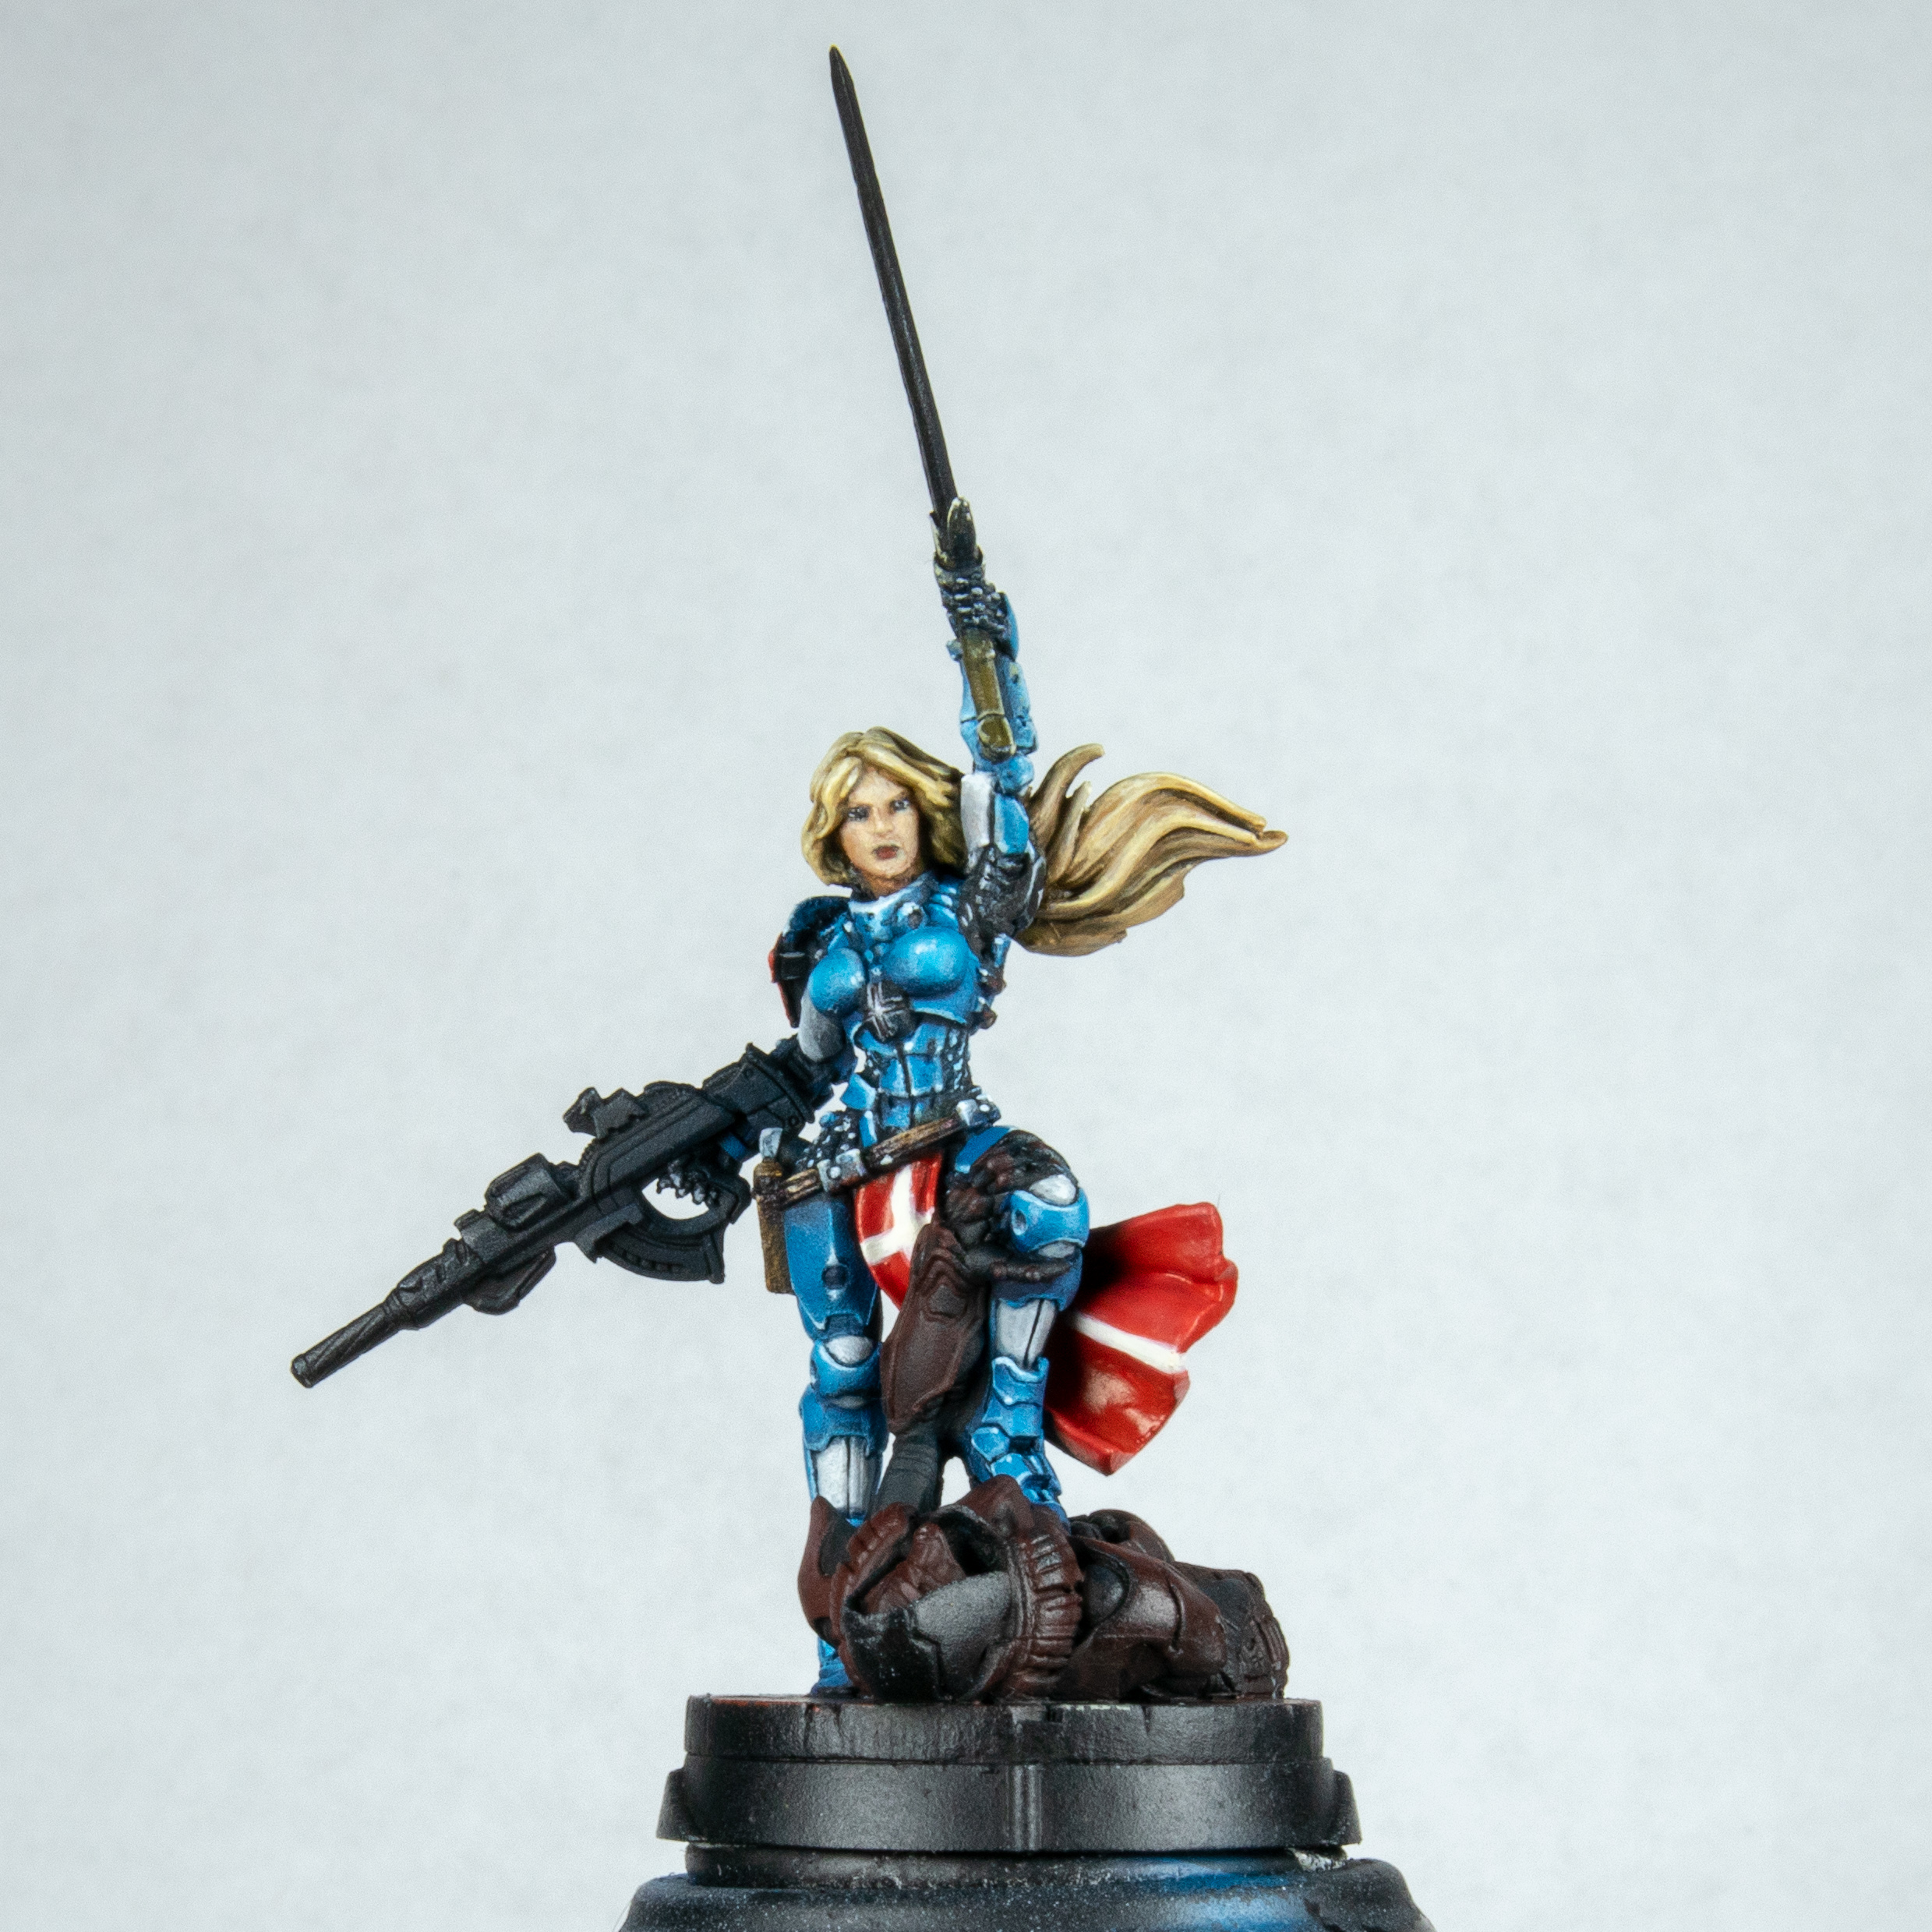 Next up I painted the tabard and shoulder in red and freehanded the white cross on it. This took 3 attempts. I should have just waited for the morning it was 2am when doing it. I painted this a dull pink before going in with Scarlett blood. A very glossy but very red paint. I then added a touch of skin tone to make a rich pink for the highlight. I was fearless though and just powered through I am trying not to overthink freehand from now. I also painted the red cross on her left shoulder pad.
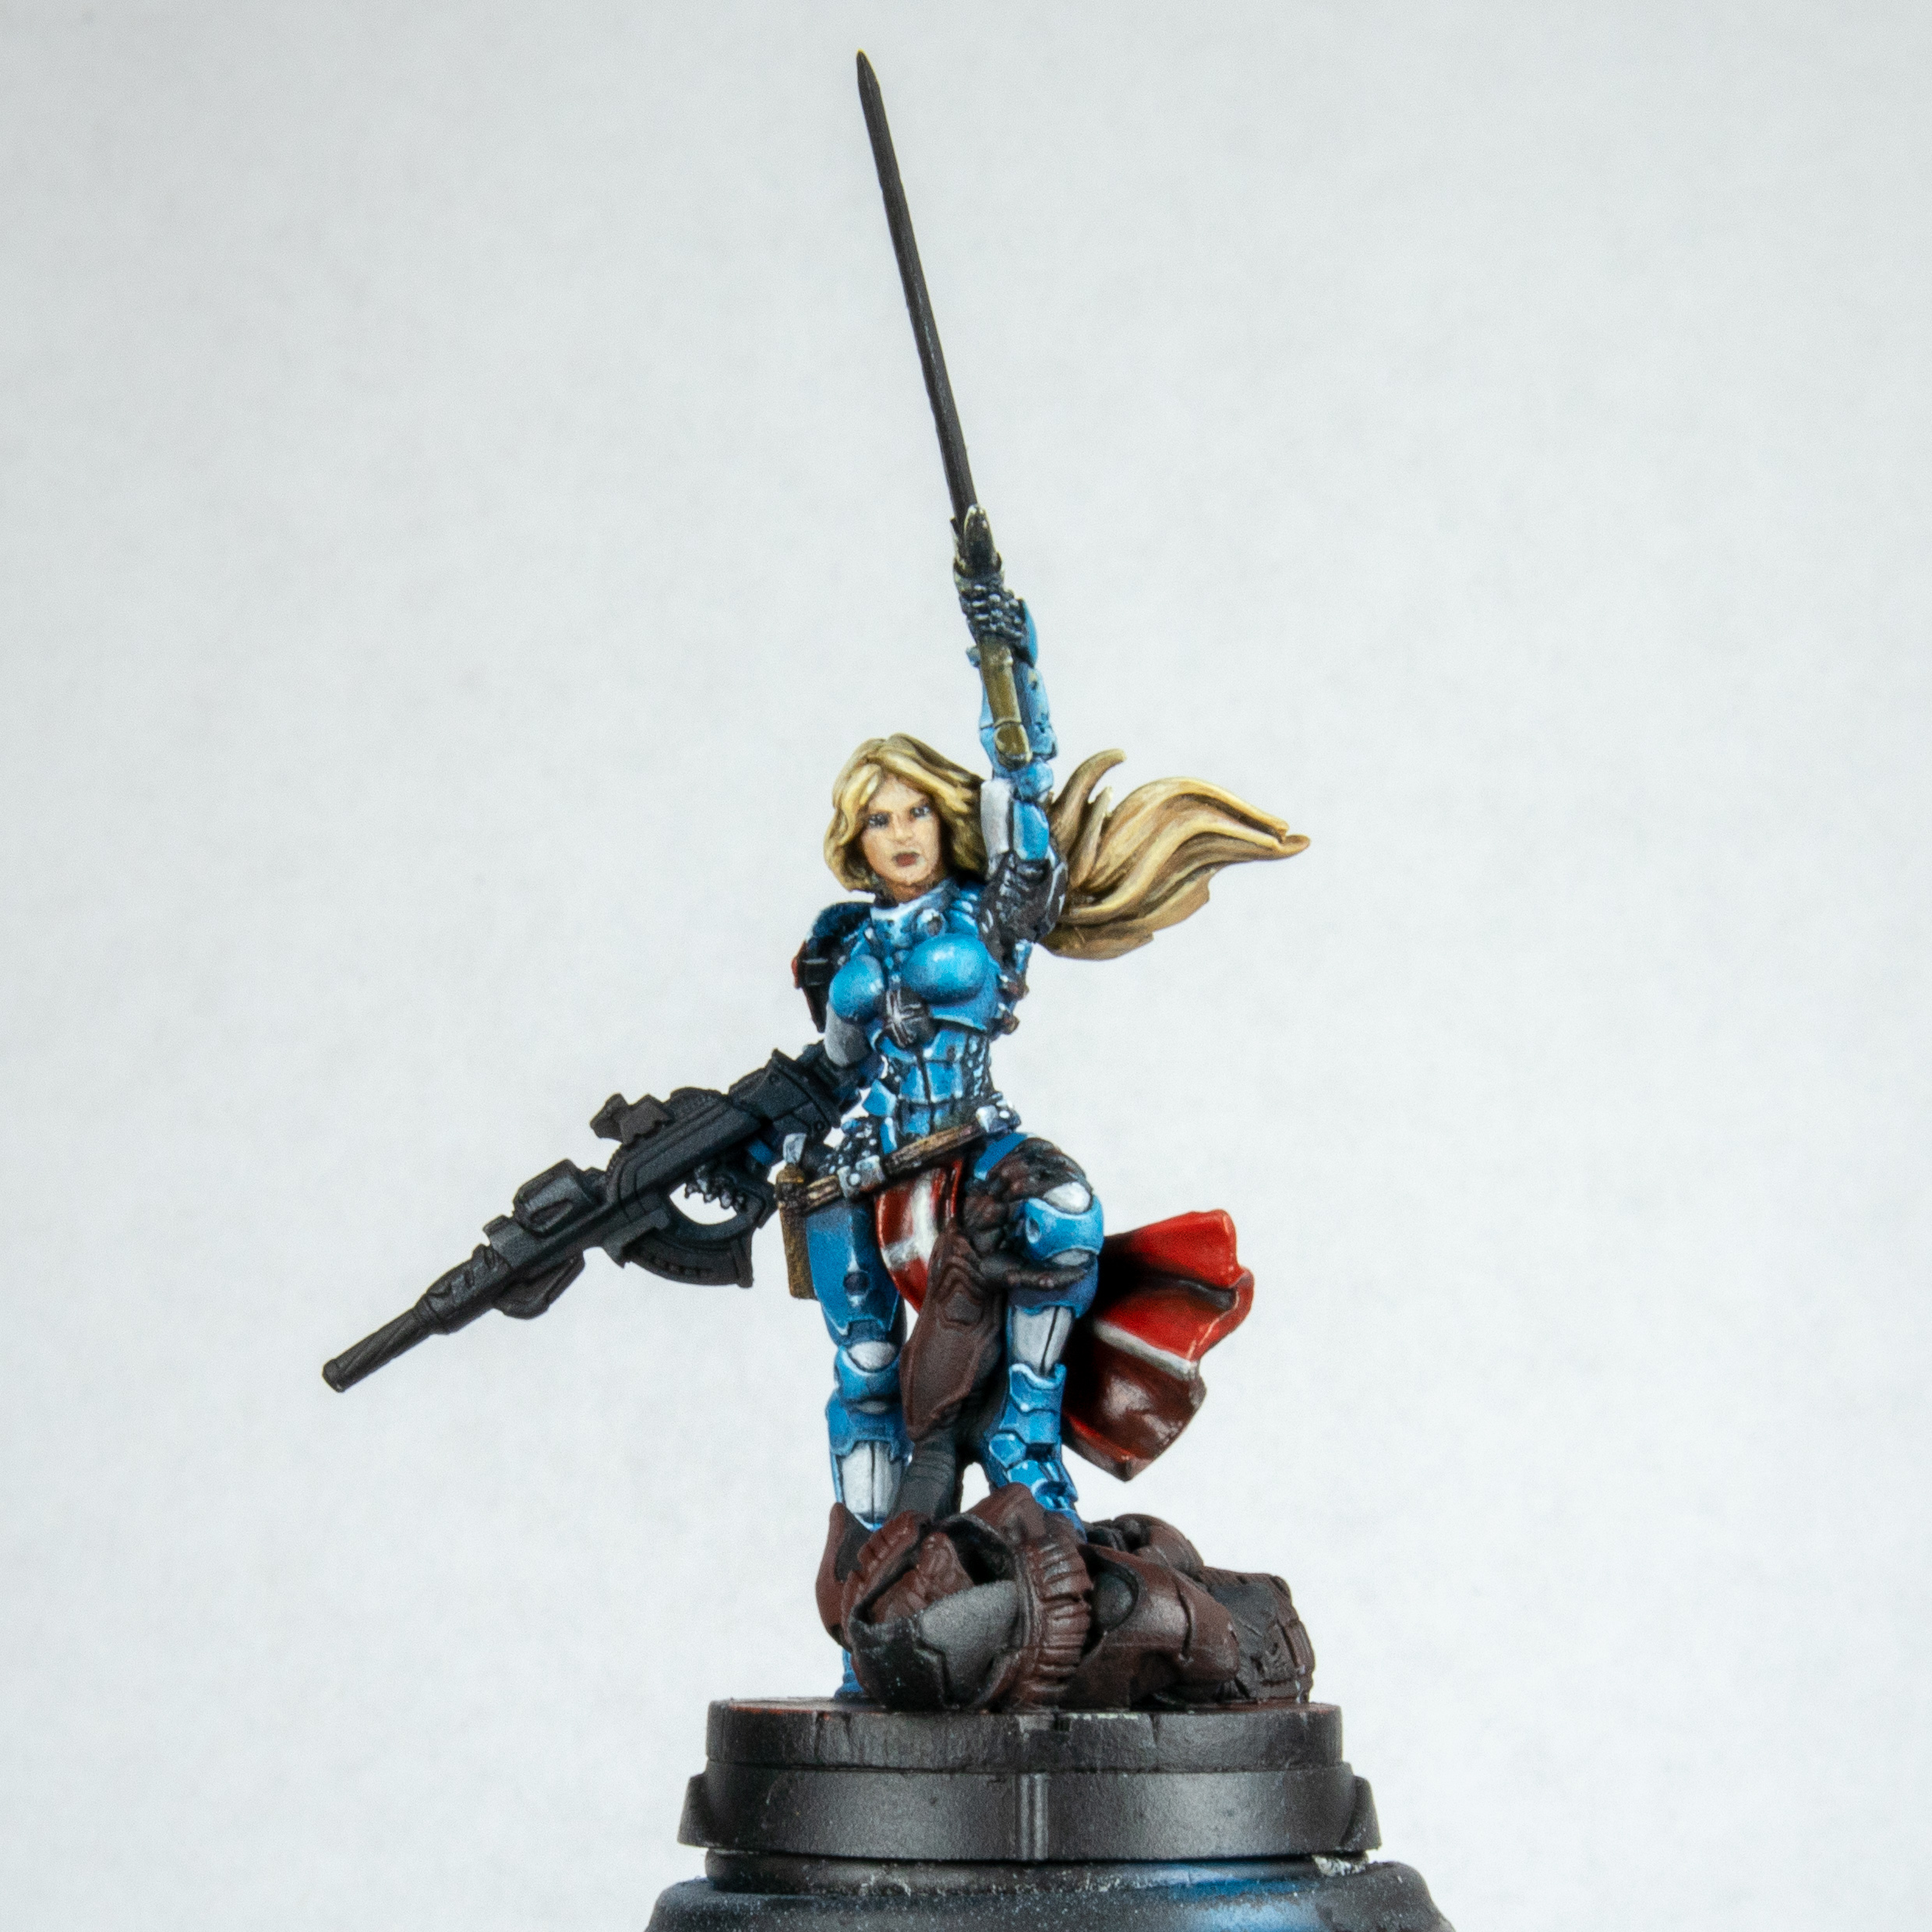 I remembered doing this before on the first one and went in with glazes and washes of black on the red but going back in and blending out errors with more red. I like the effect it gives but I wouldn't chose to use it mostly as it looks a little messy. It does keep the bright red in place though and doesn't desaturate it. You cant see much due to the gloss and I do correct this a little until the end due to this.
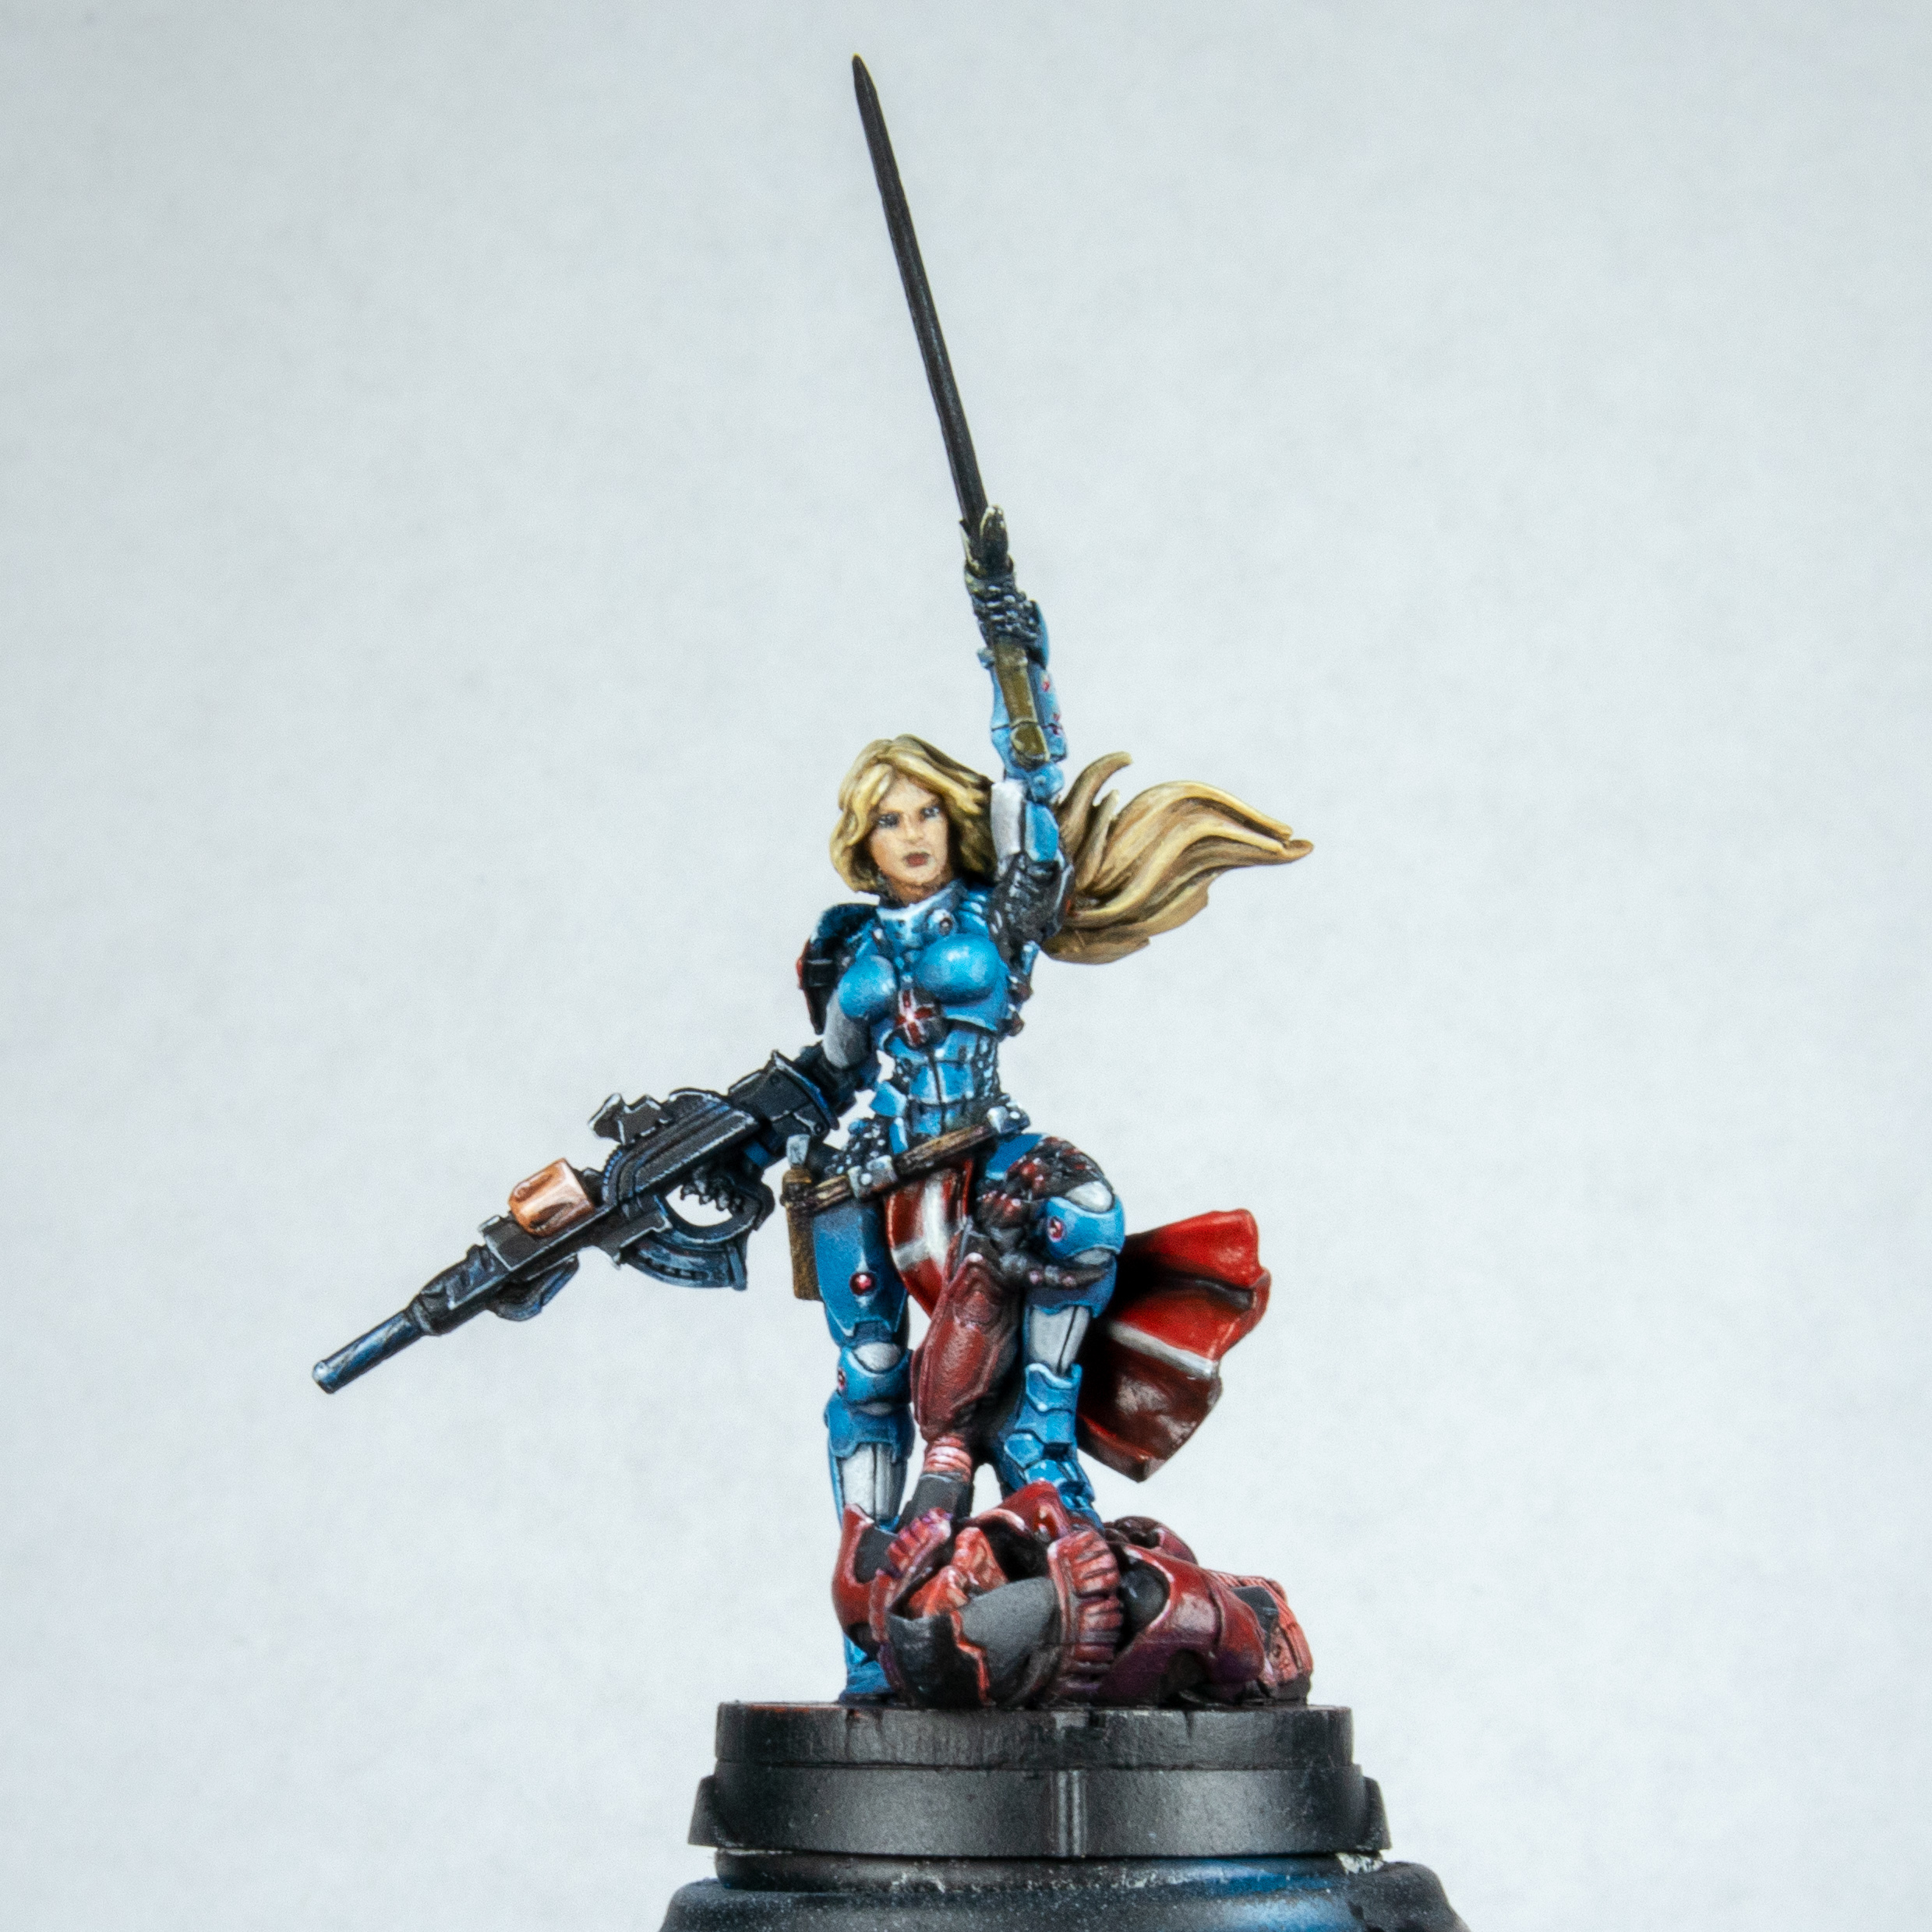 I then painted the Umbra on the base. I wont go into it but it was like painting another model. This did piss me off a little. What is the colour of the base? Red. The colour of the Umbra? Red. It clashes. If I didn't have the army and some of them to paint I would have done this in Necron style green. This also ended up shiny due to the use of the same red in glazes. I then picked out the red components on the armour trying to make a lens effect out of them. finished the gun by adding orange brown and red for my pallet along with white and some washes I used before for the cartridge. I lined the run out in white and added spots of dark Prussian blue washes to areas to give visual interest but not draw the eye to much. I don't like the out hanging gun on the pose but wanted to use that as a line to bring the viewer into the model.
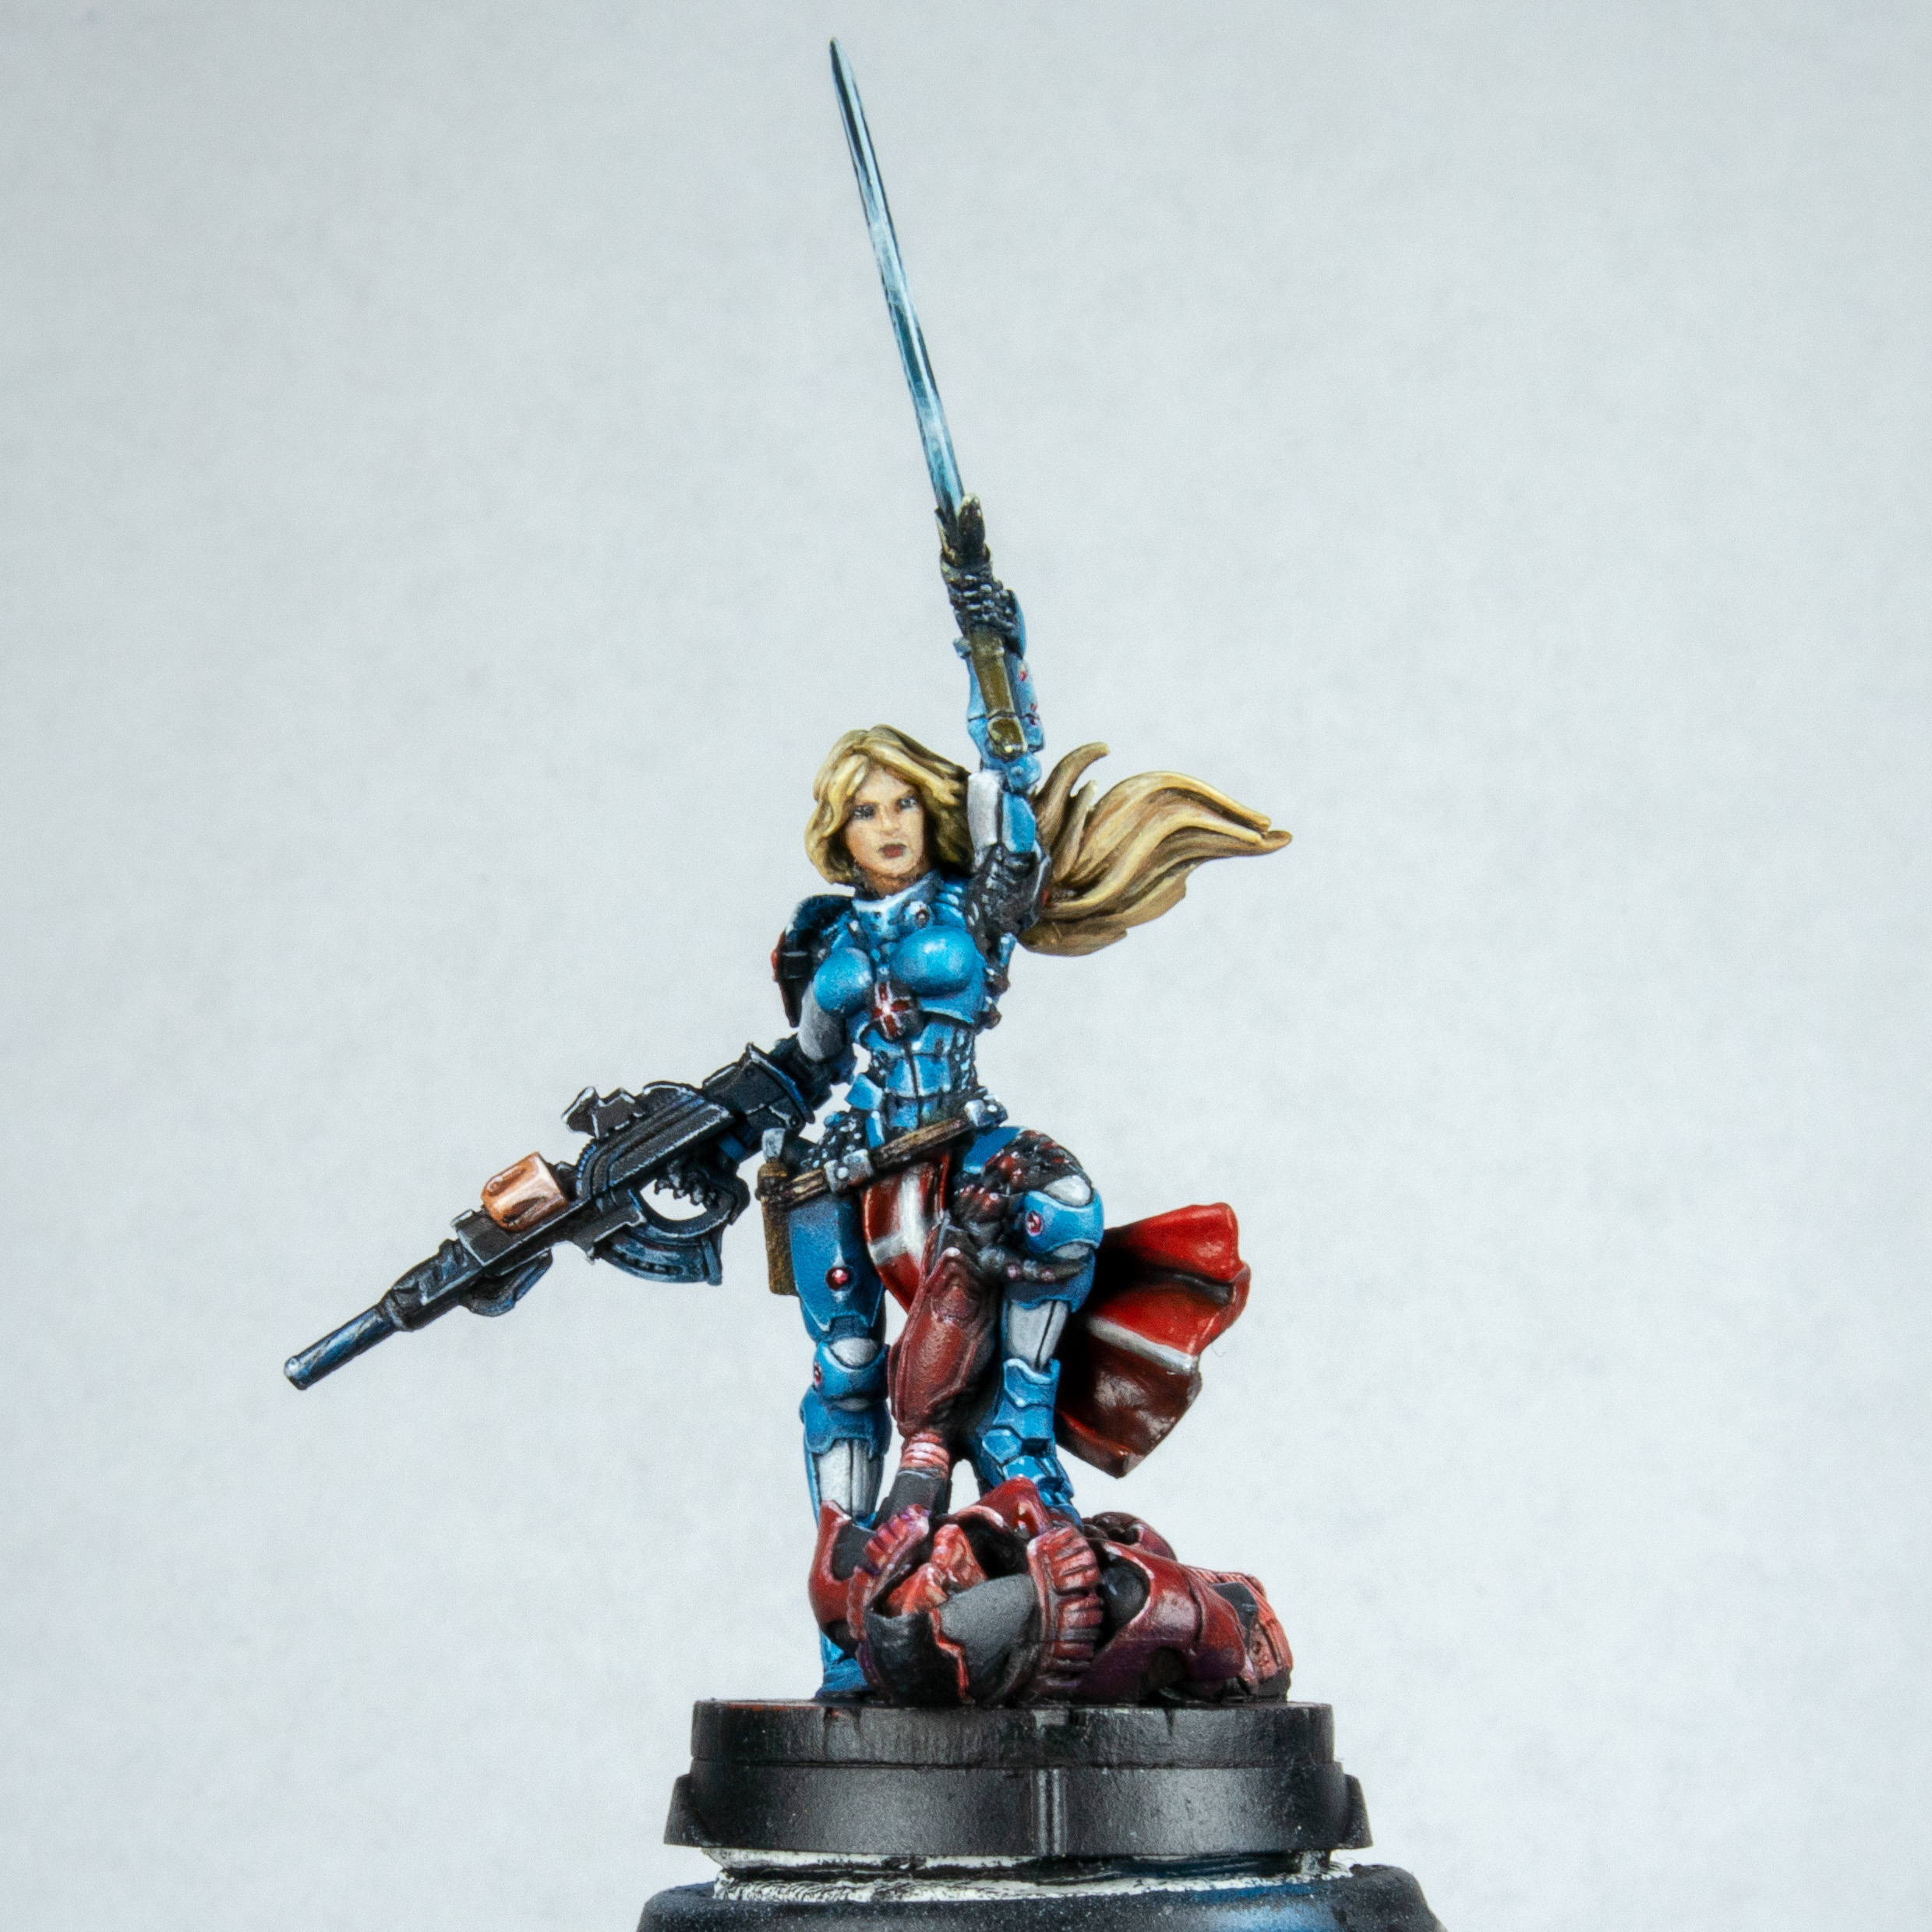 I went ahead and got my turquoise out. I was thinking of going more green on the sword but it didn't look right so painted it again is just turquoise with white and black added and then put in the sword with the side of the brush. You cant see much here. The only thing I did do was create a very almost water consistency of glaze before the final highlight and picked out areas of blue yellow and red depending on what would be reflecting. This is extremely subtle in real life but is lost completely in the pictures I think.
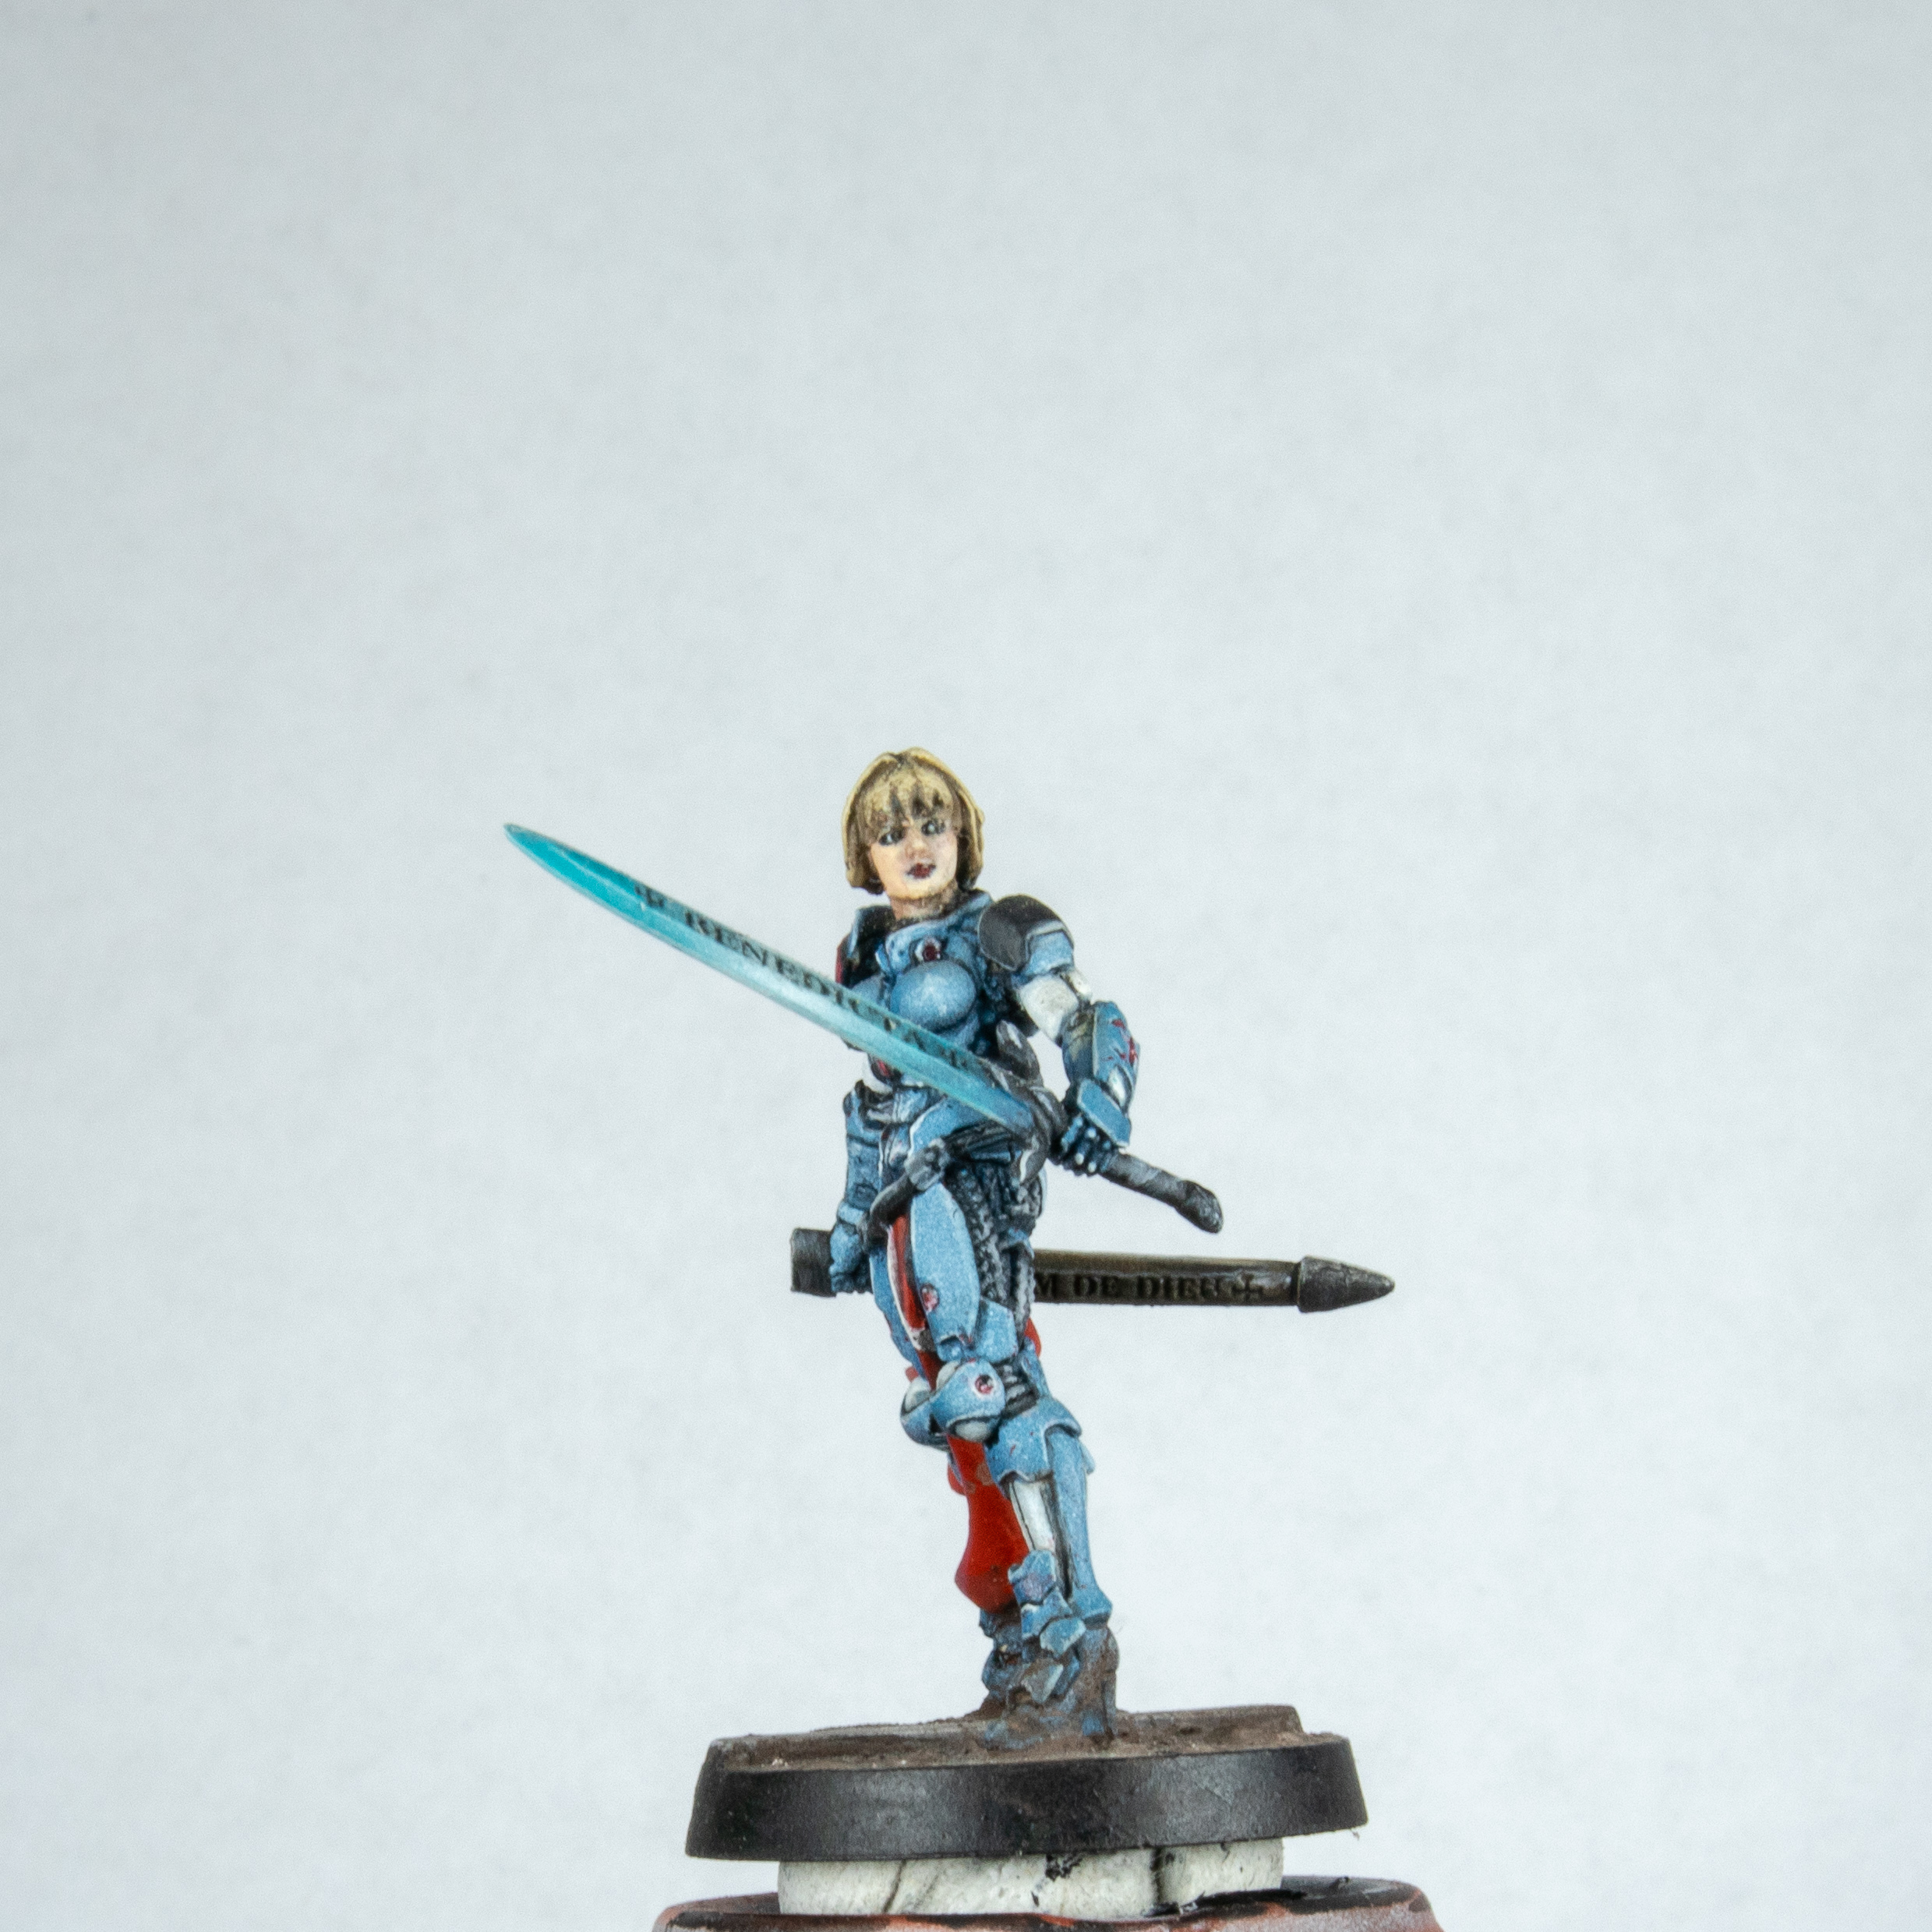 At this point I am finished apart from the varnish. I took the time to look at the model and compare this to my first (technically second) Joan of ark. The two base models are pretty much the same. I have changed the way I have done things at points all over, I think the only thing that was done the same was the tabard. The mail before I think was over brushed. I highlighted the pano blue so much with white it is a desaturated dull grey blue. I think this took me a week to paint on and off. The other model I painted in a day and a half which is about double what I normally spend. This could have been photography time and thought rather than time with brush on model. I am still pleased with both for different reasons. I have painted a new benchmark in my painting journey and have two reference points I can look at when being too self critical, to ground myself. I still have loads to learn in painting models. I need to do more focused practice but that's hard when I have so many models I want to paint.


Leave a Reply