Crazyredcoat's Crazy Compendium of Collected Creativity
Achtung! Panzer!
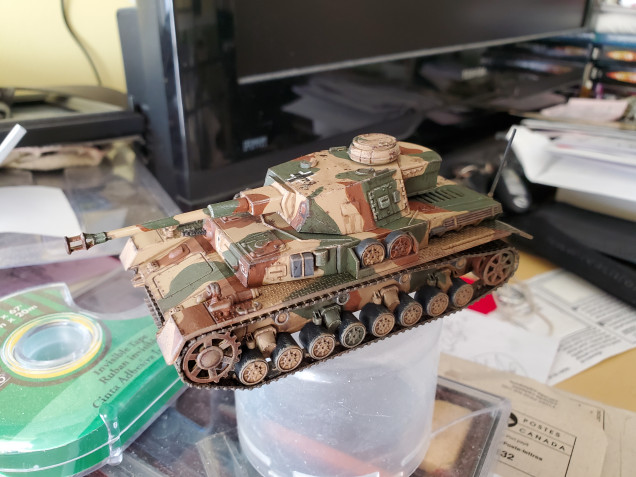
Hopefully I spelled that right…my German is rudimentary, at best. 😛 Anyway, I’ve been working on this on the side of some school projects for this PzKpW IV ausf H(?)…I think it’s an H. I lost track of what I built it as as it was so long ago… So long that you may notice a bit of an odd kink in the aerial because I have to fix it up before priming…even then it’s been sitting primed for some time. I’m really bad at painting things on time…
Anyway, the camo pattern was based upon a few images I found on the interwebs as thanks to a bunch of chaps over at the Sitrep Podcast Discord I got some nice confirmation of patterns. Thank the gods for the German Army in 1944 being such a poor state of supply, right? So thanks to Oriskany, Damon, and the other chaps who lent their advice. Much appreciated mates!
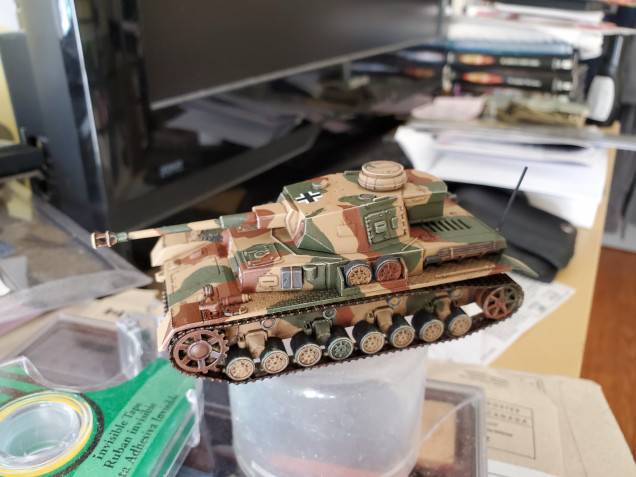 The pattern is a 3 colour pattern that is more typical for the Eastern Front in late '43 into '44, which is great for me as I went for NW Europe with this tank, but if my brother gets into Bolt Action it's likely to be a Russian army for him, so the pattern works for both even if the markings don't.
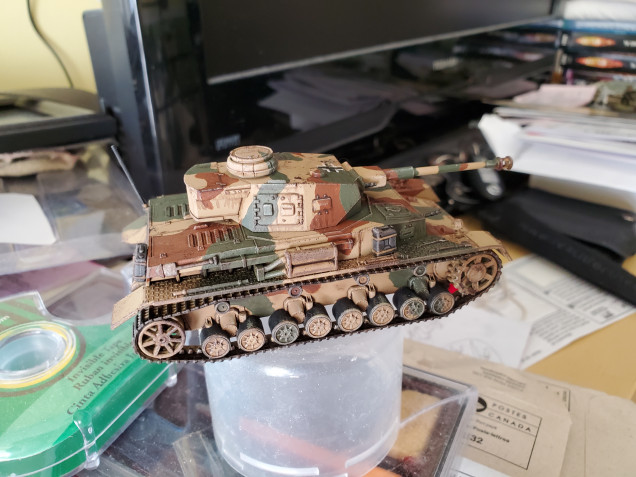
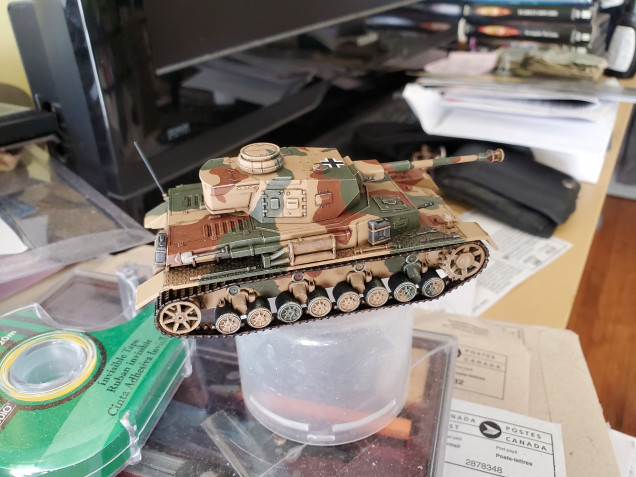 I used all GW paints here, so I'll go over some of the colours I used and they are a pretty good approximation for the colours in use at the time. The beige is Zandri Dust (I used this as a spray basecoat), the brown is Mournfang Brown, and the green is Castellan Green. They work quite nicely and also shade nicely with Agrax Earthshade, which is what I used to do all colours at the same time. After that I drybrushed the edges (really try and focus on the edges here) with Ushabti Bone. It is a little stark, but stands out well at this scale.
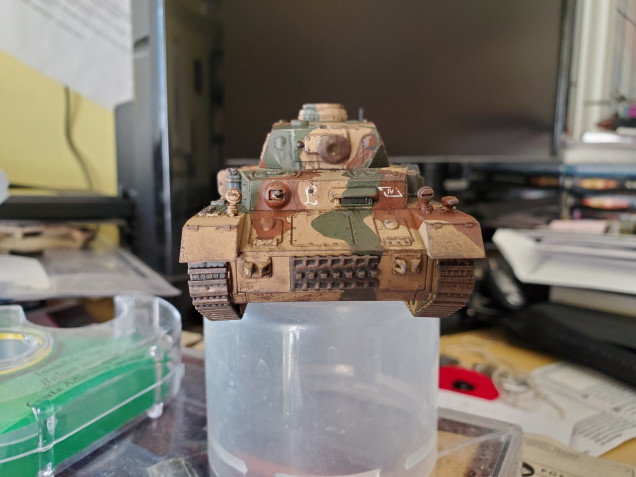
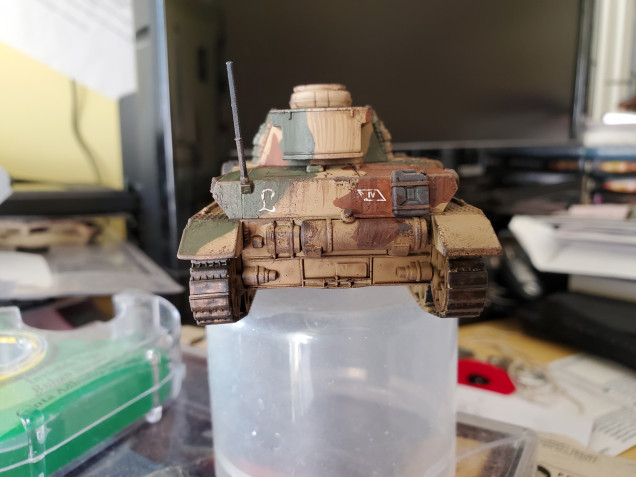
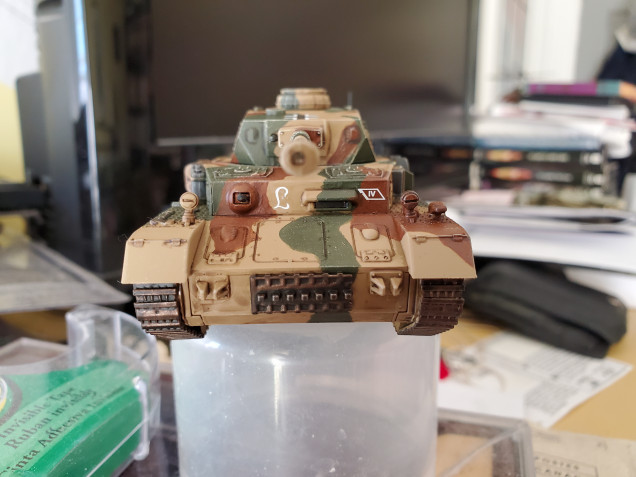 The markings are all decals available with the Warlord kit (which this is) and I went with markings for the Panzer Lehr Division. Not sure how accurate the placement of the markings is as the Germans don't seem to have been as strict with marking placements as the British were, but it works out alright for an overall look. I also went with a Balkenkreuz for the aerial identification symbol just because I'm more comfortable with it as a symbol, though it is not as accurate as a Nazi flag, historically.
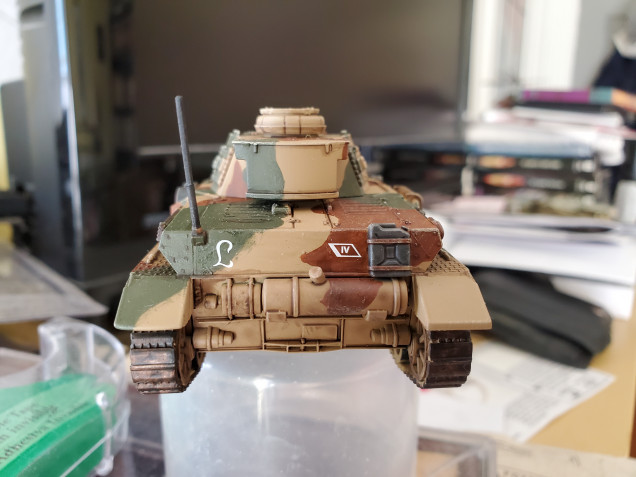 And the Lloyd shot! Do we still do Lloyd shots on tanks? We do now! This is actually the area that shows the only real dissapointment I have with this set. It sort of shows just how much this was designed as a 'gaming' kit, but the lack of detail around the back of the road wheels is pretty visible here. The lower detail on the outside will be covered by the schurtzen, but this is just a bit yucj to look at. This is probs because this was one of the first plastic kits they did as I think my StuG III has more detail there. But still.
That’s the basic paintjob, but she looks far to ‘clean’ for combat, so here comes the weathering. Sponge stippling of Rhinox Hide was the start. Focus to edges, but also best to try and run across some decals (I ended up ‘scratching’ some of mine with the basecoat colours in places). It looked quite nice, but I decided to test something. I took some Wyldwood Contrast paint and heavily watered it down. Not with medium, with water. With this thin mix I added it in places water may drip down and dragged downwards. It works really nicely for this purpose. Another handy dandy use for Contrast paints! Anyway, here’s the dirty version!
I still have the schurtzen to prime and add, so she may make a reappearance later on, but I haven’t decided on a next project, yet. Schoolwork is ramping up for the end of the year, so time may be less to play with things, but we’ll see.
On the subject of Contrast, I also forgot to mention that is how I did the MG34’s and the tracks, too. Basecoat with Leadbelcher, then cover the guns in Black Templar (maybe thin this a bit with Contrast, though) and Wyldwood for the tracks.
















Leave a Reply