Skip to toolbar
Demystifying Freehand With 144artist

Demystifying Freehand With 144artist

Supported by (Turn Off)

Project Blog by 144artist Cult of Games Member

Recommendations: 79

About the Project

I have been building and painting miniatures since I was a kid marveling at the neighbor's HO scale railroad layout. By college it had shifted to military and fantasy minis as I studied Illustration and Photography. Now, many decades later, I am still working away at creating my own tiny worlds even while teaching general art to 12-15 year olds. Along the way I have picked up a lot of tricks and exercises, many seemingly unrelated to miniatures painting, that have had a significant impact on my miniatures work. As I tell my students, practicing simple skills and breaking down a project into manageable pieces make anything possible. This is true with miniatures painting as well as one's perspective. I hope something I share will help others find confidence and satisfaction in their own creative journeys.

This Project is Active

Exercises to Change One's Perspective

Tutoring 14
Skill 13
Idea 14
5 Comments
Some dots and lines parallel to the edge are no different than the lettering.Some dots and lines parallel to the edge are no different than the lettering.

As I mentioned in the intro, I have a background in illustration but anyone who can write their name with a felt tipped pen can learn to do what I do. Along similar lines, I heartily suggest watching the excellent Gerry Can episode on using pens for fine detail. A big part of dealing with anything new or intimidating is to break into its elemental parts and change one’s view.  Freehand detail on miniatures comes down to lines and dots, just like writing. A lower case “t” written on a shield is a cross, extend the lines and the shield is now quartered.  I’ll go into more depth about breaking visuals down into simpler bits in later posts.  For now I wanted to start with some exercises which will go a long way in helping anyone build up control and confidence quickly

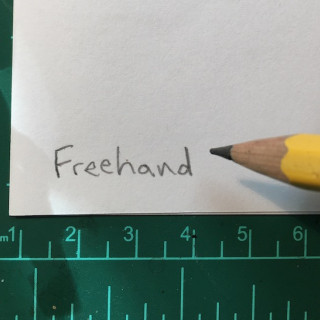
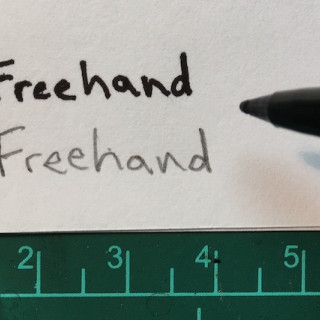
Start by printing a name or phrase in neat, small letters first in pencil on a piece of paper (easier and cheaper than minis). Using a familiar tool that erases eliminates any subconscious worries of “not getting it right”.  Once the line of ink is started you don’t even think about that, just the movements. Unlike the example, repeat the word again and again to form a line of letters/words all the way across the page. Beneath this, repeat the process with a felt tip or Micron pen as either require a gentle touch. Don’t try to be perfect, just as close as you can so don’t sweat the lines wavering in thickness too much.  A solid dot can still read as an “O” and this about building muscle memory.  Finally, the process is repeated with a fine tipped brush.  A size 0 as is plenty small enough if you keep the tip clean and sharp.  Use a very gentle pressure, like with the felt tip pen, to maximize control of the brush and paint as well as protect that delicate point.  I prefer long bristles as they hold more moisture which helps the paint move down them smoothly.  A wet pallet for fine detail can be helpful as it keeps the paint moist though even without one I still recommend adding a little water to most paints to achieve a consistency like cream. The smoother the paint flows down and off the bristles the smoother the learning process.

Repeating exclamation points are just parallel lines and dots.Repeating exclamation points are just parallel lines and dots.
 Big “X’s” with little lines become crossed sword and spear. Big “X’s” with little lines become crossed sword and spear.
Just smaller lines, like crossing a Just smaller lines, like crossing a "t".
I find that with a brush, circles are easier to do in two parts rather than one motion, putting dots in the middle is just practicing accuracy and look like eyes.  Those half circles make for nice wavy lines as well.  Practicing on paper makes it cheaper and easier to work on the skills before trying to use them in 3D.  I still do warm ups like these when I am using a new detail brush, new paint, or getting ready to do a lot of fine detail.I find that with a brush, circles are easier to do in two parts rather than one motion, putting dots in the middle is just practicing accuracy and look like eyes.  Those half circles make for nice wavy lines as well.  Practicing on paper makes it cheaper and easier to work on the skills before trying to use them in 3D.  I still do warm ups like these when I am using a new detail brush, new paint, or getting ready to do a lot of fine detail.
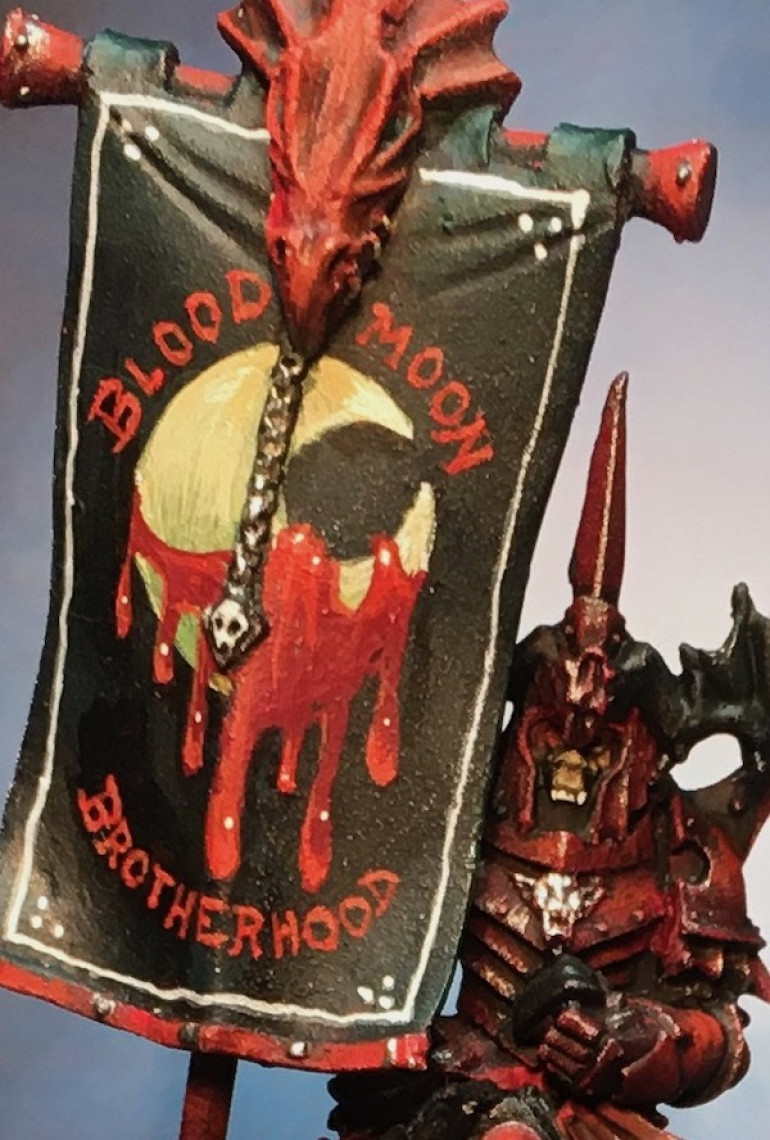
The border on the corner of the above example is an easy way to get good at fine straight lines and what will make the next step less intimidating. It is easier to paint a line parallel to an edge so I'll paint them along the sides and then add another parallel to those.  Again, don't attempt perfect, attempt repetition. A little of this practice and the edge of a glove or cape doesn't seem at all hard to follow.  I recommend starting on an area without a lot of folds and cleanly sculpted edges to, again, reduce frustration (like the smudge in the upper left from a drying brush).  The border on the corner of the above example is an easy way to get good at fine straight lines and what will make the next step less intimidating. It is easier to paint a line parallel to an edge so I'll paint them along the sides and then add another parallel to those.  Again, don't attempt perfect, attempt repetition. A little of this practice and the edge of a glove or cape doesn't seem at all hard to follow.  I recommend starting on an area without a lot of folds and cleanly sculpted edges to, again, reduce frustration (like the smudge in the upper left from a drying brush).  
Old School 40K miniature. Clean, defined edge in a basic color that will be easy to match if I mess up. Old School 40K miniature. Clean, defined edge in a basic color that will be easy to match if I mess up.
Looks pretty good even with a slight curve at the bottom that really only shows in a photo this close.Looks pretty good even with a slight curve at the bottom that really only shows in a photo this close.
From a normal distance it looks great.From a normal distance it looks great.

Laying the Ground Work.

Tutoring 13
Skill 12
Idea 13
No Comments

It may sound obvious but if you can’t see the detail you can’t really paint the detail.  I’ve always been near sighted but as I have aged my eyes have become less flexible and seeing fine detail up close has become difficult.  There are any number of solutions to this that I actually resisted for sometime despite wearing glasses for most of my life.  The loss of my ability to really see fine detail was gradual and caused me to be frustrated painting anything which is the opposite reaction one wants when pursuing creativity.  I had to get over whatever pride or fear of aging I had and just find tools to help.  Once I did, WOW! It was like being born again, all that frustration replaced with inspired energy.  So I thought I would start with some of the things I’ve tried in case it helps someone else.

These clip-ons were handy for seeing detail but with only one eye didn't help with depth.  Bonus for looking very Steam Punk though.These clip-ons were handy for seeing detail but with only one eye didn't help with depth. Bonus for looking very Steam Punk though.
These came from my local hardware store. Fairly lightweight, inexpensive and some versions have replaceable lens. I got tired of the strap around my head after a while but this is minor.These came from my local hardware store. Fairly lightweight, inexpensive and some versions have replaceable lens. I got tired of the strap around my head after a while but this is minor.
Necron099 pointed me in the direction of this high tech beauty.  It was the most expensive (around $30) of the things I've tried.  Very versatile.Necron099 pointed me in the direction of this high tech beauty. It was the most expensive (around $30) of the things I've tried. Very versatile.
Has its own light with some vertical directional adjustment.  Very nice to be able to point light right into the area you are working.  Has its own light with some vertical directional adjustment. Very nice to be able to point light right into the area you are working.
It comes with five different lens and an optional headband which I prefer to keep in the box.  All this versatility comes with a cost in weight, however.It comes with five different lens and an optional headband which I prefer to keep in the box. All this versatility comes with a cost in weight, however.
3X magnifier reading glasses from my local pharmacy.  Cheapest option ($5), lightweight, fit right over my prescription glasses.3X magnifier reading glasses from my local pharmacy. Cheapest option ($5), lightweight, fit right over my prescription glasses.

The steam punk clip-ons looked cool but were limited in how much they helped over all. Each of the others had strengths and weaknesses but in the end it is the cheap reading glasses worn right over my prescription glasses that I default to now days.  No matter what you decide works best for you, or even if you don’t need any ocular aid, remember to take breaks from time to time and let your eyes rest.  This level of focus is hard work and you’re allowed to feel tired afterward.

Supported by (Turn Off)