Hot wire cutter from scraps
Recommendations: 89
About the Project
Hot wire cutters are brilliant for slicing up styrofoam for making terrain. But they're so darned expensive. At least, those tabletop ones are. And they're little more than a bit of a wire and a low voltage (DC) current. So I thought I'd have a go at making my own.
Related Genre: General
This Project is Completed
It started with this plank
I had some left over styrofoam knocking about and was wondering about how long it is going to take to print my entire Kraken Studios Fantasy Football pitch (spoiler alert… a really long time!) and how a lot of the pitch-side “terrain” was made from bolted together planks of wood.
Now I’ve made loads of laser-cut mdf terrain in the past (including a fantasy football pitch-side stand and filled it full of converted Warhammer Orcs as my fans) and while it looked nice, it was always lacking that one thing – texture detail.
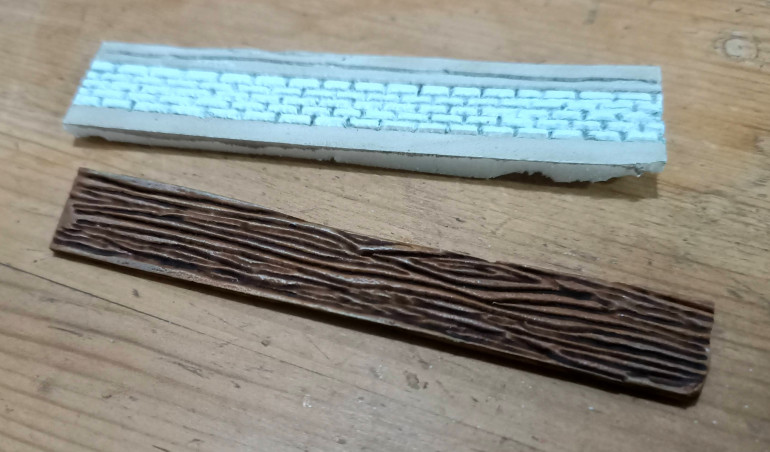
I hacked a thin strip off the styrofoam and drew on some woodgrain with a sharp pencil. A quick splash of brown craft paint, some (water-based) Quickshade Strong Tone and a drybrush of Coat D’Arms Skeleton Bone and it looked pretty good.
I also tried drawing a brick pattern onto another piece and already preferred it to my current “polyfilla applied through a mylar stencil” approach – even without painting it, I reckon this will be my go-to approach for brick buildings, simply because it was so quick and mess-free!
Now, sure, it looks a bit “cartoon-y” (especially the wood).
But I’ve been trying for a while to paint my miniatures and get away from the “cartoon-y” look and failed. I’ve just had to accept that’s how the paint comes out of my paintbrush. So instead of trying to fight it, I’m going to embrace it. Cartoony it is!
So this is where it all started.
Ok, it started with this throne
I’ve had a laser cutter for about ten years, and used it to create loads of tabletop terrain (with varying degrees of success). Even the most successful pieces, however, still appeared a bit “flat” and box-y looking. They lacked texture.
So I got a 3d printer and started printing scenery from the many excellent .stl creators across the internet. And I thought I was happy.
Except FDM printing, when you look closely – or, when you’re printing things quite small, that represent quite large things in real life – the layer lines and lack of exact precision really spoil the effect of super-fine detailed models. If anything, they have too much texture.
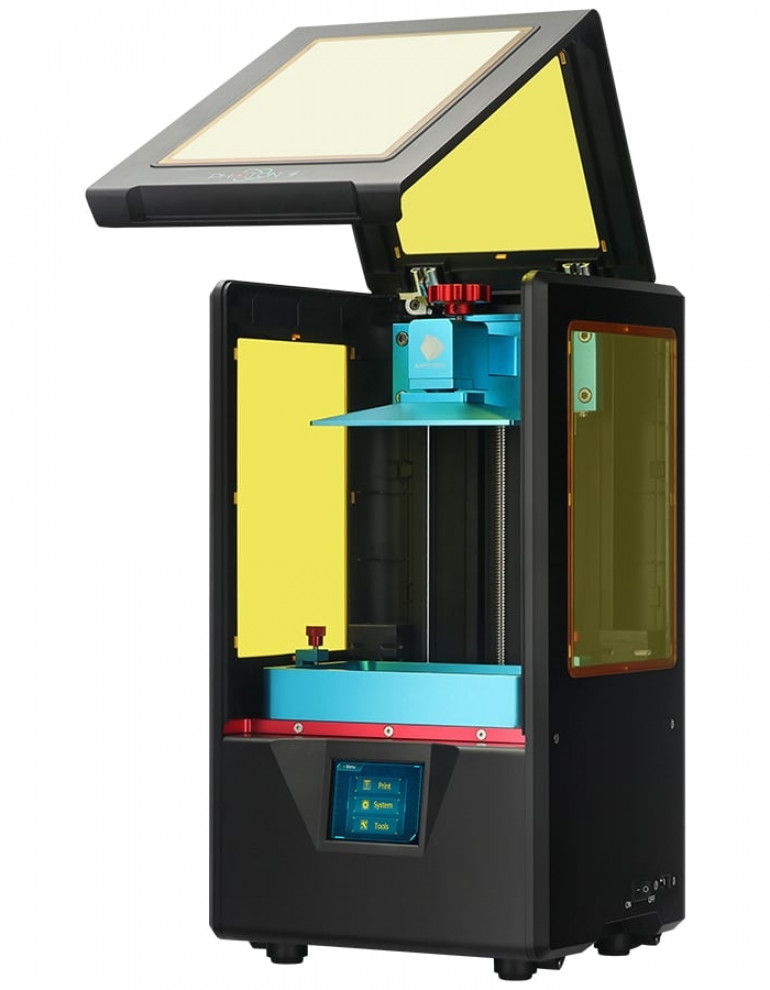
So I got a resin printer. And I was a very happy bunny.
Resin printing is just awesome. Super-precise, really nice finish, perfect for tiny details… if I could I’d resin print everything tabletop.
The only thing with resin printing is the relatively small printing area. The build plate is little more than 150mm x 65mm. That’s loads of room if you’re printing miniature characters (I often cram eight or more at a time onto a single build) but not so big when it comes to printing terrain.
So I thought, for Jabba’s Throne, I’d go “old-school”. And make it from styrofoam.
I chopped at my styrofoam with a cheap Poundland “stanley” knife and rounded the corners using sandpaper. It was a messy, horrible job. And the result was really rough-looking and wonky (perfect for a crudely carved stone throne….)
And after chopping up Jabba’s Throne, I thought “if I’m going to take this terrain-making lark seriously, I’m going to have to get a hot wire cutter.”
So this is where it all started.
Ok, it started with this couple of Herberts
I really shouldn’t have been goaded into making another project. But, like the Beavis and Butthead of tabletop hobbying, @sundancer and @avernos couldn’t help but poke fun at my perfectly good attempts at snagging another Golden Button.
I forget even which project it was, but they made it clear that my offering at the time just wasn’t up to par. Blinking LEDs were yesterdays news, the cool kids expected ever more.
Now there’s nothing wrong with a Bon Jovi song – even Beavis and Butthead would admit they quite liked a tune like “Bad Medicine” – but I felt that’s where my sticking LEDs into miniatures had led to; pretty-good-at-first-but-now- middle-of-the-road, fancy-but-nothing-amazing MTV-friendly dad-rock. Our own sniggering deliquents wanted the tabletop equivalent of Megadeth!
“Movement and audio or no golden button” they bellowed, inbetween headbanging and raising one fist.
So I decided to make my moving Jabba’s Throne. And that was too big to 3d print (on my resin printer) so I made it out of styrofoam.
So this is where it all started.
Look, it doesn't matter where it started... this is what it's all about.
Hot wire cutters are quite expensive.
Well…. relatively expensive. I mean, at least… thirty quid or so, with a cutting table. So not really that expensive. But I guess I’m just a bit stingy. Because I couldn’t justify it to myself, knowing I had everything to make one out of left-over scraps.
Essentially, they’re just a wire with an electric current running through it, which makes it act like a little heater and get really hot.
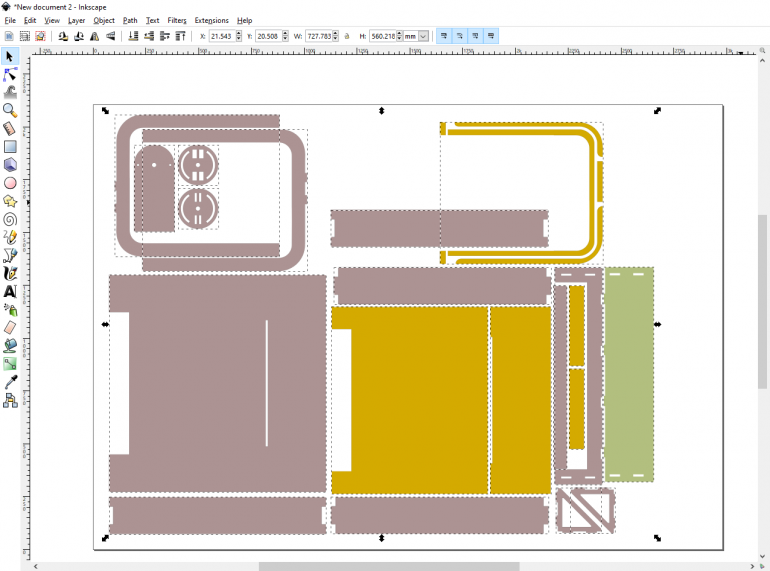
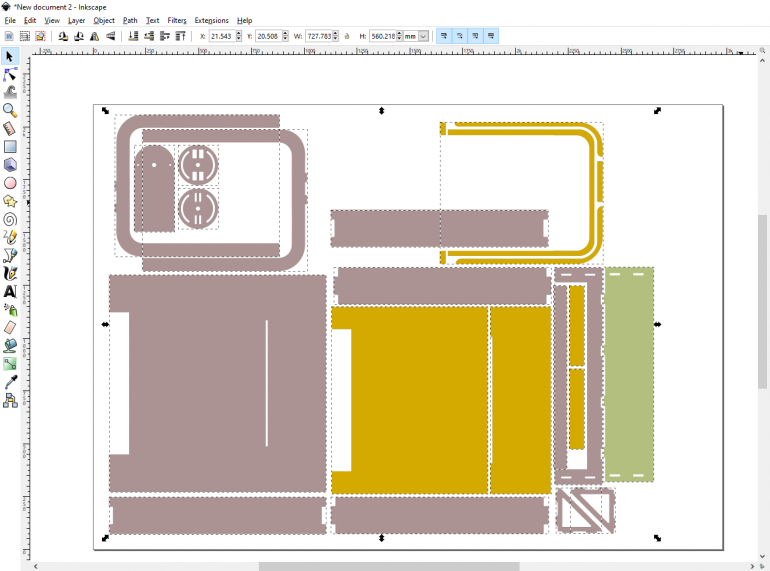
After an hour or so with Inkscape, I had a sort-of idea about how it would work out. A simple table with an adjustable stand for the wire seemed like an acheivable design for a one-day build.
(of course, like @warzan making a 3d HeroQuest board, it was soon to spiral out of control, but a one-day build felt possible at the outset).
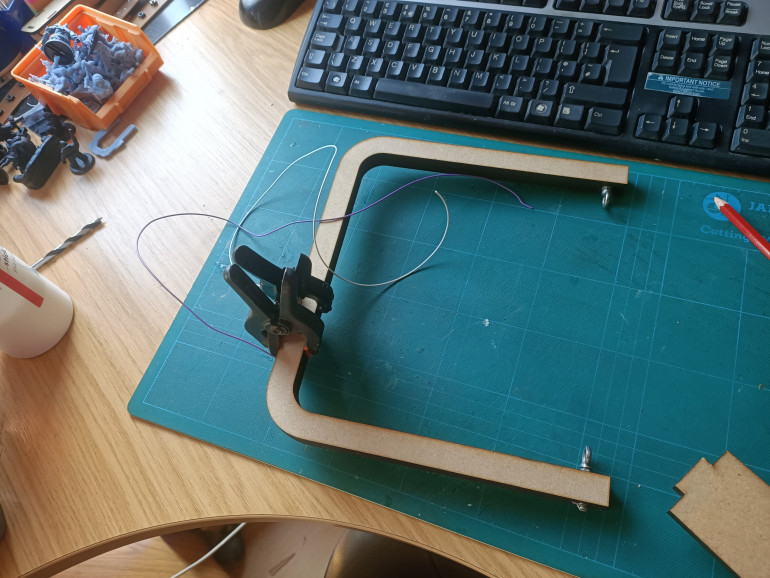
My own laser cutter is knocking on a bit now, and probably in need of a new tube, so I popped along to my local hackspace (BuildBrighton) and used their large-format laser cutter to make a frame to hold the hot wire.
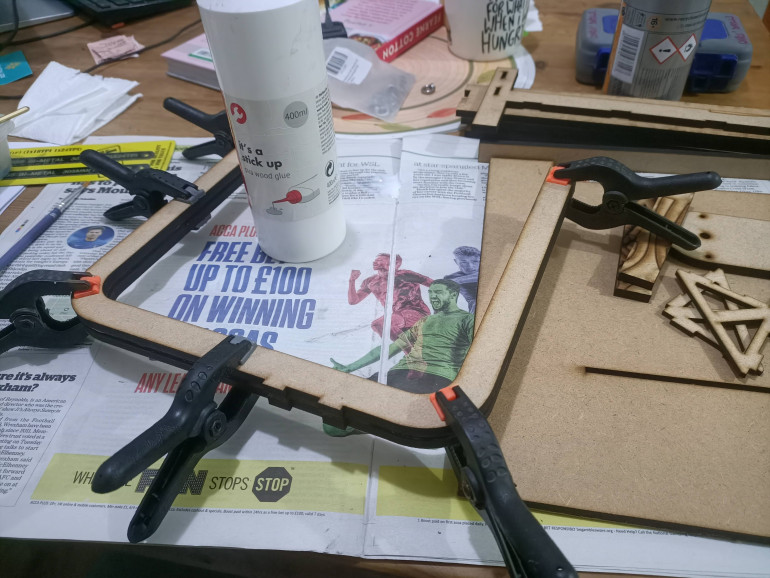
After gluing it all together and leaving for a few hours, I ran some wires inside the three layered construction and clamped them to the rings at each end using M3 bolts and washers.
At this stage, I was tempted to just connect the wires up to a 9v/12v power source and see how hot the wire got. But I was using some relatively thin 32AWG vape coil wire and had no idea how hot it could get before breaking.
I thought it prudent to knock together a quick power-controller, to be able to vary the voltage through the wire (so I could quickly kill the power if the wire got too hot!)
Using an Arduino, an LCD and a linear potentiometer, I made a variable controller using an IRF640 power FET and PWM output on one of the pins.
Amazingly, the cutter worked first time!
Building the table
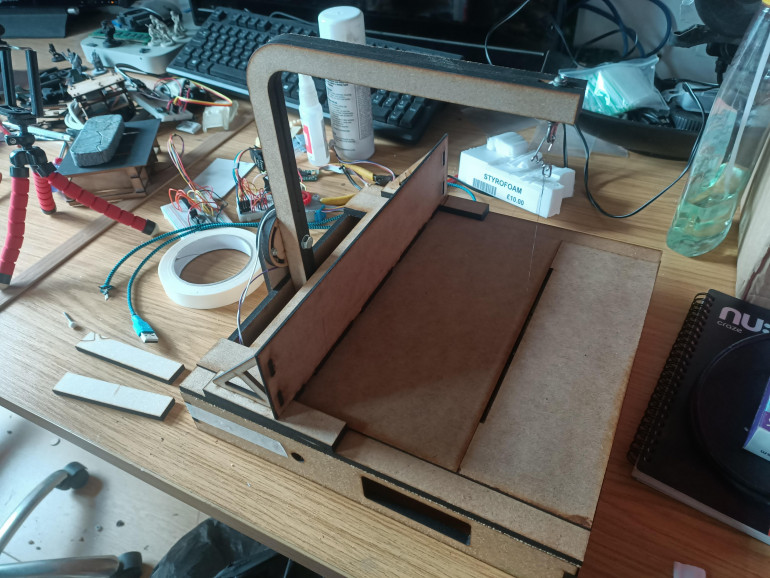
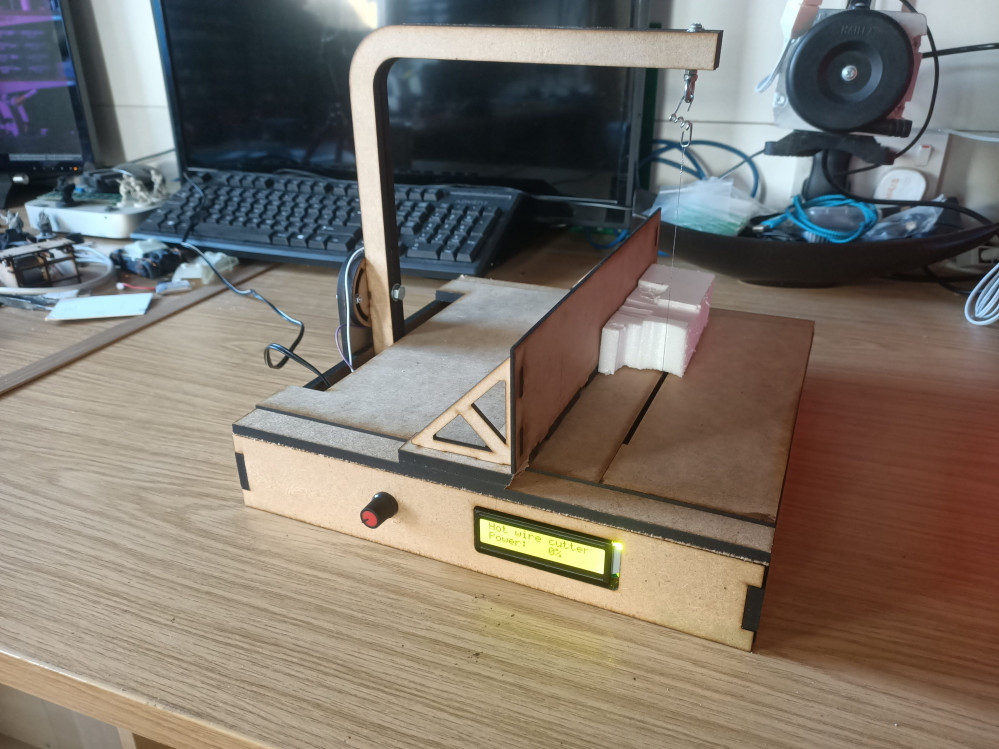
There’s not really much to say about this – the table is simply a square (290mm along each side) with a 3mm slit (for the wire to come through from underneath) and some 60mm high sides glued onto the underside.
Rather than just nail the wire frame onto the base, I used a centre-pivot to allow the frame to be angled up to 45 degrees (in both directions).
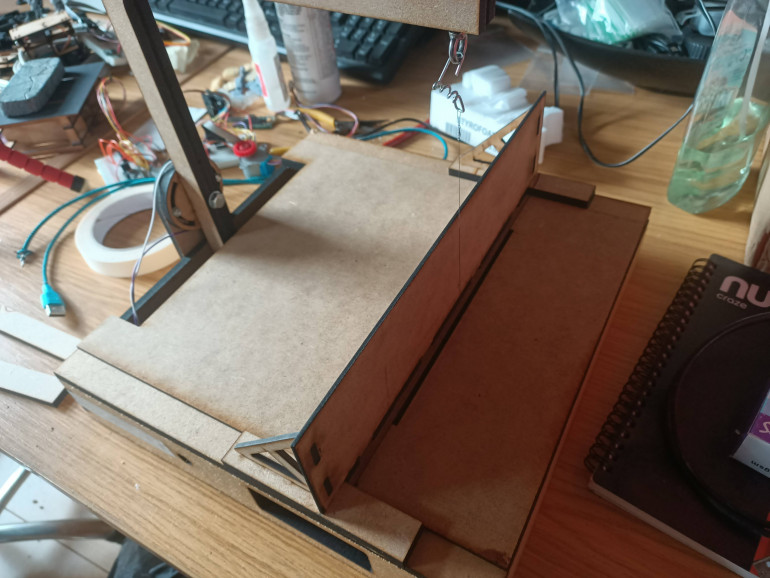
The top layer is a duplicate of the main tabletop, but reduced by 20mm top and bottom. This creates two “runners” into which I could drop the sides of a sliding “fence” (or guide).
Everything was coming along swimmingly.
Until I came to actually use the device (some of you may already be one step ahead here). When I came to push my block of styrofoam along the fence guide, the “legs” in the gutters got in the way!
Now, I should really have re-designed and re-cut the fence. But I was so keen to try the machine out, I just hacked at the fence with a stanley knife!
I doesn’t look pretty. But it does the job!
Trying it out
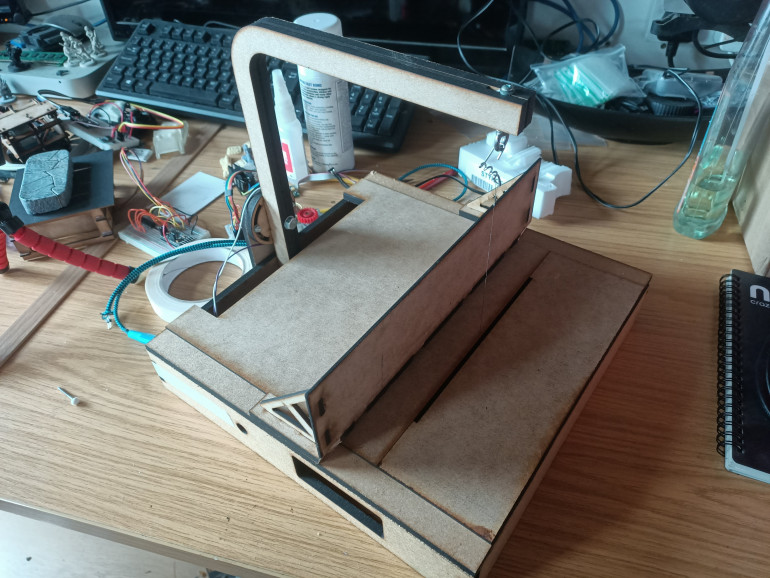
All in all, I’m quite pleased with how the project went. Originally planned as a one-day build, it spilled over two days (to give the PVA glue plenty of time to dry inbetween build steps). But as a quick-and-dirty styrofoam cutter, it works surprisingly well.
Setting the fence at 2mm from the wire, I managed to cut some pleasingly accurate strips of styrofoam. All in all, I’m calling this one done…. and a resounding success!
Should anyone be crazy enough to want to follow along, here’s the source code for the Arduino (I used a Pro Mini but it should work on any)
#include <LiquidCrystal.h> // includes the LiquidCrystal Library
LiquidCrystal lcd(5, 4, 6, 7, 8, 9); // Parameters: (rs, enable, d4, d5, d6, d7)int power = 50; // the current power value as a percentage
int last_power = 100; // last power value (to help reduce flicker)int power_pin = A0; // potentiometer power input
int fet_pin = 3; // gate on FET to control voltage through hot wireint val = 0;
int read_count = 0;
int b;void setup() {
lcd.begin(16, 2); // Initializes the interface to the LCD screen, and specifies the dimensions (width and height) of the display }
lcd.noCursor(); // Hides the LCD cursor
lcd.clear(); // Clears the LCD screenlcd.print(“Hot wire cutter”);
lcd.setCursor(0, 1);
lcd.print(“Power: “);pinMode(power_pin, INPUT);
pinMode(fet_pin, OUTPUT);
}void loop() {
val = analogRead(power_pin);
val = val >> 3; // (this reduces tiny fluctations in the A2D)
power = map(val, 0, 127, 0, 100);// if the analogue read is right on a boundary between
// two values, only update the power display if the
// value has changed for a consistent length of time
// (any flicker should get filtered out)
if (power != last_power) {
read_count++;
delay(5);
if (read_count > 5) {
showPower();
updatePWM();
last_power = power;
}
} else {
read_count = 0;
}
}void showPower() {
// this just draws the current power rating onto the LCD
lcd.setCursor(7, 1);
if (power < 100) {
lcd.print(” “);
}
if (power < 10) {
lcd.print(” “);
}
lcd.print(power);
lcd.print(“%”);
}void updatePWM() {
// our hot wire is simply connected between +ve and -ve
// through a 5A FET. By flickering the FET on and off
// we can simulate a range of voltage/power
b = map(power, 0, 100, 0, 255);
analogWrite(fet_pin, b);
}
(click the link above for 100% scaled PDF)
The purple-y coloured pieces are to be cut from 6mm thick mdf/plywood.
The yellow-y pieces from 3mm mdf/plywood
The green piece is the fence rail, cut from 2mm mdf.


