Ork Expansion
Let's Get Dirty
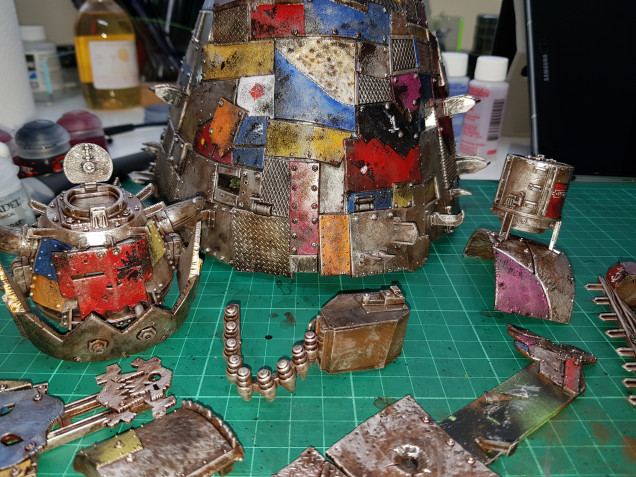
It’s weathering time. I’m hopeful that, as bad as the Stompa has looked so far, this is the start of the upward curve where things start to come together and get closer to the inteded finish.
This is another step that’s pretty simple in terms of execution, there’s very little skill involved, just spreading paint on with a sponge.
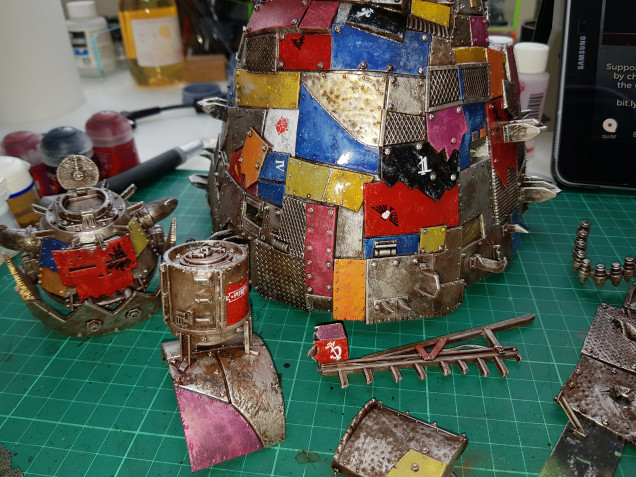
Before starting this, after adding the decals I hit a number of the bare metal panels with washes (Agrax Earthshade, Nuln Oil and Seraphim Sepia) to pick out some deatail/add depth.
The first step was to dig out some paints that are slightly lighter than the various panels that I’d painted.
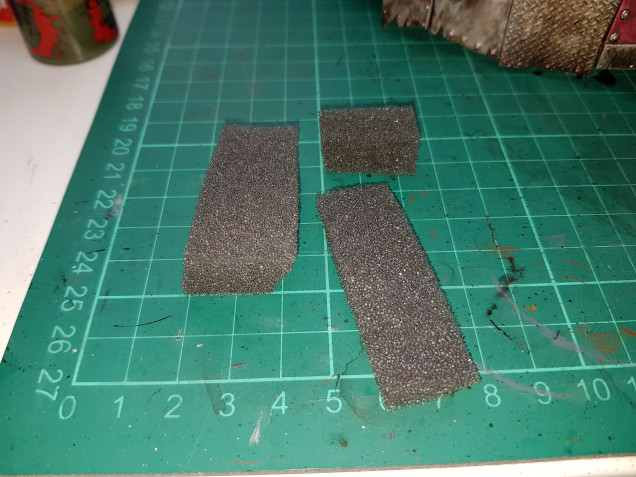
I dipped a tiny chunk of sponge into the paint, wiped the excess off in a similar way to preparing for drybrushing and then pressed this on to the relevant panel. Obviously the harder you press the more paint you get on the mini and you get a different effect as the paint runs out or dries on the sponge. I’ve tried to be as random as possible, the intention is to get a sense of scratching and wear on the panels. In addition to using lighter versions of each colour I also used some Administratum Grey which gave the impression of wear down to the primer layer of the vehicles the panels were salvaged from.
This process was then repeated with Leadbelcher followed by Warplock Bronze. The Leadbelcher was applied more liberally than the Warplock Bronze.
I tried to pick out each panel individually so that they look individual rather than having wear that carries over from one panel to the adjacent ones.
In addition to dabbing the sponge on it is also scratched/dragged across the surface to imitate scratches.
An advantage of doing this is that the rivets on the mini that had been accidently hit with colour now get covered in the metallics which is a better colour for these.












Leave a Reply