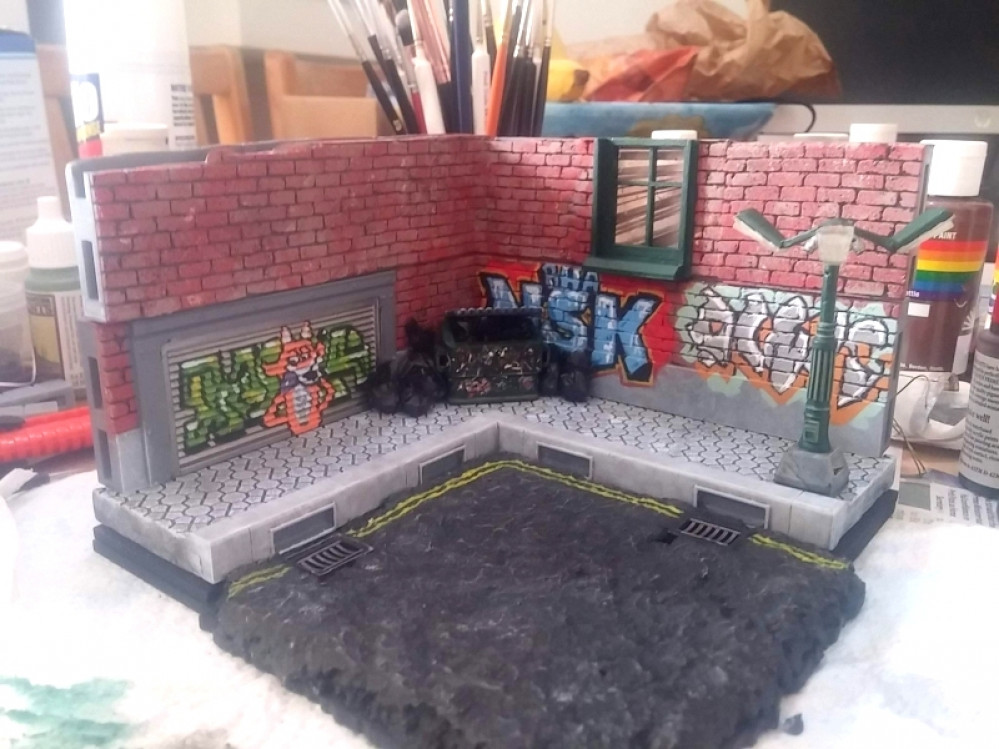
Titan Forge Cyberpunk March Diorama
Making realistic tarmac
I’ve watched far too many Youtube videos lately about how to make realistic tarmac. Many of them involve sandpaper or a similar textured paper. I’d 3d printed some grid covers and thought I’d try something a little different:
I wanted a thick surface for my tarmac, so that I could embed the grids into the floor. At first I thought about using extruded polystyrene – by breaking instead of cutting the edges, I could create a rough, pebble-like texture which would capture the look and feel of loads of pebbles held together in tar quite nicely.
As it turns out, I couldn’t find a sheet of 6″ square polystyrene sheet for love nor money. And, given the current state of the country, with us all in “lockdown” sourcing some was proving quite difficult – it’s not like I could just pop along a local shop and ask if they had any spare packaging materials they were throwing out!
Once again, my wife came to the rescue.
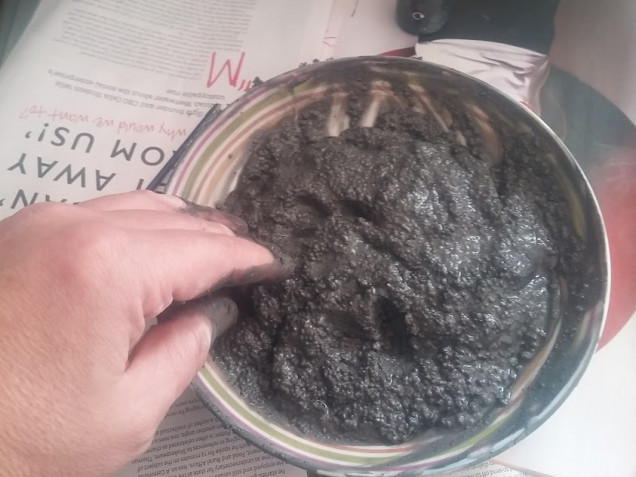
“Just make some tarmac” she said (as if it was the first thing I should have tried). I didn’t understand. So she went into the loft and came back with some plaster of paris, a small tub of Army Painter scatter grit (the stuff you glue onto the bases of miniatures) and some black acrylic paint.
The paint is to colour the entire mix, so that if it cracks or chips, you don’t see a stark white flash of plaster – it also means that cracks can be engraved directly into the surface, if necessary.
I mixed up some goop but it felt like it was missing something – it was almost there, but missing a little bit of texture. So she went and rummaged about in the kitchen cupboards….
Chia seeds (nope, me neither) not only added a great texture to the mix, but the little black flecks contrasted really nicely with the brown and white mix of grit already present, in the dark-grey slop.
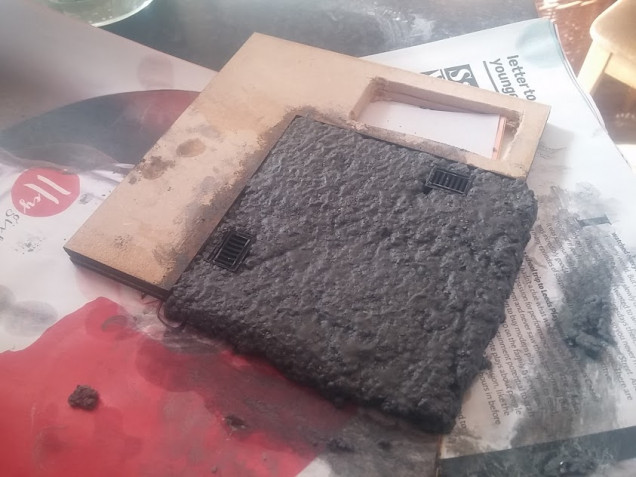
I put some little carboard collars around the grids, painted the base board black, then glued them down, before smearing the sticky porridge-like mixture all over the board.
The end result was surprisingly realistic! I’m currently waiting for the whole thing to fully dry (I reckon we’re looking at 24 hours or so at least) and it’s noticeable already that the final colour is going to be quite a bit paler than when it was first applied.
Tomorrow – all being well – I’ll add a liberal black wash over everything and a quick drybrush (to bring out the texture details). Then some broken double-yellow lines and I think we can call this bit done!











Leave a Reply