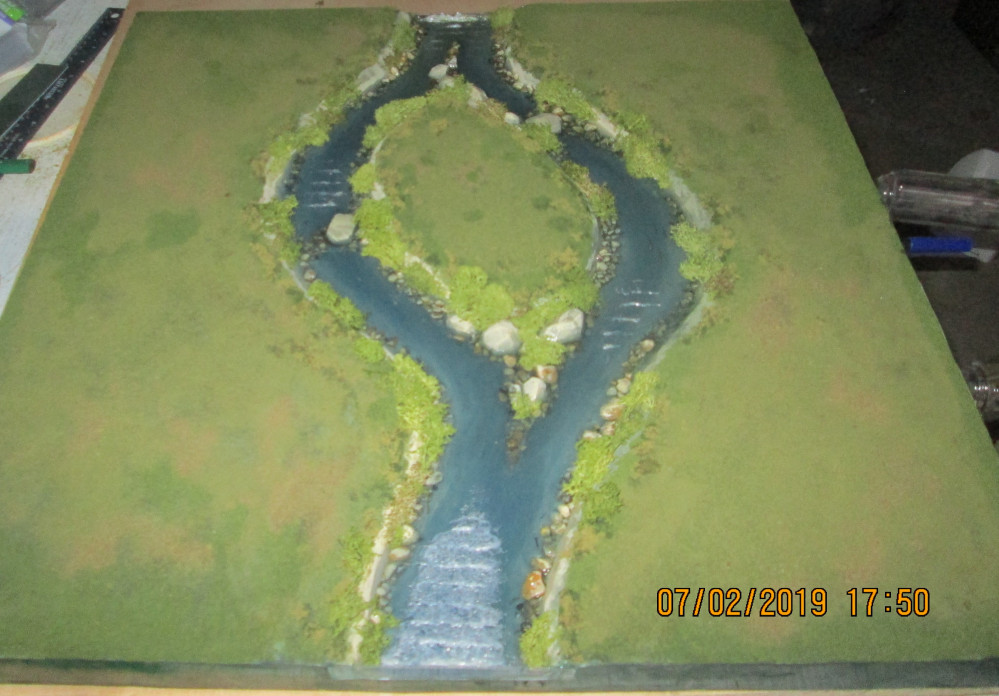
Battle Boards and Scatter Terrain
Battle Boards and Scatter Terrain
It’s been a while since I’ve been able to post on this project. Funny how life gets in the way. As mentioned previously, I’ve moved on to the battle boards themselves, and of course started with the most difficult ones: the two river boards. Needless to say, things didn’t go quite as planned… but I keep telling myself this is all a learning experience and will aid me in building the next set — bullsh*t.
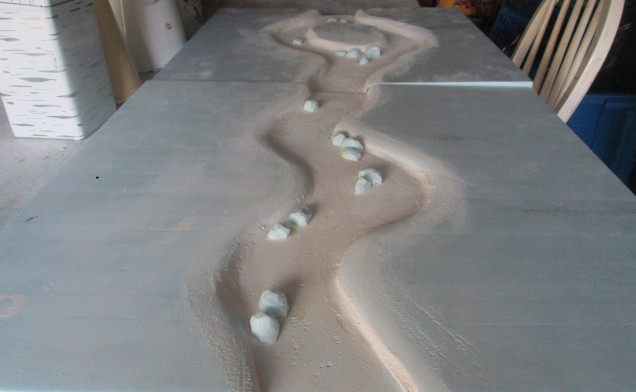 Two river boards, one with an island. After carving out the channel I lined it with wall filler, both to protect the foam in case the Woodland Scenics stuff ate it, and also to texture the bottom (I didn't like the texture and ended up sanding it smooth). I also used polystyrene to make some larger rocks for the banks and river bed. The foam has warped on the island board, but I'll weigh it all down on a flat level surface when I do the first pour of Realistic Water.
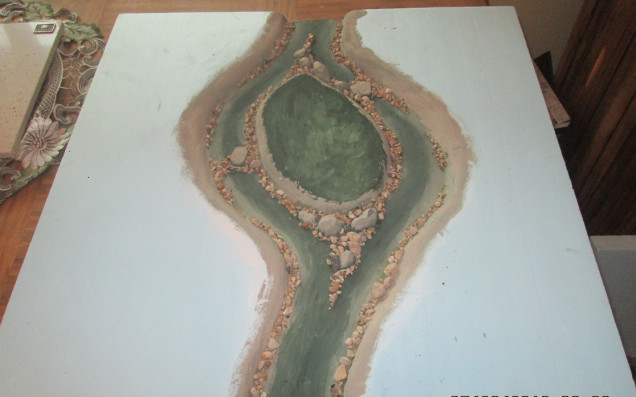
 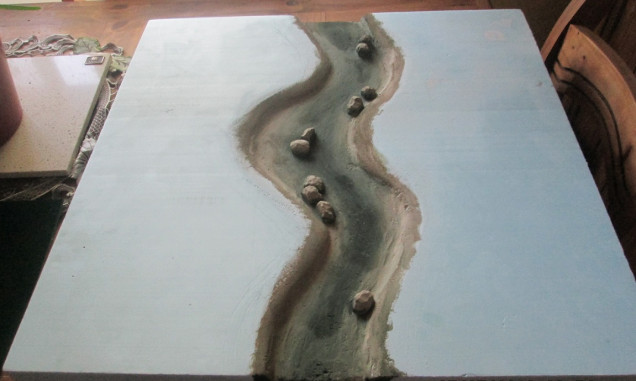 Paint: I tried to force perspective, or in this case, depth by painting the middle of the channel a darker green.
 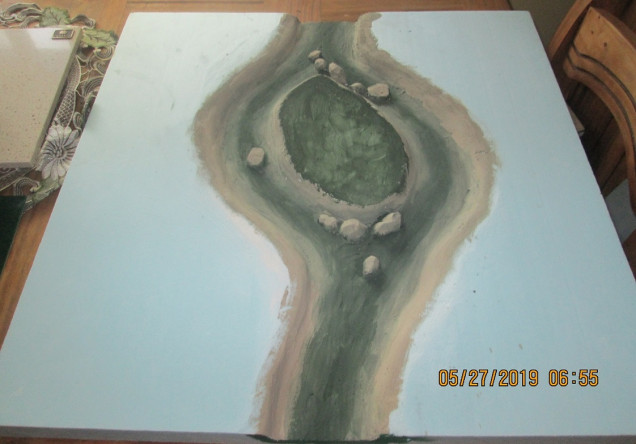 The island board. Note to self: make the @#$%! island big enough next time so that a copse will fit on it.
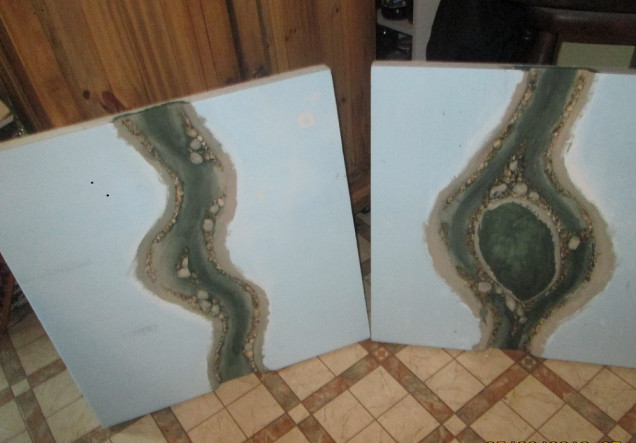 Both boards were drybrushed with a lighter tan so all the stones would look similar, but there's still enough variation in the underlying natural colours to add interest. I put in two flat stones to either side of the island to act as a possible ford. They'll still be covered with water, but will be visible, so it will be up to the players to decide whether or not the fords are in play.
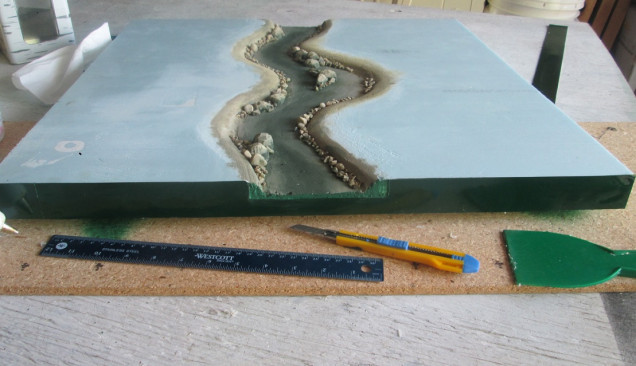 I managed to score eight plasticard signs from a local gas station that were used for a promotion. I got them before they went into the bin, so I didn't even have to go dumpster diving, though I would have (saved $25). I cut out a section of the plasticard where the river ends, and will use clear blister pack plastic to dam it up. Note the plastic putty knife, used it to flatten out the hot glue beneath the plasticard.The top edge got a healthy dose of wood glue and wall filler to seal up the gap, as with the previous small edge pieces.
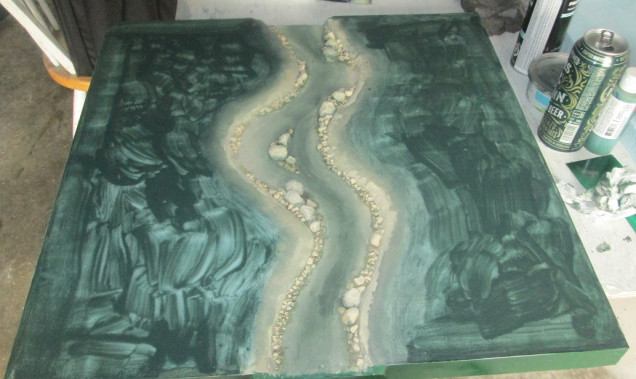 The two boards got a dark green shadow where flock will be glued down. I've watered down the craft paint considerably because A: it covers easier, and B, I'm a cheap bastard and want to stretch my paint as far as I can. In my experience it hasn't really mattered if the coverage isn't perfect. I might add that Innis and Gunn Lager is ideally suited to building river boards
 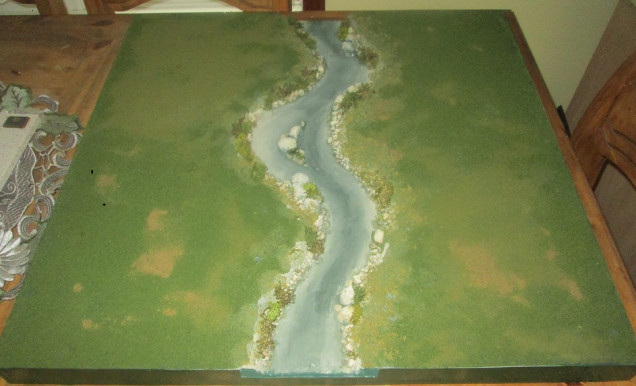 Flock added. I had some smaller bits of lichen left that had already been treated with glycerin, so lined the bank with it. Little did I know that the acrylic water would react with it and turn white. #$%^&! Also, there are some glaring gaps in my flock coverage. It reminds me of the haircuts my dad used to give me to save money. I'll patch it up when everything has cured.
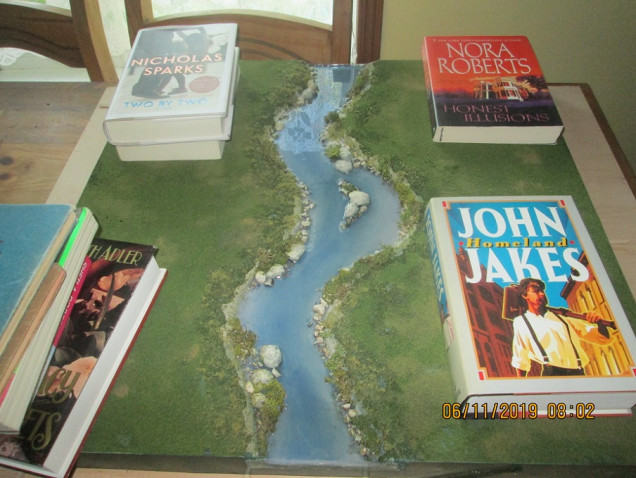 First pour. Note the clear blister plastic at both ends of the river. I tinted the water with a drop of blue tone per 2 oz. of acrylic. It looks much greener in real life. I've weighed down the four edges so they don't lift when the acrylic cures. I used an entire bottle of Realistic Water on this board, even though I tried to keep the river's dimensions modest. You could always muddy the water so you can't see the bottom (by using a drop of paint instead of wash) and thereby make it much shallower and wider. I should apologize here for the book titles; they're from my spouse's shelf.
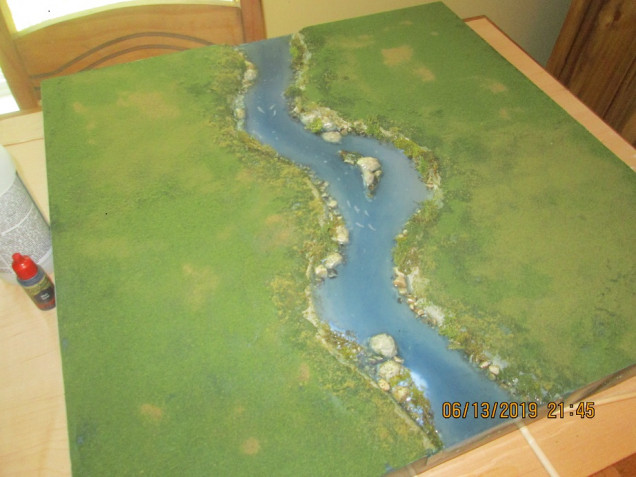 I painted fish on the first layer when it cured, using silver and a pearlescent highlight then did two more pours. Looks good now but everything went pear shaped when I added the Water Effects paste.
 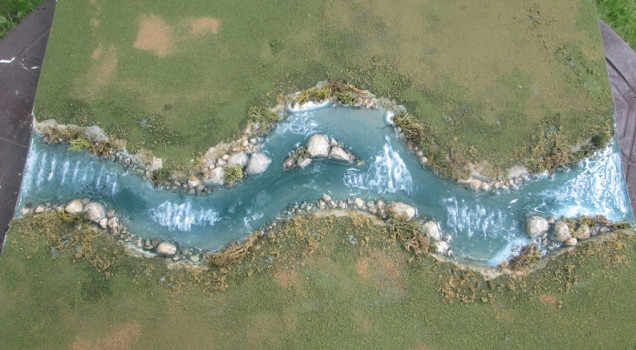 I put in a small section of waves using Water Effects. It dried clear, as advertised, but looked a bit messy, and the waves weren't tall enough, so I added more, and thought it would be a good plan to add a final layer of Realistic Water to clean it all up. I sculpted higher waves all along the river, but after several days the goop hadn't cleared completely. I got impatient with the mess surrounding the sculpted waves, so did the final pour. All the Water Effects paste turned white again! I'm told it will all eventually clear up, and it has somewhat after a few days in the sun, but confidence is low. The whole thing came very close to going into the bin! Note the white where the glycerin reacted with the Realistic Water. I'll either cover it with more lichen (using wood glue to stick it down this time) or put some bright green flock over the area as pond scum. The plan was to make the river non-directional, as the two boards will fit together in several different configurations. It just wouldn't look right to have the river flowing in two directions! Next: I'll post pics of the island board when I finish it.








Trying times, my friend! Don’t worry about what you are reading, the Innis and Gunn Lager makes up for that, it is a tasty drop!
Thanks @Robert . The water effects stuff is starting to clear, and I’m expecting it will do so completely now. The second board is looking much better, and I think I will re-order how I do things, adding the brush later, etc. The acid test will be whether the client likes it.
I think the Innis and Gunn Lager has also worked better on the second board. 🙂
It is interesting that the glycerin reacted with the acrylic water. Hope it all clears for you. If the client doesn’t like it… they just have no taste!