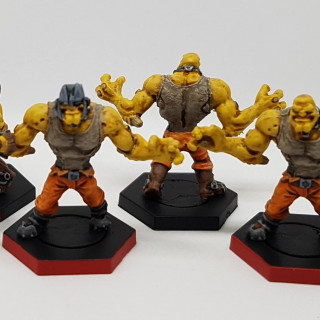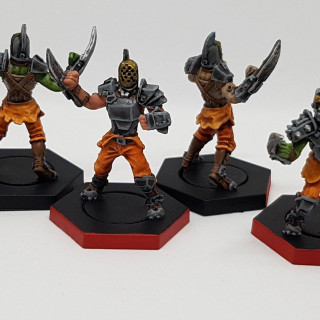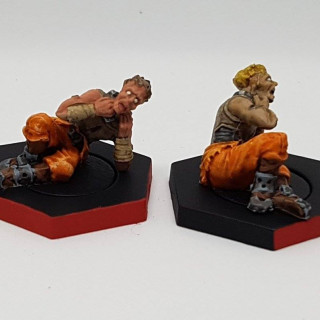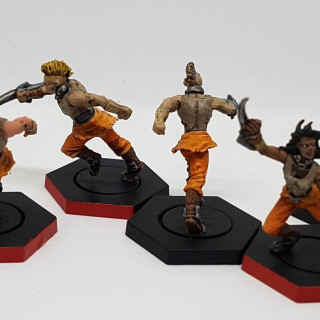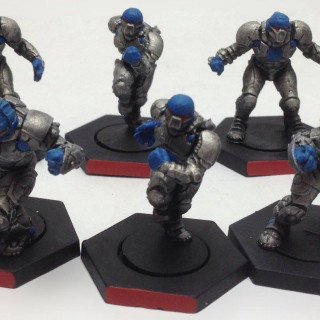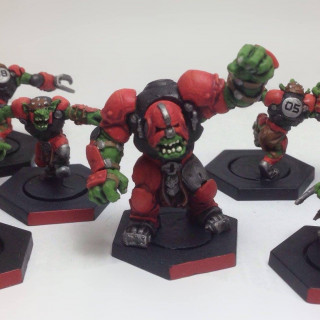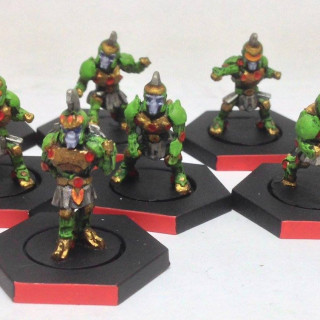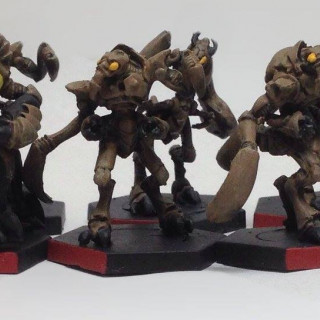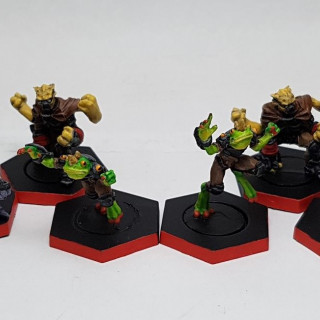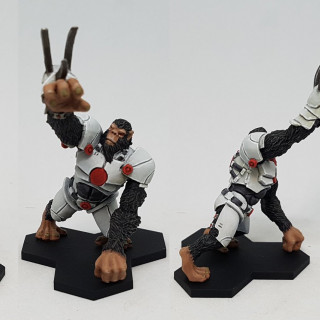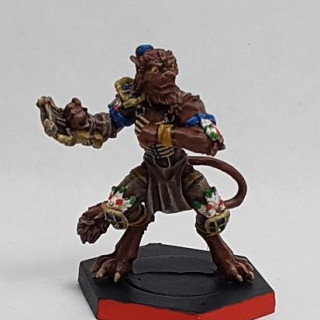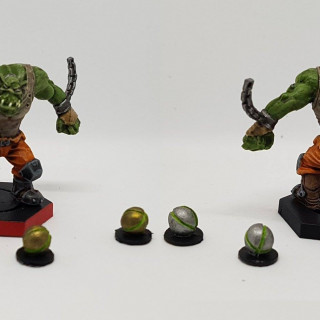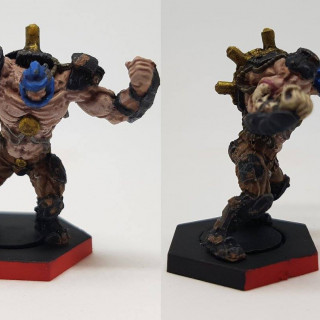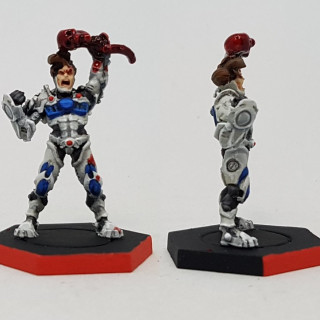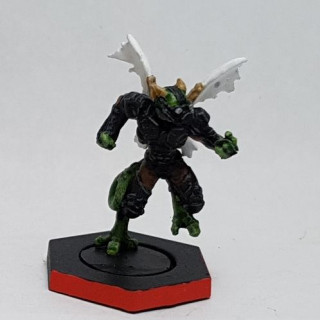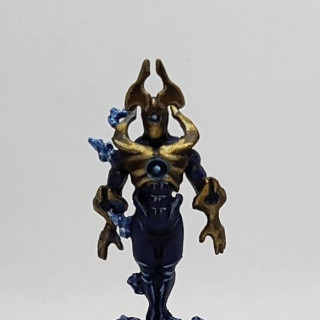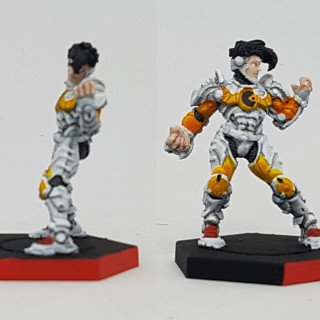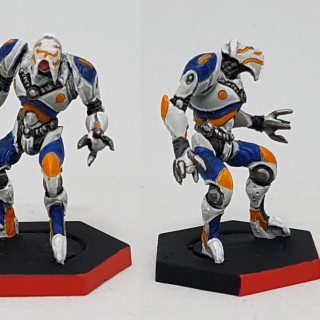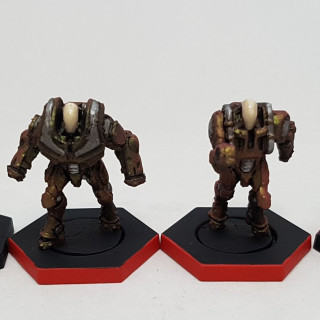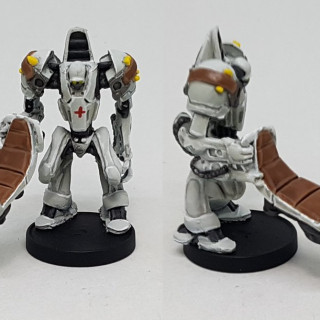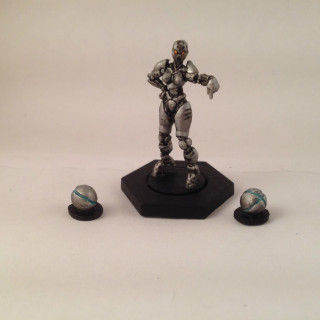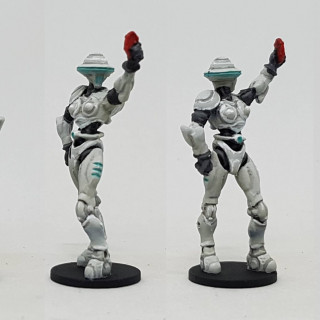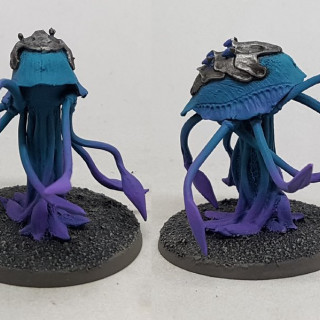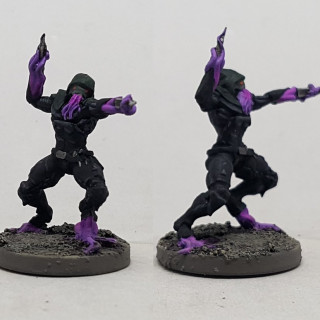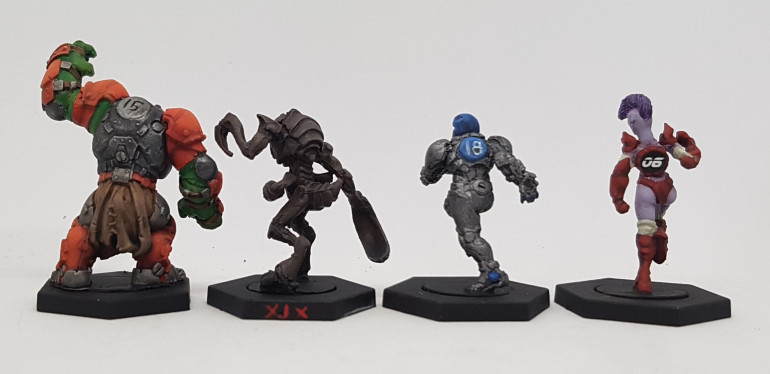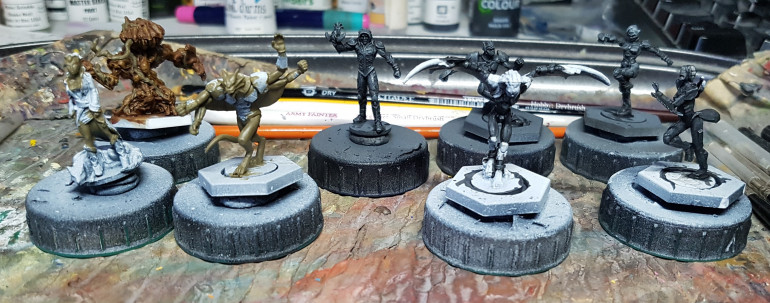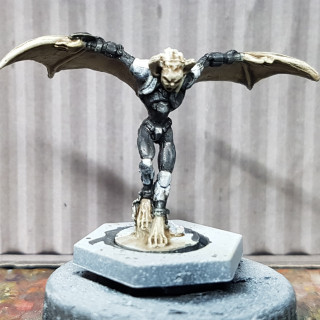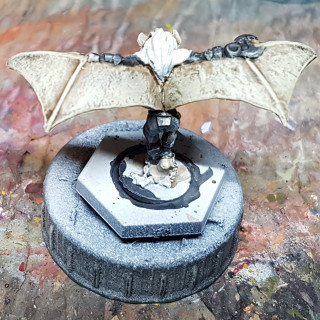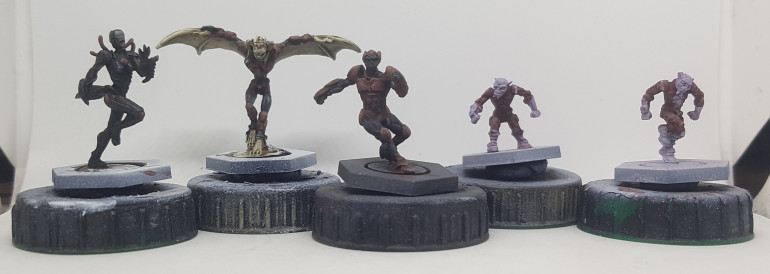
Dreadball Spring Clean Hobby Challenge 2022
Recommendations: 567
About the Project
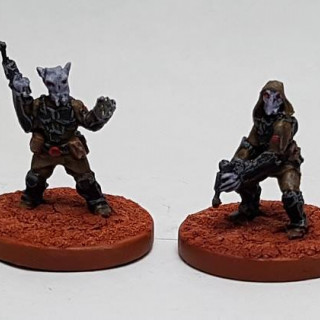
Spring Clean Hobby Challenge 2022 to deal with a largely unpainted game I've been ignoring for almost a decade: Dreadball. The goal is to get stuff painted fast and to a tabletop standard, not slow and to a high standard. I may pick some models to experiment with though.
Related Game: Dreadball
Related Company: Mantic Games
Related Genre: Sports
Related Contest: Spring Clean Hobby Challenge (Old)
This Project is Completed
Planning (14/02/2022)
The Premise
A long long time ago when I was still kinda new to the hobby and shiny syndrome was in full effect a friend pointed me towards Dreadball and expressed an interest so I bought in (2013). There was more talk about it a while later, so I went all in on the Xtreme kickstarter when it came out (2014). In all the years since then I’ve played Dreadball on maybe 3 occasions. My group never got on board with it, although a few others picked up starter teams. The earlier Mantic sculpts and resin were not the best to work with or paint so it’s all mostly sat on a shelf unpainted. I’ve even tried selling it all off a few times. Some parts of it were bought.
Over HERE I count down towards being 100% painted, but that total is a lie. It ignores what I’ve been calling my Box of Undesirables. The stuff I don’t particularly want and haven’t sold along. Its mostly Dreadball in there. My Spring Clean Hobby Challenge is to deal with this dirty little secret, and then see if I can tempt my group in to a (bi)monthly league day.
A dumb idea?
During lockdown I was also toying with the idea of a 1.5 player league hosted over the internet. It’s probably a dumb idea, but it might work with a game like this. Here’s my idea:
- Every player uploads their current team roster to a shared google spreadsheet, and keeps it updates across the season. On your roster sheet you can include standard deployments, possibly even conditional based on what type of team you’re up against.
- The TO draws opponents for the round and everyone has 2 weeks to play their games and update the Google Sheet with the outcome and update their roster. Then the next round match ups are drawn
- No one actually plays against a live opponent. You play the actual games running both sides in your own house, using the updated rosters and deployments from the Google Sheet. You are expected to play fair. If you cheat you’re only really cheating yourself. There’s no real prizes.
- This means both opponents can report a win, so tiebreaks of some sort would also need to be tracked. (I’m open to suggestions)
- If anyone drops out of the league their team can still be used and be managed by whoever they’re playing against that round. The TO should feel free to remove unmanaged teams when they can do so without leaving someone opponentless. Active players should be drawn against active players wherever possible.
- You don’t actually need the correct minis for your opponents faction. Just make sure you can keep track of who is where, even if that’s by sticking labels on to coins.
- A 1.5 player league means that while you are playing against yourself, there are still consequences and you’re not in charge of who or what you’ll be facing next, hopefully adding a little of the challenge back, while allowing everyone to try different teams and experience other aspects of the game. You’ll also clearly have the team you’re routing for. Hopefully this will get around some of the “fun sinks” of solo play.
Is this a dumb idea? I’m not sure I’d stay interested after the first couple of games. If it works, it would allow us to have an OTT league without anyone leaving their houses and definitely removes the issue of finding a time when both players are free at the same time.
The Pile of Shame
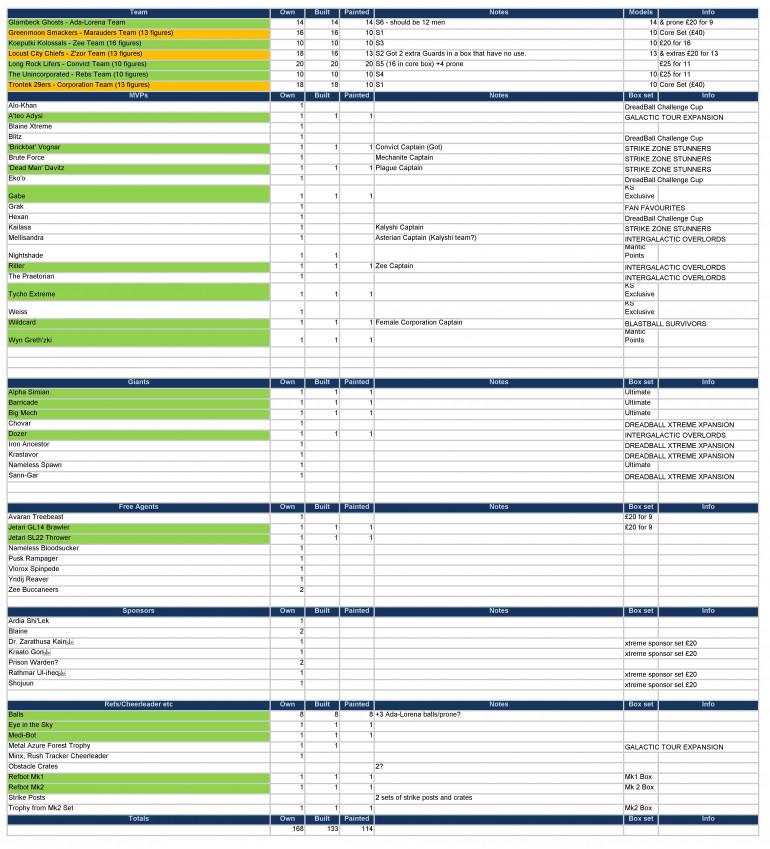
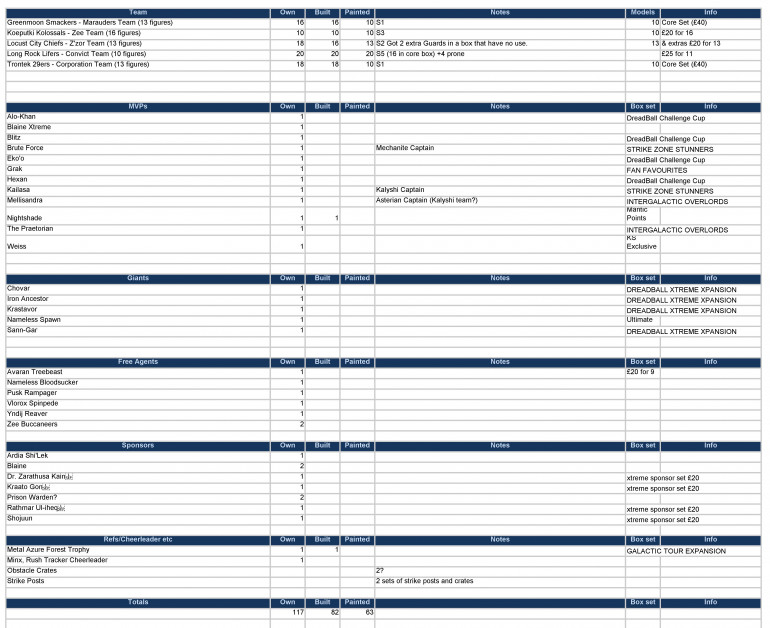
So what do I have to contend with? Here is a list of everything I think I have, and then just the stuff I think I have left to paint. I was given a goody box by mantic a3-4 years back which I know contains a few more models. I need to go through everything and confirm what I have and add the extras to this list. It’s currently February 22 and I’m in the avoiding-work-by-planning stage so I’ll update this later at my convenience. The header picture was taken a few years ago. Some of it has been sold, but a few other bits have turned up since, although I haven’t bought any more in many years.
According to these charts I’ve 54 models to paint, along with Xtreme terrain pieces. I know I’ve some more elsewhere to add still.
Prelude
According to google Spring is 20/3/22 through to 21/6/22 so I think I’ve 5.5 weeks until the Challenge starts. I’ve painting my way through Kingdom Death right now. I hope to have that done before this starts, with enough time to do a full inventory, wash clean up and prime everything that still needs it. Most of it is built. I cannot remember if I washed or cleaned it all up. There’s no harm in washing everything again, just to be safe. Dust may be an issue anyway.
Quick Questions
- I haven’t played the game since Sponsors were added. I’m pretty sure I don’t have enough bases to go around. Do they need hex bases? Can you see anything else on my list that doesn’t need a hex base? If I can save a few that’d be great.
- Is there a good app for Dreadball that’ll manage your team and handle rolling for new powers when you level up? When I had a league day we had one set of books to fight over between games, and looking up all the different XP tables at once took multiple books. It would be good if we could avoid this by doing it all with a few touches of our phone screens. I own the 2nd ed rules, but I’ve not read them or looked at the current state of the game so I’ve no idea how many books have XP tables in them for the current edition of the game.
Chillcon 19 Goody Bag DB Contents (15/2/22)
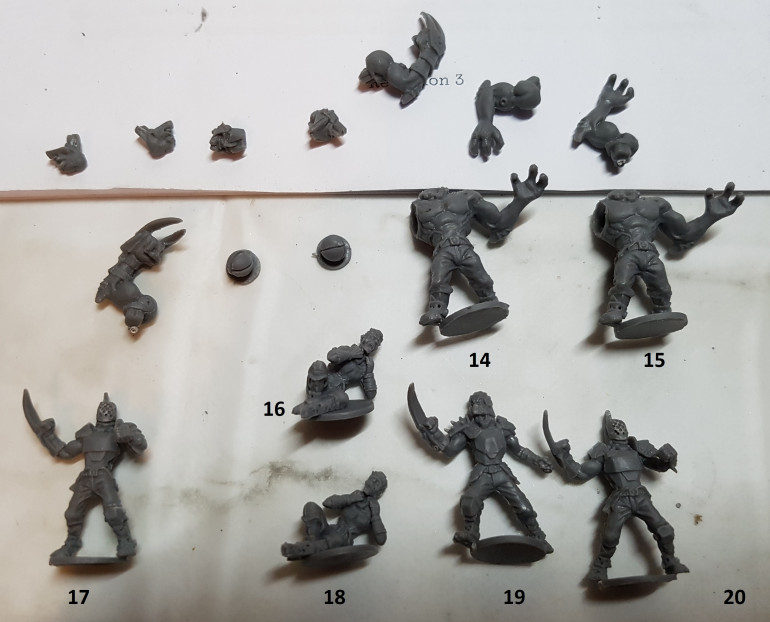
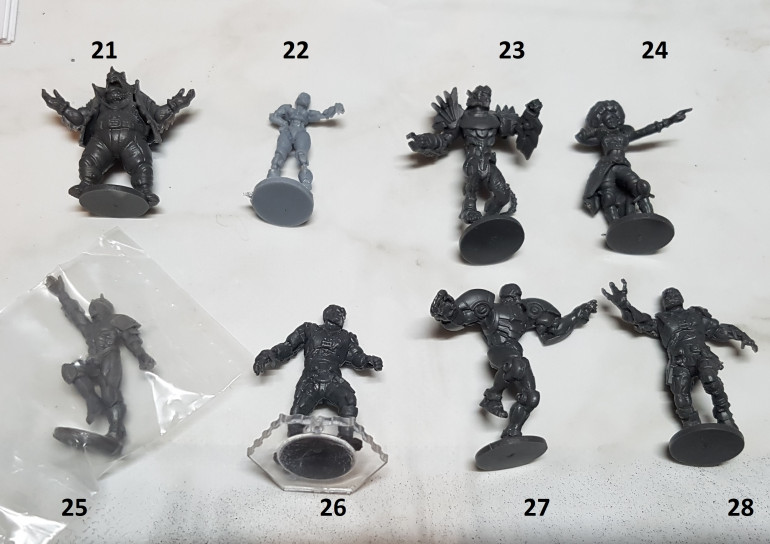
Back in the long lost Before Times I went to Chillcon in 2019 and they gave me a goody bag, and mantic added a box to it that was twice the size of the bag! I’ve dealt with some of it, but there’s still plenty in there that wants attention. Here’s pics of the Dreaball stuff from it which I need to identify, and two models that are free to a good home.
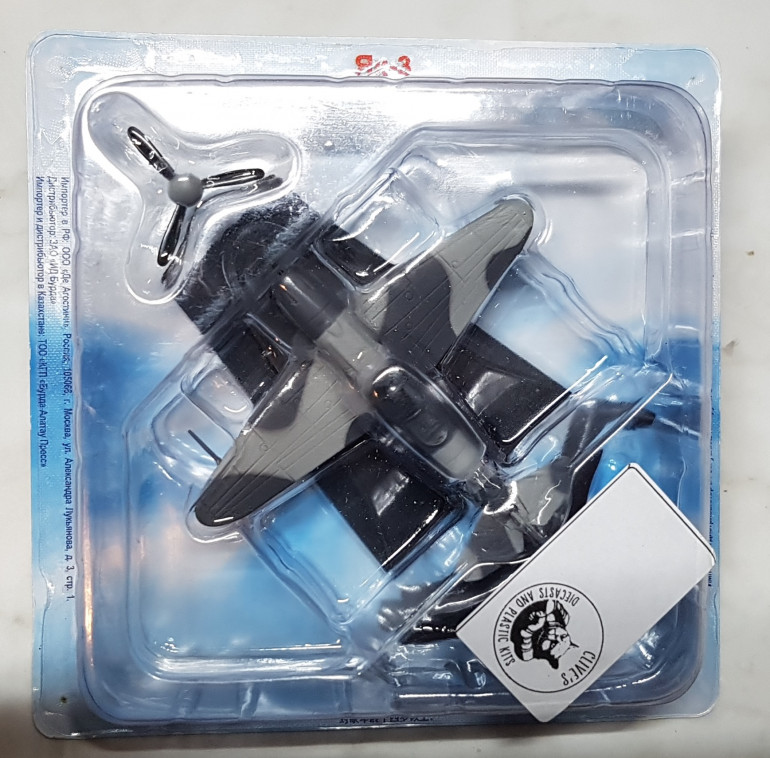
This plane is free to whoever wants it. You pay postage though.
https://www.flyingmule.com/products/DA-DARA20
De Agostini Russian Aircraft DARA20
Yakovlev Yak-3 Display Model
Soviet Air Force, USSR
| 1:100 Scale | Length | Width | ||
|---|---|---|---|---|
| Yakovlev Yak-3 | 3.25″ | 3.5″ |
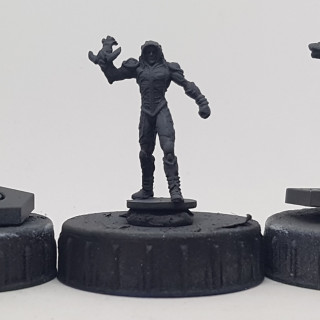
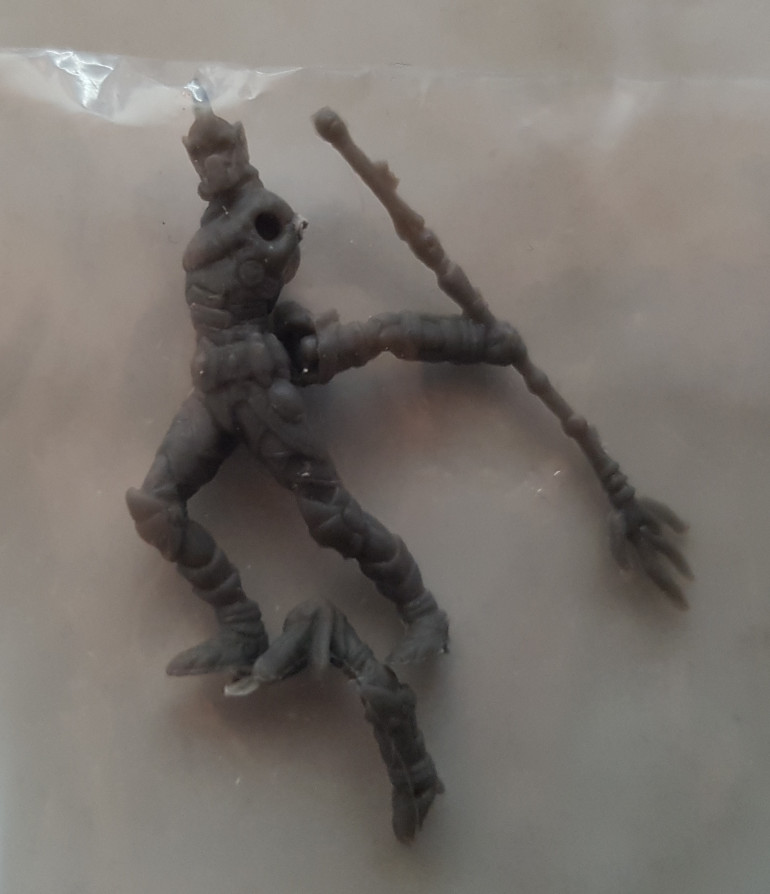 Who is this guy? I assume its a KoW Trident Realms something? Anyone recognise him? I don't have a Trident Realms army so if that's what he is, and you want him, he's yours. Just cover my postage. UPDATE: He's an Asterian overseer. I might have a small bag of troops to go with him.
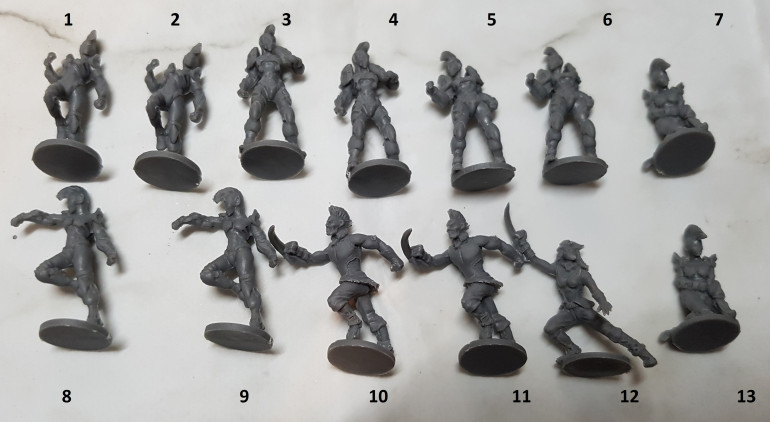
So who are these guys? I’m going to label what I know and fill in the gaps with your help so please speak up if you can identify something I can’t.
I’ve already built and painted a load of Convicts. possibly double what’s shown here. If I have no use for what’s shown here, they’ll need a new home too. I’ll need to check the books to see what the max allowance of each troop type is first though.
- Bremlin Nebulas Kalyshi
- Bremlin Nebulas Kalyshi
- Bremlin Nebulas Kalyshi
- Bremlin Nebulas Kalyshi
- Bremlin Nebulas Kalyshi
- Bremlin Nebulas Kalyshi
- Bremlin Nebulas Kalyshi
- Bremlin Nebulas Kalyshi
- Bremlin Nebulas Kalyshi
- Long Rock Lifers Convicts
- Long Rock Lifers Convicts
- Long Rock Lifers Convicts
- Bremlin Nebulas Kalyshi
- Long Rock Lifers Convicts
- Long Rock Lifers Convicts
- Long Rock Lifers Convicts
- Long Rock Lifers Convicts
- Long Rock Lifers Convicts
- Long Rock Lifers Convicts
- Long Rock Lifers Convicts
- Coach Fergus from Dreadball Kickstarter 2
- Refbot
- Na’hautl, Night moon tree sharks Captain
- Coach Tracer from KS 2
- Weiss (Possibly my second)
- New Eden Revenants Captain
- Neobot Captain
- Frank Burke #2 New Eden Revenants Team Captain
I’ve just been to the mantic website to ID these models, and they only have 7 products listed under MVPs. Is there another site I can go to to see every mini they’re released, even the discontinued and out of stock ones?
Update 18/2/22
I emailed mantic for some help and they gave em enough information to go away and ID the remaining models. Thanks, Mantic.
Washing and Bases Question (27/2/22)
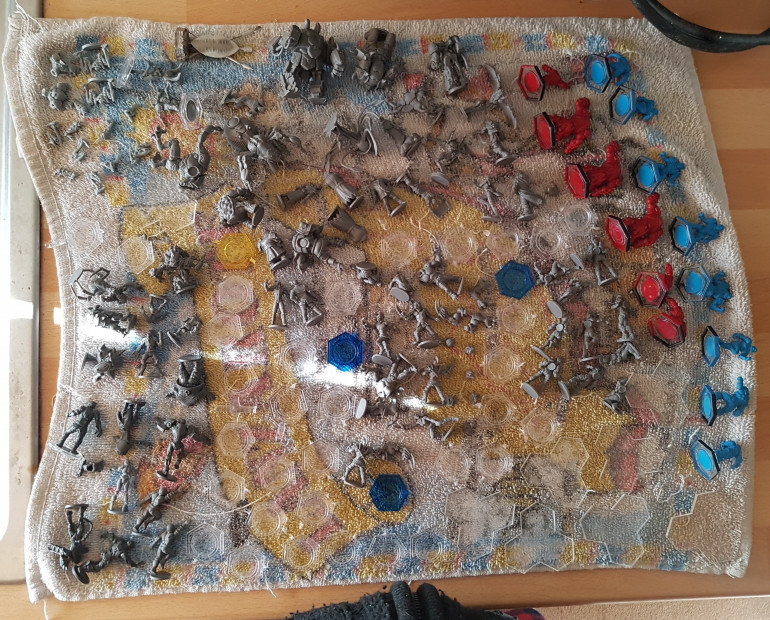
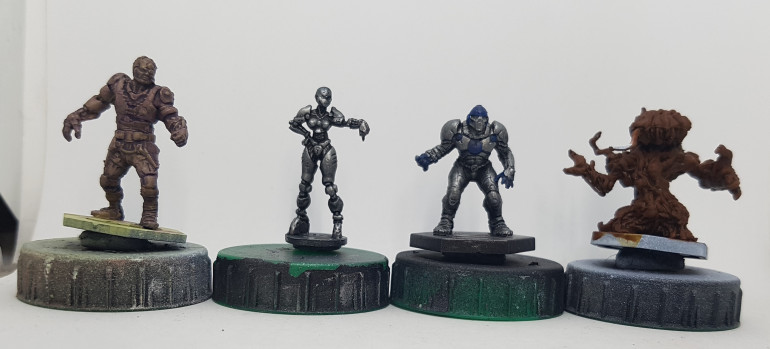
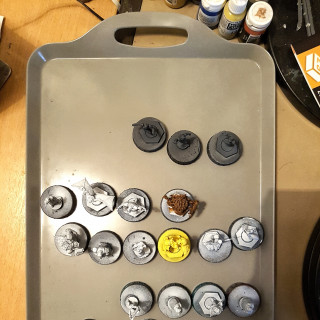
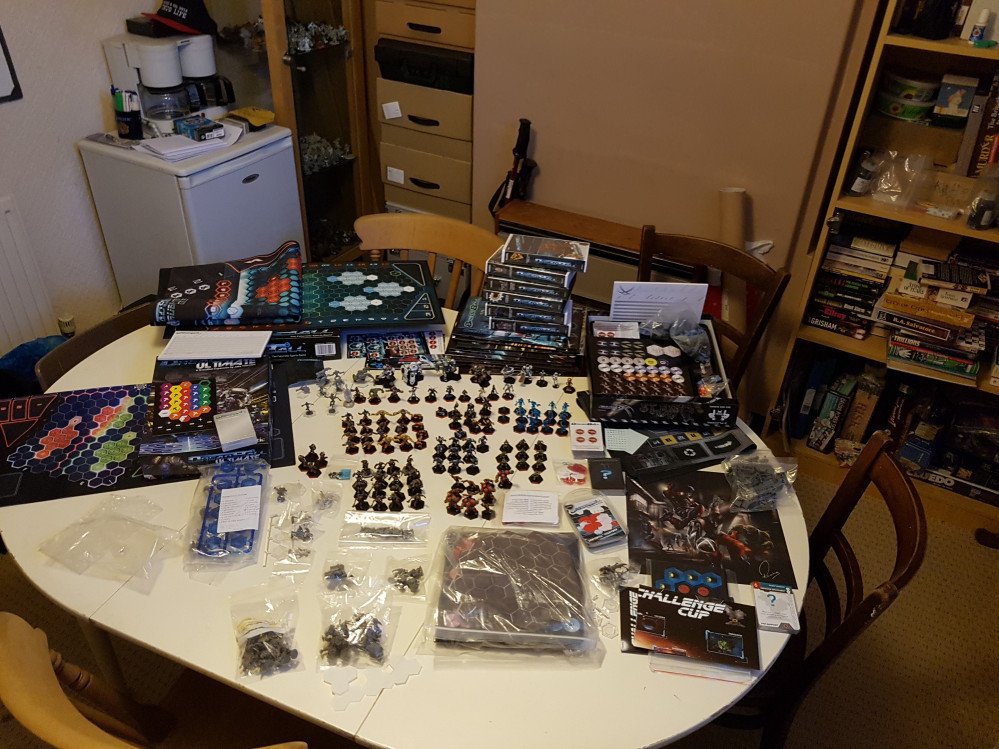
I was waiting for some washes to dry on another project so I thought I’d use the time to wash and separate out all the DB models. Here they all are in the pic below. I’ve since bagged them up in to individuial projects, along with the required bases. I’ve 15-20 more models than bases though, it appears, which leads me to my question:
Do any models other than players actually need a base? Does anyone else have a facing that matters? Refs, coaches, cheerleaders, medibots? Do prone players have a facing or need a base? Do you even need them, or are you better off laying down the model or using a token? Anyone other than players? I don’t want to spend £5 delivery on £3 of bases from Mantic and I don’t think my FLGS will have any.
Update: 2/3/22
A quick keyword search through the rulebook and the Mk1 XTreme book reveal:
- Coaches appear to actually be sponsors, even though they’re sold as coaches. I might be wrong here?
- In the core rules the only Coaches are the guys rolling the dice (ie you and me)
- Sponsors are only used as tokens off the main board and as such have no facing, so bases do not matter
- The ref has no facing, so bases do not matter
- Prone models are considered to have 360 back arcs. Models can choose a new facing when they stand up. As such, facing and bases for prone models does not matter.
- Cheerleaders are just score trackers so don’t need a base
- Medi-bot isn’t even mentioned in the rules, so presumably doesn’t need a base
Please correct me if I’m wrong on any of this before I glue my limited supply of bases to the wrong models.
Old Paint Jobs (18/3/22)
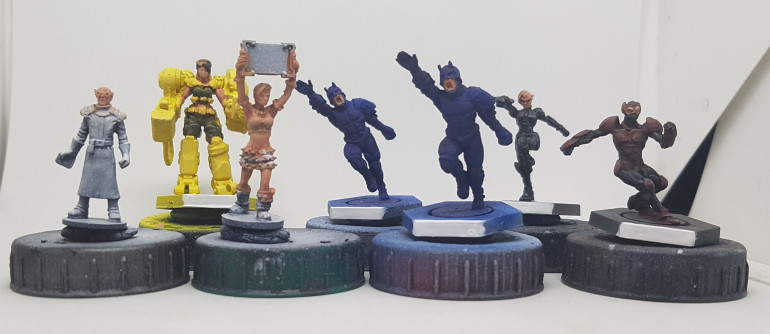
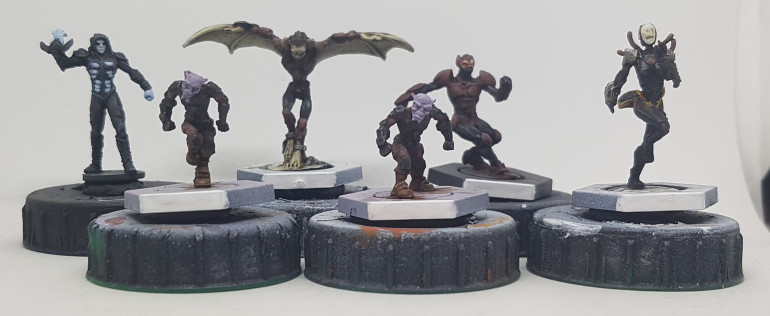
With the challenge about to start, and my desk covered in naked plastic minis that I need to decide how to base coat, I thought I should go through my old pics so I can try and colour match where applicable (ie I already have starter teams for the corporation and marauders so I plan on adding these extra Models to those teams). I thought I may as well upload those pics here so everyone can see them, and so I can reference them easier as I work through the project.
These are all old pics taken when the models were first painted, 2+ years ago. Much longer in some cases.
Gallery 1:
Ada-Lorena Team
Convict Guards and Keeper
Convict Jacks
Convict Prone Markers
Convict Strikers
Corporation Team
Marauders Team
Zee Team
Z’zor Team
Gallery 2:
Rebs Team
Alpha Simian
A’teo Adysi
Brickbat Vognar
Deadman Davitz
Gabe
Galdo
Phantasm
Tycho
Gallery 3:
Wyn Greth’zki
Eye in the Sky turn tracker
Jetari GL14 Brawler SL22 Thrower
Medi-Bot
Refbot V1
Refbot V2
Trophy score tracker
These next few a reference pieces from Deadzone that I’ve previously painted. They’re here as colour guides.
Gallery 4:
Chovar Psychic
Project Oberon
Reb Zees
Base Coating (19/3/22)
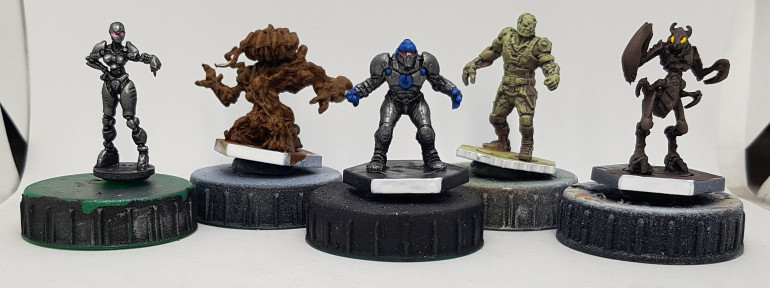
The first weekend of the spring challenge is here and I wanted to get as much prep work done as I could. I was out all day Sunday so I didn’t have as much time as I would have liked. Friday after work I got all the priming done, and then Saturday I buckled down and got as much airbrush base coating done as I could. Everything below was done as lazily and quickly as I could with an airbrush, unless I’ve said otherwise. Maximum results for minimum time and effort is the guiding principal here.
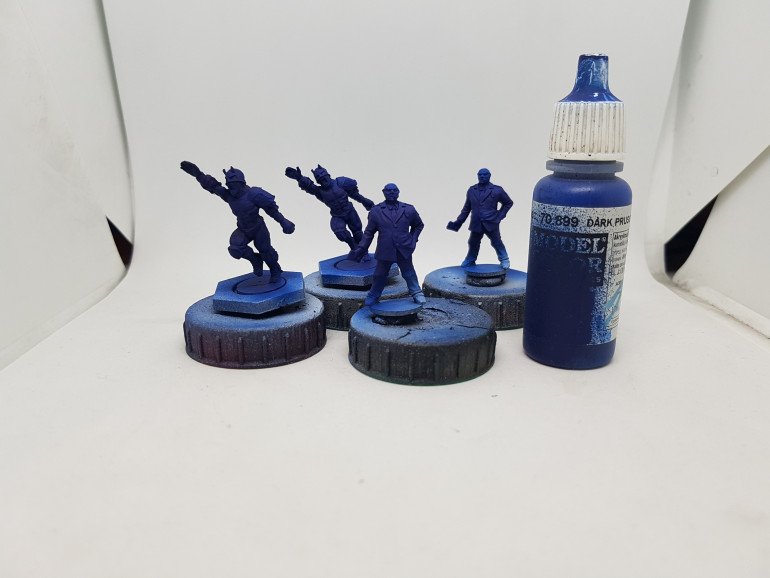
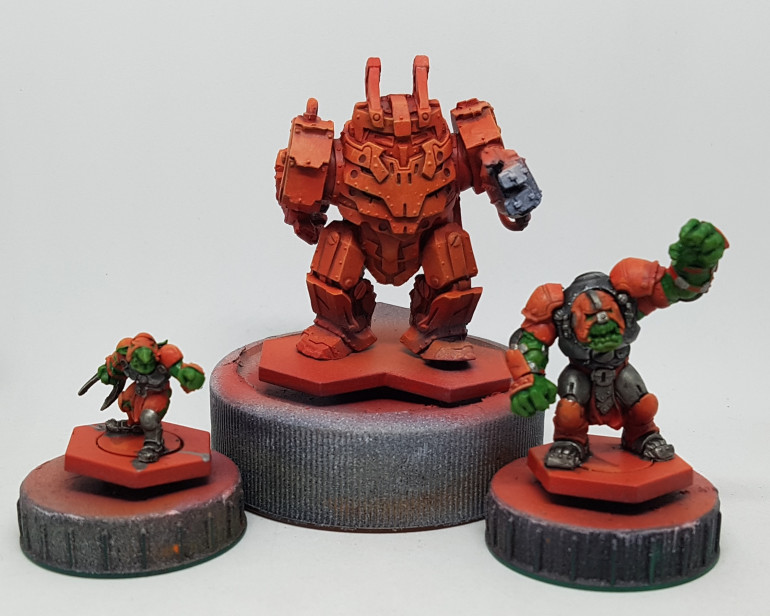
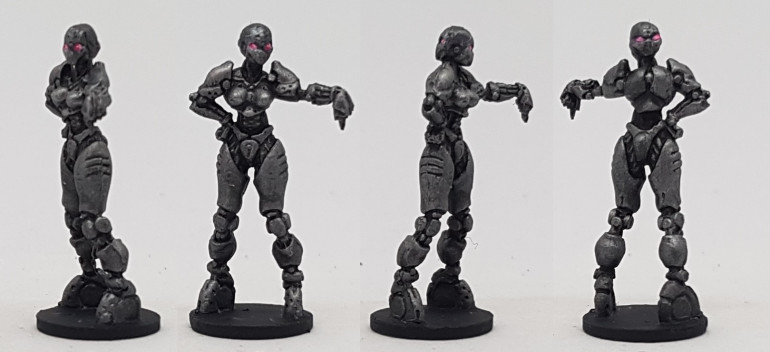
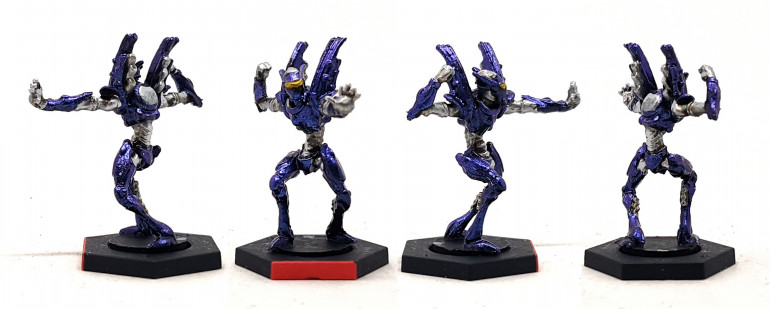
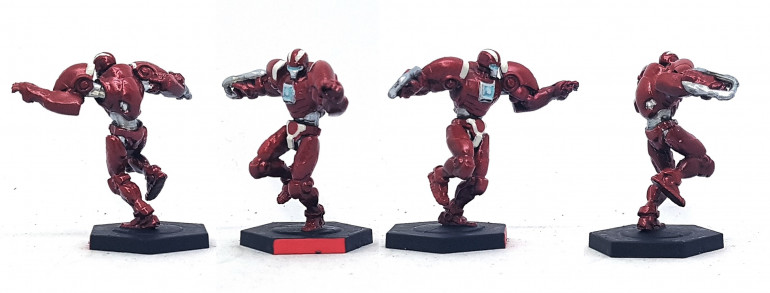
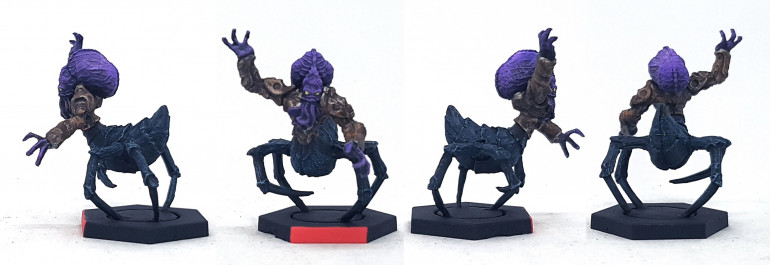
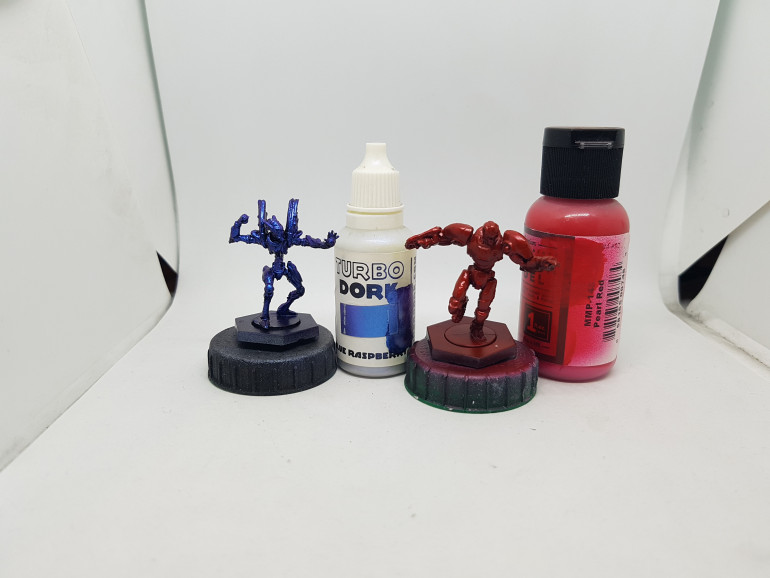 Colour Shift Turbo Dork Blue Raspberry for the asterian. The Shiny Red Robot as undercoated with Steel and drybrushed with silver (Dunno if preshading matter here?) and then given a few coats of Mission models MMP-148 Pearl Red. I Put one coat all over, then added more coats from the sides and then only from above
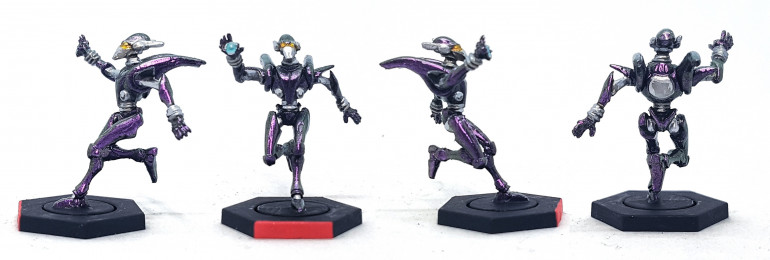
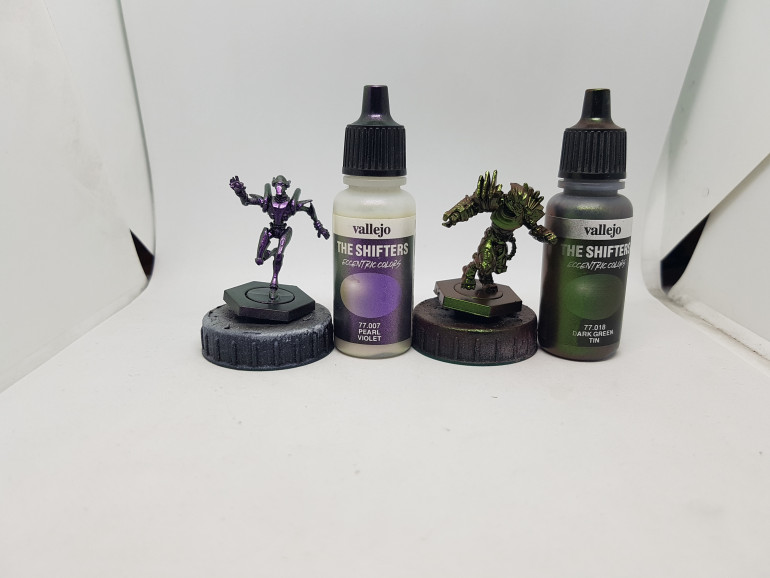 Vallejo colour shifters applied over a gloss black undercoat: 77.0707 Pearl Violet, and 77018 Dark Green Tin
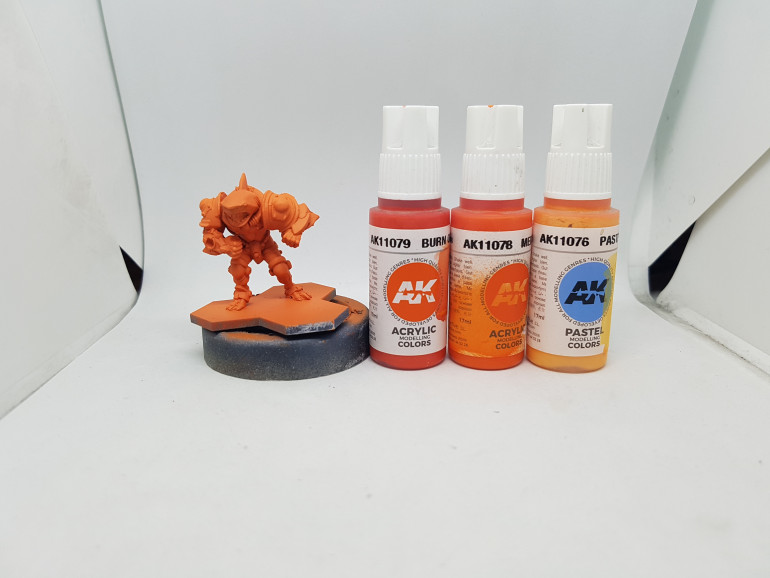 Even base coat of AK11079 Burn orange, then side and downward coats of AK11078 Medium Orange. Some AK11076 Pastel Peach was added to the previous colour and used as a highlight
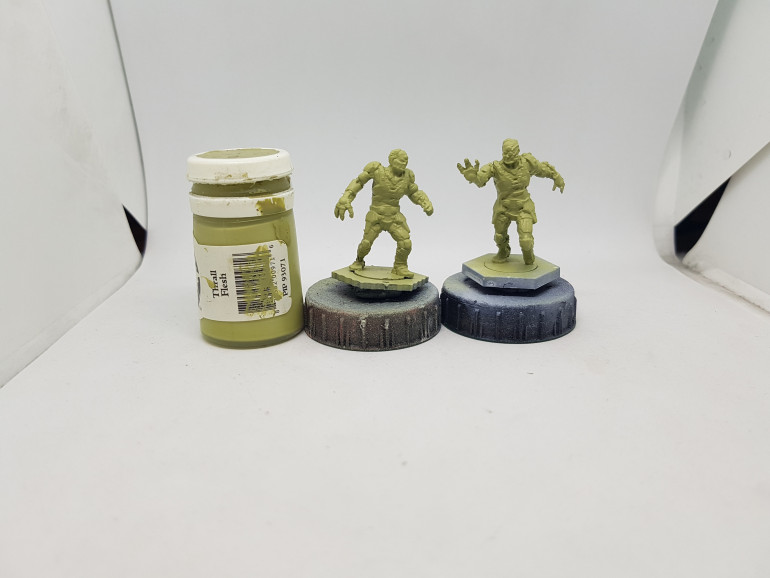
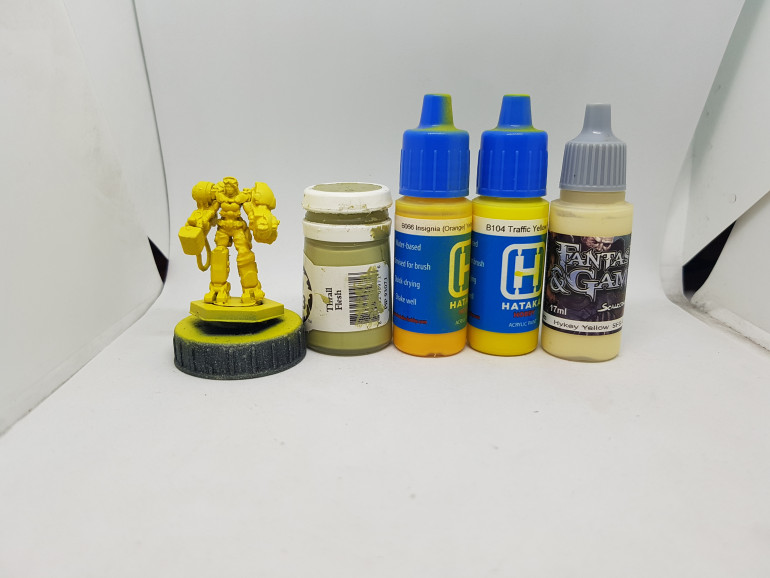 I tried applying the yellow over a standard zenithal preshade, but the black was too strong. A coat of P3 Thrall Flesh fixed this, and looked good as a shade colour. I'll have to remember that for the future. Hataka Model paints tend to be a bit thin for my tastes at the best of times. Based with Hataka B088 Insignia (orange) yellow. Zenithal with hataka B104 Traffic yellow. Then added some Scale75 Hykey Yellow to that, and did a highlight spray.
Communal Washing (21/3/22)
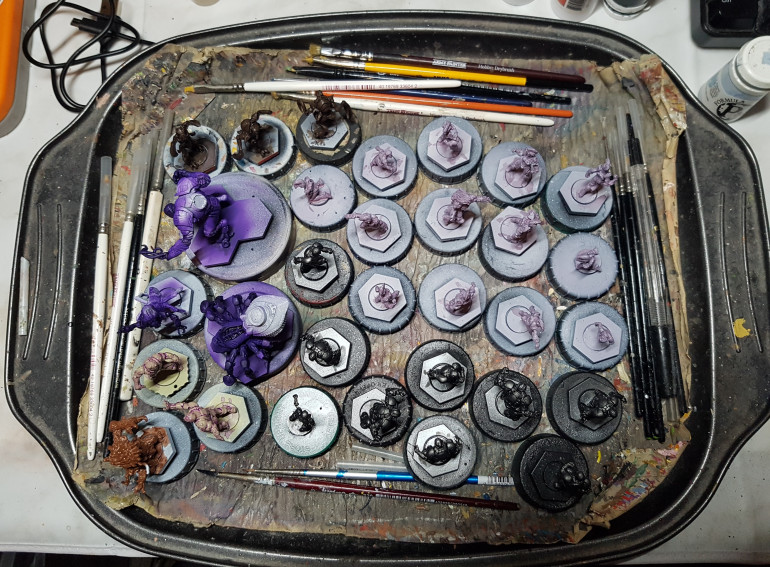
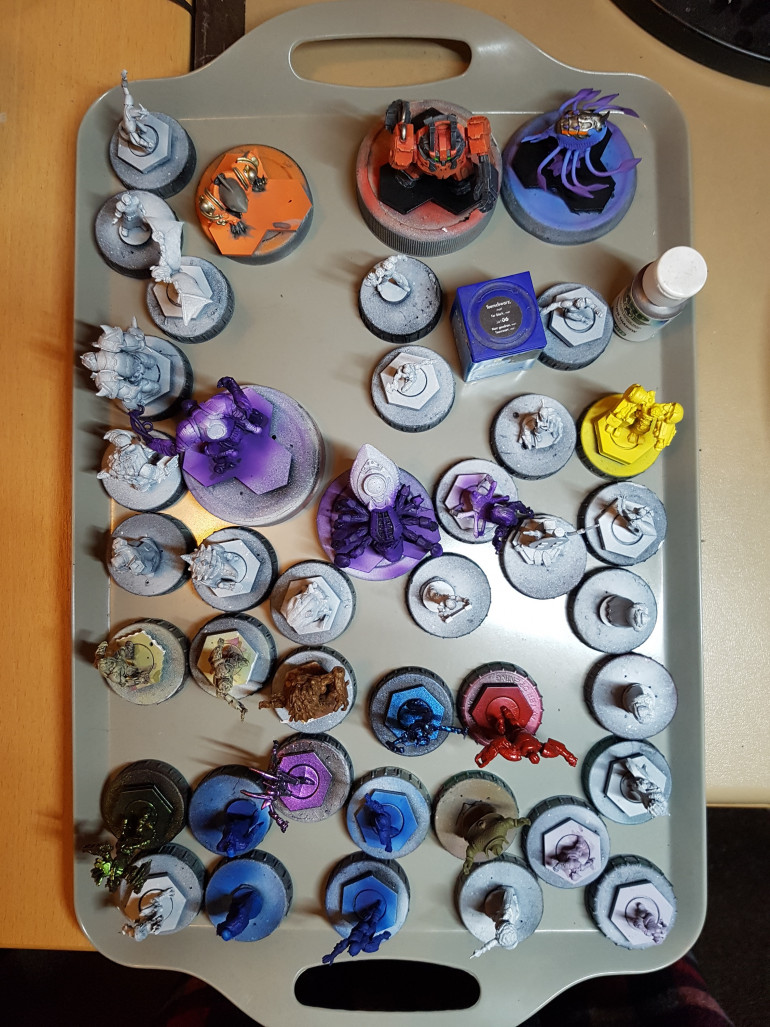
All the airbrushing has had about 48 hours to dry, so I rushed home from work and applied washes over everything I could. I filled up my work tray, otherwise I might have got more done. This is 31 models all being worked on at the same time. I’ll go in to more specifics on colours later on, when I focus on pieces a little more.
There is some more washing left to do, but next time I sit down to paint I can actually do some “real” painting if I wish. I’m going to focus on units first to get me some quick wins and clear off my desk. The Z’zor are almost done, and the Corporation colour scheme was chosen specifically to be quick and lazy.
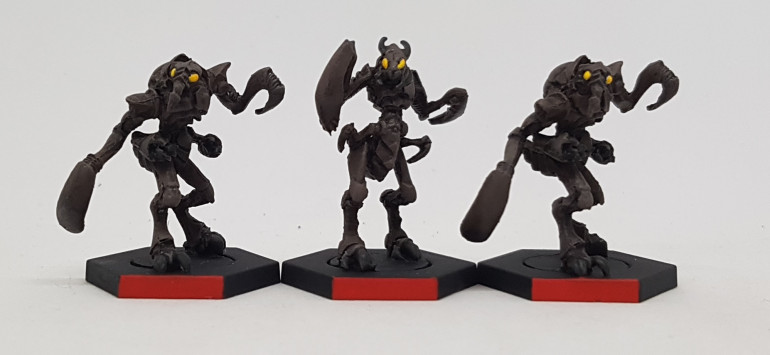
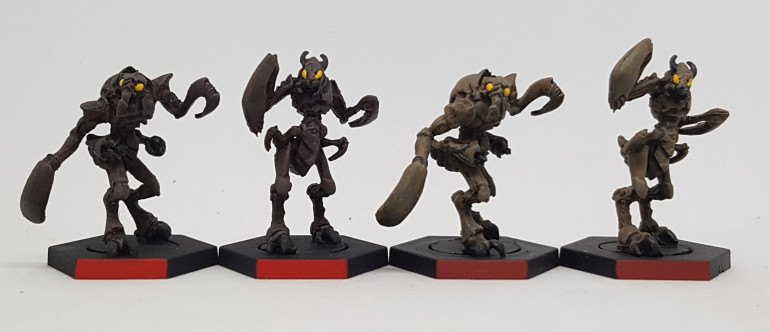
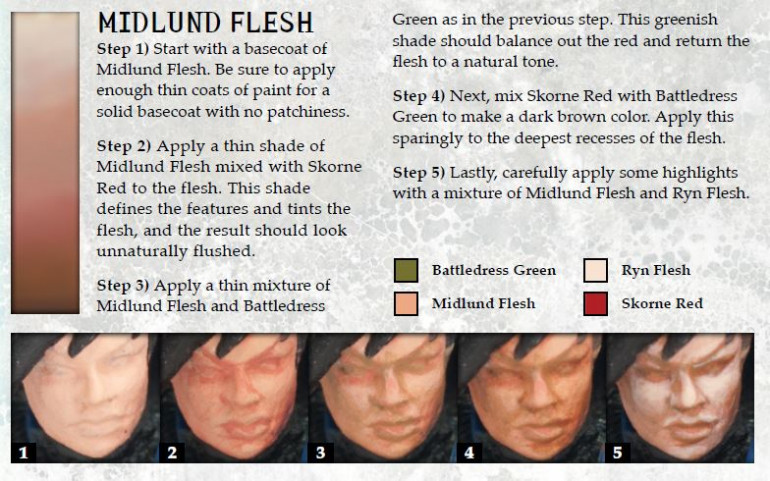
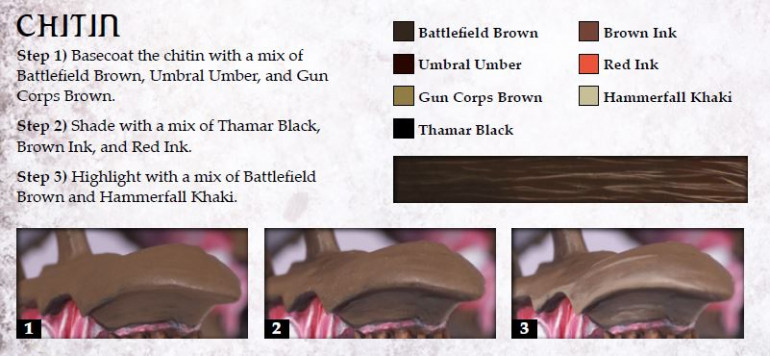 This is Privateer press's Chitin guide. This is what I used to paint my Z'zor last time, and what I'm using to get the last 3 up to standard
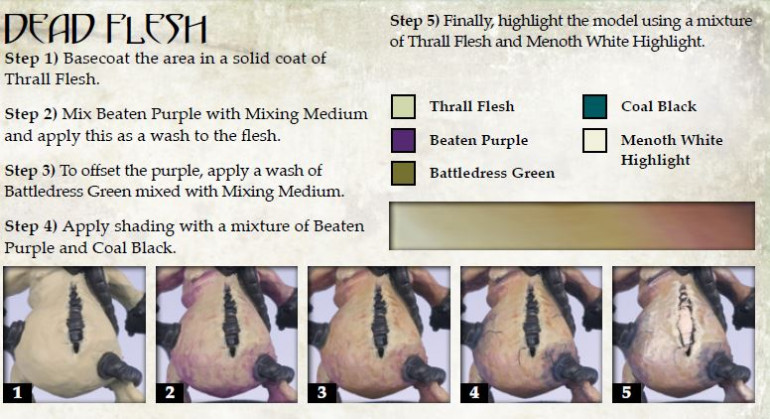
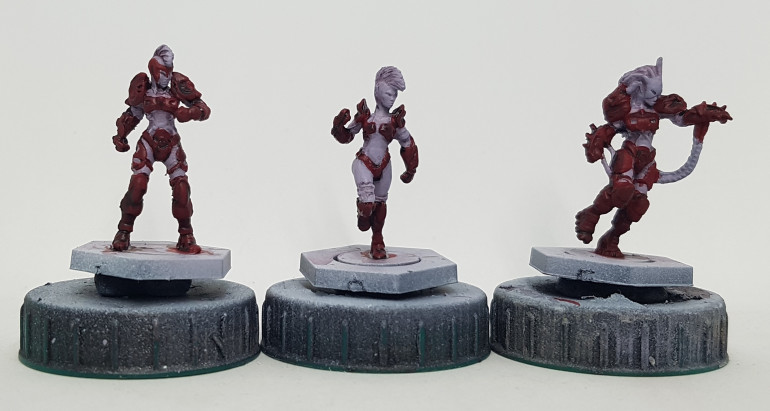
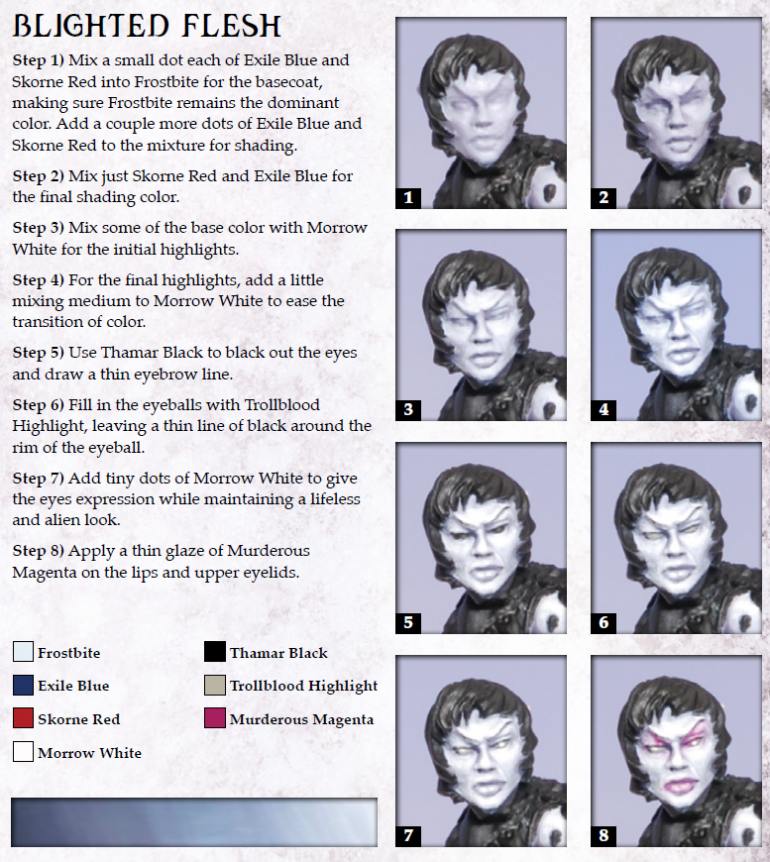 My Asterian ladies, and my two Zees will be done using PP's Blighted Flesh guide. I think I skipped a later stage or two for my previous Zee's
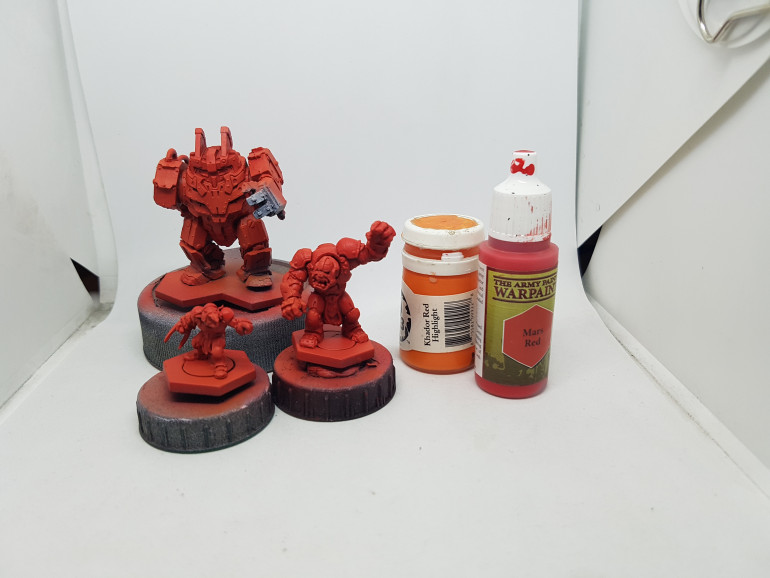
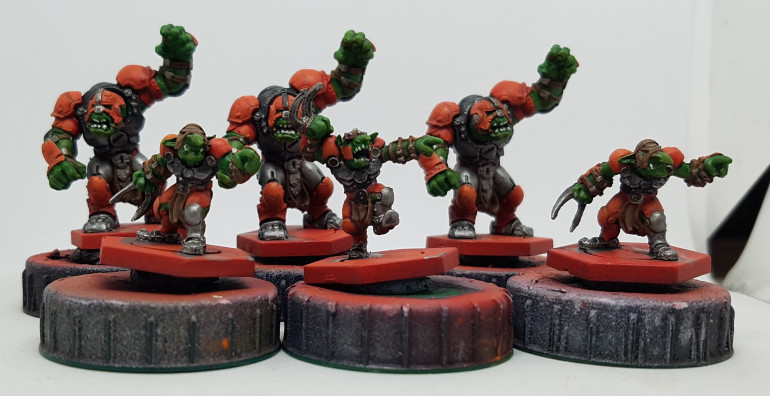
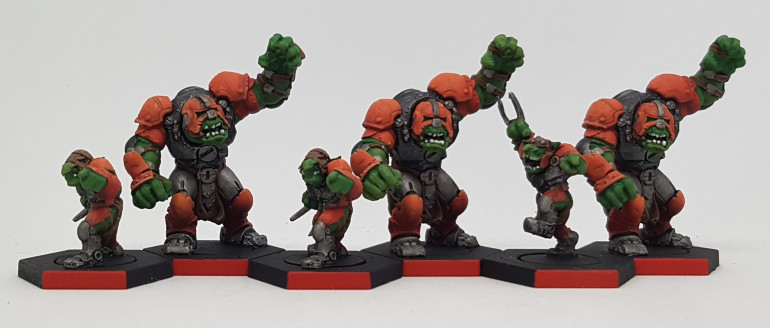
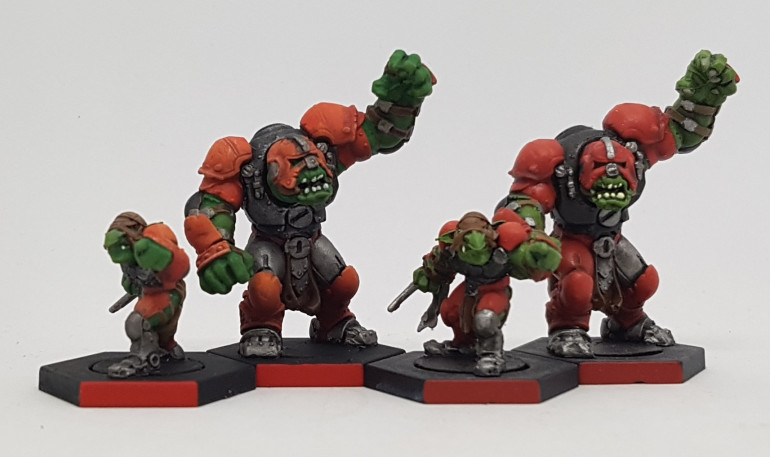
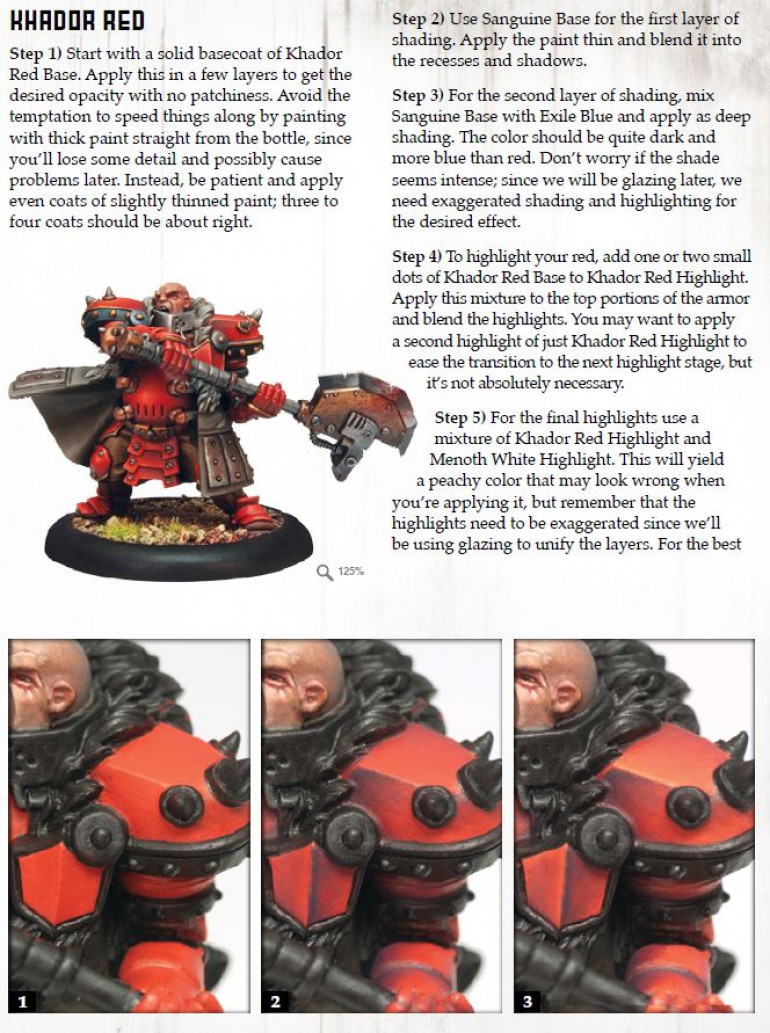 Pretty sure I used this guide for my previous Marauders. This time I swapped out the base colour for Army painter Mars Red, for the convenience of using a dropper bottle with my air brush.
I said I was out all of Sunday in my last entry. I went to a Warmachine tournament. The Sherwood Spring Steamroller. Always a great day. A relaxed tournament with an all day buffet (Or, lets be honest, an all day buffet with some games attached to it!). I’ve barely had a game in 2 years, so it’s no surprise I came last of 14 in my group (there were 2 “pods”, each a tournament for up to 16. There were some last minute cancellations due to plague). I won a game though and I’m happy with that. I had lots of fun and ate too much and won some prizes.
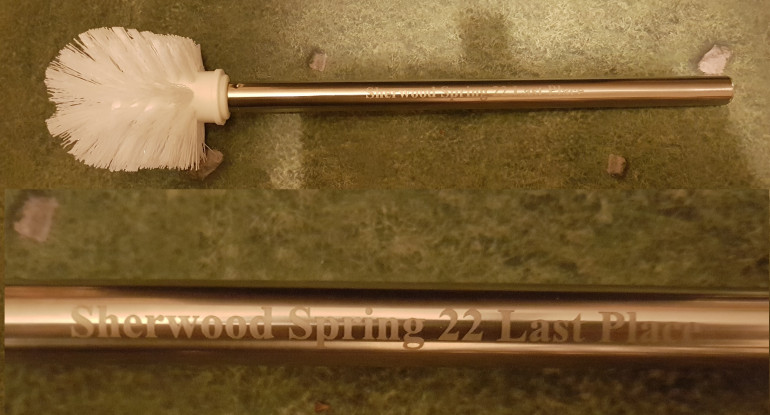 The last place wooden spoon was actually a shiny engraved toilet brush, now on display in my living room
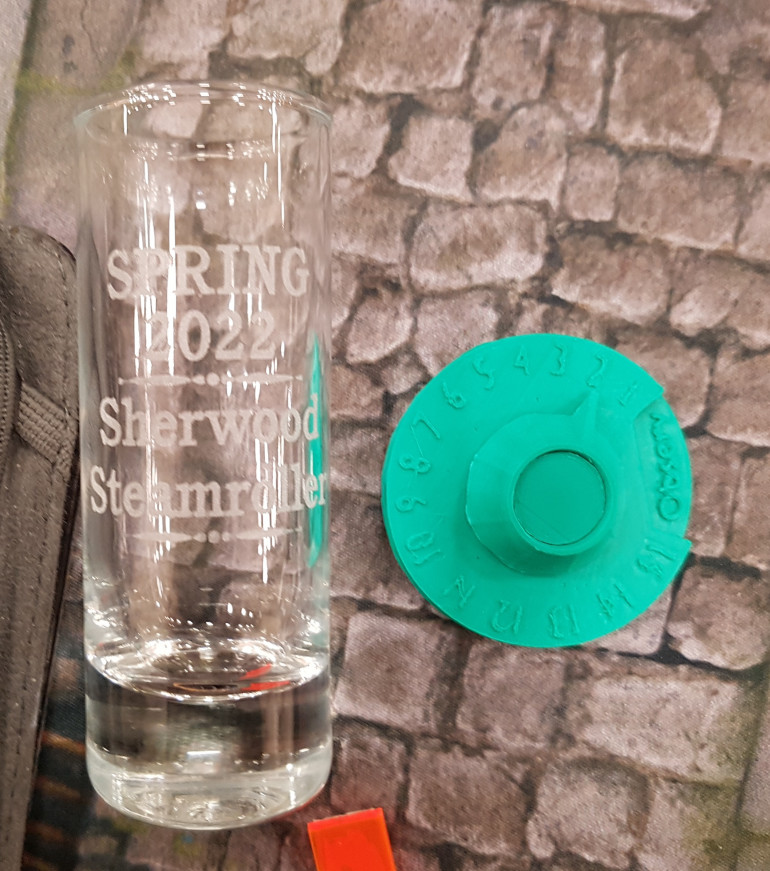 Each round also has a spot prize. First to do a task decided by the organiser. I won won for being the first in my pod to finish a game, and I got my caster assassinated really fast in round 3! My opponent got a set of faction dice and a template. I won an engraved shot glass and an objective damage tracker widget
I'm not showing up :(
I’ve just clicked the link (https://www.beastsofwar.com/project-contest/spring-cleaning-hobby-challenge) to see what else is in the challenge and despite mine being the most recent update, I don’t appear to show up. Anyone any ideas why? Do I show up to you? My previous years projects still show up, and I show up in the general project links. Odd.
Corporation and Friends (24/3/22)
I got to do a little painting after work last night. I sometimes get a couple of hours in on weekdays, so I try to use it wisely. The nights goal was to get more washes in so they’d be dry before the weekend so I don’t waste any time waiting for stuff to dry. As such, my steps for the night were:
- Apply the second was on the undead flesh. Its a 3 wash stage, so the sooner this wash is applied, the sooner I can get the next one on.
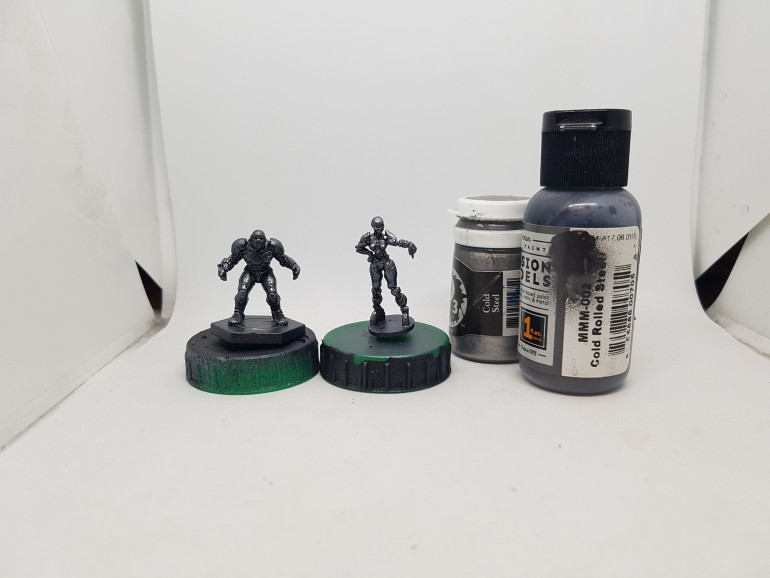
- I dry brushed all the steel on the Corporation and the Refbot with P3 Cold Steel. It’s quick and dirty, and what I assume I did last time so it should make it all more or less match
- I applied some GW Nuln Oil in to the recesses on the RefBot. The areas of pistons, and wiry mechanical “tendons” etc. The goal was to make them more black and look separate to the shiny outer plating. A quick and lazy way of breaking the model up and look like its made of multiple materials.
- The tree man had been base coated with S75 Brown leather SC31 on Monday, so I applied a wash with slightly thinned S75 Inktense Chesnut SC81. This will make for a good bark effect, which I learned from an Asset Drop guide, back when they were still active.
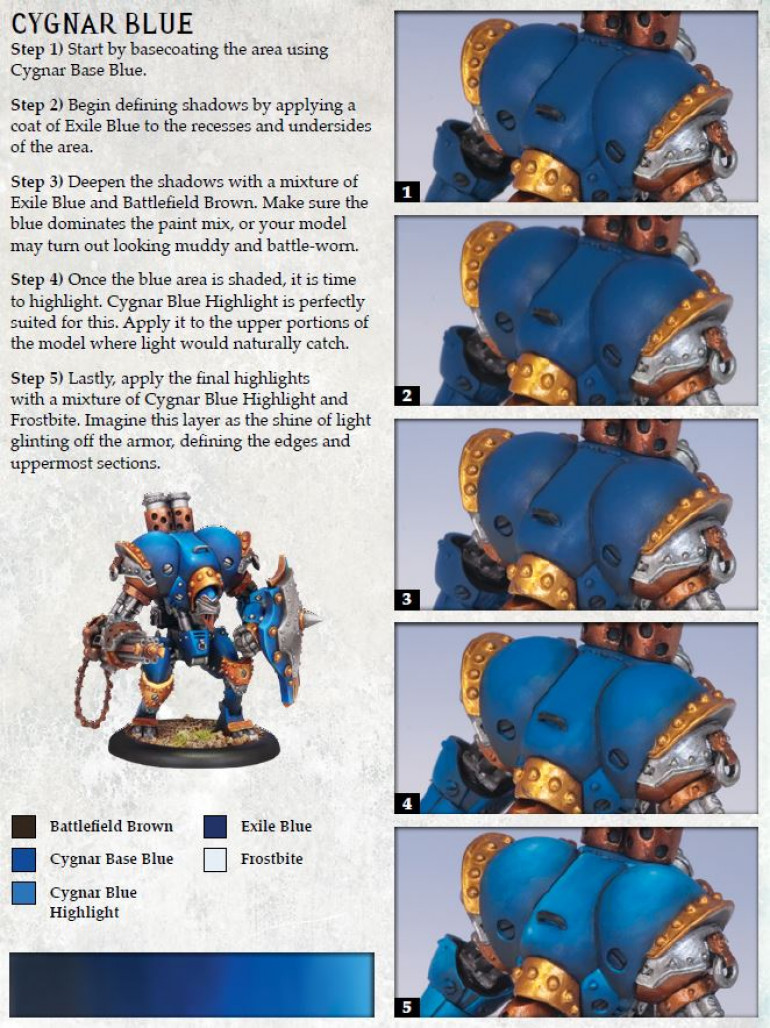
- I base coated the blue areas on the corporation team. Given the time I painted the last batch I’d most likely have followed the Privateer Press guide for Cygnar Blue from “Forces of Warmachine – Cygnar” (see below pic). The codex for Cygnar from the previous edition, which is presumably out of print. I’m pretty sure I skipped steps last time so I’ll be skipping some here. I’ll likely skip step 2, wash step 3, drybrush step 4 carefully where I can , and maybe do a quick drybrush of 5 on the top of the helmet. We will see.
- With 3-4 coats of Step 1 down, I went for a shower to ensure it was fully dry before the next stage
- With me and the base coat fully dry, it was that time in the evening where I usually down tools and read or watch TV to wind down. However, if you have a wash to apply it should always be the last thing you do in a session, not the first thing you do, given the chance. You don’t want to be sat around waiting for drying times. As such, I got back to work for a while longer, and shaded the blue
- The undead flesh was dry, so it seemed silly not to apply the third and final wash there too.
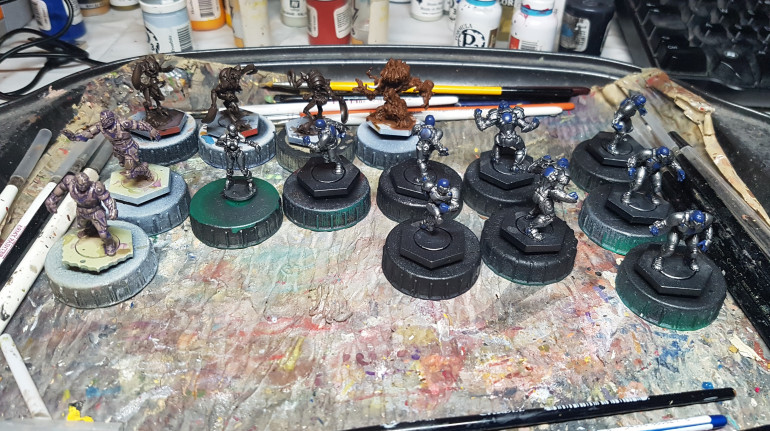 Everything I'm currently working on, with washes drying as I've just downed brushes and am about to watch Picard in bed. The TV show that is. I don't sneak in to his bedroom or anything. Not since the judge had words.
Tonight I likely finish of the blue, pick out some eyes and either do some bases, or move on to other minis and bulk base and varnish a bunch of stuff together later. It’ll be more efficient to bulk base, but there’s something to be said for the motivation boost for getting stuff completely finished and off the table. Progress breeds progress.
First Batch Done (ish) (25/3/22)
I got a couple of hours in after work last night and was able to all bu paint the bases and apply transfers on a bunch of models. I’ll do that en masse later on, or as a time filler while waiting for washes to dry.
Anyway, here’s what i did.
- I tried to drybrush the blue highlights, but it wasn’t working. The area was too small and the brush was too big, and there wasn’t enough detail for it to catch on. I ended up badly painting on the two tones of highlight, following the earlier guide.
- I painted the corporation eyes with P3 Khador Red base. Normally I’d undercoat with white, but the old guys eyes don’t look vibrant and I’m trying to colour match so I skipped the undercoat.
- I did undercoat white the eyes on the Refbot. I then based them with Warcolours Pink 3, and painted a central dot of Pink 1 in to each as least-hamfistedly as I could.
- I then drybrushed the highlight on to the Z’zor bug people, following the Chitin guide from a couple of posts back.
- Their claws, teeth and horns were then painted with P3 Cryx Bane base, drybrushed with P3 Hammerfall khaki and washed twice with GW Nuln Oil
- The bug eyes were undercoated white, based with P3 Heartfire, and given a dot of P3 Cygnar Yellow
- The tree man was given a drybrush of Coat d’Arms Horse Tone Bay.
- The undead flesh was given its final highlight as a heavy drybrush, following the earlier guide
- I wasn’t quite ready to quit for the night, but didn’t want to start something new so I applied a few coats of white undercoat to the front arc of everybody, ready to take some red later.
That’s my Friday evening done. I’ve been at this a week and I have 12 models all but finished, and strong progress made on a whole lot more, and I don’t feel like I’ve really spent any solid time painting yet. Tomorrow I head back to the Marauders and the Asterians I think for a whole day of painting.
Marauders Day 1 (26/3/22)
Saturday was supposed to be a dedicated day of painting but I found between every colour, I’d get up and do some housework or DIY, to the extent I accidentally started demolishing my lean-to, which I wasn’t planning on starting yet. It was sheltering the last of the Ivy I spent most of last year trying to murder, and the ivy was growing happily inside it, so it had to be done.
So what painting did I do?
- I fished out my Marauders and Iron Ancestor and I did a targeted shade wash with P3 Sanguide Base. This was applied only to the recesses and edges where shadow would appear.
- I started mostly ignroing the Khador Red guide from earlier, and just using it as a suggestion. I applied a drybrush highlight using P3 Khador Red Base, and then a final drybrush highlight, trying just to catch the hard edges, using AK 11076 Pastel Peach
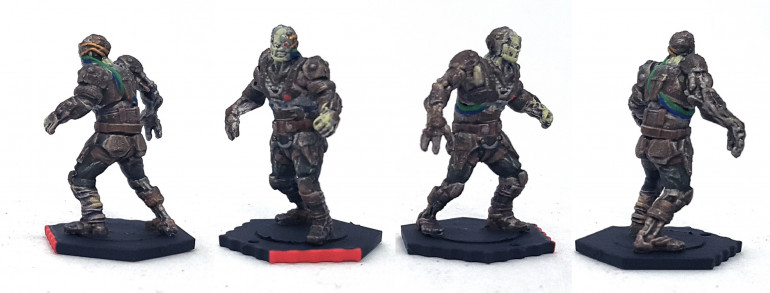
- Orc flesh was previously painted with VGA Goblin Green I think. My pot ran out or dried up ages ago, so I googled what it looked like, and grabed a “close enough” colour: P3 Iosan Green. This took 4-5 coats over the red
- The flesh was washed with P3 Gnarls Green. Normally, I’d mix in a burgandy as that shades green more realistically, but I hadn’t learned that when I painted the previous Orcs and I’m trying to colour match.
- They were then drybrush highlighted with P3 Bog Moss. I tried P3 Wyrm Green first, but it didn’t make uch of a difference.
- The black metals were painted with VGA 72754 Gunmetal, ashed with GW Nuln Oil, and drybrushed with P3 Pig Iron.
- The more silvery irons were painted with P3 Pig Iron, then washed with GW Nuln Oil before I called it a night and went off to read God Emperor of Dune. In the morning, they’ll lilkey get a drybrush highlight of p3 Cold Steel.
A productive Saturday. If I’m left to my own devices I hope to finish the Marauders and get the Asterians on my tray tomorrow. I have to run my first D&D session for over a month in the evening though, so I’ll need time to prep for that.
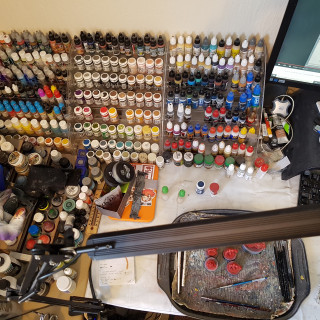
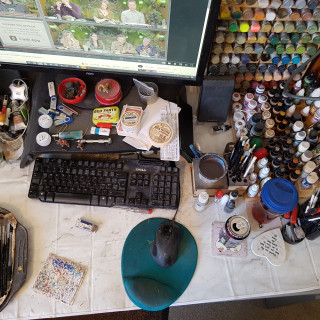
Batch Painting Work Flow / My Desk (26/3/22)
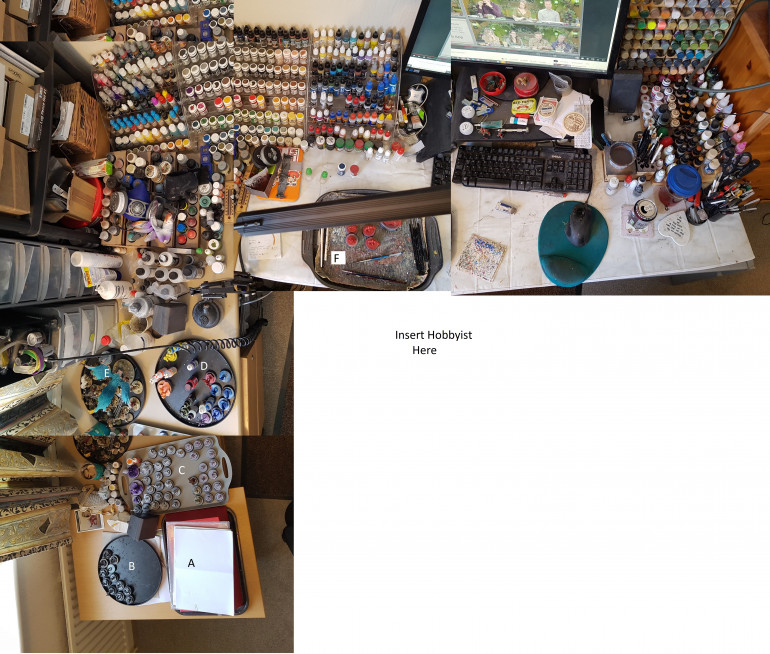
It occurred to me that if I’m making this project all about bulk painting, then maybe it’d help someone if I zoomed out a little and showed not just my current tray, but the state of my hobby space, especially how I keep it all organised and ready. So here are a few pics with some explanations as to what’s what. I have an L shaped desk arrangement and no good way to take an all encompasing pic, so appologies for this monster jigsaw image abomination.
The Key:
A. A covered tray full of the models I was half way through painting when I switched to Kingdom Death. The dust and sun are being kept off of them as it could be a few more months before I finish them off
B. The tray full of Dreadball minis that are done, but need basing, transfers, and some varnish before they’re finished. Over there and out of the way so my To Do trays don’t look so busy and I can see at a glance all the progress I’ve made. I’ll likely finish these off when I’ve done the last of my units
C. My main To Do tray. I keep swapping models off of this on to my active tray, so it’s got a little space on it. As I get more done I’ll probably move everything off the other To Do trays on to this big one.
D. My second To Do tray, with the models that still have the paint pots next to them as reminders for what paints I’ve used so far, as I may want those colours again when i get to them.
E. My completed tray. These guys need putting away, but I’ve been too preoccupied / lazy. Since taking this pic I’ve set up Kingdom Death: Monster in the spare room ready to play and taken the relevant models through.
F: My active tray. You can see the Marauders on it as I was working on them at the time.
As you can see, I do my painting in front of the computer, with web content such as OTT or Critical Role for company. I also have a bunch of painting guides and recipes stored on that computer, ready to access. I have 6 racks of paints all within line of sight and ease of reach. I could fill a 7th, but I don’t really have space, without starting to put things up against a radiator. if you zoom in you can see 2 orcs on my monitor stand. These are my reference pieces from my previous batch 5-8 years ago. I’ve also got a cheap plastic table cloth pover my paint area to protect everything from the splaces and spills. I cannot recommend this enough. I’ve also got a cheap rug under me to catch spills. Accidents happen. It’s unavoidable.
So everyhting is with reach, and organised by stage. Models with similar colour needs are grouped together, and I’m constantly reassessing that as I progress. It’s a little like an office desk. I have In and Out trays for my work.
If you have any questions about what anything is, or how I organise my stuff or my work, please ask.
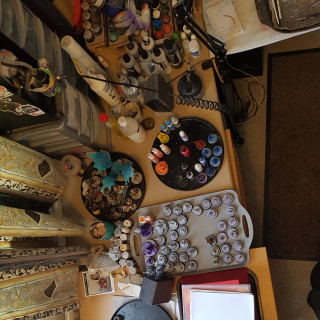
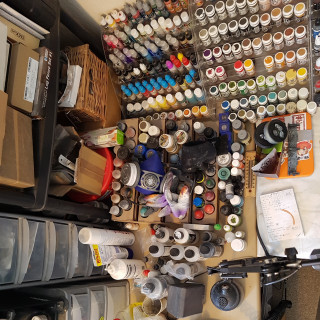
Here’s the idividual parts, in case that makes anything easier to look at. These should be a little higher rez, making it easier to zoom in and find that one embarrasing thing I still haven’t realised was in the shot.
Marauders finished (27/3/22)
Sunday was my D&D day. We’ve taken a month-ish off from my campaign between adventures while someone runs something short and different, to give us a break and give everyone a chance to deal with some down time. As such, I’ve not had a whole day to paint. I stopped mid afternoon to spend a few hours prepping and trying to get the whole adventure fresh in my mind as I’ve no idea how much or what they’ll do. Turns out I didn’t need to stop painting as only 2 of my 7 players turned up. The rest backed out last minute, or said they’d be running late but would be there, and then didn’t show up at all. Useless bunch. I wasted half my Sunday for no good reason.
Anyway, before that I pushed through and finished off my Marauders, and started work on the lady space elves (the Kalyashi). I sleeved up my KD:M cards whenever waiting for paint to dry. There’s a lot of cards and decks in that game!:
- I drybrushed P3 Cold Steel over the lighter iron areas I’d washed at the end of yesterday.
- I base coated the leather areas with P3 Bootstrap Leather, then washed them with GW Agrax Earthshade. They then got a drybrushed highlight of P3 Beast Hide
- The teeth were picked out with P3 Menoth White highlight
- Buckles were reclaimed with a little P3 Pig Iron where needed. This brings the Marauders to completion, ignoring bases and transfers so they’re added to my Completed Tray, to finalise later.
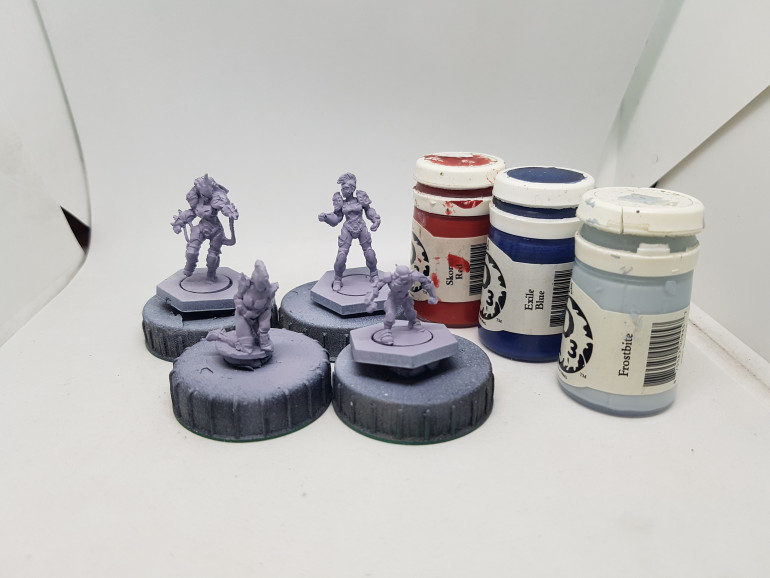
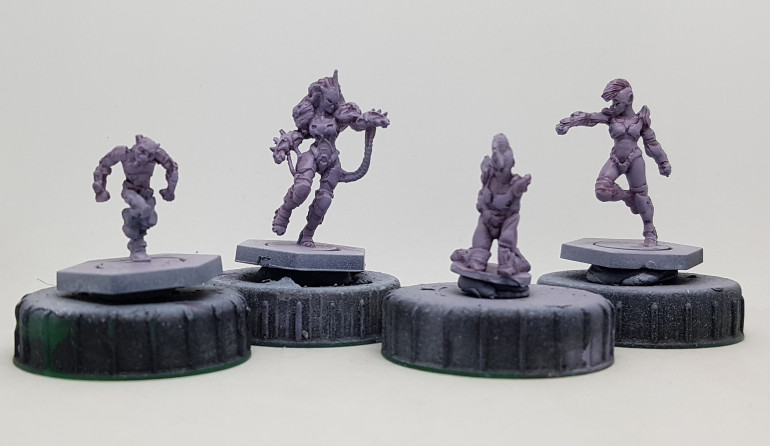
- I brought the Kalyashi over to my work tray and drybrushed on their flesh highlight colour: P3 Frostbite, P3 Morrow White, with a tiny bit of P3 Skorne Red and P3 Exile Blue. basically, the base colour, with some white mixed in.
- I’ve picked out a couple of reds for their armour to use next time I sit down. I want their red armour to look different to the Marauders armour, but still be a strong red. I’ve gone for a rich darker red from Vallejo as the base, but not had time to start applying it yet.
That takes me up to 18 models “done” in 9 days, 5 of which were spent at work, with progress made on a whole bunch more.
Kalyashi Red (3/4/22)
I was away all weekend and busy most of the week so I got very little painting done last week. Only two evenings. In two hours on Monday I put down the first base colour on the red here. On Thursday in 2 hours I put down a second coat and a shade wash. Very little work was done, but progress was made. I’ve 3 evenings and the weekend free next week, so I hope to finish them then, and if I feel like it and have time, I might base and put transfers on everything I’ve finished and get them varnished. I can put some stuff away them and really see a difference in my work pile / in and out trays.
Base: VGC 72.012 Scarlet Red
Wash: VMC 70.859 Black Red with just enough black added to tint it, mixed with 3-4 drops of water and 3-4 drops of GW Lahmium Medium
I’m writing this from the future so I can tell you what I did next to finish this off, and show you those pics at my next weekly update:
Highlight 1: thinned VGC 72.106 Scarlett Blood (please note, it’s Vallejo that changes the way they spell Scarlet(t) between these paints, not me), brushed on.
Highlight 2: Drybrush of GW Wild Rider Red, only on the high points and edges it was safe to get to. Accidents were made.
Teams Finished (9/4/22)
On Monday I finished of the red, as detailed in the previous post, and then set to painting the Kalyashi’s cloth, and the hair:
Cloth
Base: Reaper 09149 Mouldy Skin
Shade Wash: Reaper 09148 Ghoul Skin
Highlight Drybrush: Reaper 09150 Bloodless Skin
Hair
Base: 3:2 Reaper 09024 Amethyst & Reaper 09023 Imperial Purple
Shade Wash: GW Druchii Violet
Highlight Drybrush: Reaper 09024 Amethyst
Holy hell, guys! I’ve been using this projects system since day 1 and I’ve just discovered that if you hold down shift while pressing enter it doesn’t give you the forced double line space thing! Am I dumb? Is this a common feature in lots of software? I’ve always hated putting lists on here as double line spaced lists look so wrong. No more of that now!
Next up I started off my Saturday by finishing off the details, then painting the blue and gold on the team captain
Leather Straps
Base: VMC 70.995 German grey
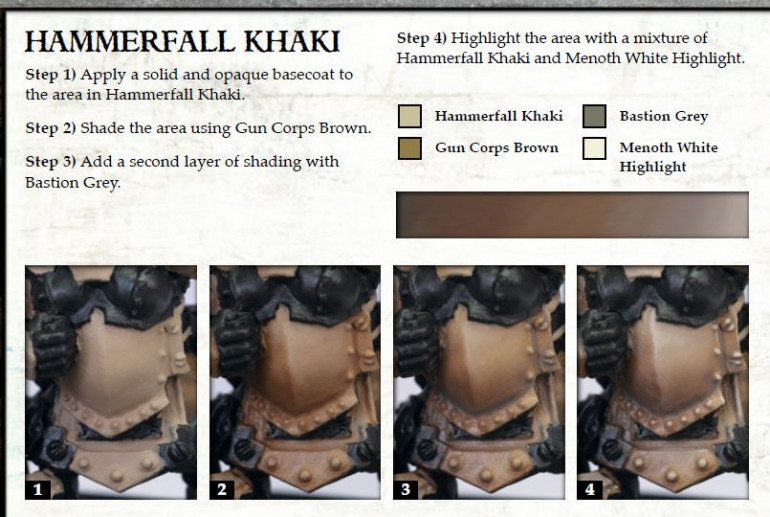
Highlight Drybrush: P3 Hammerfall Khaki
Shade Wash: GW Nuln Oil
Iron
Base: P3 Pig Iron
Shade Wash: GW Nuln Oil
Highlight: P3 Cold Steel
Gold
Base: GW Retributor Armour
Shade Wash: GW Seraphim Sepia
Highlight Drybrush: P3 Solid Gold
Blue
Base: P3 Meridious Blue
Highlight 1: P3 Arcane Blue
Highlight 2: P3 Arcane Blue mixed with p3 Frostbite
Eyes and bases where then painted across everything I’d done so far that needed it. The red stripe on the bases was undercoated with white and painted red before I painted the black. t makes it a hell of a lot easier that way. Transfers were applied, and everything was varnished with gloss and then matt.
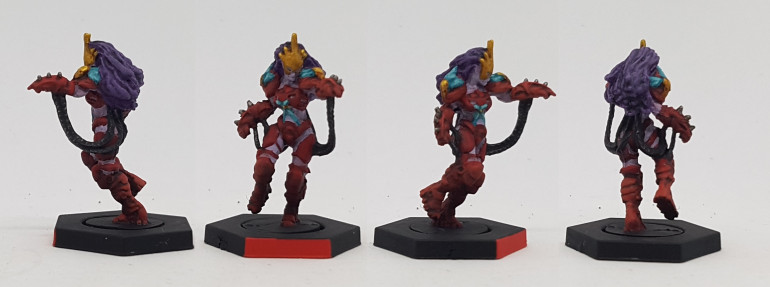 Kailasa. Here's an example of why old Mantic models get a bad reputation. See those blue parts on her shoulders? On the web shop they're clearly feathers, with good detail. On mine they're indistinguishable bumps on bumpy shoulder pads. The sculpt has good detail, but on the final model, it's a bit lacking and can be frustrating to work with. These space elves had lots of narrow fiddly bits I wasn't keen on painting
While the airbrush was already out for varnishing, I thought I’d apply some base coats on a couple more models, now I’d decided how to paint them.
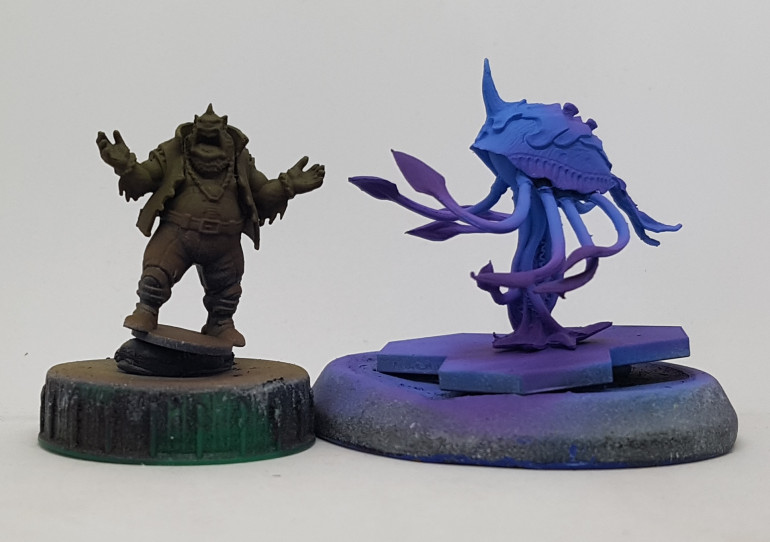
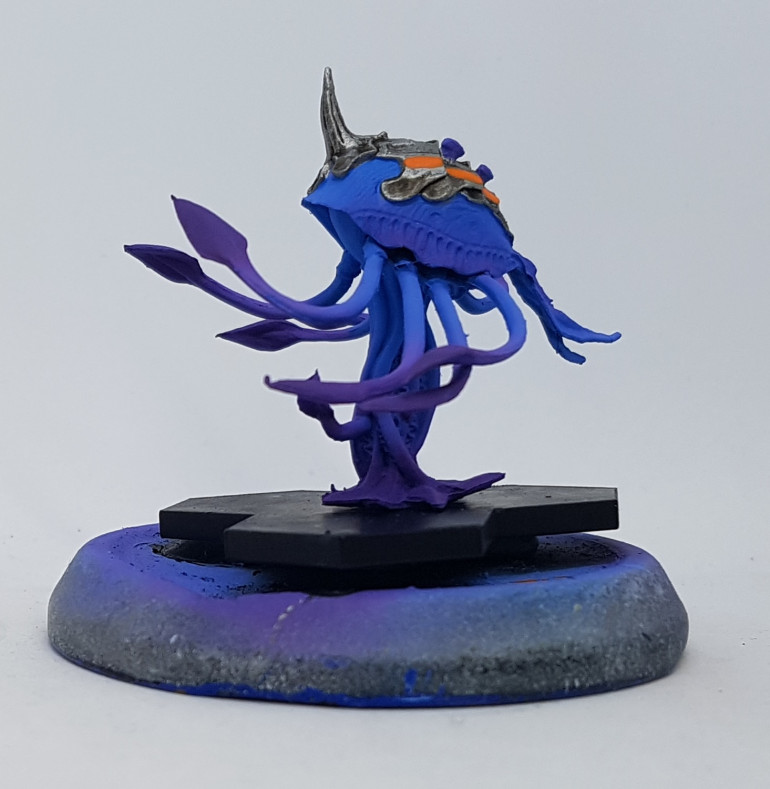
Chovar (Space jellyfish)
Base: 1:3 Pro Acryl Blue: Pro Acryl Faded Ultramarine
Highlight: Pro Acryl Faded Ultramarine
Purple base transition colour: Reaper 09024 Amethyst Purple
Purple heavier colour: 2:1 Reaper 09024 Amethyst Purple: Reaper 09023 Imperial Purple
Heavier shades of purple were added by mixing in more Imperial Purple
Coach Fergus (Frog guy thing)
Base: 2:2 Mr Paint Purple Shadow : Mr Paint Swamp Green
High 1: 1:2 Mr Paint Purple Shadow : Mr Paint Swamp Green
High 2: 2:4 Mr Paint Purple Shadow : Mr Paint Swamp Green
High 3: Mr Paint Swamp Green
All layers were airbrushed from progressively steeper angles, so as to leave previous layers showing .
At this point I called it a day and went and watched Logan for the first time. How comes the bad guys were willing to murder, main, enslave, kidnap, perform live human experiments, clone people and all sorts of other horrible and illegal things, but they drew the line at crossing the border illegally? What part of that is just too evil for them? Good film otherwise though. Probably the X-Men movie that’ll hold up the best long term. Everything after the second was a bit poop (First Class was OK) and I suspect the first 2 were only good because there wasn’t anything to compare them to at the time.
Transfers (9/4/22)
A quick word on transfers, in case anyone reading this is unsure how to use them.
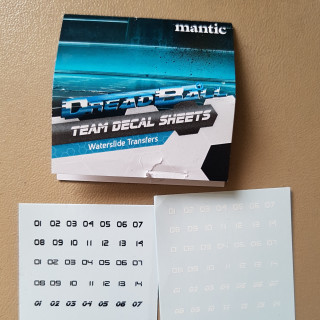
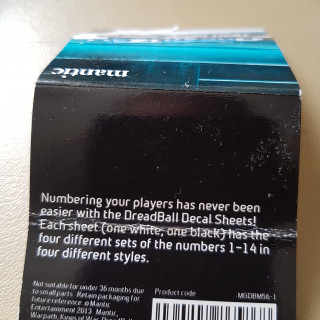
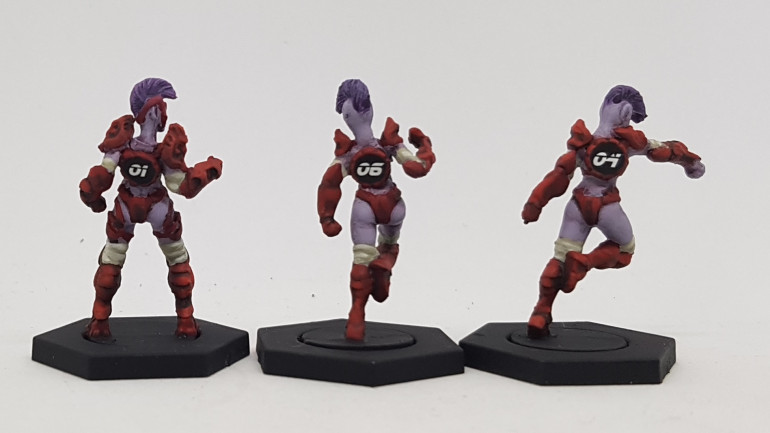
Mantic sell transfers specific to this task. They’re small enough to fit nicely inside the little disks on the models backs. The packs contain enough black and white numbers to do 4 teams per sheet and I have 4 sheets. I think you just get 2 in a pack though. If you read the back of the label you can see how considerate they have been with them too. We all know about nut allergies and gluten and lactose intolerances these days, but no one thinks about numberwang intolerance. Numberwang is a common ingredient in many transfers, and Mantic have chosen not to use it and make it clear it is safe for the numberwang intolerant to use their product. For more information on Numberwang, click here.
First thing I did was brush on a little gloss varnish on the areas before I painted the bases. This meant it had plenty of time to dry. A coat of gloss will make it easier to move the transfers around, and protect the paint as I’m poking it with tools.
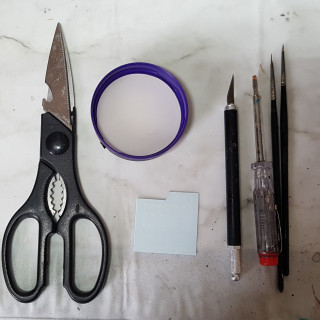
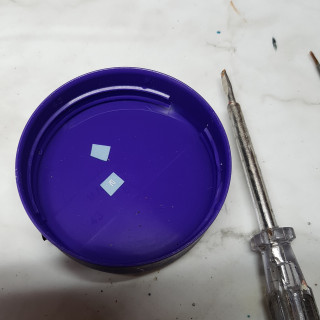
I gathered my tools together before I began. You’ll see made a dumb mistake that I quickly fixed. I used a white bottomed water dish for my white transfers, making them unfindable once they’re off the backing paper. You’ll want a wide shallow water dish for soaking the transfers in. I use an old hot chocolate tub lid.
The transfers were cut off one at a time and soaked for 20-30 seconds. I got an old brush in each hand and dampened the surface to prep it, and then used both brushes to take the transfer off the paper once it was easy to move. I then lifted it out of the water carefully on whatever brush it stuck to, carefully draining excess water out of my brush on the side of the pot. Both brushes were used to apply it to the surface and line it up. Excess water could be drained off with the spare brush, if it was a problem. Once in place, the model was put on one side to air dry. I kept an eye on them though, in case a transfer shifted.
Once all transfers were applied and dry, a gentle coat of gloss varnish was applied over the top, to ensure they stayed in place. The models were then ready for a full varnishing.
The transfer sheets go up to 14 as the max roster size in Dreadball is 14. However, many teams will have the option of more models to pick from to build your team. As such, I found the sheets didn’t go high enough, and I had to hand paint on a few higher numbers. For the record, even I have trouble reading my own handwriting so as bad as this is, I don’t think I did a terrible job, for me.
Chovar, Sann-Gar, & Iron Ancestor (10/4/22)
With the teams varnished and put away, my work pile is looking a lot more manageable. Only 41 models, and a lot of them already have colour on them.
With the last of my teams finished, it’s time to do something a bit more fun so I thought I’d finish off a few Giants that I’d already started.
First up, the Chovar Psychozoan.
Helmet
Base: P3 Pig Iron
Shade Wash: Januinevision’s Magimix
Highlight drybrush: P3 Cold Steel
Go Faster Stripes: Vallejo 72.008 Orange Fire
I don’t have the recipe for Januinevision’s Magimix to hand right this second, but I’m pretty sure it’s 6-8 parts GW Nuln Oil, 6-8 parts GW Agrax Earthshade, 1-2 parts GW Athonian Camoshade and 6-8 parts Lahmian Medium. It creates more of a dirty grimy colour than just a black or brown wash, and is a little thinner. Thanks, Januinevision.
Then the base was pained black, and they were put on one side to be bulk varnished later.
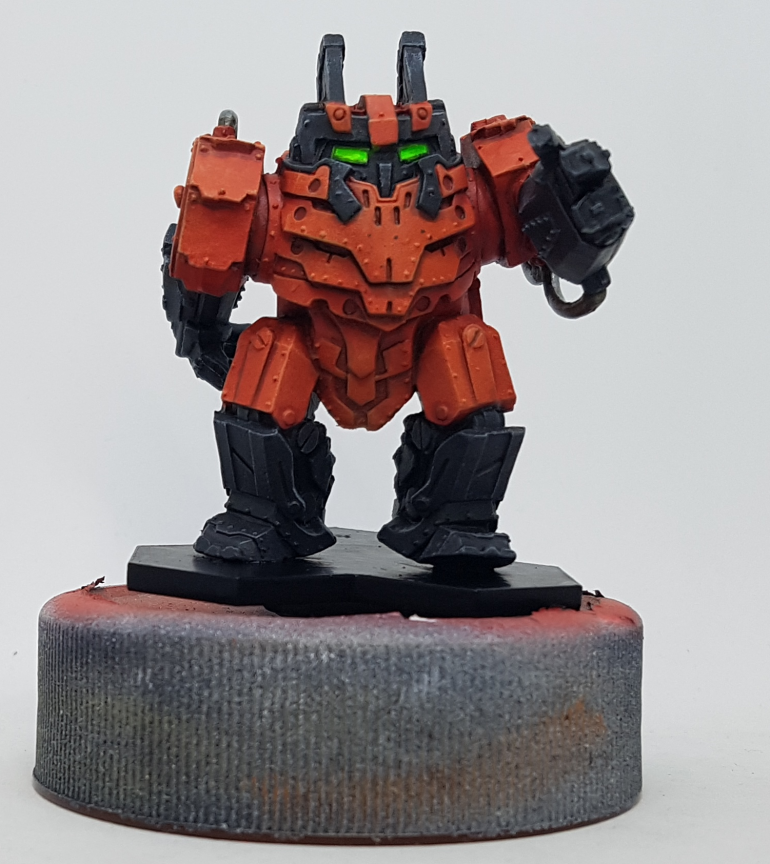
Then I saw the Iron Ancestor and Sann-Gar staring at me. The Iron Ancestor was mostly done anyway, so why not paint the black on both at the same time?
Black
Base: VMA 71.054 Dark Grey Blue
Very Light Highlight Drybrush: P3 Frostbite
Shade Wash (San-Garr only): GW Nuln Oil
I was going to wash both, but I quite liked the Iron Ancestor as he was so didn’t bother.
Next, I painted the iron and the eyes on the mech, and the flesh on the shark at the same time.
Iron
Base: P3 Pig Iron
Shade: Jan’s Magimix, but just around the joins
Highlight: P3 Cold Steel
Green Eyes
Undercoat: Lightly thinned white
Base: VMC 70.737 Green Fluo
Shark Underbelly Flesh
Base: 1:1:to taste P3 Bastion Grey : P3 Midlund Flesh : enough white to lighten without turning it pastel
Shark Top Flesh
Base: P3 Bastion Grey
Wash: P3 Greatcoat Grey
Highlight Drybrush 1: P3 Bastion Grey
Highlight Drybrush 2: P3 Cryx Bane Highlight
Eyes: Any black
Toe Nails
Base: P3 Cryx Bane base
Highlight: P3 Beast Hide
Wash: GW Nuln Oil
Once the flesh was done, I picked out the silver:
Silver
Base: Vallejo 72.053 Chainmail
Wash: GW Seraphim Sepia
Highlight: TBD. probably a drybrush of more Chainmail, and then something lighter? Perhaps VMA Chrome if I’m feeling brave?
I think I need to revisit the orange and give it a bit more depth. Some pin washing with the darkest colour from the base range, and some careful drybrushing with the lightest colour should help.
This project is brought to you by Drybrushing.... (15/4/22)
Drybrushing. For when you want to get stuff done FAST, and aren’t feeling too precious about the results!
We’ve just had the Easter weekend. I don’t know where you are or how your country handles things, but for us in the UK that means we’ve just had a 4 day weekend and some pretty nice weather with it too. This means I’ve had a lot of free time and some solar powered motivation to go with it. I’ve got a lot done over the last week. I doubt I can fit it all in one update. I’m not convinced I can remember it all lets plug ahead with this and see how useful my notes (quick pics of a line of paints next to a model) actually are. All pics are taken after the model was finished and varnished.
So where was I? Ah yes. Sann-Gar…
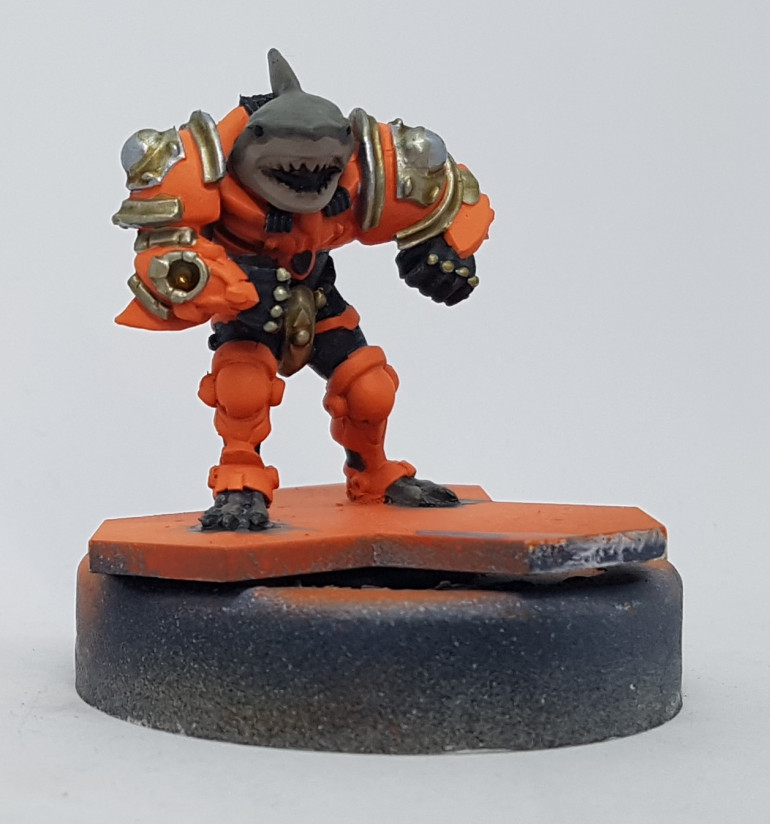
I pic washed the orange armour to give it the depth it was lacking. I made a wash out of AK11079 Burn Orange mixed with a little P3 Khador Red Base. once dry, I carefully drybrushed him with AK11076 Pastel Peach. it made all the difference.
I then went to finish off the silvers. I reached for the Vallejo Chainmail and grabbed VGA 72.752 Silver by mistake and didn’t realise until later. I highlighted with this and then added glints with VMA 71.064 Chrome.
The yellow gems(?) were given many coats of Mission models MMP-159 Iridescent Lemon Yellow. This isn’t as good as their pearl red unfortunately. I put a coat or two of Mission models MMP-148 Pearl Red inside the glowing thing on his glove. Once everything was varnished, these red and yellow parts got a final coat of Gloss Varnish, along with the eyes.
The teeth were picked out in GW Screaming Skull and highlighted with P3 Menoth White Highlight.
This was all done in a couple of evenings across the week, and he was finished except the varnishing by the end of Thursday. Everything from this weekend was varnished collectively Monday afternoon.
It’s now Friday morning and I’ve got no active projects. The colour shifted robot types looked like quick wins so I went with them next. Alo-Khan, The Praetorian, and the Neobot Captain.
Silver/Iron
Base: VGC 72.053 Chainmail Silver
Wash: Jan’s Magimix (see earlier post)
Drybrush/brush Highlight: VMA 71.064 Chrome
Yellow eyes
Based as above then painted with 2-3 coats of A.Mig-097 Crystal Orange
Blue Glow
Undercoat with highly thinned white
Base with watery P3 Arcane Blue
Highlight with watery P3 Arcane Blue mixed with P3 Menoth White Highlight
Reclaim silver as appropriate
White Stripes on Red Robot
Base with Reaper MSP 09150 Bloodless Skin
High with Bloodless Skin with some pure white mixed in
While everything usually ends with a coat of matt varnish, I allowed all colour shifted areas to keep a final coat of gloss varnish, and then brushed on matt varnish around them.
According to the date stamps on the pics on my phone, this was all I got done on Friday. The new season of Diablo 3 started at 4pm and I jumped on to that and spent the rest of the evening playing instead of painting. One of the perks of a 4fourday weekend is that the pressure is off to get stuff done by a deadline.
I also caught up with Picard. Were we supposed to think that was Dr Julian Bashir? Was that a deliberate choice to make us not think, or a poor, confusing casting choice?
Easter Weekend Paintapolooza (16/4/22)
It’s Saturday morning. I’ve garden work to do, but I’m not awake enough for that yet, even if the sun is already out. Yesterday I finished off three colour shifted guys, but there’s one left on my tray. He’s not a robot though. He’s a Yindij, and I’ve another of those so I’ll paint them both at the same time. The two animal/bug free agents are staring at me too. I know what I want to do with their flesh and I know it’s going to take lots of washes and long drying times so I’ll do all 4 models at the same time.
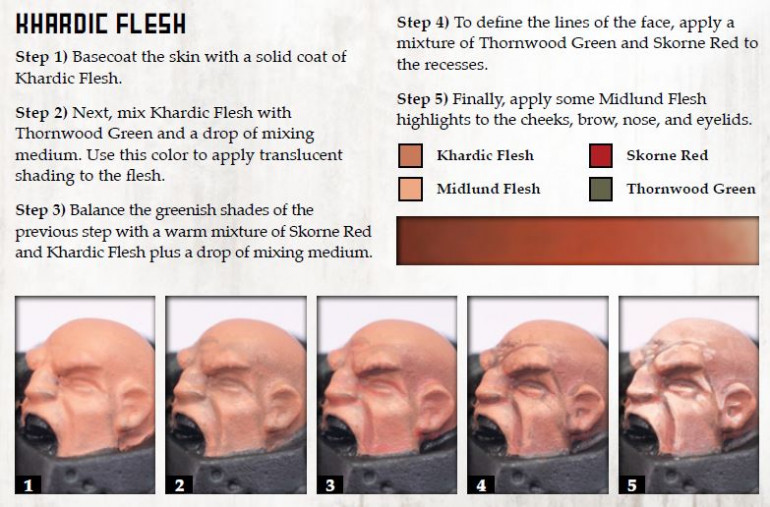
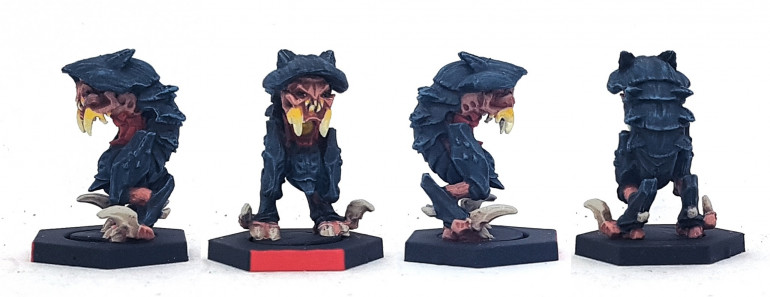
The free agent things were painted using the Khardic Flesh guide from Privateer Press’s Forces of Khador.
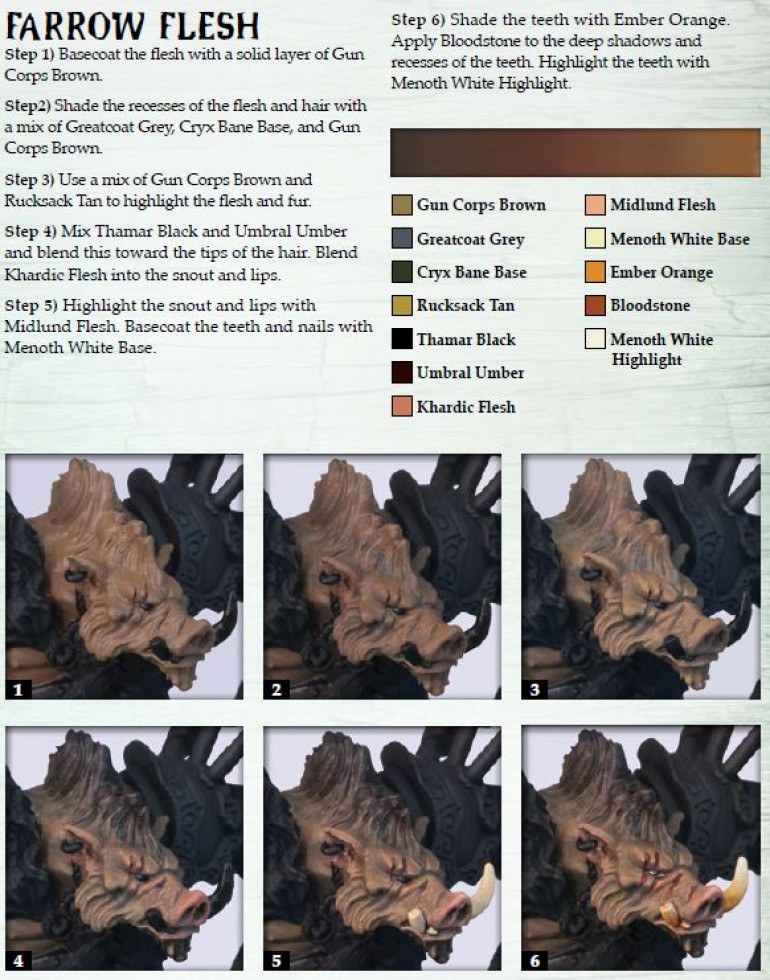
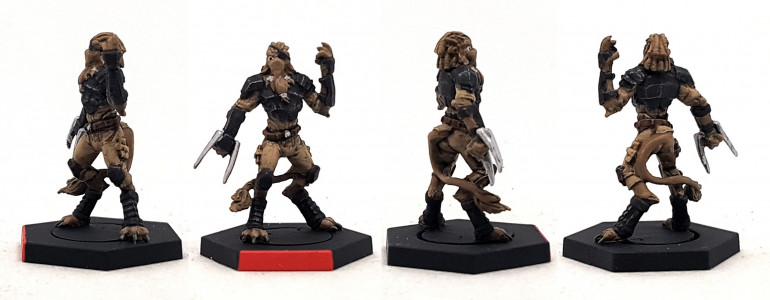
The Yindij Flesh was painted using their Farrow Flesh guide from Forces of Minions. Eventually the free agent tusks were done using this guide too.
There is some red armour on both creatures and I wanted that done before I got to their carapaces.
Base GW Evil Sunz Scarlet
Wash GW Carroburg Crimson
Drybrush GW Wild Rider Red
Dark Bluegreen Carapace
Base P3 Coal Black with a little black added
Wash GW Nuln Oil
Highlight 1 Drybrush Coal Black
Highlight 2 Lightly Drybrush P3 Trollblood Base
Somewhere around here I knew I had a long wait for washes to dry so I went and tore down the last on my lean-to, chopped up the waste and filled the bin (It’s overflowing and there’s still more waste!), and mowed the lawn. I then went back inside and took my shoes off before remembering I needed to go to the shops to buy stuff for lunch. Still, that’s the last of the responsible adulting that needed doing this weekend.
Living Bone Carapace & Claws/Nails
Base Mr Paint MRP-F059 Brown Grey
Pin Wash recesses with Brown Grey with a little P3 Umbral Umber mixed in
Drybrush Mr Paint MRP-F060 Dust Grey
Lighter Drybrush of Mr Paint MRP-F063 Bone White
Yellow Armour Rims
Undercoat White primer
Base P3 Mouldy Ochre (It’s got great coverage for a yellow)
Highlight P3 Cygnar Yellow
Yindij Light Brown Cloth
Base P3 Hammerfall Khaki
Wash GW Agrax Earthshade
Drybrush Ammo A.Mig-0620Dark Sand Dio Drybrush Paint
Black Armour
Base VMC 70.994 Dark Grey
Drybrush P3 Pig Iron, but not too heavy
Wash GW Nuln Oil
Claws/Toe Nails
Base P3 Cryx Bane Base
Drybrush P3 Hammerfall Khaki
Wash GW Nuln Oil
Leather
Base P3 Bootstrap Leather
Drybrush P3 Hammerfall Khaki
Wash GW Agrax Earthshade
Silver
Base VGC 72.053 Chainmail Silver
Wash Jan’s Magimix (See previous posts)
Highlight 1 VGC Chainmail
Highlight 2 VMA 71.064 Chrome
Gold
GW Retributor Gold
It was about 10pm so I called it a night there and hopped in bed for another chapter or two of Heretics of Dune. I’m enjoying the series, but I kinda want it to end now. I’ve come too far to not find out how it ends though. I’m not convinced this whole book couldn’t have been a chapter, or a paragraph in the next book. There’s time for it to surprise me though.
The One Where Unexpected Cake Arrives (17-18/4/22)
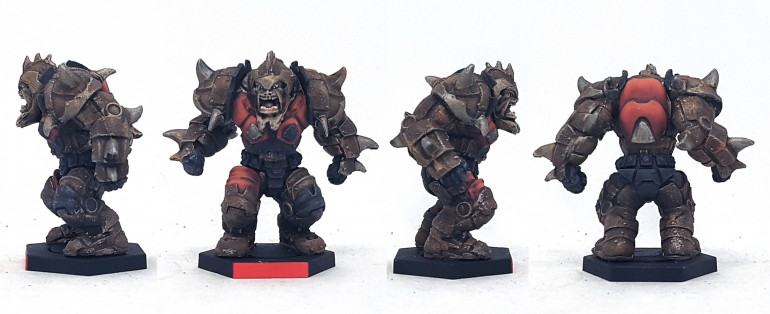
It’s Sunday morning. I’m between models looking at my To Do tray with no immediate inspiration so I go with the three purple fleshed guys. They should be simple enough, and they’re already based and shaded. They got a quick drybrush of GW Genestealer Purple. I know what I want to do with the Nameless Bloodsuckers carapace, but he really needs his rusty metal doing next. I’ve 3 other models that want rusting so I set him on one side to do with them, and finished off the two big purple guys, Krastavor and the Nameless Spawn.
Krastavor’s Black Metal
Base VMC 70.994 Dark Grey
Drybrush P3 Pig Iron (heavily on the parts that will end up Iron)
Wash GW Nuln Oil
Nameless Spawn’s Brown Armour
I was concerned about this looking like leather, so I tried something new here to try and make it look more like metal: I mixed some iron/silver in to the brown. Not enough to take over. Just enough to give it a sheen.
Base VMC 70.873 US Field Drab with a little Hataka Have Glass Grey FS36170 (it was in a dropper bottle and in front of me unused. Hataka paints tend to be a bit thin for my tastes
Drybrush lightly P3 Pig Iron
Wash GW Agrax Eathshade
Drybrush P3 Hammerfal Khaki
Drybrush super lightly P3 Pig Iron
Iron
Base P3 Pig Iron
Wash Jan’s Magimix (see previous posts)
Drybrush P3 Cold Steel
Yellow Armour
Base P3 Mouldy Ochre
Highlight P3 Cygnar yellow
Green Glow
Undercoat with watery white (p3 Menoth White Highlight)
Undercoat/Base P3 Necrotite Green in the middle of the big light only
Base 2:1 P3 Yellow Ink : P3 Green Ink. Apply a few coats as needed. Splash a little outside the lines as glow.
Nameless Spawn’s Lighter Brown Cloth
Privateer press’s Hammerfall Khaki recipe from Forces of Mercenaries, as below
The red lights on the spider were just given a quick coat of GW Evil Sunz Scarlet. The eyes were based P3 Coal Black and given a tiny dot of P3 Menoth White Highlight. The fangs were painted with Menoth White Highlight.
It’s almost 4pm and they’re both done. I think I took a little time to play Diablo while some washes dried.
On to the rust. This goes on the Nameless Bloodsucker, Grak, and both versions of Frank Burke.
Rust
Base P3 Pig Iron
Wash GW Nuln Oil
Paint and/or dab on P3 Typhus Corrosion to taste Leave the iron showing through in variable amounts as you see fit
Drybrush GW Ryza Rust over the previous layer. Go heavier and lighter in different places.
Drybrush P3 Pig Iron wherever you want a little shine showing through
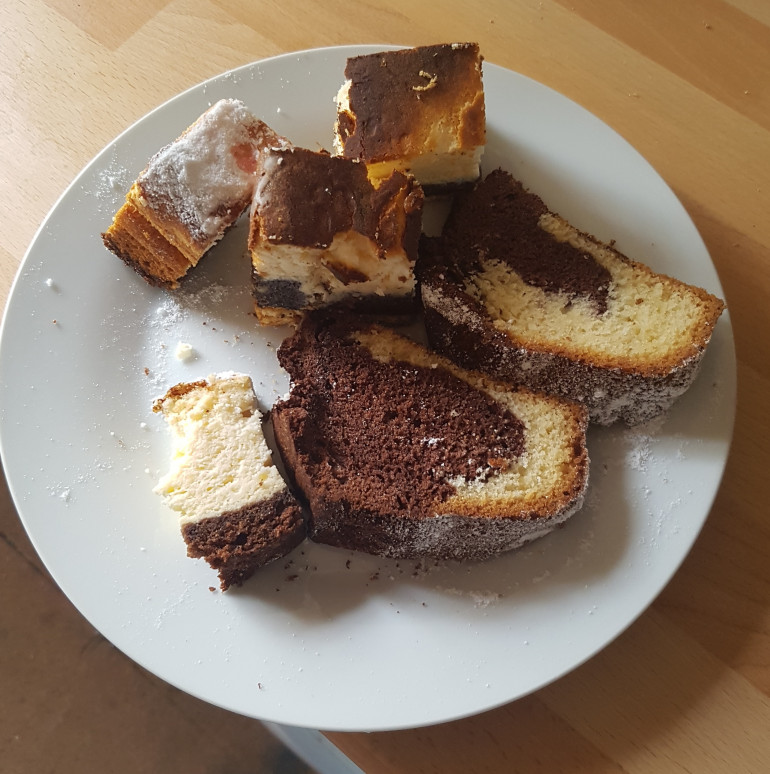
It was while I was working on the next stage that my doorbell went off. I wasn’t expecting anyone. I had a friend who was supposed to pop around to grab something the weekend before so I could only assume this was him. Nope. Its an 8-10 year old boy with a plate full of cake to offer me. I thought he was just offering me a slice, but it was the whole plate. He’d come from next door and wanted his ball back from my garden. He didn’t need to bribe me to get it, but it was very much appreciated! They’re a polish family and there appears to be two different polish cheesecakes here, unlike anything I’ve had before. The cheese part is usually very moist, but in this the cheese part was dry like cake. Google tells me it’s called Sernik and it’s made from dry cheese curds.
Does anyone know if there’s any polish (I assume they’re polish, but I could be wrong. I know English isn’t their first language and they sound polish, but what do I know?) traditions about giving cake to neighbours at Easter, or did I just get super lucky and they’d baked more than they could eat?
Anyway, I didn’t eat it all right away. I was in the middle of painting
Frank Burke’s Trousers
Base P3 Cryx Bane Base
Drybrush P3 Thrall Flesh
Wash GW Agrax Earthshade
Grak’s Flesh/Fur
Base P3 Gun Corps Brown
Wash GW Agrax Earthshade
Drybrush P3 Hammerfal Khaki (His beard didn’t have any detail to pick this up unfortunately)
Leather Belts
Base P3 Bootstrap Leather
Wash GW Agrax Earthshade
Drybrush P3 Hammerfal Khaki
Grak’s Mouth Insides
Base P3 Midlund Flesh
Wash GW Caroburg Crimson
Grak’s Red Armour
Base P3 Skorne Red
Wash P3 Umbral Umber mixed with p3 Exile Blue
Pin Wash with the previous mix, with added P3 Coal Black
Careful brush highlighting was the used for all the highlights (Possibly the one and only time I’ll do this in this project!)
Highlight 1 was P3 Skorne Red
Highlight 2 was Skorne Red with some P3 Ember Orange
Highlight 3 with more Ember Orange added
Highlight 4 with some P3 Heartfire added
I called it a night there. It was getting late, and I had cake to eat and a book to read. The next morning I got back to it. The red may have been done Sunday morning. My time stamps are lacking for this stage.
Grak’s Black Armour
Base VMC 70.994 Dark Grey
Drybrush P3 Sickly Skin
Wash GW Nuln Oil
I played a little Diablo while waiting for everything to dry thoroughly. After lunch I got the airbrush out and varnished everything and applied a base coat and some highlights to 3 more models
Apparently, I’ve only room left for one image when I want two so I’m ending with a gallery. At the end you can see the models I’ve been prepping. They may look lightly zenithal primed, but I promise you, that’s black and grey paint in prep for black armour. The final image is my To Do tray as of the end of the four day weekend. Only 25 models left to go, many of which already have paint on. This seems a lot more manageable. There’s about 9 weeks left in spring so that’s about 3 models a week I’ve got to get done on average, and there’s more bank holidays to come too.
With my airbrushing all done by mid-late afternoon I threw myself back in to Diablo 3. I’m now max level and I’ve completed the first 3 tiers of the season, unlocking 4 of my 6 set armour pieces..
All The Things, All At Once (24/4/22)
So here I am with only 25 models to go and over the last week I’ve found I’m working on more and more of them at the same time as there are similar colours and it’s just more efficient to paint a small group of models at once. You can paint 3ish identical models in the same time it takes you to paint one. The biggest time sinks are in switching paints and waiting for the previous coat to dry before you apply the next one. You could be painting that same colour on more models. These waiting times are also when I find I’m most prone to being distracted.
This stage of the project going forwards might be a good example of how to get a lot of diverse models with recurring colours or schemes done all at once.
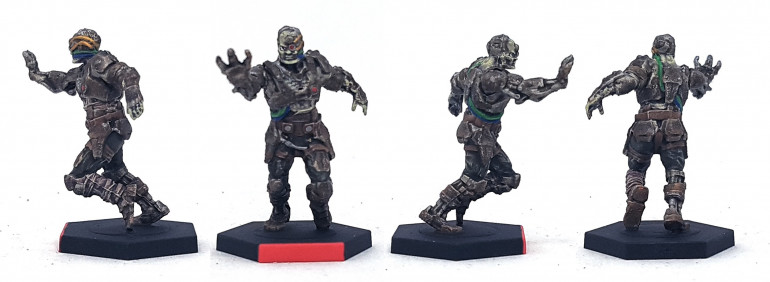
So yes. At the end of last week I’d used the airbrush to lay down a “black” base coat and some highlights on three models. First, they got a coat of Revell 36106 Tar Black, then I mixed in some 36174 Gunship Grey and sprayed from the sides and above, then just from above using only Gunship Grey and from a distance. I cleaned up my airbrush and didn’t paint again for a few days, by which time I’d realised two more models needed to be black (Hexen and Eko’o) so I fudged them with a base of Vallejo 70.994 Dark grey. There are two more models that want the black (the Zee), but they’re better off having their red done first so I’ll come back to them later. Everybody got a drybrush of Revell 36176 Light Grey, and then a wash of GW Nuln Oil.
This wash was going to take a while to dry, so I pulled out two models that have a darker green skin tone to paint, and thought I may as well paint the vines on the Treebeast the same colour while I’m at it. They were given a few coats of Coat d’Arms Tank Drab, and then put on one side for later. It was getting late on Tuesday evening, so I packed up and went to bed.
I next picked up a brush on Thursday evening. I’m working towards doing the reds on these black models, and so I can bring the Zee in to the mix, but the manbat feels like I’d be better off doing his flesh first. Some of the red goes over it, and it means I can afford to be a little messier with a drybrush this way. here’s a recipe I’ve used before. I found it didn’t work so well on the textureless wings here, but its good enough, and done is done.
Vampire Flesh
Base GW Rakarth Flesh
Wash GW Agrax Earthshade
Drybrush 50/50 P3 Menoth White Base / P3 Thrall Flesh
Drybrush less/lighter with GW Pallid Wych Flesh
This appears to be all I got done on Thursday after work. I must have gotten distracted. I suspect I played some Diablo 3 while waiting for the wash to dry, and stopped early to watch the new episodes of Picard and Moon Knight.
It’s Friday evening, work is done for the week, and it’s time to paint the red on Eko’o, Hexen, Nightshade, and the two Zee. I’ve a recipe and some paints from an old Asset Drop I’ve not tried yet and I’d like a different red to the others I’ve used in this project, so lets see what it looks like. In their guide, they’re using it on a dragon’s wing, rather than a metal surface. It turned out after it works better on natural surfaces as it’s more of a desaturated neutral red, than a vibrant eye catching painted metal surface. I’ll use it again for sure, but these surfaces could have done with something a little more poppy. Once again, it’s good enough, and done is done.
Red
Base Mr Paint RP-F073 Red Shadow
High 1 brush on a 2:1 mix of Mr Paint RP-F073 Red Shadow and Mr Paint RP-F070 Pink Fleshtone
High 2 same as above, but make it 1:1
High 3 the same as High 1 but 1:2
High 4 Drybrush gently to catch just the edges with Pink Fleshtone
High 5 Catch just the tips with a mix of Pink Fleshtone and any White
Shade with Mr Paint RP-F072 Brown Shadow
Pinwash Shade with Brown Shadow and a little Black
It appears I didn’t finish the final stages of the red until Saturday lunchtime. I suspect more Diablo distractions while waiting for washes to dry. I lost some of Friday to a window fitter appointment that got cancelled last minute.
With the red done, I painted the black armour on the Zee’s, repeating the steps above using the Vallejo Dark Grey. While working on that I also painted the hair on the Vampire, and then got the leather belts and boots done on the Zee
Bat Hair
Base P3 battlefield Brown
Drybrush Troolblood Highlight (done at same time as for the Zee boots)
Wash GW Nuln Oil
Leather Boots
Base P3 Bootstrap Leather
Drybrush Troolblood Highlight (done at same time as for the Vampire’s hair)
Wash GW Agrax Earthshade
With those washes dry (and probably after a little Diablo, or a lunch break) I picked out the steels on Hexen and Eko’o
Steel
Base P3 Pig Iron
Wash GW Nuln Oil
Drybrush P3 Cold Steel
Hexen’s gold trip was then carefully picked out with GW Retributor Armour, without highlighting or shading. I thought I was done with him, so i started work on the pale blue flesh of Shojuun.
Pale Blue Flesh
Base P3 Frostbite
Wash P3 Frostbite mixed with Warcolours Marine 1
Highlight P3 Frostbite
I may have mixed a little white in to Frostbite for a final edge highlight on the nose and perhaps eyebrows, and maybe knuckles and fingertips.
I then remembered Hexen’s stupid masks with their stupid shallow detail, and stupid hand and backpack in the way. I couldn’t tell you what they’re supposed to look like as the detail just isn’t there. Here’s my recipe. I’ve used it elsewhere with more success
Hexen’s white mask
Base P3 Menoth White Base
Wash P3 Trollblood Highlight
Reclaim with base
High 1 Menoth White base mixed with Menoth White Highlight
High 2 Menoth White Highlight
High 3 Menoth White Highlight mixed with White. Keep adding more white and painting more layers, until you’re happy
High 4 glint highlights with pure white, if required
Back to Shojuun, picking out the remaining details on him
Shojuun’s wires: Reaper 09024 Amethyst Purple
Shojuun’s eye sockets Mr Paint MRP-072 Brown Shadow (it was already in front of me)
Shojuun’s “Backpack” was painted the same as the Steel above for Hexen.
The last remaining colour on these minis was Caucasian flesh tones, which also appear on five other models, so I painted them all at the same time. One of those models is Brute Force (Power Loader Ripley from Aliens). Her yellow was painted back at the start, but it needed a little something more so it got a drybrush of Scalecolor SFG-41 Hykey Yellow. Doing this first meant I could be messy. I then got to work on the flesh. This has lots of washes which I know take a while to dry so i played a lot of Diablo and watched X-Men Dark Phoenix (Not as bad as people have said. It had it’s problems, but I think it annoyed me less than some other X-Men movies, perhaps only because my expectations were so low at this point). I got the final wash in before going to sleep, and drybrushed the highlights in the morning.
It’s now Sunday, and I’ve finished the flesh highlights. My D&D group is starting up again this evening after a month or so off. I’m running things and it’s the start of a new adventure. I’ve been doing prep for months, but it’s like the day of an exam. There’s cramming that can only be done on the day, and there’s some nerves too as I’m out of practise, and in theory, they have the option to derail everything, and have multiple paths available to them, depending on who turns up and what they want to do. So yes. I’m a little distracted and I know I’ve got to buckle down after lunch and get some “work” done.
Rather than embrace a large stage of the project, I found myself drawn to Brute Force. I’d ben avoiding her as I was afraid that she was too soapy and I wouldn’t be able to tell what’s what on her. I was also afraid that she’s a bulky model in a cramped pose and I’d have great difficulty painting her. Now the flesh is on I can see her better, and I’m feeling a lot more confident on her. I can also see she doesn’t match the studio model on their website. Mine doesn’t have that canister above her head. I can’t remember if she came pre-assembled or not, but I cannot see an obvious attachment point for it. I’m confident that the studio paint jobs are done on higher grade casts than are sold to the public, which feels cheeky at best, and an outright lie and a con at worst.
Where was I? oh yes. Painting Brute Force. I painted her trousers and shirt at the same time. They’re both military greens, so a lot of the same paints and steps were used. I got her hair done while waiting for the wash on the clothes to dry too.
Green Trousers
Base P3 Traitor Greem
Drybrush P3 Thrall Flesh
Wash GW Agrax Earthshade
Green Shirt
Base P3 Ordic Olive
Wash P3 Agrax Earthshade
Reclaim with Ordic Olive
High with Ordic Olive mixed with a little P3 Bog Moss
High 2 as above, but with a little Thrall Flesh
Hair
Base P3 Battlefield Brown
Drybrush P3 Trollblood Highlight
Wash GW Nuln Oil
I think I allowed myself to be distracted by Diablo until early afternoon, when I buckled down with my homework, and we eventually had what felt like a good D&D session.
I said in my last entry that I need to be averaging 3 models per week in order to be done by the end of spring. I have 6 models here I’m calling done, and I’ve made a lot of progress elsewhere too. I’ll do everyone’s eyes, bases, and blue glow all together at the end, just before varnishing. It just seems more efficient that way. I have undercoated with white where the red will go on all the bases already, while waiting for other paints to dry.


![TerrainFest 2024 Begins! Build Terrain With OnTableTop & Win A £300 Prize! [Extended!]](https://images.beastsofwar.com/2024/10/TerrainFEST-2024-Social-Media-Post-Square-225-127.jpg)


