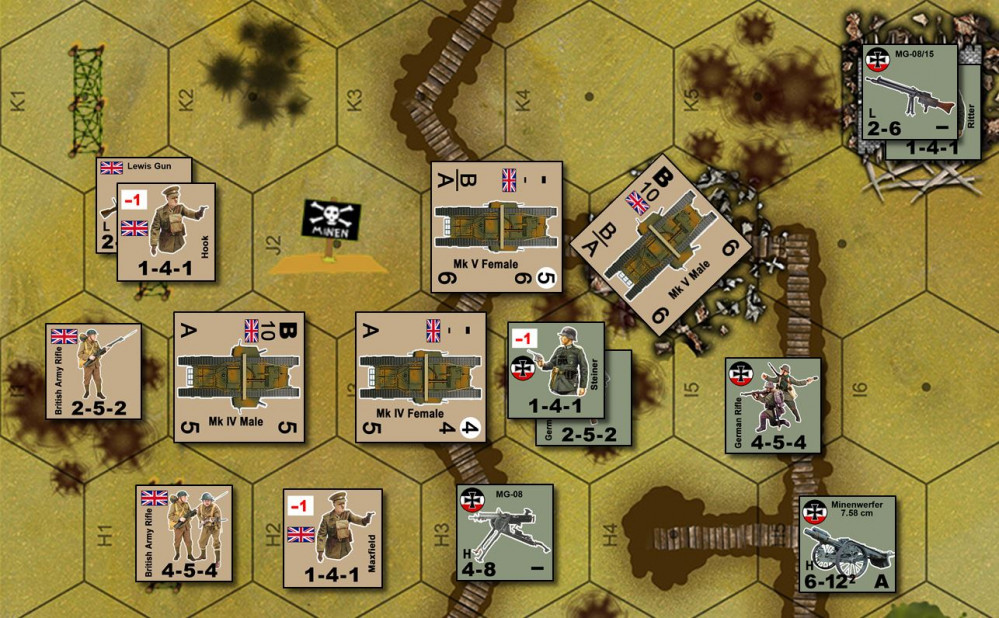
Oriskany's Final Days of the Great War - Australians + British tanks vs. Germans at Hamel
Australians vs. Germans at Hamel, 1918 (Part 04)
The Australian infantry assault (supported by British Mark V tanks) against German entrenchments at the town of Hamel (4 July 1918) continues in our “1918 Edition” of Barry Doyle’s Valor & Victory system.
So far we’ve seen Australians mount their advance toward the German trenches, their artillery splash across the frontal German line and ranging through their backfield, and then the first Australian infantry assaults actually fail. Then came a British Mark V “female” (armed entirely with Hotchkiss MGs) mounting a successful overrun attack against a section of the first German trench, putting the first real crack in the German defense.
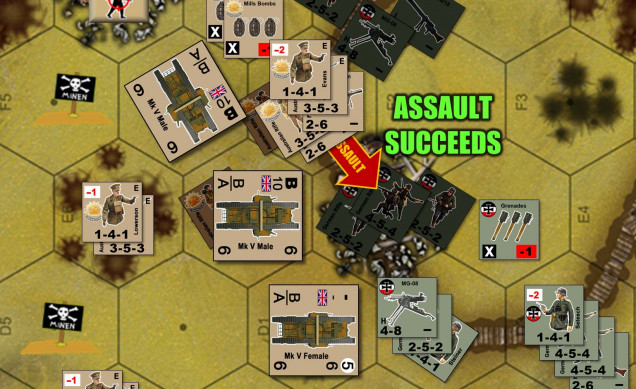
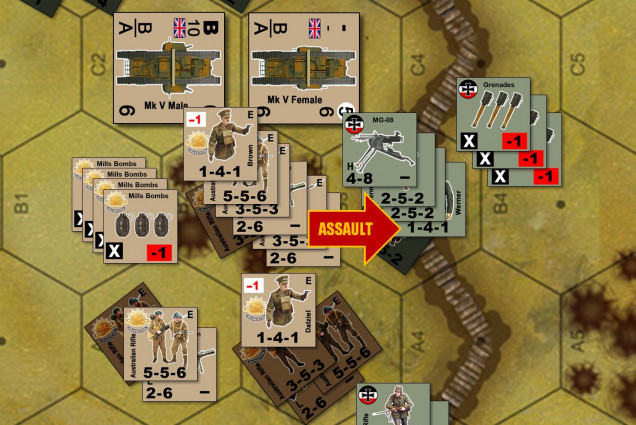
Now, still in Turn 2, we continue the Allied movement phase with additional Australian platoons mounting close infantry assaults against sections of the German trenches further to the south. Here we see a successful Australian assault, thanks in part to the suppression fire already put down by those British tanks and earlier Australian off-board artillery.
This is where games like Valor & Victory (and ASL, Panzer Leader, etc.) really shine, by encouraging the use of real-life combined arms tactics without the player having to be some kind of military officer or student of history. Just follow the turn sequence, and work out a plan that really gives you all the advantanges. Some players think this feels “gamey” … but a good game simply builds the rules where where life tactics are what really works within the structure of the game without holding your hand and carefully explaining why you should do a, b, and c.
Case in point – how to assault a fortified position in Valor & Victory. Your turn starts with the Command Phase, which is when off-board artillery (if you have any in the scenario) is used. You can call it in on any hex to which you can draw a line of sight, so it’s a good idea to have spotters already in place the turn before. The artillery can hit its target and either kill, or at least pin targets. You can also call in smoke to reduce the “opportunity fire” that will be coming back at you when you make your advance.
Next comes the direct fire phase. By and large, units that shoot cannot move that turn. You have to choose, and set up a combination of fire and maneuver elements (units that fire, and units that move, coordinating to make your assault).
So the direct fire here was from the tanks. As we saw earlier, they just kind of whiffed their rolls on this part of the line. The Australian player can now chose to set up additional fore from some of his infantry platoons, but any platoon that fires will not be able to assault.
In short, the Australians decide to bite the bullet and assault with everything here. Assaulting with too few units only means those assaults will be weaker and more prone to fail, and even if successful, will take longer and thus leave other units out here in the German MG fire that much longer.
Fortunately for the Australians, the Germans have been partially suppressed by the artillery fire. These pinned units cannot throw opportunity fire back at the Australians as they make their assault. Still, the unpinned German units do serious damage, and the Australians have to pay for the assault itself (even successful assaults against fortified positions are never cheap.
Here’s the good news – pinned enemy units are automatically eliminated in assaults, and do not count toward the calculation of Australian casualty costs. So as always, pinning as much of the enemy as you can before mounting an assault is always a good idea.
In any event “Captain James Evans” leads the assault in, applying his -2 leadership bonus to the difficulty of the assault roll. The roll succeeds, and the German trench line is cracked again.
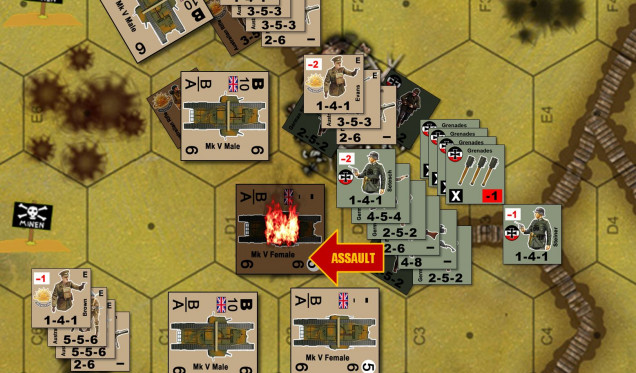
It’s now the German phase of Turn 2. In one place, they decide to mount an infantry counter-assault against the first British tank. Note that as they make their approach, they can stay in their trench, giving them a cover bonus against opportunity fire coming against them from the British tanks. Hauptmann Setesch has two half squads and one full squad with him (counting himself, that’s four units total, so he can use four grenade counters from his available pool), all of which apply with his -2 leadership bonus against his assault roll.
With a combined -6 against his assault roll (-2 leaderships plus -4 for grenades), the 2d6 roll is successful and the tank is brewed up. It has cost the Germans a half squad of troops, however (four men). Perhaps more worryingly, “Kampfgruppe Setesch” is now out of his own trench and in the open.
Turn 3 – things start to turn around for the Australians in the disastrous northern part of the battlefield. Lt. Ingram’s platoon has rolled “snake eyes” on an APFP (antipersonnel firepower) attack, the very best roll possible in Valor & Victory (most rolls are 2d6, and low rolls are usually better). So not only have their German targets been thoroughly shot up, but any unit that participated in that attack gets to make a “Valor” check. If they succeed they become “valorous,” which gives them all kinds of bonuses for the remainder of the game.
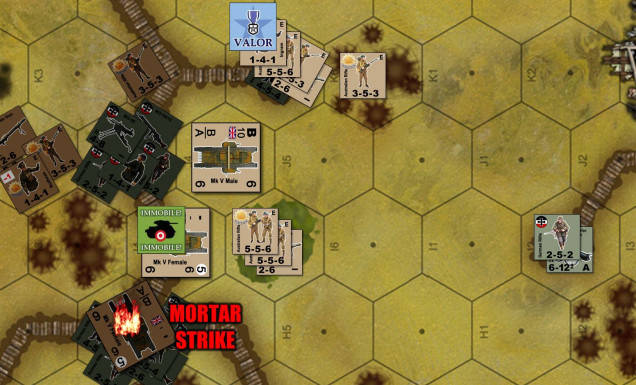
Other news isn’t so good. Although one British “male” Mark V tank has successfully traversed the German primary trench, two “females” have thrown tracks trying to cross the trench. This is very bad news for the tanks. Not only to they have to roll to see if their crews bail from the tank (thus counting them as destroyed units), but every time they are attacked at all, they have to re-make this “bail out” check.
The Germans seize on this opportunity in their turn, peppering the immobilized tanks with direct mortar fire. The odds of a hit and penetration is puny, but it doesn’t matter. These tanks are permanently immobilized and the crews can easily panic. Sure enough, one crew fails its second roll when hit by the German mortar fire, and the tank is considered destroyed.
At the extreme south of the line, more Australian assaults crack mole holes in the German trenches. German opportunity fire here has been absolutely murderous, the Australians were really let down by their artillery here. But fortunately, immediately in front of this stretch of trench are some craters the Australians can use for at least some kind of cover for their final assault.
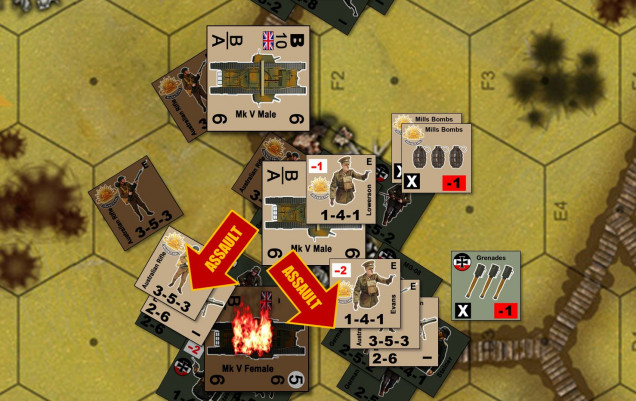
In the center, with holes now cracked in the German trenches and British tanks starting to overrun the trenches themselves, the Australians begin to pry apart the German defenses from the inside. Here we see Lt. Lowerson’s platoon and Captain Evans pivot south inside the German trench, counter-assaulting “Kampfgruppe Setesch” and supporting German units from the north.
This is probably the most violent single point on the battlefield right now, with two British tanks, one of them burning, and 64 men, four officers, and six machine guns, all within three hexes (about 90 meters – a medium-sized parking lot).
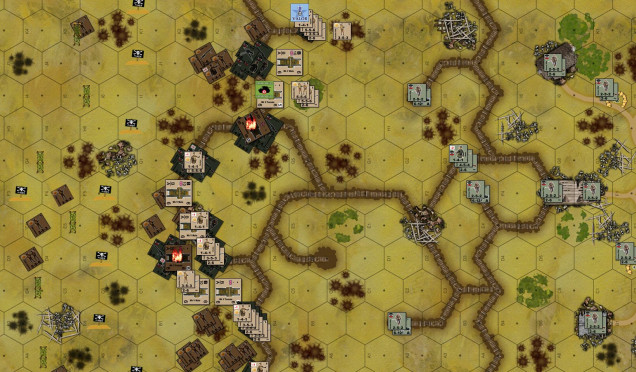
The overall situation at the beginning of Turn 4 – the Australians have cashed in about half the effective combat strength, including three tanks – but have also more or less secured the German primary trench line. The Australians will now spend most of Turn 5 consolidating their position, and on Turn 6 launch a new assault on the secondary German trench line some 150-200 meters behind (each hex is about 30 meters across at its widest point), and then the outskirts of the town behind that.





















Leave a Reply