


Bloom // Game Design


Component Design - The Board
Oh hai there friends! I want to get stuck into how I made the components this time around (since I’ve actually finished them). There were only two parts to the components I had to make: the board itself and the pieces. Continuing on this project of making and sending games back and forth to my friend, I want to get into woodworking. This informed how I approached the board as you’ll see below.
Board Design
So I wanted the board to be made of wood. Asking around the office, Justin – as a former carpenter – gave an interesting bit of advice: take a softwood like pine and etch your design into the wood with a soldering iron.
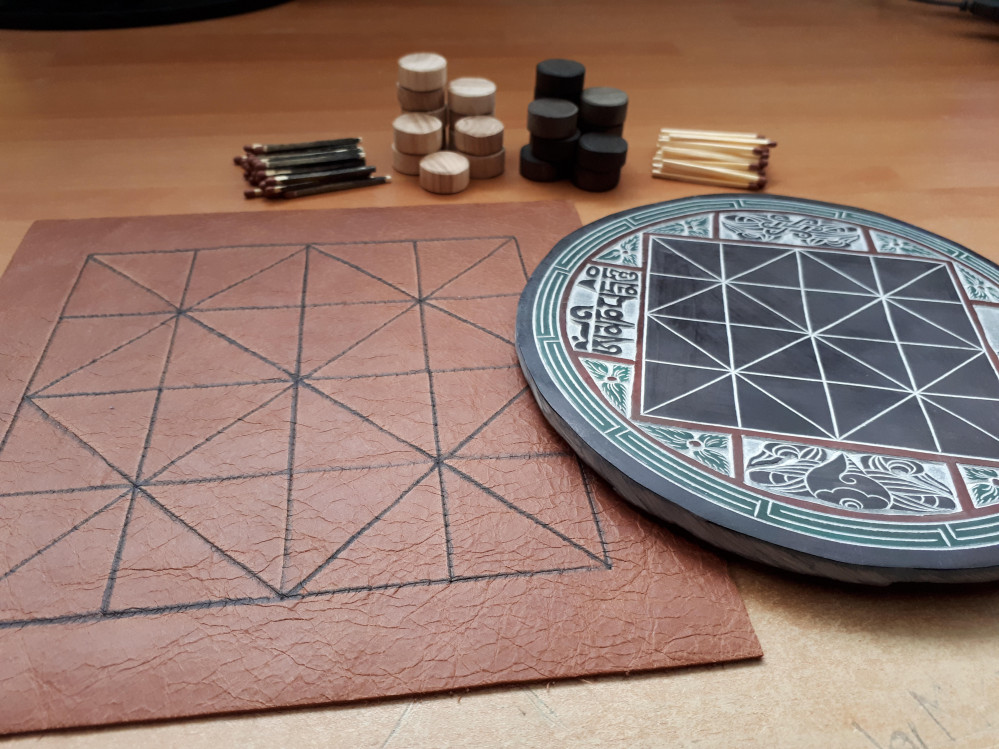
The next part of the design was to nail down the dimensions of the board. The prototype I had been using was an Alquerque board drawn on an A3 piece of paper. The drawing was large so that it could be picked up on camera for my game design streams on Twitch. The problem with this was that the board was so large that it emphasized the space in between the lines (the triangles) and not the lines and intersections themselves as this was what the game would be played on.
This prototype was a 27x27cm design. My Alquerque board was 15x15cm which was much too small for the capture markers that would be placed between intersections. So I settled on 20x20cm dimensions


The one on the left emphasizes the spaces in between lines whilst the one on the right is the right size for game pieces and allowing players to take the lines into account.
The next thing to sort out was procuring wood for the board which proved difficult. Finding local lumber suppliers wasn’t possible since they all concentrated on building materials that were either too thin or would need milling which wasn’t a service provided. The dimensions I wanted (25x25x4cm) were awkward for pine. So I decided the next best thing was to get a chopping board of the right dimensions. Going into a home store near me I managed to procure the perfect one.
 The chopping board had the perfect dimensions in the centre, and the lighter edges provided a space for players to put their pieces
With the board procured I marked out the lines for the Alquerque design and got to work with the soldering iron. This proved a little difficult, however. The soldering iron was a great idea if I managed to get a softwood like pine, but the chopping board was bamboo and so there were difficulties in etching the lines in. I had to turn the soldering iron up to its maximum temperature to even make a mark (400 C) and press quite hard on the board. Though I managed to finish the lines if you look closely it’s very rough and you can see where I had to stop and start. For future games, I might carve out the design and then use a bit of black paint.


And that’s the board! It’s my first time making something like this so even though it’s a little rough around the edges, I’m still happy that I actually made something!
Next time I’ll do a short post on how I made the pieces and how fabulous/derpy they look! 😀


Looking very cool, can’t wait to see more.
Thanks dood!