


Truncated Trees Tutorial


Materials Required and First Steps
Materials
Toilet Paper Rolls
toilet paper
White Glue/PVA
Water
Cereal Box card
hot glue
hot glue gun
Solid base option
Wax paper
Large box
tape
Gravel or washers (Washers should fit inside the toilet paper roll)
Textured Paper Towel
Pen
Paint, basing materials, and anything else you want to finish them to fit in what you have.
There are other materials that pop up depending upon some variants. Many of the paints and basing materials, along with other things, are more up to those making these. You probably want to blend them into your own terrain set and boards.
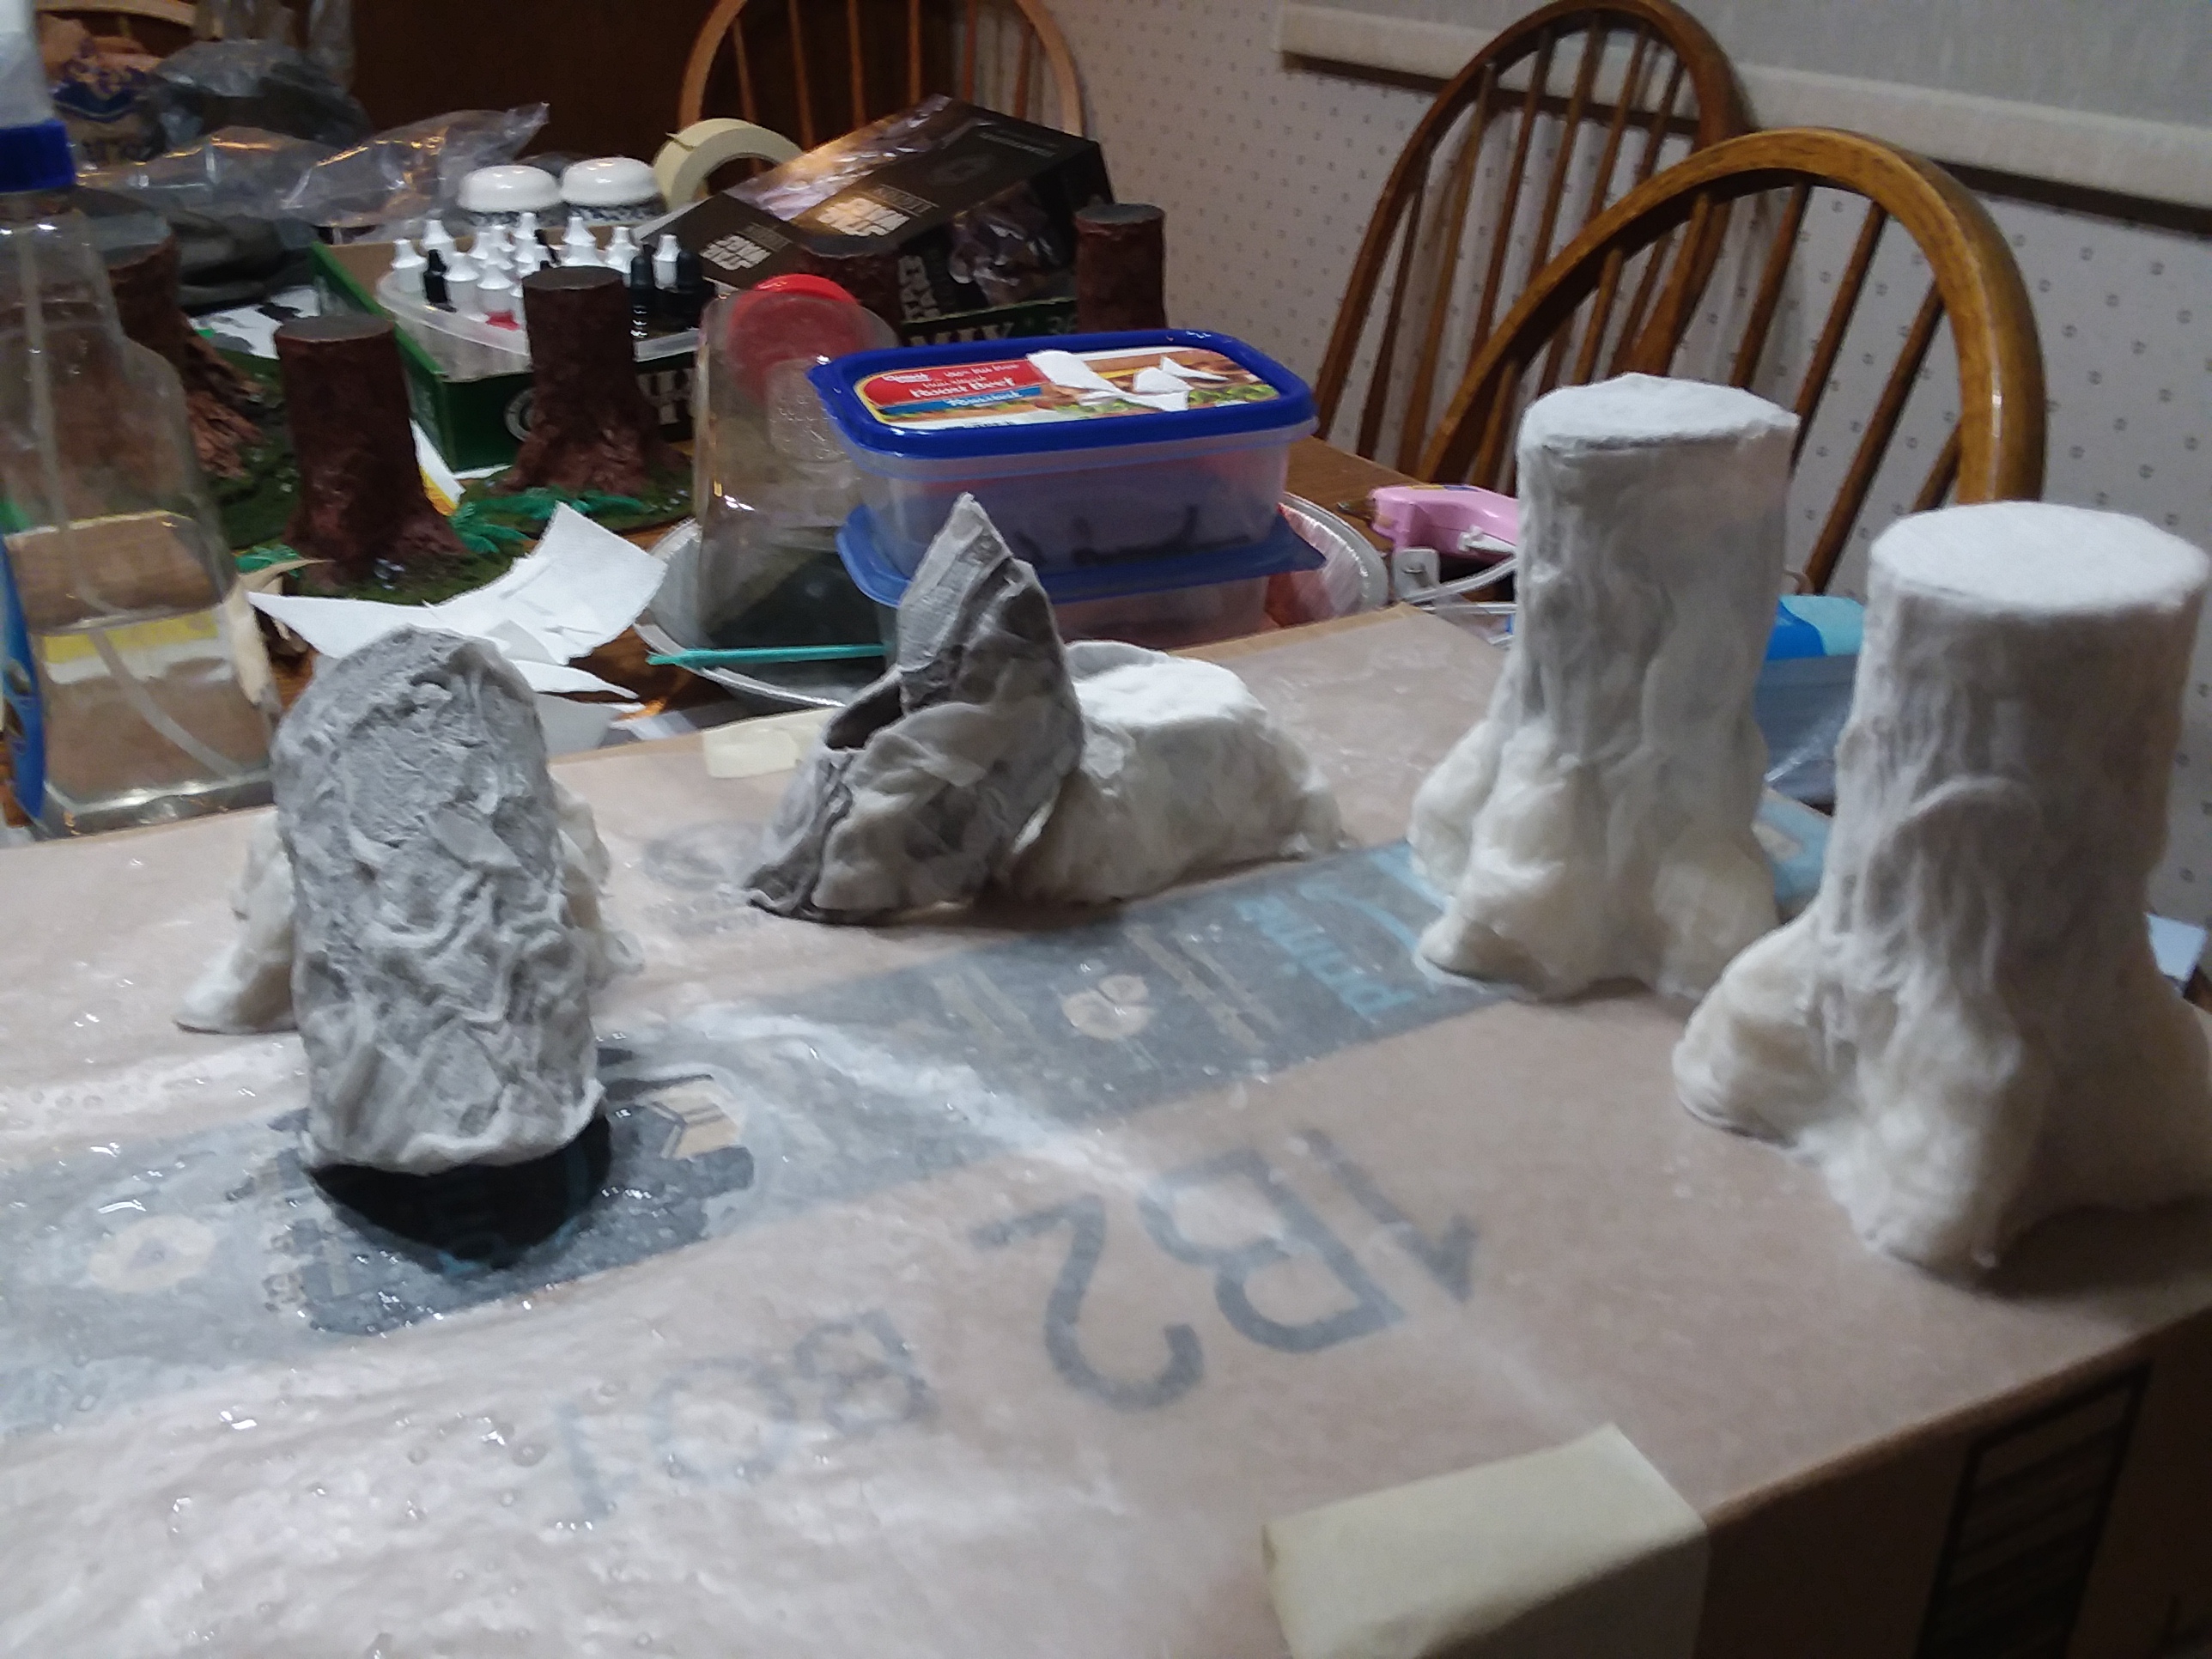
 The first completed steps of construction
Take your toilet paper roll and cereal box card. You want a piece of the card big enough for all of your trees to fit on, on end with enough space to work your hot glue gun around them. If you’re using washers glue them to the card spread out enough for your rolls to go over them
Use the hot glue to completely work around the end to attach it, make sure they’re positioned over the watchers if you use them.
If you’re using gravel, after the hot glue cures, pour some white glue into it followed by enough gravel to get the weight you want. Cut the around the sealed ends ends as closely as you can.
Then put a bit more glue in and crumple some toilet paper up and use the pen to ram it down into it, then more glue and more paper. Fill the entire tube.
When you have it full, take some more card and after putting some hot glue inside the tube on the crumpled TP before Flipping it and pushing it down on the card and then working glue around to seal that end as well into a closed tube that will form the core of the project. You want to trim the card as closely to the tube as you can.
For easy variants I’ve done and am doing, you can work several tubes togather while maintaining the length. This gives you a larger tree, and you can even use more of the cereal card to make a tunnel through it like the redwood tunnels. You also want to use some of the card and perhaps other rolls to reinforce the top of the tree.
Another variant is to measure the roll against the minis you want to use and judge a good height and cut it off there, cut a circle of the cereal card to that can fit into an end with a slightly lip. Attach and weigh down the main cut down tube to a sheet as normal, then use the TP to fill it to the point where you can glue and work the circle into position and seal it in place with hot glue. At the same time, use an extra roll and cut back the ends and create holes in it to work like an old, rotting, log in the end. This makes a good stump and log look for variety.
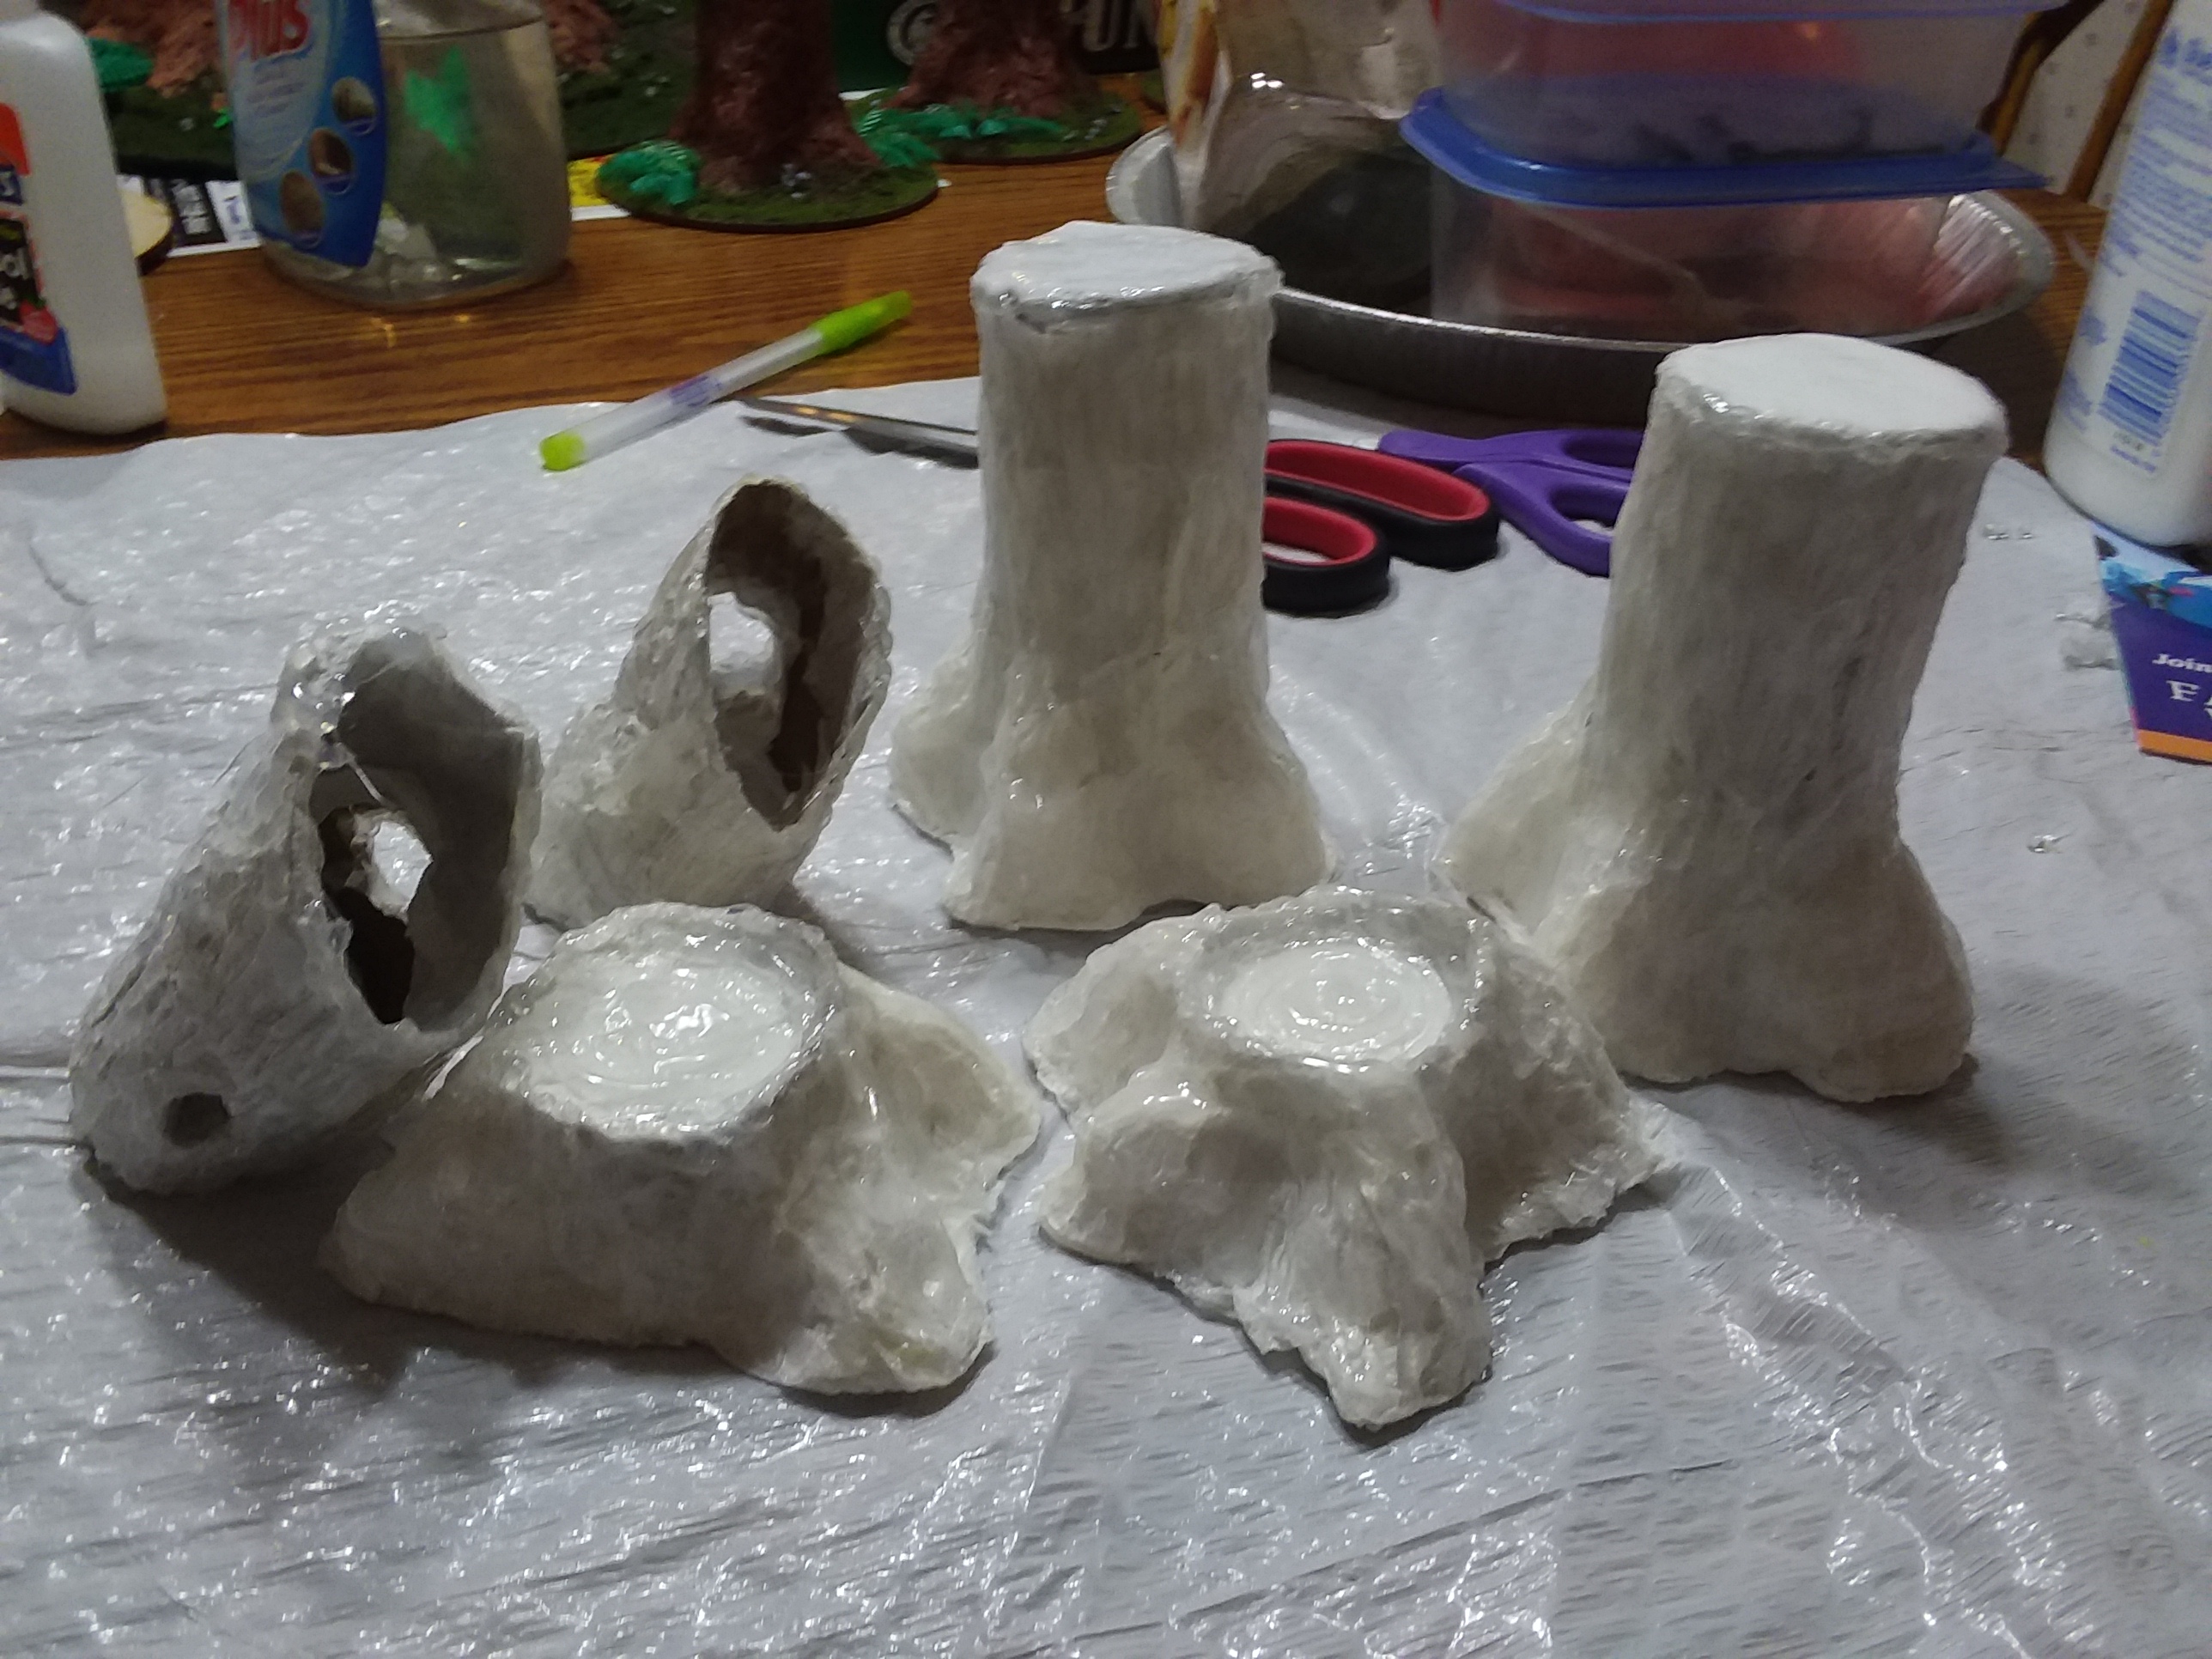
 Completed step 2
Start with the box, take your wax paper and get it laying flat and taped into position over a large, flat side.
Now take your tubes and use some of the white glue to coat a small part along the base of it, then take some of the TP and water to make the basic shapes for the root structures, you want 4-5 per tree. Then use a bit more glue and work layers of the paper over the basic structure and the remaining portions of the tp tube.
Then take the paper towel, cut it down to be just a bit larger than the top of the tube, coat the top in glue and pull it over the top. Part of this is to have a consistent look that will imply that the tree continues upwards from there when this is done. It seems to work well for me with ones I have done that the top is not playable area and more.
After that, it’s back to the TP to try creating a defined line around the top edge, the top should always have the paper towel visible though. Water and white glue works well in making it work. and getting full coverage.
When it’s done, take more white glue and give the top a heavy layer of it. This is something that will be repeated a few times to harden it a lot more since, unlike the rest, there isn’t much more to do to that part other than more glue to reinforce it until painting.
Water down some white glue and brush it over the tp.
For the larger tree, you want more roots and to cover the interior of the tunnel if you made one.
For the stumps, skip the paper towel and cover it with TP. You still want to cover the top in glue to strengthen it since this would be a playable area. Also just use the TP, glue, and water to cover the exterior of the cut up rolls. When you finish make sure it’s held in a position where the damp cardboard won’t collapse.
No pictures of this step, but it is important.
While it’s drying, make sure you occasionally move them or they can still stick, even to wax paper. Just wait for the next day to do so when you wake up and again when you go to bed if it hasn’t fully dried.
 Completed Step 4
Now comes the most tedious part of this when it finishes drying.
Get your hot glue gun, start by running a thick bead of glue around the upper rim of the trunks. Having it rise slightly with a rougher look above is fine, but try to just get the boarder between the top and sides completely covered.
Then in an up/down motion, work around the trunk and roots to cover them with the hot glue and keep going into it to create the more vertical bark texture. You want it to look like it goes from the top of the tree down towards the base, you can split it up and work in shifts and other bits to it as you go. Do this in sections and let it completely cure from time to time in order to protect your fingers and the texture. You don’t need to do anything to the underside, it’s actually better not to.
For the larger tree variant, make sure the interior of the tunnel is also textured this way.
For the stumps, you want to work over the rim of it so that the bit above the flat part is covered as well. For the center of the trunk you want to quickly cover it in a layer of glue and, then, while it’s still molten, start in the center with the hot gun but not pulling the trigger, create a quick, tight spiral out from the center. It tends to end up looking better than actually making tree rings due to how hard it is to not mess up the rings in the limited time before the glue starts solidifying.
For the logs, you want to start at the ends and around any cutouts you have, you really want to work glue around those edges to reinforce them along with adding texture, then cover as much of the interior as you can, followed by finishing the exterior. Try for the same kind of texture as used for the trunks.
All of this takes time to do, take some breaks to let the glue cure off and on. You want that to keep from messing with your finished work and from getting the glue on fingers which is painful.


I’ve included this tutorial series in my miniature tree making resource database: https://alkony.enerla.net/english/the-nexus/miniatures-nexus/miniature-hobby/miniatures-miniature-terrain-scenery-making-trees-resources