Take A Journey Into 3D Printing With Gianna
February 8, 2017 by stvitusdancern
We have been seeing a large influx of 3D printers over the past couple of years and Warren has been making predictions that they would be making their way into a lot of peoples' homes. Well, I took on the challenge to see how we as miniatures gamers could embrace this new technology.
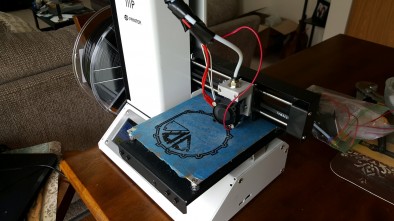
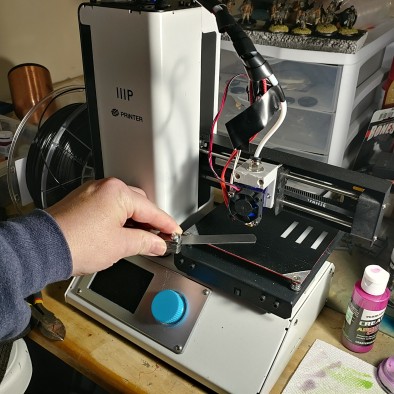
Monoprice Maker Select Mini 3D Printer
My first foray into 3D printing was the purchase of a $200 printer. I chose this as it was a good entry point and because it came assembled. Not having much of a background in 3D printing, I wanted one assembled and ready to go. Also, I figured if things did not work out I would not have wasted too much money. (Beasts of War do not endorse any one printer over another)
The printer arrived and I took it out of the box straight away and that is when I learned that you could not just plug it in and start printing. There is a lot of prep work to get the printer, even an assembled one, ready to print. Arguably the most important aspect of successful printing is to have the bed levelled and the hot end height correct. Otherwise, you will have so many problems and waste a lot of time and filament.
Into the Darkness, I Go…
OK, so I have this machine sitting in front of me and I am looking at it thinking “now what?” So, I read the very sparse instruction booklet and plug her in. There was a sample of filament included in the box so I load it per the instructions. I must take a moment now to tell you a couple of things first - per the booklet, they say the bed was levelled at the factory prior to shipping. “Cool,” I think to myself.
Second is that there a couple of types of filament feeders currently on machines. Let’s stop the story here to tell you about the basics of 3D printers.
A Machine is a Machine is a Machine, isn’t it?
Well, no they are not. While the premise may be the same for many of them there are some obvious differences. The most common 3D printers available currently are based upon the additive manufacturing process. In this case, placing layers of molten material on a previous layer to build up into an object. The actual terminology for what the home 3D printer does is Fused Deposition Modelling (FDM).
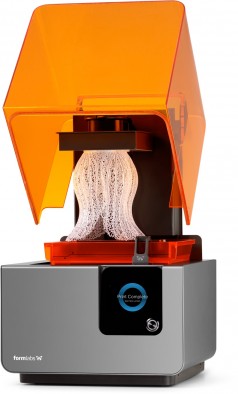
There is a second technology that is starting to make its way into homes but it still rather expensive compared to some FDM models, and that is resin printers. Resin printers or Stereolithography (SLA) use a bed of liquid resin that is light sensitive and will harden when exposed to a laser.
This type of printer prints upside down, that is the bed is rising from the resin and the model is printing inverted. Do you remember the scene in the Terminator movies when the liquid metal rises from the vat to form a T-1000? Yes, sort of like that. I currently have two of the FDM type printers and that is what you will find in most homes.
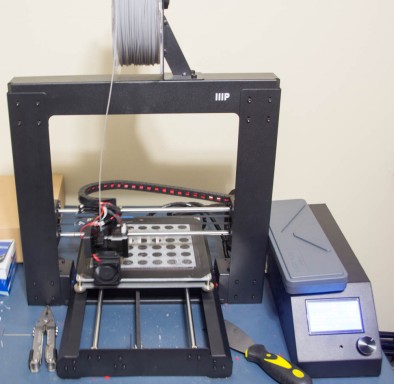
Depending on the type of machine you bought, bed levelling can be challenging. On my smaller printer (Monoprice Select Mini) you must use an Allen key to adjust the build bed. On my second printer (Monoprice Maker Select V2) they have dial-in knobs that make adjustment somewhat easier to do. The most important thing to remember is that the bed should at operating temp (50-60 degrees Celsius) prior to levelling so that it won’t change once heated and the metal expands.
I use a business card to check level. I am planning on getting a set of gap gauges as they will be more accurate and longer lasting. You need to check each corner of the bed as well as several mid areas to make sure you are level. Also, look at the bed itself and make sure you do not have any severe warping as this will make it near impossible to level the bed.
I know a lot of people who use glass on their beds as it will remain level and they have more success with adhesion of the print materials. Whatever route you choose you must take your time. One of the most important qualities of a successful 3D printer operator is patience. If you do not have it, learn it or you might want to look elsewhere. Between setup, operation, troubleshooting and actual printing, you must have patience.
The hot end (the extruder) is going to be another big area of contention for people. They can clog and clog they will. You need to be prepared and learn how to service your extruder. On my smaller printer, I had clogging problems quite often. It got to the point that I ended up replacing the whole thing with an aftermarket hot end and I am very happy with the results.
This is not to say that the stock one is a piece of junk, on the contrary, it works just fine. In my case, I got in a rush to print and did not take my time and caused a huge clog in my extruder that ended up in me dissembling it the wrong way and it was not the same since. Also, in my clumsy efforts to repair my extruder I messed up my thermistor and that caused all kinds of temp issues until I fixed that.
Some of the most helpful advice I can give anyone considering going into 3D printing is to find support groups and forums and join them and you will learn from others mistakes and there is so much wonderful advice out there. I joined the MP Select Mini Owners on Facebook and it was extremely helpful. 3D printing is like being a part of Beasts of War, there are always people around to help you out.
What Do I Use to Print With?
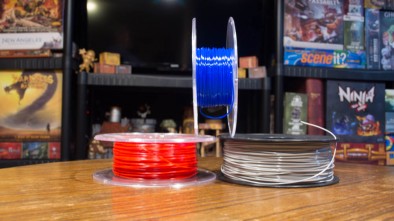
That is a loaded question, it depends on what you are trying to achieve. I know there will some of you that will disagree with what I am about to say, but in my humble opinion, I think for the average person it will be good advice. Use polylactic acid (PLA). PLA is a biodegradable and bioactive thermoplastic aliphatic polyester derived from renewable resources, such as corn starch (in the United States and Canada), tapioca roots, chips or starch (mostly in Asia), or sugarcane (in the rest of the world).
In 2010, PLA had the second highest consumption volume of any bioplastic of the world. [Wikipedia] Why do I say use PLA? Because, it is easier to work with than other filaments, lower melting point, lower bed temp and adheres easier to the bed. Now there are some who say that it is a poor choice as it is not as strong as ABS (Acrylonitrile butadiene styrene) and that it can absorb moisture.
My counter argument is this, I believe the strength is a non-factor because you are not doing any high-stress actions when you use this for terrain or anything else miniature gaming related. As far as the moisture if you keep it sealed and do not live in a very damp area of the world you will be fine.
If you do live where the air tends to be damper than others, print what you need and then seal it away in an air-tight container and drop in some silica to absorb any moisture. Once it is printed the fusion process will resist moisture and I will be priming and painting my prints anyhow. Personally, I have had more success with PLA over ABS as I get less warping as ABS needs higher temps and more temperature stability.
There are also the fumes produced by printing. With the PLA, you get a sweet smell almost like cooking sugar (which technically you are doing) over the more noxious fumes of melting plastic of ABS.
Besides PLA or ABS, there are many other filaments that you can choose to print with such as PLA+ (stronger PLA) PETG (Polyethylene terephthalate) or food safe plastic. There is also wood, metals, flexible and even carbon fibre filaments. All of them have their purpose and can produce amazing results, however, they can also have their own set of challenges when it comes to using them to print.
So, my advice is to find what works for you and stick with it, unless you have decided to take on a unique project. The more success you have in 3D printing the more likely you are to stick with it.
They Can Repair Themselves
Well, sort of. I was dumbstruck when I was watching my printer print its own replacement pieces for parts that had been broken (extruder filament arm) or a new mount for my new hot end. The idea that a machine could create new parts is mind-blowing!
We are crossing over into some fantastic possibilities. No matter how you look at it, the idea that you can create repair parts and fix your machine yourself is amazing.
Ok, Great But How Does It Help the Gamer?
Now, we get to dive into the meat of this article and that is how can I use 3D printing to my advantage to help in my games?
Let us start with the obvious, you can find a myriad of files on sites like Thingiverse or My Mini Factory or you can go to miniature specific sites like Printable Scenery.com or our friends at Fat Dragon Games who have included some free files in Re-Roll.'
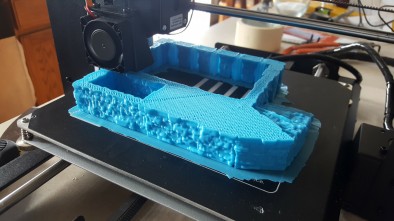
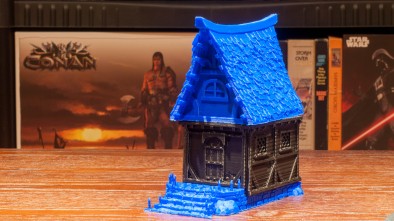
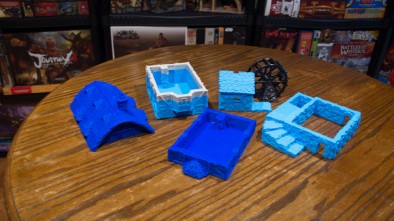
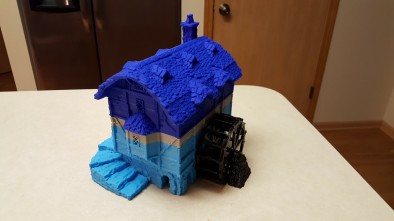
Currently, I have printed two complete fantasy buildings from Printable Scenery’s Winterdale Collection. The Watermill and the Small Cottage. I am currently finishing up the Turret Cupola.
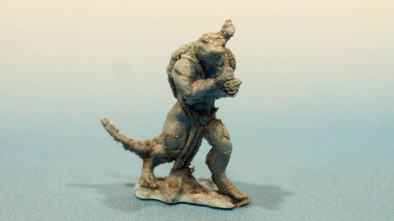
I also printed a couple of the Fat Dragon miniatures that were included as free downloads. With the terrain make sure you watch your settings and start with the creator's suggested settings. Also, make sure you look at the files in your slicer first so you know what it is you are printing. I made the mistake of printing the solid roof for my cottage versus the hollow one and I increased my filament and print time tremendously when I did not have to.
Remember the quality of your print will hinge on many factors: quality of the design, the slicer software, settings of the printer, filament used and bed levelling. The design of the item to be printed must be of a high quality. You will find some files out there that no matter how much you have your printed, in the al end in that they never come out correctly.
That could be because there is an issue in the design itself. When you look at the file in your slicer program layer by layer you might discover incomplete layers, which will cause incomplete printing. I do not know about you, but some of these projects can contain hundreds if not thousands of layers and I am not a fan of looking at each layer.
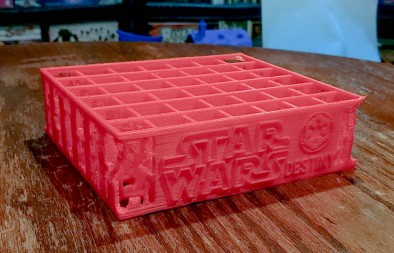
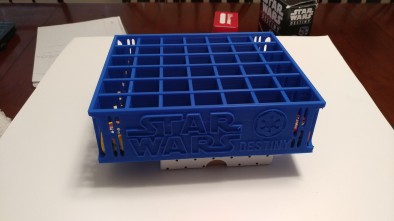
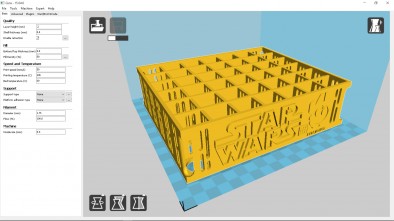
Remember you could be printing at a resolution of .2mm or smaller. Just keep that in the back of your mind when you download a file and print it. As I have found there are some amazing pieces to print out there. Besides the scenery and miniatures, I have printed, I also printed a dice tray for Dawn’s Star Wars Destiny Dice Box that I found on Tinkercad.
The potential to blow tabletop gaming wide open with 3D printing is there and the future only looks brighter.
What Is This Slicer You Keep Talking About?
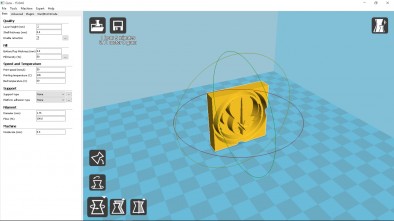
I cannot believe I forget got to talk about slicer software before. For your 3D printer to be able to print a file, it needs to know how to lay down each layer. This is where slicer software comes in. It takes your design file and then “slices” it into each layer based on your settings. This becomes the command file for your printer to use. Most common file factor is the .STL file format.
There are many different programs out there - some are free and some do cost money. I currently use CURA as it was what came with both of my printers and for the most part does what I need it to. Slic3r is another one that is free. Slimpify3D is a popular one that will cost you some money. They all have their pluses and minuses.
Do your research and look through the support groups at other’s experiences with the different software. I would start obviously with the free ones and when you get to a point where you feel that piece of software can no longer handle your printing needs than move up to a more involved piece of software. Just remember a high-quality file will make your life a whole lot easier.
But I Want to Create My Own Items
Ok, so do it. There are a tonne of different software and applications that will let you design your own print files. Not having a lot of experience with CAD programs it has been slow going for me up to this point when it comes to designing my own items.
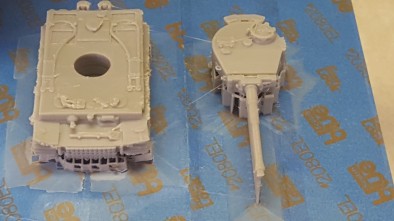
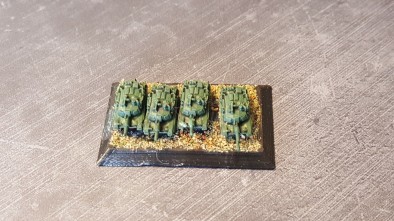
So far, I have created some bases for my 3mm modern tanks so I can play Team Yankee at this scale to get a “more real” scale experience. If you are lucky enough, you might be able to get a CAD file from someone else and take a deep look at it in a CAD program. Change the shapes and dimensions so you can get a feel on how to design a piece. A huge part of 3D printing is exploration, so take the time to roll up your sleeves and dig in. You will be creating your own pieces in no time.
Is it Worth It?
This is my opinion, yes, it is worth all the investment in time and energy. Will it replace miniature companies? No, no it won’t not anytime soon. The resolution is not there yet and the speed to print is not there either. It took me approximately 100 hours to print the Watermill building.
But once you get to the point where you can print some high-resolution pieces and cast them for say a dungeon then you will have an incredible resource. The idea of printing from an empty space a large 3-dimensional piece is incredible to me. We see huge leaps in 3D printer technology every year and it will only get better.
Remember the advancement of the VHS? We can only guess what the future holds for us as far as 3D printing is concerned but it is very exciting to me. The thought of creating a tangible piece from an idea in my head is such an awesome prospect, that I am excited to see where I can take 3D printing.
Will you join me in the wonderful world of 3D printing?












It’s great to see a 3D printer being used for the hobby. It definitely isn’t a replacement just yet, I agree.
My brother just got his printer and I intend to use it for my hobby, mainly though, I just want to print a custom coin for my Blood Bowl team. I’ve designed it myself and can’t wait to see it physically made =)
Isn’t amazing what you can create? Would love to see a finished coin!
Awesome video and project! I remember the 3D printed ‘mech you were playing with for the Battletech thread.
That print ended up in the trash due to the top half collapsing on itself.
Oh no! A failed prototype! 😀 Ah well, a common staple to any R&D program. We can always make up a story about how it was damaged in heroic combat. 😀
My brother got a 3D printer. One of the first thing he printed was the same watermill you printed. 🙂
I still have to get into designing something to print my self. I was thinking of starting with some bases as well.
123d design is a good program to start out in. it’s free.
It’s a bit basic but if you can make something in that, you can graduate to something better no problem! =P
I recommend FreeCAD.
I had never used a modelling tool before and yes it took a little bit to get used to it. It can easily create cubes/cyliners, round edges, make a union of two objects, and subtract/cut one object from another. That’s enabled me to design many useful things for around the house.
Just jump in and try. You will be amazed on what you can create.
Great article!
Please keep us posted on your progress. 🙂
Thanks, I have 100 WWII armoured vehicles files to try as well!
Really enjoyed both the article and video, may well dip my toes into the world of 3d printing later this year.
Thanks a lot, come on in the water is great!
With these things creeping into the ‘affordable’ price ranges it’s definitely good to remind us that these things require time and patience to produce results.
Is there any way to estimate how much time an object will require ?
And what is an average size / time ?
I remember when colour matrix printers could print a simple example that would show the various colours and fonts the printer could produce.
Do these 3D printers have ‘example objects’ or anything else that helps demonstrate their skills ?
Your slicing software will give a reasonable estimate of both time taken and material required. In the case of Cura it will tell you both the length and weight of filament used. From their it’s fairly simple to figure the cost as a percentage of your, say, 1kg roll of filament.
but what about a speed indicator for those of use who don’t have such things ? ‘2D printers’ usually boast about being able to do ‘x pages per minute’. It’s often an inflated number (simple font, n % coverage), but it gives a sense of speed before you buy into the stuff. An equivalent of this for 3D printers would be a good thing. Stuff like a [standard object that everyone can relate to] requires y hours on this printer and z hours on that other brand. In (war)gaming terms this could be stuff like 28mm models as a reference.… Read more »
I agree a standard speed measurement would be handy. The closest thing is the speed the print head can move at, but any one of a dozen settings for the model / printer can affect the time taken – can the printer reliably lay down the material at that speed, what is the material, what infill setting you use etc.
As mentioned in the slicer programs it will tell you estimated print times and in the case of CURA it gives estimated length of filament to be used.
Most printers come with sample files to print. However, remember those have been fine tuned and the settings tweaked for the perfect print. Your next print might have issues until dialed in.
Since I got my 3d printer last year, I’ve been printing almost non-stop. I have all of the Printable Scenery stuff from their Kickstarter campaigns, and I can agree, it’s brilliant. And is the model you’ve downloaded in the wrong scale? Too “heroic” rather than realistic? Scaling models is trivial, and can be a great way to print out, say, 1/4 prototypes to get a feel for a model or lay out a terrain board. 1/4 scale will print in minutes rather than hours typically. Also one thing that can’t be over-stated is the huge amount of satisfaction that comes… Read more »
I love the Printable Scenery terrain and I am very anxious to print more! That is why I got a second bigger printer. We will be getting an Original Prusa I3 Mk 2 soon as well as a Resin SLA printer when the budget allows.
I’ve had a 3D printer for about a year and a half that I built from a cheap kit. It’s a thrill to print something new, but patience is crucial. I’ve had to replace/upgrade several parts including the main board (did I mention my kit was cheap). I’ve printed all sorts of useful things around the house and have made many simple things using FreeCAD. My advice, if you’re even considering getting a 3D printer, do it, it’s a lot of fun. Don’t expect to save money, it’s a hobby. But I’d suggest skipping the cheap kits and saving up… Read more »
I agree, you definitely get what you pay for. The Monoprice Mini is an excellent starter printer for the price and they have a Mk2 version coming in April with upgrades suggested by owners of the first model. We are getting an Prusa soon.
I wouldn’t mind videos like this when you manage to print out some neat stuff. I’m sure there is going to be a lot of great things to show over time.
We will definitely look into doing something in the future. I also have another scenery project I back for city buildings maybe we can do something with that. But I think we can try to bring in more of this kind of technology on some projects.
What a fantastic Article Gianna ! I’m looking forward to see more !
Thanks, we will see what we can do. Looking forward to our next visit to the UK
Still not convinced about home 3D printing. Maybe in 20 years or so we can do good quality prints in the home
@stvitusdancern Good to see your into your 3mm like I am myself. If your interested in maybe 3mm WW2 Sam Mustafa has a set of operational WW2 rules coming out this year
I would be very interested in getting a look into those rules. I also have Hind Commander I still have to try. Maybe some Desert Storm what ifs with big tank battles.
super interesting video and article, thanks!
Thank you!
Great article and video. It’s great to see 3D printing on beasts of war. Scenery, bases and accessories Is definitely what it’s best for at this time. I produce my own scenery I have designed on my printer and as you said for a few pounds you can print a whole building. I have been produced my own New York style buildings for use with batman and marvel type games and I produced dungeon/sewer modular scenery that the guys at paranoid miniatures have been using for their demo games. I think you summed it up well when you said it… Read more »
I would love to see some of the terrain you designed.
I have a close friend that just got a high end 3D printer and was wanting to do a test print. That fantasy building looks to be the right thing to take a swing at.
They are high-quality files and I know that they will print well. I would start with a smaller piece to start and work up from there.
great article and video looking forward to more
We will see what we can do!
Good see 3d printing getting a look in again. I haven’t tried anything but PLA on my printer but the results are good but as you say it takes quite a while.
I look forward to see what those houses look like painted.
As soon as I get them finished I will post pictures.
That is a great article. Thanks very much for all the information. Looking forward to the follow up with the painted models.
Working on them as we speak!
great video wont be long before the details are their for HD quality figures are a click away.
Dawn is actually working on a news piece on that very item!
Awesome stuff, I definitely relate. I sent a quote off to zealot a week or so ago to finally get some of my armies printed/cast, it’s quite exciting 🙂
The unexplored side of our hobby, creating your own miniatures. It is very cool to make your own creations, Dawn did it with Jezebel and @deaddave is working on his own.
Great article 3D printers are definitely a way forward in the hobby, I really wish they mature faster though.
It is like any new technology it starts slow and picks up momentum as more people use it. The advancement from two years ago is incredible.
Indeed it is, but it is still a bit out of the point it will get the critical mass to be accepted.
Good article 😀
Great stuff, it can almost become a hobby all by it self
So are most people who print terrain using it to create masters to create moulds later on or if say you wanted walls and hedges say printing out ran individual terrain piece?
Stupid autocorrect
It was meant to ask if you use 3D printing to create masters for more traditional moulding or if you 3D print each terrain piece you need
The prints themselves are so cheap that I see no benefit in using moulding and only print the masterpiece (while to be honest I have no experience with moulding). Before I got my printer, I did not realize how long a spool of filament lasts, but in fact you can print a lot with 1KG PLA. And you can tinker with your settings (especially infill settings) to reduce the material needed. As it was mentioned before, the time that a print takes is something that may be a disadvantage over moulding. But while that is true for sure and may… Read more »
Great article, really enjoyed that. You may just have pushed me beyond the limits of my resistance to purchase! Now it’s just a matter of setting budget!