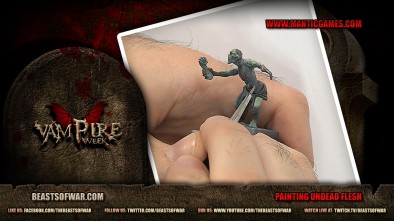
Painting Undead Flesh
January 30, 2012 by elromanozo
Video Sponsors: Wayland Games - Infinity
If you're keen on Vampires, then you're going to want to know how to paint some grisly zombie flesh!
Romain demonstrates some cool techniques using a Mantic Zombie.
Supported by (Turn Off)
Supported by (Turn Off)
Supported by (Turn Off)


I use this type of colour for my IG as they are to look malnourished and fighting for to long.
Thepainting in this video can be used on some other things other than undead.
A pretty good joke 😀
Love the holder you have for the mini. Did you make it yourself or is it something you can purchase online? Have been sticking mine on corks, but it’s a little small to handle well – your device looks perfect.
Looks like the old “Camera film canister and Blue Tack” trick to me.
Sweet/candy containers, medical items, fish paste jars, paint pots, grenades and small spray cans.
Just to name a few options lying arround in my bedroom.
Where I come from, pretty much every painter has something home-made, adapted to his own idiosyncrasies… Don’t buy the weird miniature holders. I made this by filling an old film pot with large glass beads, the type you use as counters for MtG… This was to give it weight, because I like that sort of thing. I affix the figure with double-faced tape, not tack, as tack doesn’t hold as well and doesn’t allow for the figure to be “straight”. Many people don’t like the weight, and they use corks or other devices in which they can plant their pinned… Read more »
I put small dice into my holder, which is an old metal cylinder from medicine.
Nice tip on the double sided tape. I always use blutack but find the same problems. Tape will hopefully be strong enough without being too strong it’s problematic to get it back off. Thanks!
Be sure to get the “permanent” one. It’s not that permanent, and the non-permanent won’t hold the heavier minis.
BoW Romain
I use 2″ lengths of 1″ dowel. Glued to a thick, wide washer, or a poker chip for figures.
Corks glued to washers for bits being painted on wire, imo they’re too unstable for anything too weighty.
Nice to see a very effective and quick way to paint Zombies,and as they tend to come in ever growing numbers it is well appreciated as I have to paint a load for a game we are running
Just curious, but it looks like you didn’t prime the model? Do you not do this for plastics?
I’ve primed the model three times, if you must know… And I believe I mention it now and then.
I have done a tutorial or two where I explain this priming method.
BoW Romain
When Romain says hes primed it three times, he’s referring to his priming method where three shades are used in the priming process, this ‘pre highlights’ the model to either reduce painting time, or if you wish serve as a guide for highlighting etc.
Excellent approach for source lighting too 🙂
Indeed… Quite useful for speed painting as well !
6.35 mentions specifically that the priming coat can still be seen through the base coat, it is definitely primed, the speckle on the base is a “dead” giveaway..(ha, see what I did thar!)
The not suitable for young children part of BoW… which part IS suitable for young children?
Er…. Heroclix ?
I thought you didn’t want to expose them to the miniature horrors at the tender age …
Point.
“Mehr Licht!” were his last words. And later that night, they found him eating the manservant.
Sorry, couldn’t resist … 😛
Another great tutorial, I like the effect(s) that quick and “dirty” approach gives in this case. Will use at least some of the tips on Mantic Ghouls, even if they’ll be a tad fresher …
hey, perfect german from Romain! 😉
Looks like I have to search about and hope the painting tutorial is not one of the many missing YuouTube videos. Really impressed with the priming on this figure and would like to copy it. At present I am just using a base white or black depending on the figure but my eyes being what they are I can use all the help I can get and this primer method seems to bring out the detail better for painting. Every little helps..:)
It’s here, in backstage, not on Youtube…
First prime black on the whole miniature, then wait for it to dry…
Then prime grey on top to bring out the edges, and let it dry…
Finally, prime white slightly from the very top, to accentuate zenithal lighting.
It’s quite easy.
I hope this helps !
BoW Romain
It helps alot thanks Romain. Maybe I can see what I am doing in future! 😀
Just a question. Royal navy brown = Dark sea blue VAL 70898 ?