3 Colours Up: Flames of War – British Crusader
January 12, 2018 by johnlyons
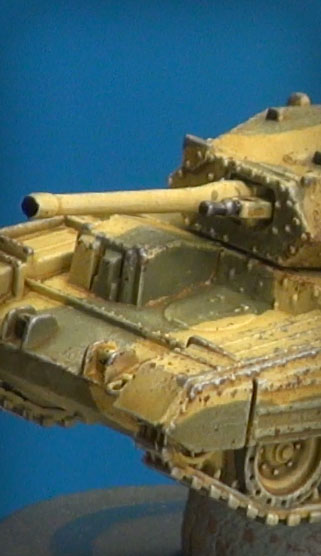
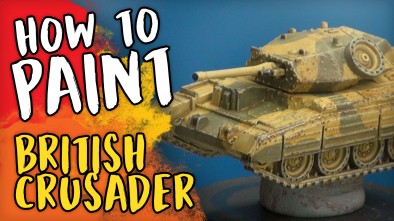
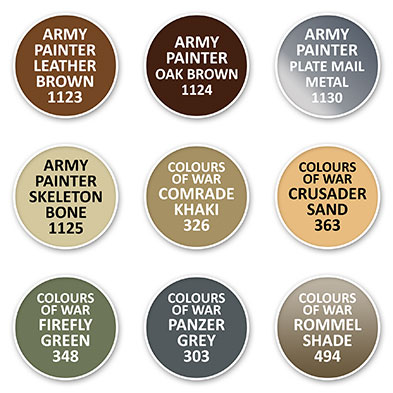
John is taking over the Hobby Lab today to show you how to paint a British Crusader from Battlefront's 15mm scale Flames of War range.
Click Here For More Painting Guides
In this episode, I'll be guiding you through the British camouflage scheme and how it differs from worldly camo in the same era.
Using a variety of techniques from freehand brushing, dry brushing, washes and pigment powders it's easy to create your own fleets of weathered tanks, ready for the tabletop.
What's your favourite camouflage design?





![TerrainFest 2024 Begins! Build Terrain With OnTableTop & Win A £300 Prize! [Extended!]](https://images.beastsofwar.com/2024/10/TerrainFEST-2024-Social-Media-Post-Square-225-127.jpg)





@johnlyons great vid as usual… have you ever attempted 3mm? Obs you wouldnt put down the amount of weathering as you do on 15mm+ but just curious how far you’d take that scale – once the weather improves I’m hoping to get back out into a ventilated space with my rattle cans to start one of the many many projects I keep buying crap for and one is 3mm WW2 so would be interested in your thoughts. Kind Regards
The smallest I’ve painted is 10mm (dropzone commander) And I’m honestly not sure how I would go about anything smaller. At 10mm you still have a fair amount of model to play with. I would say that inks would probably be far better for weathering at such a small scale 🙂 More to represent dirt and dust than actually go into applying pigments and the like. I would imagine most pigment powders on the market are too coarse to go down well on 3mm.
Cheers dude, I’m looking forwards to getting going with this, and with Vanguards 3mm stuff, and maybe my Napoleonic in 3mm (saw on a blog some guy paint I think 600 strips in an evening but dont quotes me) – the trouble with the mall stuff is that they take up so little space you just end up with loads of the damn stuff!
@nogbadthebad
You might find this useful
http://analogue-hobbies.blogspot.co.uk/2015/07/wee-men-in-belgium-blucher-napoleonic.html
Apologies bud, didn’t realise you copied this too me… I really like their take on it
Nice job buddy, any reason you didn’t use masking putty and the airbrush to achieve the camo effect or do you prefer using the brush?
I am not a huge fan of masking putty or most types of masking material. But for FoW I am quite happy to brush paint (or like on my Team Yankee British) careful airbrushing without masking.
I learnt chipping is a splendid way not only to weather things, but also to highlight them. As a good hint I found I should figure out or imagine in what colour the vehicle may have come out of the factory, so that the colour choice for the chipping makes for more realistic results. I tend to be impatient when applying highlights and stuff, which is probably a mistake. It´s good to see someone gradually painting up and highlighting a model. Ommmmm, I need to be more patient and take my time. What I would have done is glueing real… Read more »
I used to find clay/mud in the field out the back of my house, let it dry, crumble it up, mix with PVA glue then apply. Surprisingly the models I have done with it still look decent. Of course, I don’t recommend sourcing your clay or mud from a field you know animals have been in… it may not be mud at all 😉
Really helpful video. I bogged up my Pz IV by following the approach in the back of the Flames of War Afrika Korps book. Way too heavy on the wash and a virtual re paint by brush of the base coat. Will try John’s approach on my Stuart’s.
John showed a photo of the caunter camouflaged Matilda. This looks a nightmare to paint. How about a tutorial on easy caunter for beginners?
Easy? Doesn’t exist 😉
On your PzIV, maybe try applying a few light drybrushes of your base colour to bring the details back? It may not eliminate a heavy wash totally but it would bring back the upper details enough for you.
a great video on a great model.
Lovely.
Nicely done
Even using a brush, I’m somewhat surprised that you didn’t use a mask. It’s a fairly easy pattern to cut masks for, and it improves the result a lot for very little extra work.
And using an airbrush (or just different cans) and a mask this kind of camo is really quick and easy to do.
The “exhaust system” is actually connected to oil bath air cleaners. The actual exhaust exits centrally through the rear louver slats.